If you’re not using video content to promote your blog and/or online business, then you’re getting left behind.
By 2017 (that’s next year!) it’s predicted that 69% of website traffic will come from video content (Source).
If you’re not using videos for any of the following reasons then this blog post is for you:
- You’re nervous about being on camera
- You have no idea what software to use to record videos
- You think screen capture software is expensive
- You aren’t tech-savvy or think it’s all too hard
Recording video tutorials is much easier and quicker than you think!
How to use videos to promote your blog or business
- Share/teach how to do something (e.g. how to use software)
- As a promo for one of your products. It might be a video with no talking, only music showing a new product line you have coming out
- Share how to use one of your products (tutorials). For example, in this video I show how to make your own planner dividers using one of my Photoshop templates that’s available in my shop – the viewer learns something new (provides value) and I promote my product in a non-sleazy way
- To answer FAQ’s and connect with your audience – if you can answer questions live e.g. during a webinar it showcases your expertise on the topic and builds authority. I used to get asked all the time what an editable PDF means, now I can simply direct customers to this video where I show rather than just tell them exactly how it works.
So let’s delve deeper into why you need to starting using video content (or use it more frequently if you’re already using it):
Pros and Cons of Using Videos to Share Content
Pros
You can embed Youtube videos to your blog meaning you only have to upload the video to the internet once (perfect if you’re internet connection tends to drop out a lot like mine does). You only need to record it once, upload it to YouTube and the work in creating that content is done forever!
Unlike a blog post, you can reach more people using the same content. You only need to record the video once; you don’t have to do endless proof-reading and editing trying to make it perfect. I am a perfectionist so doing videos has helped me get over that and accept that ‘near enough is good enough’ helping to make me more efficient.
For a tutorial such as this one where I show you how to make a wallpaper for your computer, laptop, iPhone, tablet or other electronic device, it takes a long time to write out written instructions, you might get lazy and not want to take screenshots of each step so you might forget to miss some steps. If you’re adding screenshots to your written instructions (which you should!) then you’re going to have to go through all the steps in the tutorial anyway to show screenshots of all of them.
You may be well versed in the topic or thing you are teaching, but the person reading your written instructions may not be, and it may be hard to follow , especially if you use shorthand or think something is obvious (which is might not be to a beginner!). With a video they can see the exact steps you’ve taken, pause the video if they need to etc.
Instead of writing a blog post, record a video of you speaking the steps. Not only is this quicker than typing out the instructions and taking screenshots of each step, but you can take screenshots as you record videos (I use Movavi), or when you watch the playback on screen. You can also take the audio recording and generate a transcript, which you can polish up (and remove the um’s or if you repeated yourself or want to summarise the video) to quickly craft into a blog post that will get found by search engines such as Google.
You can reach more people – people reading my blog may not realize I have a YouTube Channel, and people who find me on YouTube may not realize I have a blog or an online shop. I can also link from my product descriptions to video tutorials where I show how to use my products. For example, these pantry labels can be customized in Canva, which I show how to do in this video tutorial, and I show how to add your own monogram to my printable binder covers in this video tutorial
Videos show authority – if you can show someone exactly how to do something in a video where they can watch exactly what you’re doing and (it’s hard to hide if you make a mistake!) then it establishes you as an expert. Mistakes are easy to pick up on in a video, so if you don’t know what you’re showing someone how to do it’s going to be easy for the viewer to . While you can edit parts of the video, it can be time consuming so your option is either spend time editing or just redo and do a new take. I chose the latter, I felt editing videos would be too time consuming and I may as well do a new take – doing more video takes also make me more rehearsed and practiced. The most takes I’ve done for a video is 3
You can pause the recording if you need to and come back to it if you’re in the middle of something, get distracted, need to pop out an run errands or your upstairs neighbours in your apartment building decides to start vacuuming their wood floors (why must they always vacuum when I want to record a video?!) You can also edit videos after recording such as if you sneezed in the middle of the video, or if you want to break it up into multiple smaller videos and re-purpose it for a free email course, or edit out a special ‘fast-action’ bonus you offered for one of your products on a webinar.
People can relate to you more – they can hear how you speak and your personality shows through more than just written words. You don’t have to show your face on camera (I don’t show my face for any of my video tutorials – I’m a night owl and I figure people don’t want to see me in my PJ’s :p).
They improve your confidence – If you’re not confident with public speaking or are thinking about doing webinars, then video tutorials are a great starting point. If you find you’re messing up a lot, I recommend going through the steps and doing a practice run before filming the video. I only recommend doing one practice run though, as you may forget some content or tips you want to share, and you don’t want to sound over-rehearsed. You also don’t want to spend 5 hours re-recording one video tutorial to make it perfect (the main point of using videos is to speed up the content creation process!)
I’ve definitely found people respond better to visuals and demonstrations rather than just a written explanation. When customers email me asking questions about how my printables work such as what an editable PDF is, how to add text to a binder covers, how to use the binder covers in my shop to create a cover for their Erin Condren Planner etc. It also prevents back and forth emails if customers need me to expand more before they fully understand how a printable works. If they find my videos on Youtube and comment, I can see what problems people are having who have just found me (and are not familiar with me or haven’t been to my shop) and add that to the FAQ’s, as well as drive traffic to my store.
Cons
Background noise – make sure you don’t have any other music playing on your computer or in the background. I had Spotify open on my laptop and thought I had the music turned off when recording videos. Because my headphones were plugged in I didn’t realize music was actually playing when I was recording the video so when I listened to the playback One Direction was playing in the background – oops! (yes I am a One Direction fan #noshame)
Videos show mistakes. There’s nothing worse than being halfway through a 20 minute video tutorial and you get super tongue-tied, forget a step, someone interrupts you (such as the postman delivering a parcel!), you accidentally repeat yourself, you lose your train of thought, your computer freezes or your internet drops out. The resulting video can be a bit disjointed, especially if you’re pausing and restarting often.
My best advice? Record Short Videos
Not only are they easier to digest, but if you mess-up and need to restart the recording, it won’t take too long to re-record. You can always edit that section out of the video but I’ve personally found it easier just to re-record the video (I treat the messed up ones as practice runs!).
By doing shorter videos, you can break up the steps and make the information easier to digest.
Larger videos not only take longer for you to upload (which can be a pain when you’re internet frequently cuts out like mine does), but they will also take longer to load when a customer (or blog reader) wants to watch them. If they take too long to load, they will probably close the browser and not get to see/hear the awesome content you’ve created for them.
If someone sees a video is an hour long that’s a big time commitment – they’re unlikely to watch the entire video through to the end. They may also think what you are teaching them is too hard ot takes too long when really you’ve just jam-packed the video with a ton of content.
Some video recording software have a time limit on how long your video recordings can be.
You can rearrange and re-purpose. For example, I recorded separate videos on how to set up a listing for digital products on Etsy and how to write a product description for my ecourse: How to make patterns in Photoshop and monetize your designs. I did this so I can re-purpose them for different ecourses such as my ecourse where I show how to write product descriptions. You can also rearrange the order the videos appear in a lesson within an ecourse, or I could upload them to Youtube as a ‘sneak peak’ video to promote my ecourse like I did with this video where I show you how to make a stripe pattern.
Important: If you say you’re gong to include the link to a blog post, product or another tutorial in your video, it’s easy to forget to to this! As I tend to batch record videos, after I record one, jot down some dot points about what I said to remind me to add the links/relevant information when I eventually upload the video
What do I use to record my video tutorials?
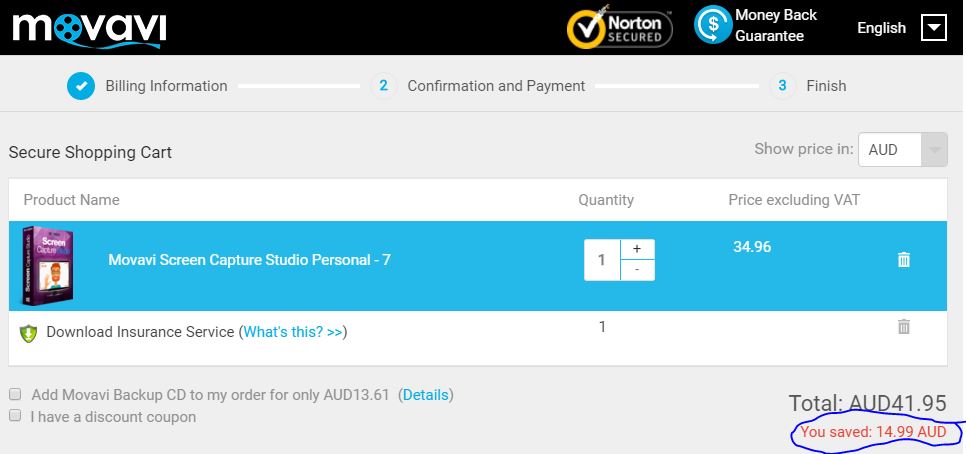
I use Movavi Screen Capture software (Movavi Screen Capture Studio Version 7) – it cost around $50 (Tax deductible)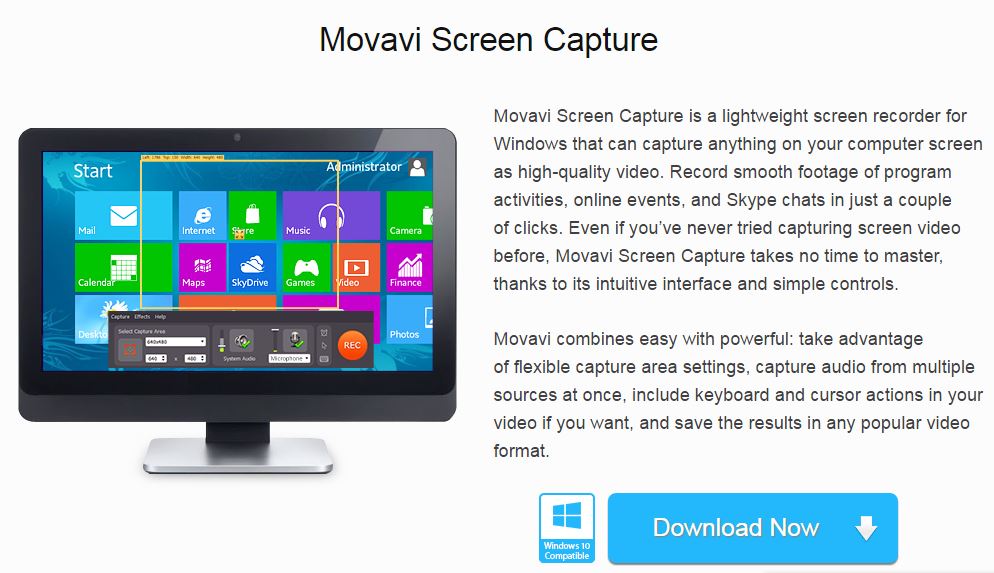 I’ve found Movavi very easy to use. They also have a ton of guides and tutorials on their website if you need help.
Movavi will work on a Microsoft computer and Mac. Alternatives to Movavi are Screencast, Screenflow and Camtasia.
How to record a video tutorial using Movavi
(I’m sure this process is similar for other types of screen capture software.) After you purchase the software, have downloaded and installed it on your laptop or computer, you can start recording video tutorials.
Make sure that the screen capture area covers your screen. When I record tutorials I show the Photoshop screen or my web browser, but hide the bottom start-up menu of my computer (where they can see what programs I have open, the time and date). The reason I do this is because the tutorials I record are evergreen content, they’ll still be relevant for years to come and won’t change so I don’t want people to see a video I’ve recorded now, a few years into the future, and think the information is less ‘valid’ or ‘useful’ or that it ‘won’t work’ (people would also see that I record most of my tutorials at midnight!) Showing the start up menu is also an unnecessary distraction for the viewer.
This is what I see when I record a video tutorial:
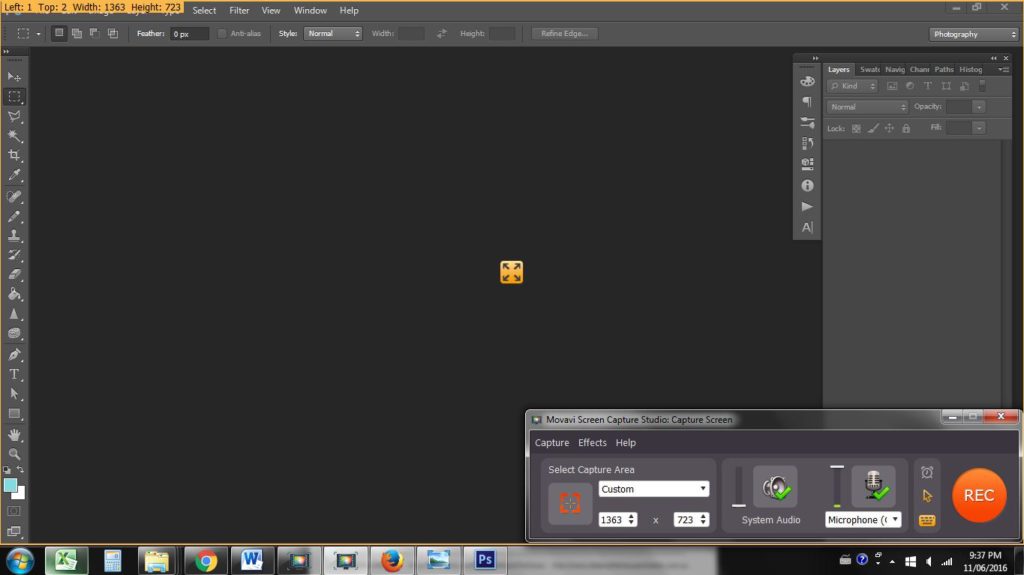
Note that the orange border (showing what area of the screen will be captured in the recording) and the bottom right ‘Movavi Screen Capture Stdio: Capture Screen’ menu disappear when you press record.
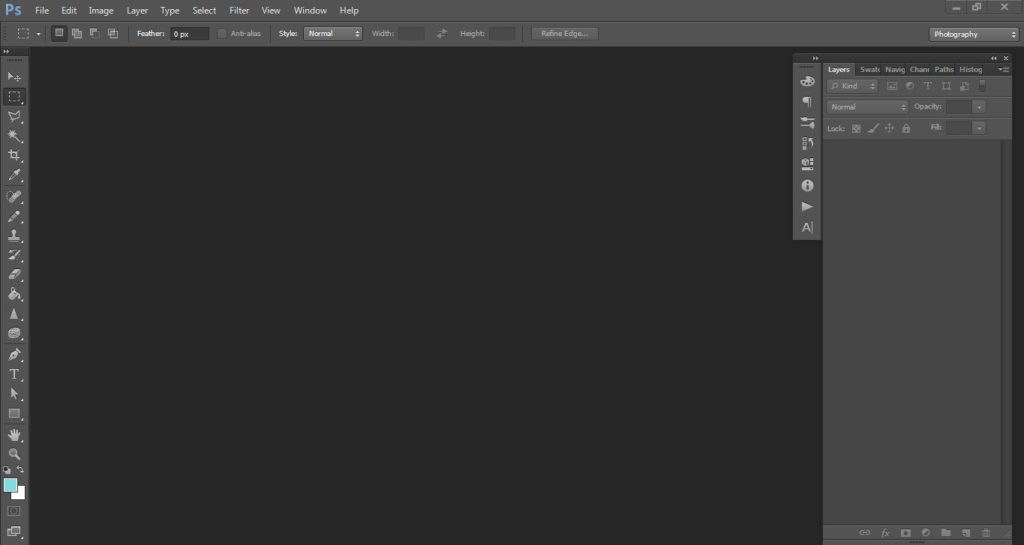
This is what viewers watching the video see:
 To record a video, make sure your microphone is at the highest point on the bar and choose your screen capture area based on your screen size. If you’re not sure what size your screen is, go to WhatIsMyScreenResolution.
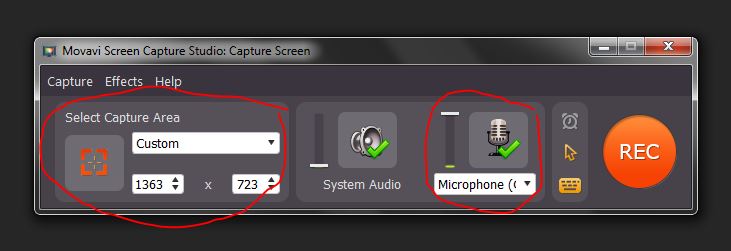
Hotkeys:
F10 = End video
F9 = Pause video (press again to resume)
I don’t recommend setting a timer for the video to automatically end as it may cut you off when you’re halfway through! Most screen capture software have a limit on the maximum length a video can be. The longest video I’ve recorded was 40 minutes where I shared my step-by-step process for writing product descriptions – I don’t think I would record a video any longer than that.
Here’s a quick video demonstration of how I use the software:
Disclaimer: I am an affiliate of Movavi. If you choose to purchase and use the discount coupon you will receive a discount off the price of the product and I will receive a small commission from Movavi (at no extra cost to you) for referring you. I only recommend products I use and would recommend regardless of whether I was being compensated or not. I purchased and used the product for months before writing this blog post and joining Movavi’s affiliate program.
After you record the video tutorial, you’re going to want to add it to your blog post. I’ve recorded a video tutorial to show you how to embed a video (after you’ve uploaded it to Youtube) into a blog post on WordPress:
Some popular video tutorials you might be interested in:
- How to add text to printable labels (plus free cleaning labels)
- How to make printable labels for FREE (using Canva)
- How to make a desktop background for free (using Canva)