For week 16, I only needed to plan 4 days. I returned from my trip to Adelaide on the Monday, was at my day job for Tuesday through Friday before heading off the Perth for the Anzac day long weekend. After 3 years of working 90 hours / week between my Etsy shop, day job, this blog and studying at university, it was nice to have a few short getaways!
Before the Pen
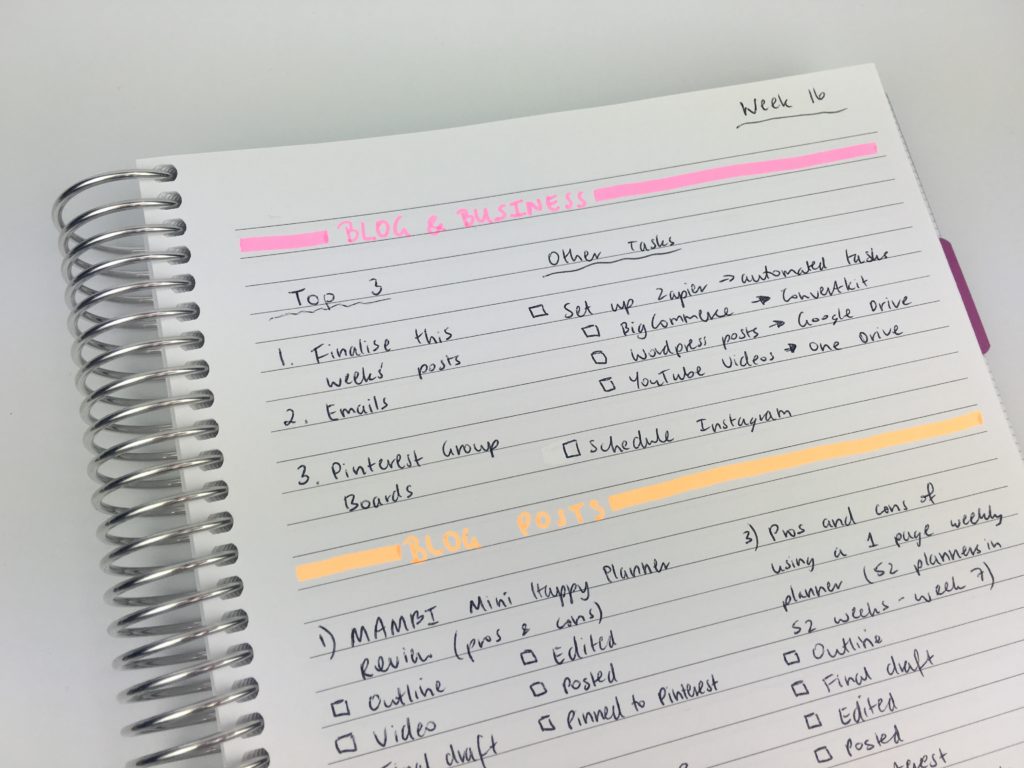
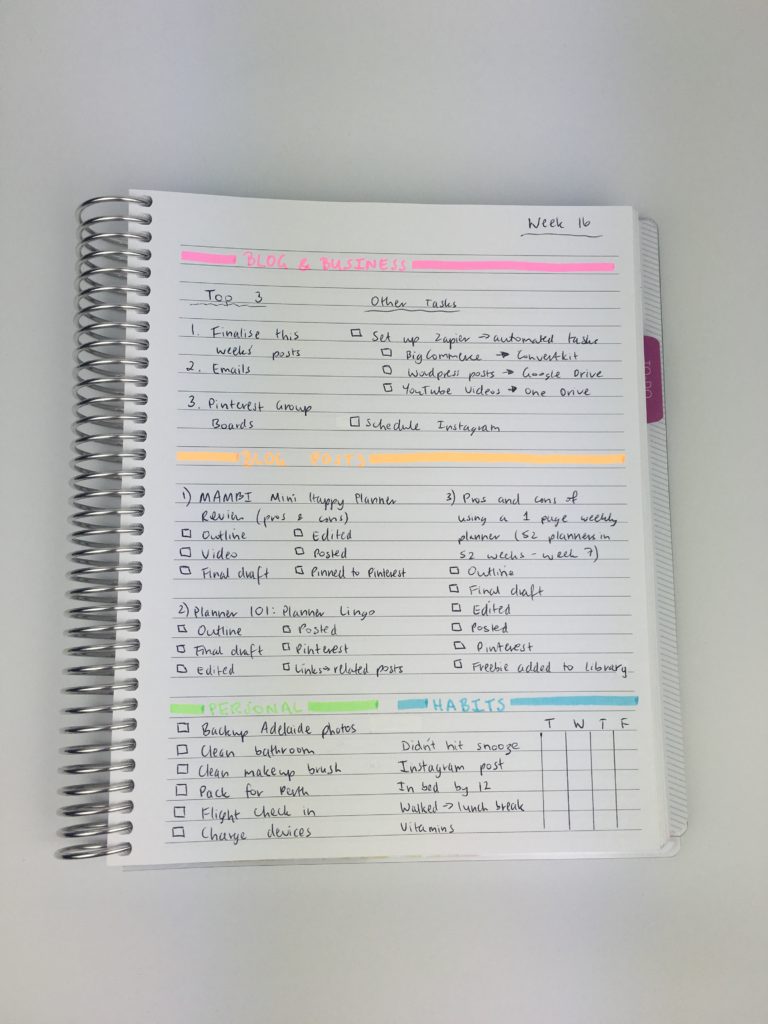
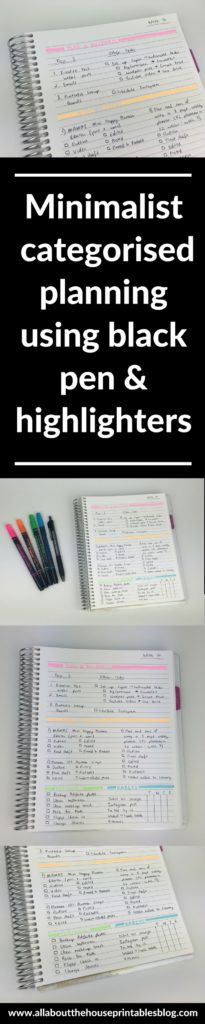
I only need a 1 page layout and paired this week’s spread back to the essentials:
- Blog and business tasks
- Blog posts
- Personal to do’s
- and weekly habits
I used one of my Plum Paper notebooks to plan this week.
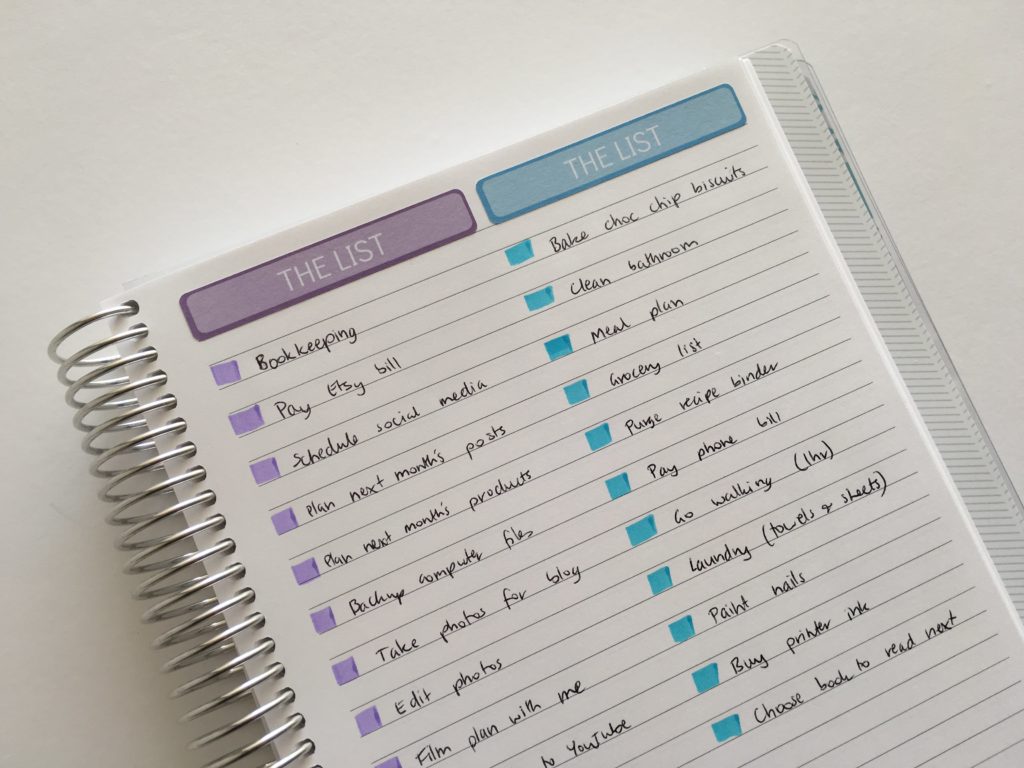
I did a similar layout to the previous week (read about week 15 here), with black pen and highlighter. Only this time I used different sections and wrote the headings in highlighter as well as the lines beside the title.
The photo makes it appear that it’s hard to read the text written in highlighter but it’s actually bright and easy to read.

Because I didn’t need to meal plan (only cooked once, had leftover and bought takeaways since there was no point cooking if I wasn’t going to be there to eat it!)
I hand-drew the checkboxes for the tasks. If you didn’t want to use this you could use the MAMBI self inking checklist stamp instead, or do a highlighter swatch and tick / cross over the top of the highlighter color similar to this:
Related: Planner Organization: How to color-code your planner (so you’ll actually use it effectively)
Pens used
I use the Papermate Injoy 300RT. This pen comes in a few other colors including orange, green, blue and purple (I think). I found them at Target. They’re an ok everyday pen but I’ve noticed it’s prone to smudging a bit after you’ve used it for a while.
Highlighters Used
I tried the Daiso double fluro highllighter pens. They have a 0.7mm marker style pen tip on one end, with a highlighter chisel tip at the other end.
I was pleasantly surprised by these highlighters. For only $2.80 for 5 of them (and the fact that they’re twin tip) they were a great price and worked just as nice as much more expensive highlighters such as the Stabilo brand. I’ll be interested to see how long the ink lasts!
Pros of this spread:
- Quick and easy to set up – only took 10 minutes
- Simple
- Can easily be tweaked from week to week. Because it’s a hand-drawn spread if you needed more space for one category you can just make that space bigger and add new sections
- Only need a pen and highlighters – you could use the same color highlighter for each section but I opted to color code. This would be an ideal planning layout if you were traveling or on the go and can’t take a lot of planner supplies (such as stickers) with you. You don’t need twin tip makers, you could just use the point end of a highlighter to write the headings, or write these in black pen and highlight over the top to make them stand out

Cons of this spread:
- This would only be ideal if you didn’t have much to plan. You could extend the spread similar to how I did in week 15 of the challenge with another page to do daily planning
- The habit tracking space was ok for only 4 days, but if you were using it for an entire week you’d need to cram it up a bit more. If you used this spread in a full page size notebook (A4 or letter size) this wouldn’t be an issue (I used a 7 x 9″ notebook)
Related: 130+ functional ideas to use blank notes pages of your planner or an empty notebook
Would I use this planner again?
I liked the simplicity of this layout and find myself using habit trackers more and more – such a good space saving idea. It was ok for this week given I custom designed it to suit the 4 days I needed to plan, however, if I used this layout for a full week of planning I’d use 2 pages:
- Page 1 would be blog & business tasks as well as blog post planning (with the workflow tasks)
- Page 2 would be the habit tracker, personal to do’s and I’d add a meal planning section as well
Catch up on past week’s of the challenge here:
- Week 4: Minimalist planning: how to plan your week using a blank notes page and stickers
- Week 7: Pros and cons of using a 1 Page Weekly Planner
- Week 8: Weekly Planning using the Plum Paper Memory Keeper Book
- Week 13: Using a Kmart lists book to plan your week (planning by task, rather than by day)
- Week 14: Using a simple, 1 page weekly planner with only 3 sections
Liked this post? Pin it!
Leave a Reply