If you’re new to the planner community or you’re struggling to keep up with all of the cute new stickers, stamps, washi tapes etc. (MAMBI are the worst – they’re always putting new cute products all the time!) – there are easy solutions to your problem.
-
You don’t need everything
As nice as it would be to have every cute planner supply under the sun it’s just not possible. My sister has over 1,000 planner supply products in her shop and our small 2 bedroom apartment is absolutely exploding with boxes of planner supplies. As tempting as it is for me to walk over to a box and pull out cute stationery supplies and pens (oh how I love pens!) I must resist!
Stickers are pretty, colored pens are nice but you don’t NEED dozens of them. I’ve been guilty of spending a good 10 minutes going through my multiple binders of stickers (I’ve designed over 400 of them over the past couple of years) just to find ONE sticker. Now yes the sticker is cute, but was that really a good use of 10 minutes of my time? No. So if you’re also guilty of being a bit of a planner supplies hoarder, now is the time to scale it back.
You don’t need to use every type of planner supply (stickers, etc. for your planner spread to look good. Sometimes it’s better to scale it back and just use ONE type of planner supply. So a week of just stickers, or a week with just a bit of washi, rather than washi, colored pens, colored stickers and stamps etc. all in the one week. There are 52 weeks in a year, plenty of time to experiment with different planning systems and different planner supplies!
Related: Planning 101: Need versus want versus wish list planner supplies
If you want to purge and sell some of your planner supplies, Facebook groups are a good place to start. I shared a list of some in this roundup of 60 Facebook groups for planner addicts. But proceed with caution when it comes to Facebook groups:
2. Join only a few planner Facebook groups
The key is to join only a few Facebook groups. Some of them have 30,000+ members and the posts move quickly! That’s a lot of notifications showing up on your news feed. Pick just 3 Facebook groups to engage in and set a timer so you don’t waste hours in there
Related: 60 Facebook groups for planner addicts

YouTube videos are another cause of overwhelm and an enabler to spend more money.
There are so many YouTube videos for literally everything planner related – from pen reviews, to sticker hauls, to plan with me videos – you can waste many hours on there if you’re not careful!
3. You don’t need a $50 planner to plan your day
Just because everyone else is using a certain planner doesn’t mean you have to use the same one. I was guilty of using the vertical Erin Condren Life Planner for too long even though it didn’t fit my planning needs purely because that’s what everyone else was using and it’s a ‘trendy’ planner. Sure it’s nice but it’s not worth $50 ($55 with metallic foil on the cover or the metallic binding), plus the accessories, plus the $40 shipping to Australia!
There are plenty of good planners that cost less than $50 (there’s nothing wrong with not using a big name brand planner). You can do a DIY planner for much cheaper than $50!
Related: Which is Cheaper: DIY Printable Planners or Pre-Printed & Assembled Planners?
I highly recommend Plum Paper Planners – they have lots of layouts to choose from, they’re affordably priced, have reasonable international shipping rates and you can still personalise the cover with your choice of pattern, color and text!
Related: Plum Paper Planners Haul & Review
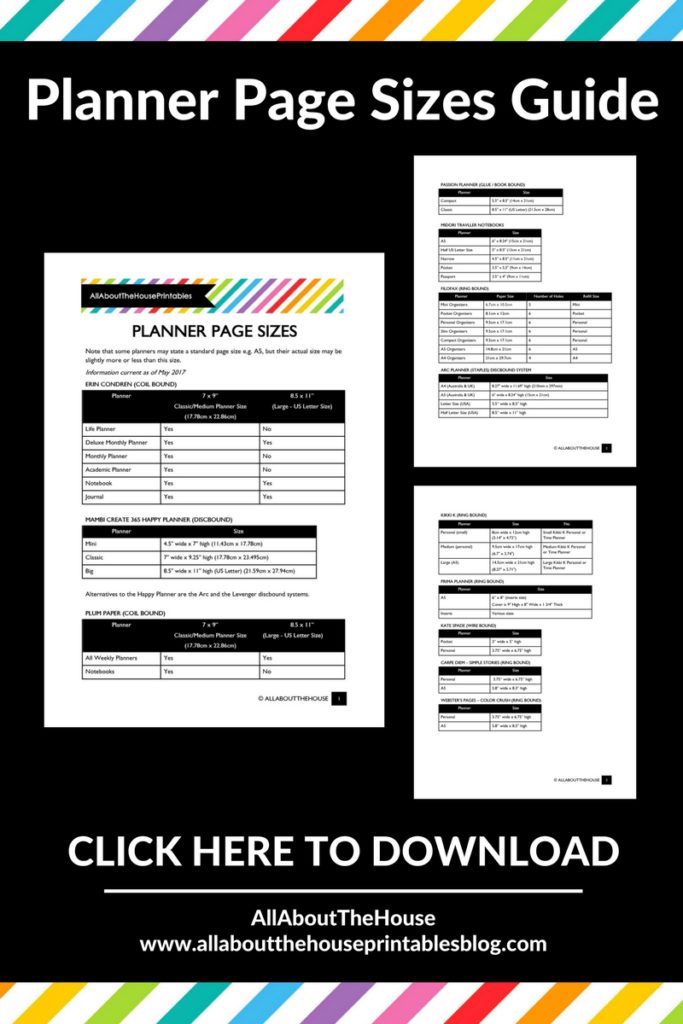
4. Choose a planner size and stick with it
See this post for a roundup of popular planners and their sizes as well as a printable side guide you can download, print out and take with you while planner shopping or have in front of your when you’re browsing the internet for your next planner!
Note that most planners come in the following page sizes:
- Pocket 81mm x 120mm
- Personal 95mm x 171mm
- A5 (Half A4 page size) 148 x 210mm or 5.8 x 8.3″ (used in Australia & the UK)
- Half letter size 5.5” wide x 8.5” high (used in the USA)
- Classic (medium) 7” wide x 9” high – this is my favorite planner size – not too small and not too big!
- A4 210 x 297mm or 8.3 x 11.7″ (used in Australia & the UK)
- US Letter size 8.5” wide x 11” high (used in the USA)
Some planner companies will let you download and print their planner layout so you can try it out for free. I did a roundup in this post.
Related: Planner companies that will let you download, print and try their planner layout for free
5. Develop your planning style
There are plenty of different ways to plan including:
- No white space spreads using lots of stickers and washi (these take a long time to set up!)
- Themed sticker kits
- Bullet journalling
- Pen only
- Pen with stickers to highlight important tasks and save space
- Writing in black pen and color coding using highlighters
- Using the monthly calendar of planners for meal planning rather than meal planning in the weekly spread
- Using a combination of a paper planner and digital tools
- Using a planner to plan your day and a laminated meal planner on your fridge
- Etc.!
If your current planning system isn’t working, then change it! That’s why I’m doing the 52 Planners in 52 Weeks challenge.
Related: Why I plan my day using planner stickers (and why you should too!)

6. You don’t need to buy everything
If you have no self control when it comes to planner supplies, remove yourself from any planner related buy/sell/swap related Facebook groups right now. It’s rather overwhelming to keep up with all of them and the money you save isn’t worth it given how much time you’ll have to spend in those groups, for a post to come up with stuff you actually want to buy.
Facebook groups and Instagram are also rather ‘spammy’ with sale posts. The Monthly Planner Madness account on Instagram in particular, is dangerous, as they have dozens of shops participating in the sales events each month so you’ll probably end up spending more money than you intended to! Instead follow only your 5 favorite sticker shops.
Only buy what you actually need. If you want to try planner stamping, for example, don’t go out and buy 20 different packets of stamps (there are literally stamps for everything from sports, to camping to school etc.). Be realistic – how many times do you actually go camping? Do you really need a stamp to mark that in your planner? There are plenty of other (cheaper) alternatives to highlighting things in your planner such as writing in a different colored pen, writing in black pen and highlighting the text etc.
For most planning supplies, there’s usually an ‘everyday’ or ‘most used’ type set – those are a good place to start to try them out and if you find that you’re style, and only then, would you go and buy more.
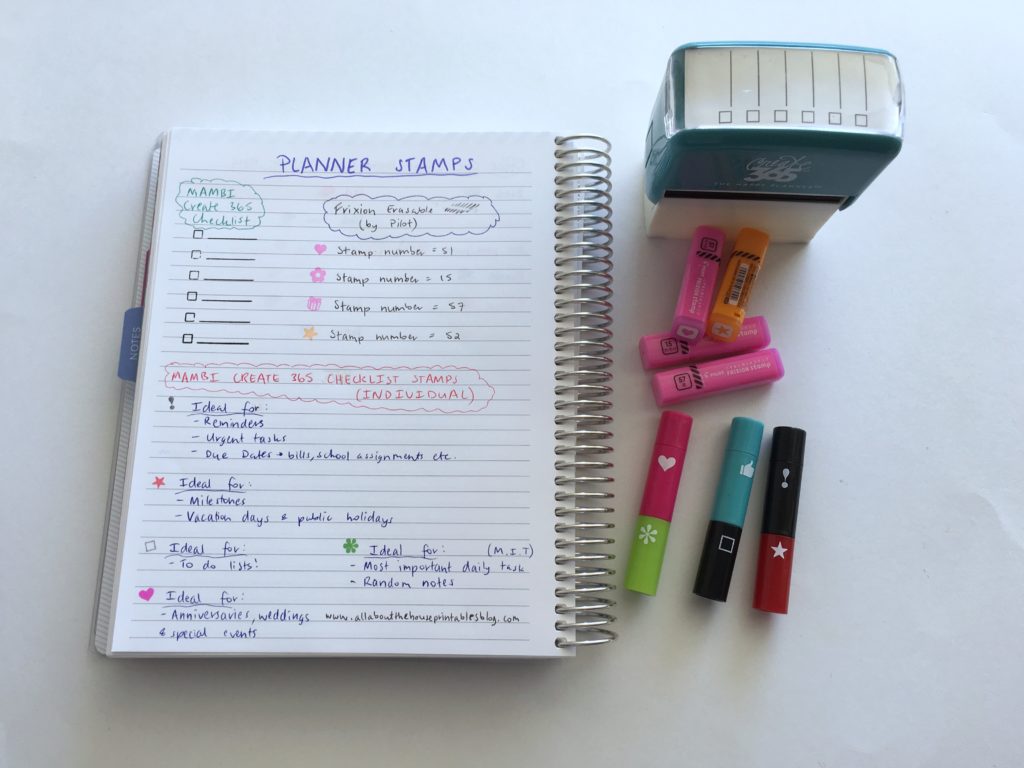
I like the idea of stamping but it can get quite messy and laborious pulling out the different ink pads, setting everything up, stamping (and hoping the stamp is straight), cleaning the stamps etc. Hence, the only stamps I own are self inking stamps (quick and easy and no mess!) I use the Frixion erasable and the MAMBI checklist stamps.
7. Sell planner supplies
If you’re overwhelmed it could be because you have so many supplies – purge via Facebook groups or organize them better so you know exactly where each supply is. If you know where each are stored then you’re more likely to use them!
There are so many sticker shops on Etsy now if you’re overwhelmed by all of them start with rainbow stickers. I may be a bit bias in saying that since the stickers in my shop are rainbow colored, but the reason I really only use rainbow stickers is because they’re great for color coding and you can easily mix and match colors.
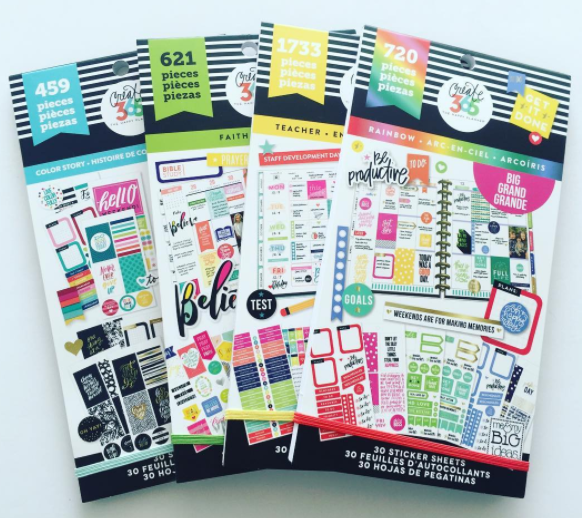
The Mambi sticker books are also good value and have a lot of stickers that are great with mostly functional stickers in the books.
8. What do you actually need to plan?
If you do things on autopilot you probably don’t need to write them down to remind yourself to do them. For example, I know that in the morning I need to clean my teeth and make my bed so I don’t need to put those in my planner. Don’t waste your time trying to ‘fill’ up your planner – it’s ok to have white space on the page!
Related: Week 9: Customising the Erin Condren hourly planner for task based planning
9. You don’t need to color code everything
I try and stick to only 4 – 5 colors when color coding:
- Pink for planning
- Green for business / Etsy shop related
- Blue for graph design & video tutorials
- Purple for behind the scenes / shop maintenance
- Occasionally red for urgent tasks or meal planning
I find when I use anymore than 5 colors it becomes too time consuming switching colored pens or highlighters or zooms all the time.
Related: Planner Organization: How to color-code your planner (so you’ll actually use it effectively)
There are also multiple ways to color code your planner:
- Colored pens
- Write in black pen and use highlighters
- Write in black pen and use zooms to color code
- Use different colored icon stickers to save having to write the same tasks over and over again
- Etc.
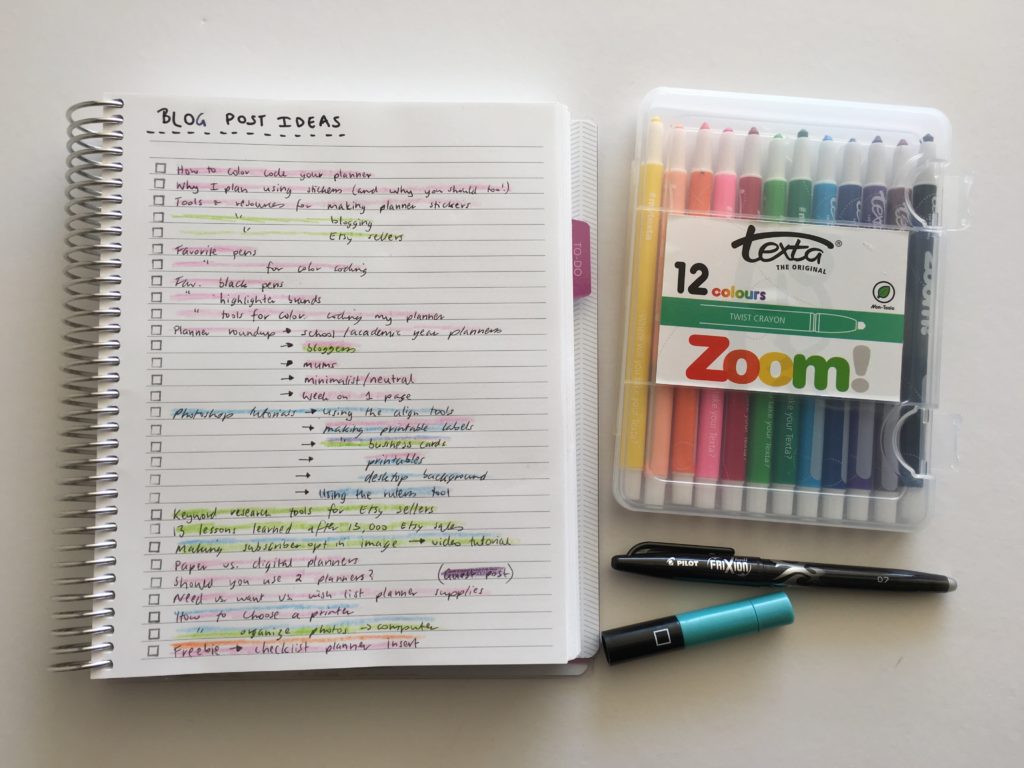
Related: Simple method for organized brain dumping of blog post ideas using a notebook and zooms
Related: Ultimate list of the best planner pen brands and how to choose colors for color coding
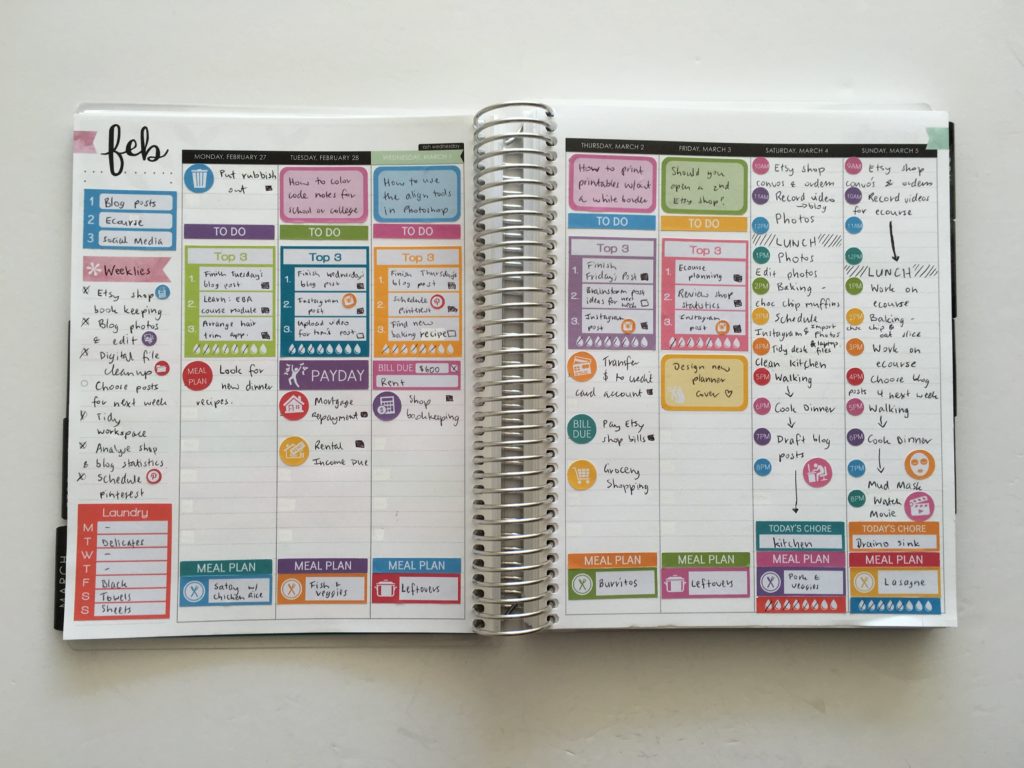
10. Don’t do weekly themed sticker kits
Sure they look good but they also take a long time to set up if you’re a perfectionist like me. For example, this spread looks good. but do you know how long it took me to stick those stickers? 20 minutes. 20 freakin’ minutes spent deciding how to stick the stickers before the actual planning process of putting pen to paper even started!
Needless to say I don’t used themed weekly spreads / sticker kits very often anymore.
Related Posts
- Planning 101: Need versus want versus wish list planner supplies
- Week 1: Using a daily habit/routine tracker to plan your week
- How to choose the right planner pens: what to look for when buying planner pens
Liked this post? Pin it!
Leave a Reply