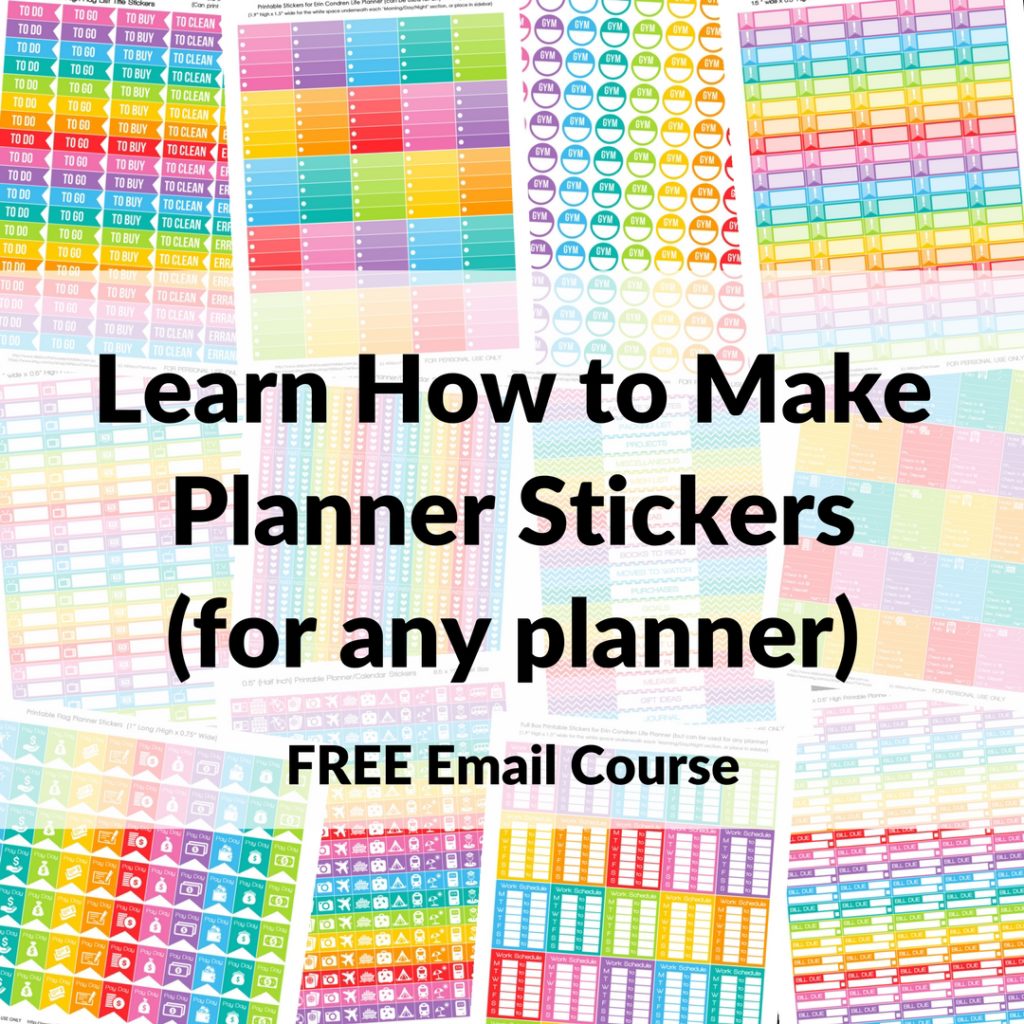
I’m a massive planner addict (as you’ve probably realized by now) 🙂 and I love making planner stickers. I’ve been making them since 2013 and my obsession isn’t slowing down anytime soon – there are too many cute fonts, graphics and designs to make!
If you’re interested in learning how to make your own planner stickers, I teach how to make them in my ecourse (click here for more info)
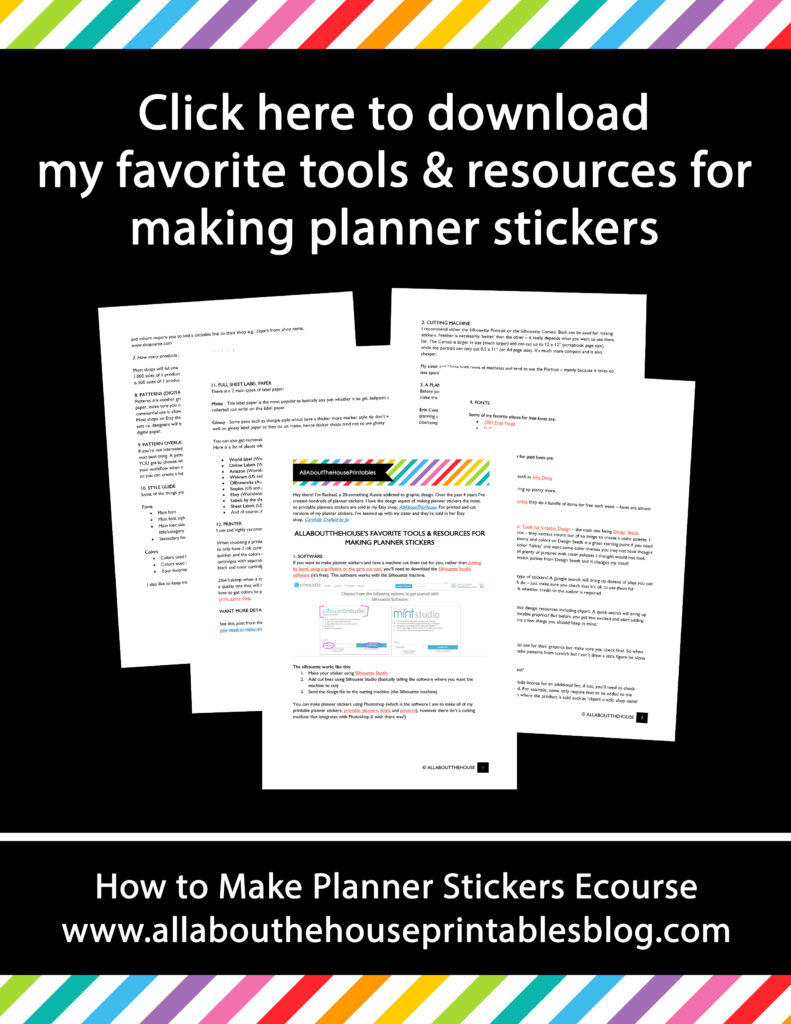
One of the questions I’m most frequently asked is what tools and resources are needed to start making your own planner stickers. So after many requests I’ve finally got around to compiling a comprehensive list of all the things I use to make planner stickers!
If you’re new to the blog, by way of introduction, I love the design aspect of making planner stickers the most, so printable planners stickers are sold in my Etsy shop, All About Planners. For printed and cut versions of my planner stickers, I’ve teamed up with my sister and they’re sold in her Etsy shop, Carefully Crafted by Jo.
-
Software
If you want to make planner stickers and have a machine cut them out for you, rather than cutting by hand, using a guillotine or the gyro cut tool, you’ll need to download the Silhouette Studio software (it’s free). This software works with the Silhouette machine.
I use Silhouette Studio Version 3.8 – all tutorials I record use version 3.8. There is a version 4 of the software but it’s relatively new and has a few kinks to sort out. I personally prefer to use version 3.8 which can be downloaded here.
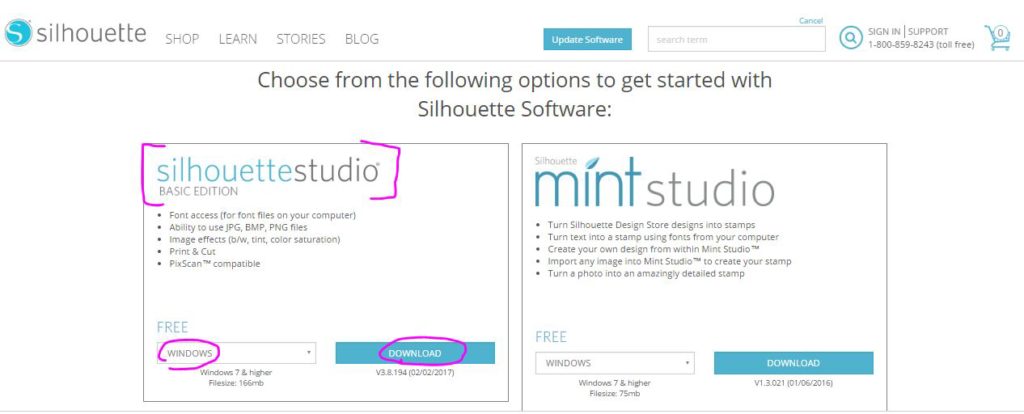
There is a paid edition of the Silhouette Software which is the Designer Edition. If you’re wondering if you need the designer edition of Silhouette Studio, the answer is no. I don’t use it and the additional features (being able to import SVG cut files if you make designs in Adobe Illustrator) aren’t necessary to make planner stickers as you can make them directly into the Silhouette Studio software (which is what I’ll be teaching how to do in the course).
If you want to find out more of the differences between Silhouette Studio and Silhouette Studio Designer Edition, see here.
The silhouette works like this:
- Make your sticker using Silhouette Studio
- Add cut lines using Silhouete Studio (basically telling the software where you want the machine to cut)
- Send the design file to the cutting machine (the Silhouette machine)
You can make planner stickers using Photoshop (which is the software I use to make all of my printable planner stickers, printable planners, labels and patterns), however there isn’t a cutting machine that integrates with Photoshop (I wish there was!)
The business edition of Silhouette Studio is another edition again. It allows you to connect more than one silhouette machine to your computer at the same time (to be able to cut more stickers).
2. Cutting Machine
There are 2 types of Silhouette machines:
1. Portrait
2. Cameo
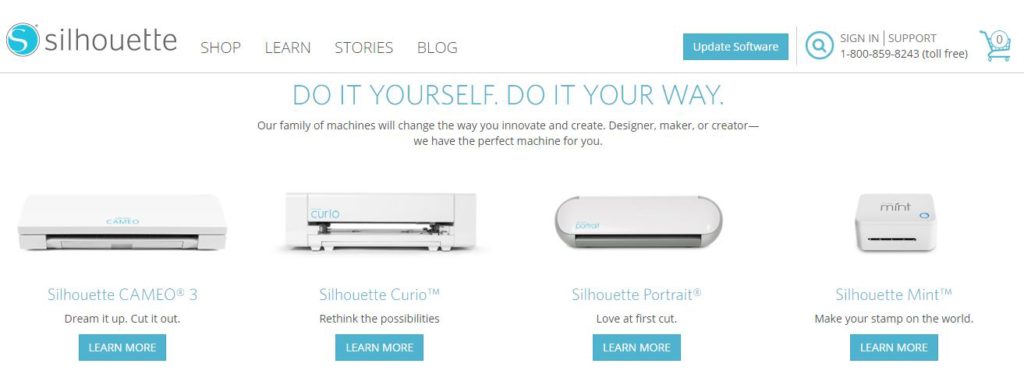
Silhouette have other machines, but the Cameo and Portrait are the 2 you can use to make planner stickers.
Both can be used for making stickers. Neither is necessarily ‘better’ than the other – it really depends what you want to use them for. The Cameo is larger in size (much larger) and can cut up to 12 x 12″ (scrapbook page size), while the portrait can only cut 8.5 x 11″ (or A4 page size). It’s much more compact and is also cheaper.
My sister and I have both types of machines and tend to use the Portrait – mainly because it takes up less space and the cutting mats are cheaper due to the smaller size.
If you’re thinking the Silhouette machine seems expensive, like it’s a big investment to make, trust me, it’s not. This machine is cheap. Planner stickers are very profitable and these machines last a long time (we’re still using the first machine we bought a couple of years ago). As far as starting a business goes, a business making planner stickers is literally one of the cheapest business’ that you can start, and it’s cheap to operate (plus it’s a fun way to make money!)
I shared some of the pros, cons and other things to consider as well as a comparison of using Silhouette Studio versus Photoshop for making planner stickers.
Along with the Silhouette machine, you’ll also need a cutting mat and a blade. My sister sells these in her shop.
Want to learn how to make your own planner stickers? Click here for step by step tutorials!
3. A Planner
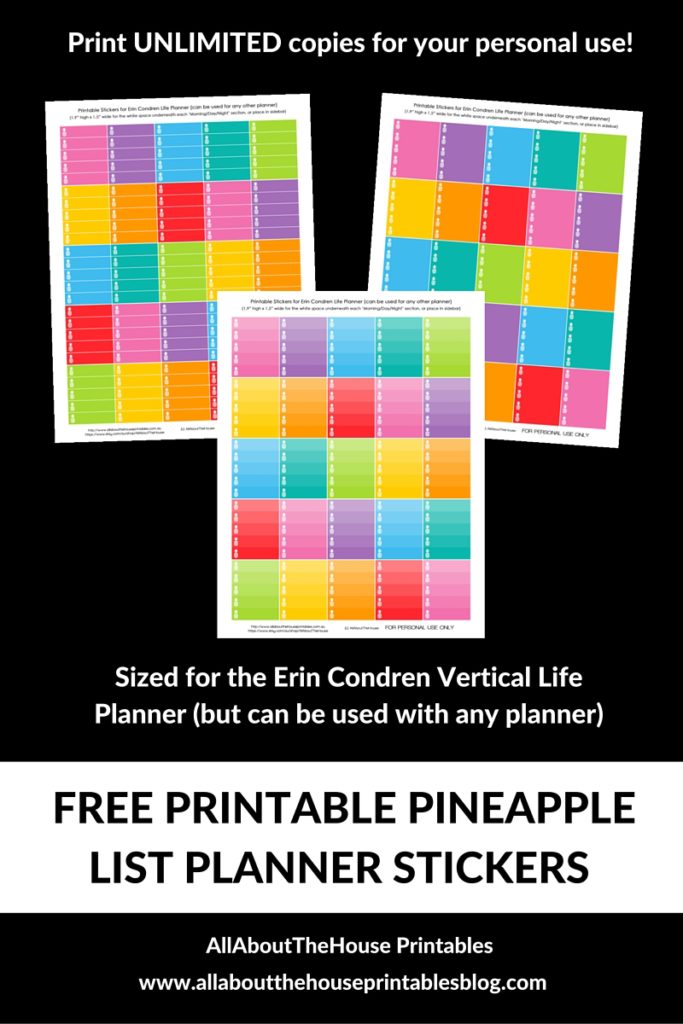
Before you start making stickers you’ll need to measure up your planner so you know what size to make the stickers. These are some popular sizes for planner stickers:
Erin Condren full box
This means the sticker is 1.5″ wide x 1.9″ high and is designed to fit the daily planning spaces in the Erin Condren Vertical Life Planner (the white boxes under the colored title/category headers that used to say morning, day and night)
Erin Condren half box
Half the size of the box described above. This size is great for highlighting events such as birthdays, each day’s dinner and the most important thing that needs to be done that day
Header stickers
These stickers fit the colored boxes above the full box daily planning space
Sidebar stickers
These stickers are placed in the notes/goals/to do/ blank column that usually appears on the left or the right side of the weekly or monthly planning space in a planner. There is no ‘standard’ size for sidebar stickers – you can make these at any size you like! I tend to use Erin Condren full box size, and create multiple types of stickers than stack them one on top of each other. Some examples of sidebar stickers are: meal planning, fitness tracking, spending, mileage, chores, tasks, school assessment, birthdays, bills due that week (or month) etc. !
Another way I like to use the sidebar is to intersperse smaller stickers in between the larger sizes to create a custom sidebar with whatever I need to track that week or month. My favorite size for these stickers that I intersperse with others in the sidebar, is quarter box size.
Quarter box size
Refers to a sticker that is 1.5″ wide x 0.5″ high. Approximately 4 of these will fit the full box size of the Erin Condren planner (hence the name quarter box). However, this sticker size is popular as it suits almost all planners (not just the Erin Condren!) This size sticker is my favorite for bill due stickers, appointment labels and reminders.
Icon stickers
These are my favorite stickers for planning! They’re compact and they typically involve icons which are always cute – need I say more? 🙂
Related: how to use functional icon stickers.
![]()
In the ecourse, I’ll be sharing the sizes for each element of the design (e.g. header boxes, sidebar etc.) of these popular planners:
- Erin Condren
- Plum Paper
- Limelife Planner
- MAMBI Happy Planner
4. Fonts
I’ve shared my favorite font websites and how to download and install custom fonts on your computer . When choosing fonts make sure you check the terms of use and that it’s ok to use for commercial use. Make sure you respect the font creator’s terms of use and credit them if they require it.
Some of my favorite places for free fonts are:
Some of my favorite places for paid fonts are:
- Creative Market
- Etsy
- Discount websites such as Inky Deals
A Google search will also bring up plenty more ?
If you sign up to Creative Market they do a bundle of items for free each week – fonts are almost always included.
When making planner stickers, avoid using cursive fonts as the main font in a design. If you really want to use a cursive font, only use them for headings (this is what I do for my printable planners). Simple fonts are not only easier to read, they’re more likely to appeal to everyone.
Related: How to make planner printables (advice from a planner addict that’s made 4,000+ printables)
5. Colors
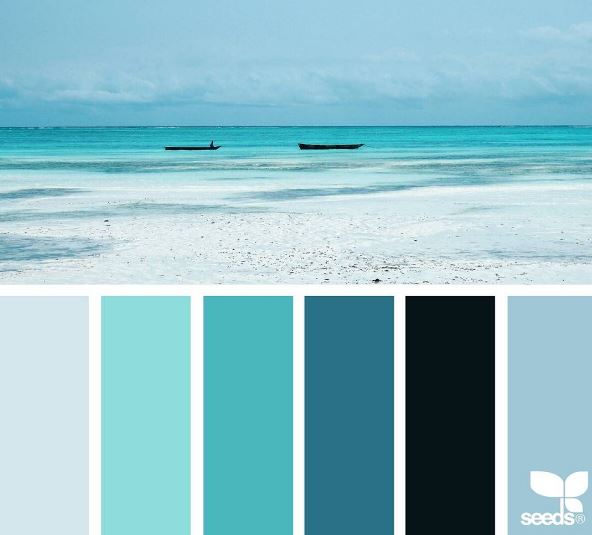
I shared my 5 Favourite Color Tools for Graphic Design – the main one being Design Seeds.
Design Seeds is a free resource – they extract colors out of an image to create a color palette. I tend to stick to the same patterns and colors so Design Seeds is a great starting point if you need to get outside of your usual color ‘habits’ and want some color themes you may not have thought of otherwise. There have been plenty of pictures with color palettes I thought would not look good together, then I see a swatch pallete from Design Seeds and it changes my mind!
I also like to use Photoshop’s color swatches menu for color inspiration. I shared a tutorial video walk though on how to use Photoshop’s color tools if you’re interested.

Make sure you take the time when it comes to choosing colors. Don’t rush it because once you choose colors if you want to make coordinating planner stickers, then you’re basically stuck with using those colors, unless you want to spend a lot of time re-coloring your stickers. I spent WEEKS choosing different colors and test printing before I ended up choosing the 8 colors that I use for my stickers (and which I’ve ended up using for my shop branding as well).
In having said that, the great thing about the sticker templates I’ll show you how to create in the course, is that if you did want to offer your stickers in another colour scheme, you don’t have to make the stickers again from scratch – you can ‘recycle’ templates you’ve made and just change the colours.
Be wary of using too many colors in a design. Yes there are a lot of pretty colors to experiment with but that doesn’t mean you need to use all of them when designing stickers. I recommend choosing no more than 4 (and at most 6) colors in a themed sticker kit – otherwise you’ll be overwhelmed trying to pair colors together. One way to avoid color pairing if you really can’t choose, is to use a digital paper and extract colors out of it to make your design. I’ve included a tutorial on how to do that in the ecourse.
6. Icons
Icons are very popular for making stickers – icon stickers are my favorite type of stickers for planning! – you can download icons from numerous places – just make sure you check that it’s ok to use them for commercial use, and also check whether credit to the author is required.
Most icons are black when downloaded from graphic sites. If you want to know how to make them white, I’ll be sharing a step by step tutorial on how I do this in my ecourse: How to make planner stickers. Make sure you subscribe if you want to be notified when enrollment opens next week!

7. Clipart
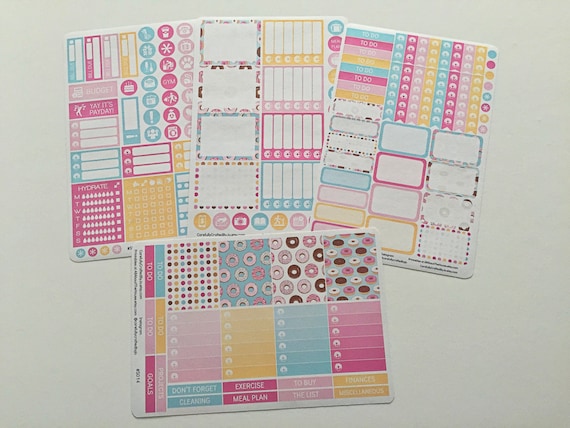
Clipart are those adorable graphics you see on everything from bed spread covers, to notebook covers, to clothing – images of owls, pineapples, animals etc. They can also be used for planner stickers – they’re a great way to add interest to a design, personalize your planner and make it look less ‘plain’. Clipart are my favorite starting points when putting together a sticker kit. For example, my inspiration for this donut themed sticker kit was an adorable donut digital paper.
In my ecourse, How to make planner stickers, I’ll be sharing my step by step process for creating a sticker kit from start to finish.
Etsy is a treasure trove of graphic design resources including clipart. A quick search will bring up an overwhelming number of adorable graphics! But before you get too excited and start adding dozens of them to cart, there are a few things you should keep in mind:
Is commercial use allowed?
Most shops will allow commercial use for their graphics but make sure you check first. So when I’m searching for clipart (I can make patterns from scratch but I can’t draw a stick figure let alone clipart!)
Is credit or attribution required?
You can usually purchase a no credit licence for an additional fee, if not, you’ll need to check specifically what credit is required. For example, some only require text to be added to the bottom of your listing description where the product is sold such as ‘clipart credit: shop name’ and others require you to add a clickable link to their shop e.g. ‘clipart from: shop name, www.shopname.com’
How many products can I make using this design?
Most shops will let you make as many products as you like but some will only let you make 500 or 1,000 sales of a product/s made using their graphics. Another thing to check is if their terms of use is 500 sales of 1 products, or 500 sales of any number of products.
Clipart is also great for making party printables.
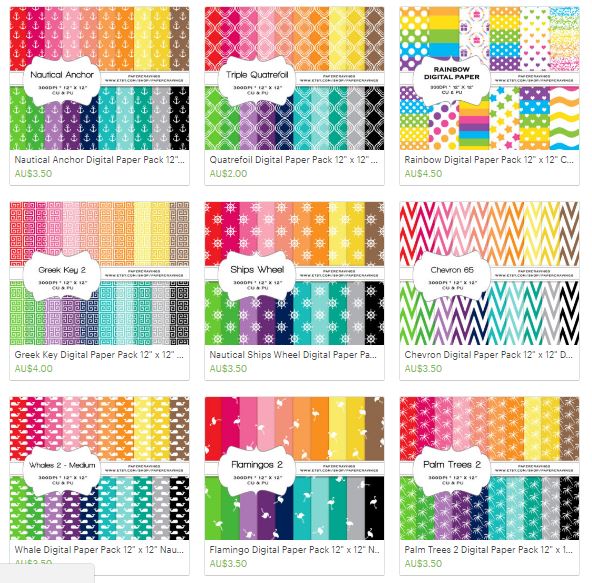
8. Patterns (digital paper)
Patterns are another great way to add interest to your sticker designs. When shopping for digital paper, make sure you consider the 3 things mentioned above while browsing (making sure that commercial use is allowed, checking if credit is required and how many copies you can make).
Most shops on Etsy that sell digital paper also sell clipart – you’ll want to look out for coordinating sets i.e. designers will typically create clipart such as cute owls, then use that clipart to create a digital paper.
If you want to make your stickers unique, I have another ecourse where I teach how to make seamless repeating patterns.
Patterns are great not only for making planner stickers, but a slew of other things as well including printables, planner bookmarks/page markers, party banners and desktop wallpapers/ sreensavers.
Another way to use patterns is for making labels. For example I used a grey chevron pattern in these free cleaning labels that I shared.
![]()
Related: How to make labels in Photoshop
Want more graphic design tutorials? Check out the free graphic design tutorials library!
Being able to make your own patterns is a skill you can use to make sure you stickers look nothing like the competition and are a great way to make your stickers more memorable and unique.
I also have a free mini email course (that includes a pattern overlay) if you want to give making a pattern a go.
9. Pattern overlays
If you’re not interested in learning how to make patterns from scratch, then pattern overlays are the next best thing. A pattern overlay is essentially a digital paper but with a transparent background. So YOU get to choose what color you want to the pattern to be. Not only that, they really speed up your workflow when making stickers as you only need to change the color to create a new sticker, so you can create a lot of stickers in a short amount of time.
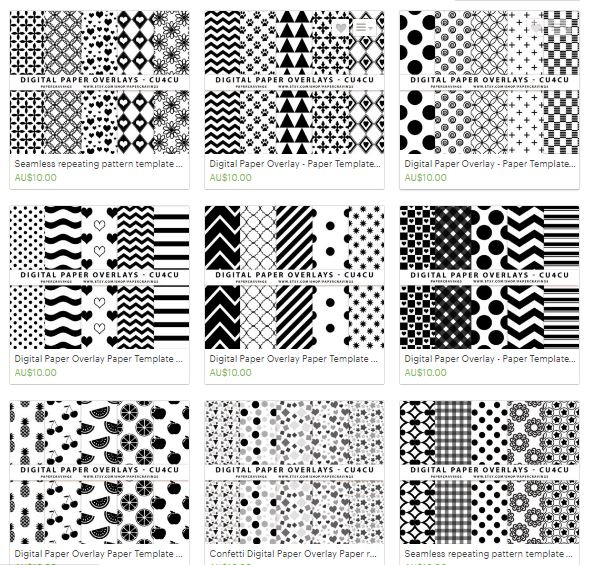
I have tons of pattern overlays in my graphic design resources shop, PaperCravings
If you want to try using a pattern overlay in your sticker designs, I have a free polka dot pattern you can download. Commercial use is ok so you can use the pattern to make stickers that you sell (you just can’t sell the pattern file as is i.e. the file you’ll get when you click here to download it).

Related post: 25 Products You Can Create With Patterns
10. Style Guide
When you’ve decided what colors, fonts, sizes etc. that you’re going to use for your stickers, I recommend compiling that information into a style guide. An editable printable PDF style guide worksheet will be included in my upcoming ecourse: How to make Planner stickers (if you want to be notified when the course is available for enrollment – it should be available by 31 March 2017 🙂 then make sure you subscribe to the blog.
Some of the things you’ll want to record on your style guide:
Fonts
- Main font
- Main font style (e.g. bold, italic)
- Main font size (I like to do this for each type of sticekr that I make e..g the size for text for a title/category header sticker make be different to a sticker for the sidebar
- Secondary font (if applicable)
Colors
- Colors used in your ‘basics’
- Colors used in each sticker kit
- Your favorite colors
I also like to keep track of colors I haven’t used yet but want to use in future sticker kits.
11. Full sheet label paper
There are 2 main types of label paper:
1. Matte
This label paper is the most popular as basically any pen whether it be gel, ballpoint or rollerball can write on this label paper
2. Glossy
Some pens such as sharpie style which have a thicker more marker style tip don’t write as well on glossy label paper as they do on matte, hence sticker shops tend not to use glossy.
You can also get removable Matte label paper although this is expensive.
Which label paper is best for planner stickers?
It’s really up to you!
If you’re making stickers for your own personal use and having the ability to move them around is important to you, then go with removable matte label paper.
If you’re making stickers to sell on Etsy or in your own online shop, matte is the most popular label paper. My sister and I use matte for our planner stickers.
I personally like glossy label paper the best – it really makes the colors POP. More tips on how to make the colors of your stickers POP.
I shared a list of places where you can find full sheet label paper.
12. Printer
So now that you’ve got the materials needed to create the sticker designs and a machine to cut them with – there’s only one more thing you need – a printer!
I use and highly recommend Canon printers. I did a post on how to choose the best printer.
When choosing a printer, make sure you don’t purchase a basic bottom of the line one as these tend to only have 2 ink cartridges – color and black and white. Because of this the cartridges run out quicker and the colors don’t print as nice. You’ll want to find a printer than has about 5 ink cartridges with separate cartridges for black and then cyan, magenta and yellow rather than just a black and color cartridge. I purchase the non-genuine ink cartridges inexpensively off eBay.
Don’t skimp when it comes to choosing a printer. Printers last a long time so you’ll want to invest in a quality one that will make the colors of your stickers POP. And if you want some extra tips on how to get colors to print nice and bright, I shared tips on how to make sure you get a high quality print, every time.
I recommend doing a test print of the colors you want to use in your ‘basics’ sticker kits (the most popular types of stickers that are a staple for every planner girl including header stickers and icons) to make sure you’re totally IN LOVE with them as you’re going to be seeing those colors a lot when you start printing all your stickers!
I also recommend doing a test print for any planner sticker kits you make, as the colors you see on your screen can print slightly different when printed due to different color modes (computer screens use RGB color mode while printers use CMYK color mode). You don’t need to know the technical reasons behind why this is – just be aware of it. If you’re really keen, I touched on the differences here: Raster, vector, png, .TIFF, CMYK – what does it all mean?! (Graphic design terminology explained)
Want to learn more about how to make planner stickers?
Enrol in the ecourse (click here).

One last thing: if you liked this post and found it helpful – don’t forget to pin it!
Leave a Reply