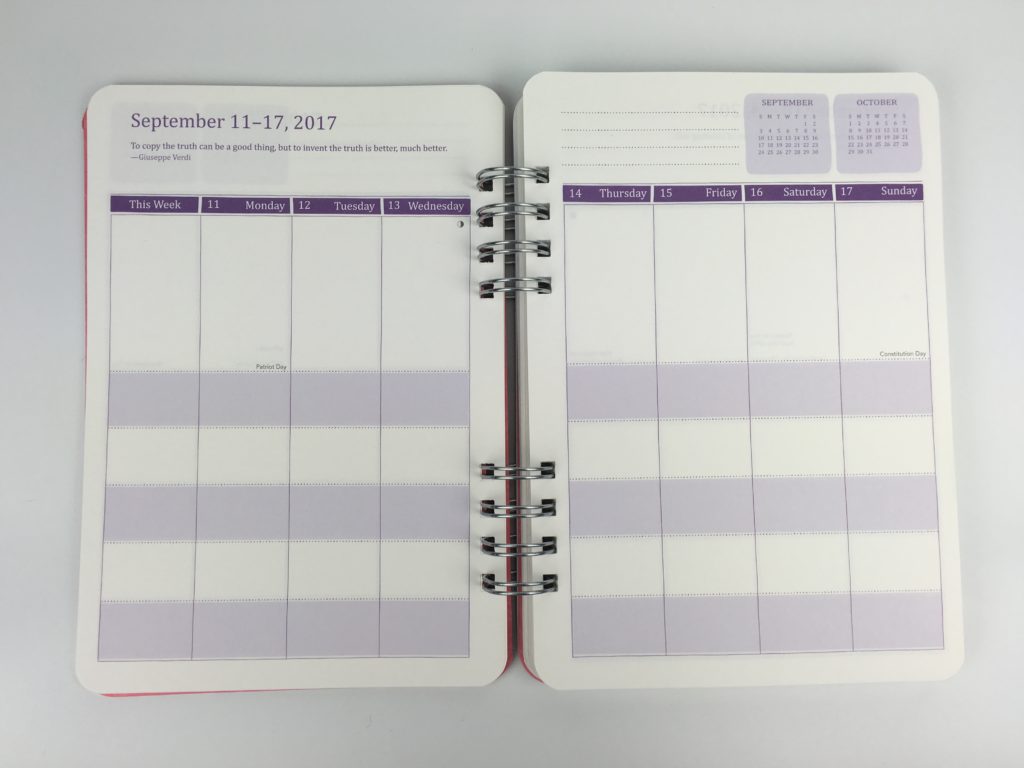
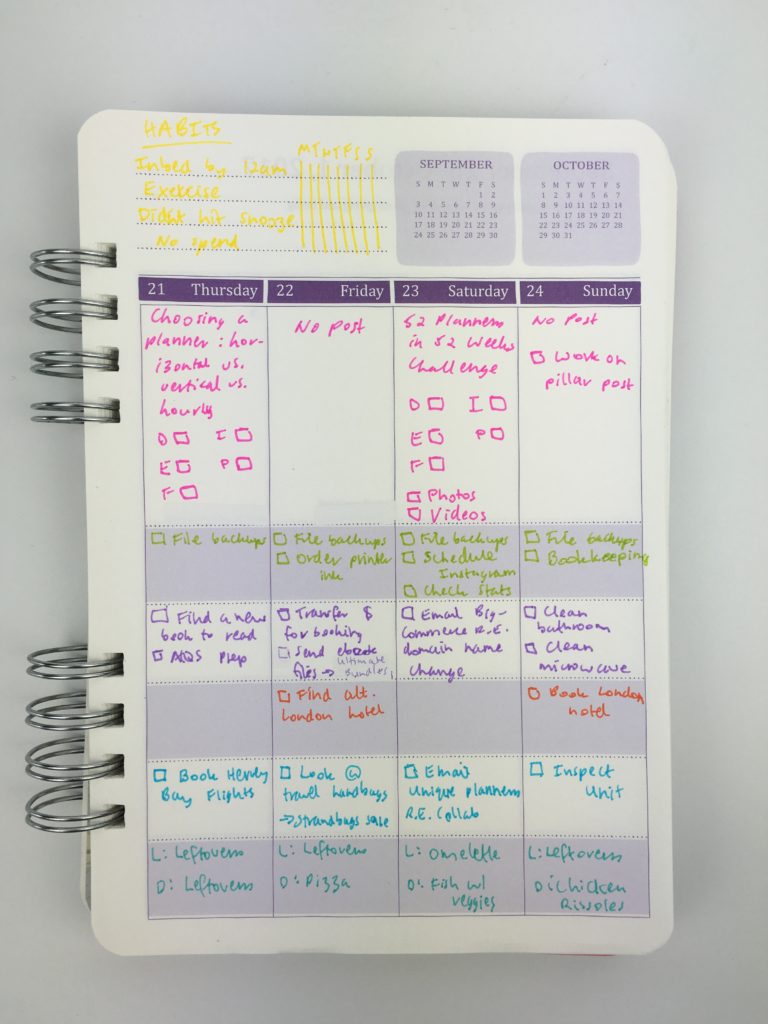
For week 38 I used the Do It All Planner from Orange Circle Studio. This planner has one of my favorite types of planner layouts: multiple boxes for each day so you can categorise and color code!
Setting up the week
Before the pen
Related: Review of the Do It All Weekly Planner by Orange Circle Studio
Color coding categories this week:
- Red = urgent
- Pink = blogging
- Green = daily tasks
- Purple = Don’t forget
- Orange = Europe trip planning
- Blue = Due today
- Mint = Meals
Related: 6 Ways to color code your planner to increase productivity
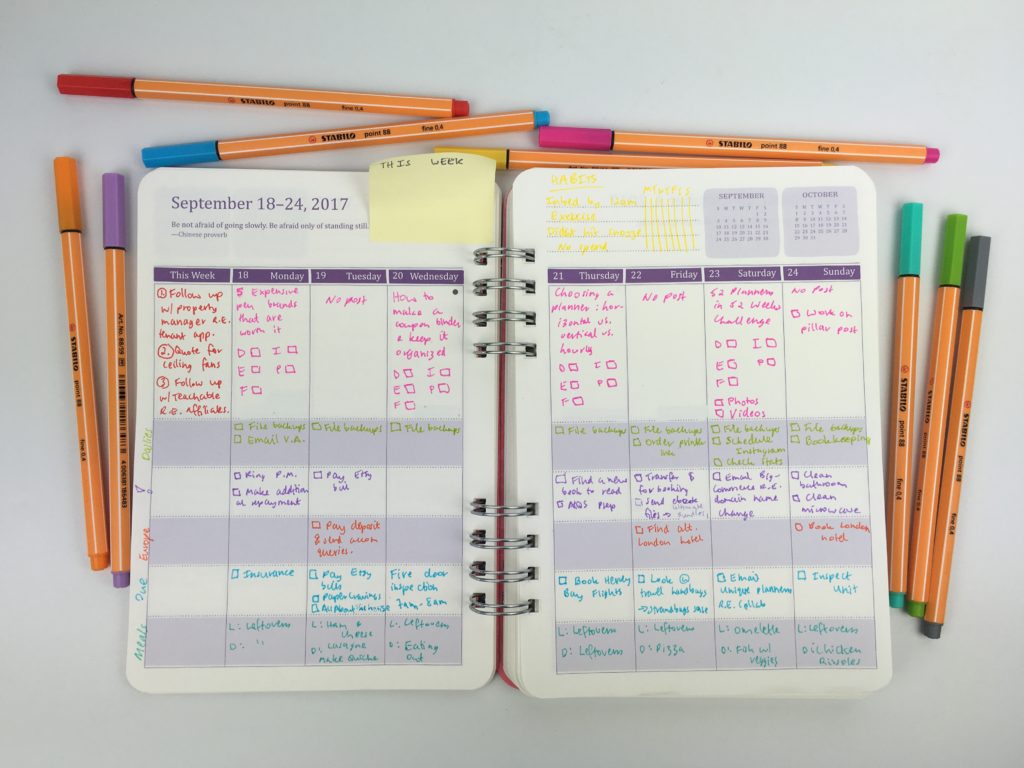
This week was a good example of one of the reasons why I tend not to allocate things to a certain day as some days I need more space and some I need less. I think I prefer to write a list and just allocate a day next to them or color code by day.
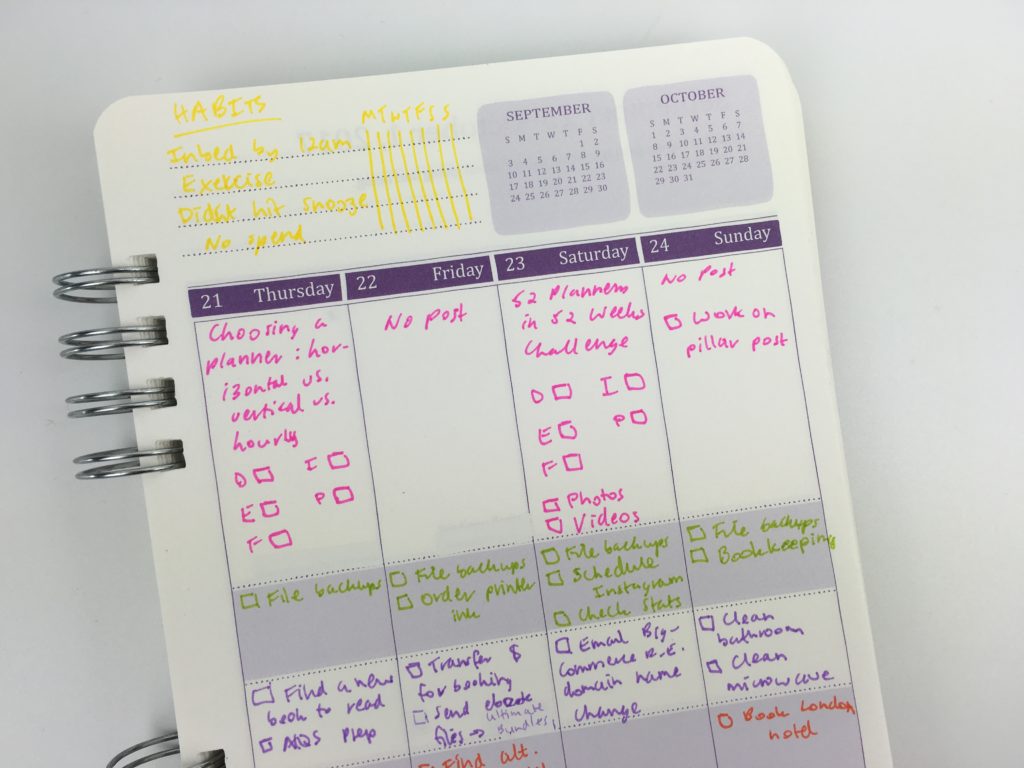
There wasn’t enough habit tracking space so I had to write out ‘file backups’ each day which was time consuming and took up too much space. I’ve become used to a large notes section for each week or at habit tracker and missed having that planner space this week.
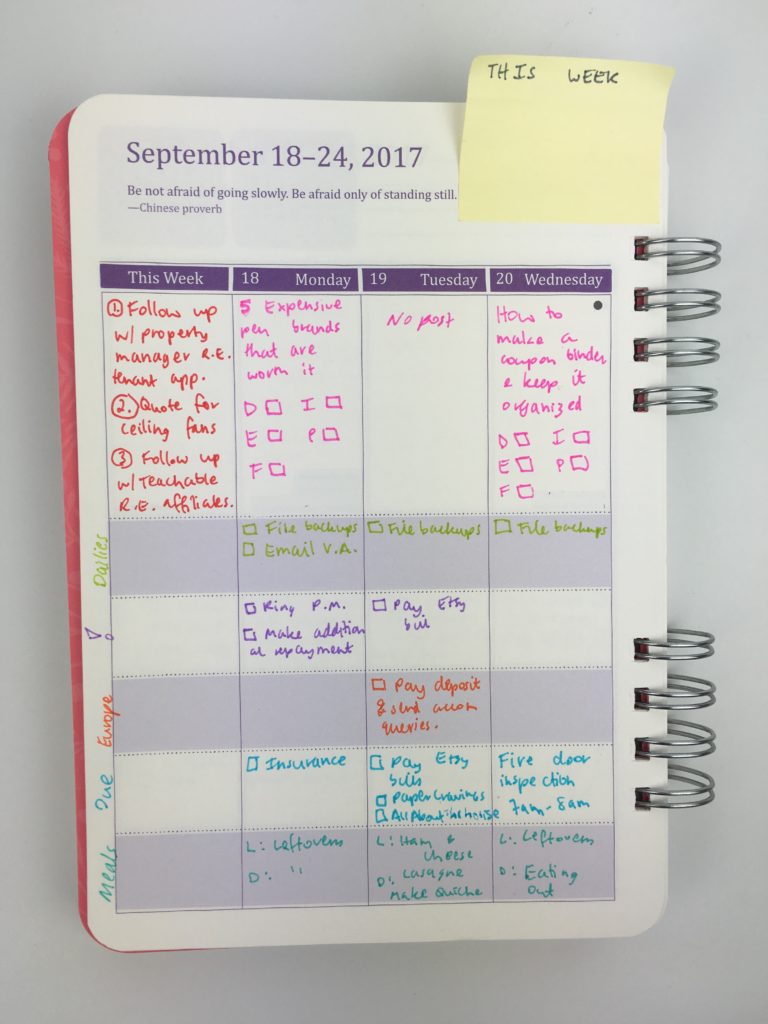
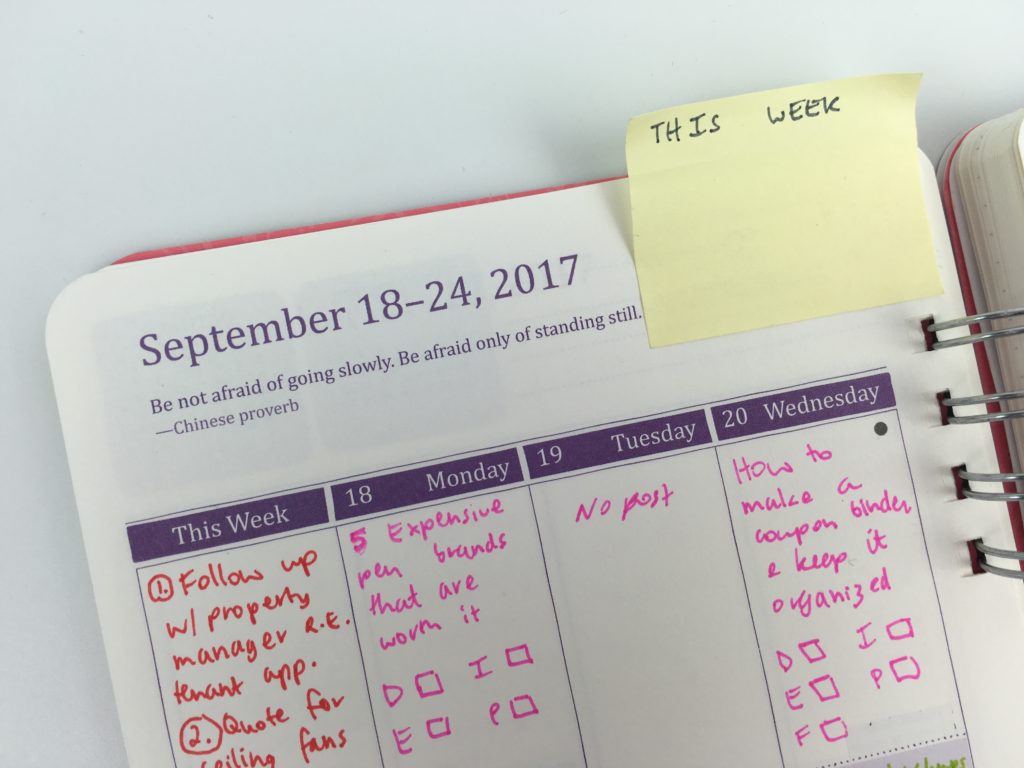
I ended up using the space on the left ‘this week’ column for overflow of tasks as they popped up during the week
Next time I wouldn’t plan using aqua and mint pens next to each other as the colors were quite similar so they didn’t contrast as much.
The meal planning space was a good size but the rest of the sections are quite small (the planner is approx 5.75″ wide x 8.5″ high)
Pens Used
I used the Stabilo point 88 pens. I really like these pens as they come in all the colors you need for color coding as well as a pretty mint!
The pens bled through the paper which is quite thin. in this planner.
Pros of the Orange Circle Studio Planner
- 6 Categories / sections per day
- Different colors throughout the planner
- Elastic band to keep everything together
- Portable Size
- Feels lights
- Holidays are pre-printed on the weekly spread and the monthly calendar

Cons of the Orange Circle Studio Planner
- The dates at a glance section is a bit of a waste of space on the weekly spread
- Random holidays printed on the pages that waste space (I used white out correction tape to cover these up to create more room to write)
- No space for planner decorating or stickers
- The columns are too narrow
- The colors for each month are a bit dull – a yukky green, maroon etc. (the purple spread I used is the nicest in the planner!)
- The pens I used (Stabilo point 88) bleed through the paper – the paper is quite thin
- The planner doesn’t have tabs – I used a sticky note to mark the week
- The binding feels cheap – like they didn’t want to spend the money to have the coil extend the entire length of the planner like every other planner does – because of this it feels like pages could easily rip out of the planner. The binding is flimsy – because it doesn’t extend the entire way down the planner spine the pages move around a lot
- The front and back covers are thin – I can see these getting damaged the more you use the planner
- The monthly calendars are a bit useless – there’s no space to actually write anything in them and they’re only 1 page instead of 2 pages like most other planners
Would I use this planner again?
I wouldn’t use this planner again. This size planner (approx 5.75″ wide x 8.5″ high) was too small for me. The fact that the binding didn’t extend the entire way down the planner also drove me a bit nuts as the pages weren’t being securely held in place. I do like categorised planners but prefer the others I’ve used previously that had more room to write such as the Plum Paper Me Planner, Limelife Layout C and the Erin Condren Teacher Planner.
This planner would be ideal for a student if they color coded by subject and just put the subject code and task e.g. AYB123 HW as the boxes are quite small.
Catch up on past week’s of the challenge:
- Week 33: Colorful Bullet Journal Inspired Weekly Spread
- Week 34: Review of the Planner Pad Weekly Planner
- Week 35: Planning with a functional minimalist DIY weekly planner printable
Related Posts:
- Similar and Cheaper Alternatives to the Erin Condren Life Planner
- 5 Ways to use sticky notes for school or college
- How to make printable graph paper in Photoshop (perfect for habit tracking and bullet journalling!)
- Arcing my Plum Paper Planner – everything you need to know if you’d like to try it yourself!

I’ve been using this planner for years and I LOVE it. I’ve tried several other planners and keep coming back to this one.
I love the overall size of it because it easily fits in my purse/bag and it is light weight. I have tried the large and small happy planners and neither of them worked well for me. I love the idea that I can add more pages to the book, but I don’t like that it’s so easy to pull pages from it! I know it doesn’t make sense!
I disagree with your thoughts on the binding, they are made of a sturdy metal that doesn’t feel cheap to me at all. I do wish it went a little further down each page, but the placement of the binding doesn’t get in the way of writing on each page.
I don’t think the paper is thin, it is thicker than normal printer paper and it is thicker than some other planners that I have used, but if you use felt pens it will bleed through. I have been using small post it notes and other sticky tabs on my pages so I can move tasks to different dates when I don’t finish something or when an event is changed.
The front and back covers are made of a thick cardstock that can get damaged throughout the year depending on how rough you are with the planner, but anything you use daily is going to show some wear and tear over the course of 18 months. They are sturdy enough to last through the year!
The monthly pages are in the front of the planner and I also find that it is hard to write anything in the spaces. Personally, I find that if I write things in the monthly spread, I forget to put them on my weekly spread! So this format works well for me!