This week I didn’t have too many things to plan so thought it would be a good time to pull out some planner stickers and a planner notepad I’d bought a while back!
Setting up the week
The notepad is A4 size in landscape page orientation by Studio Stationery. I liked the simple but functional layout of the notepad and the way the design maximised the entire page with no dead space.
I considered Arcing the page and adding to my planner but ended up deciding to just it like a normal notepad.
![]()
Related: Arcing my Plum Paper Planner – everything you need to know if you’d like to try it yourself!
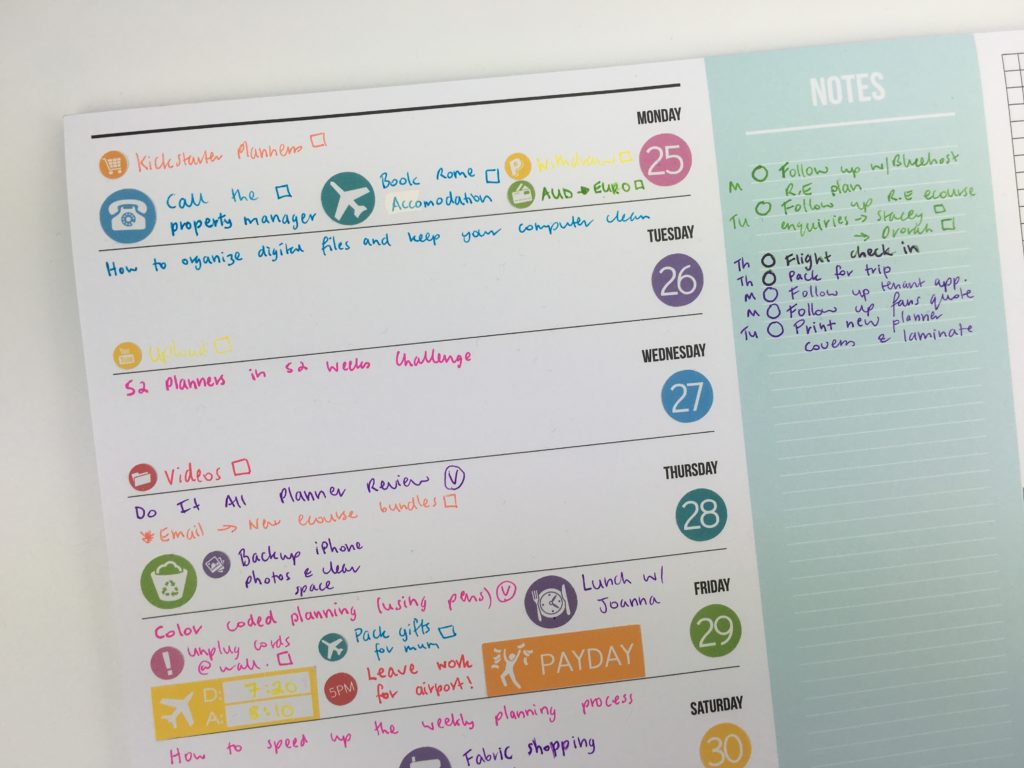
This Week’s Spread
![]()
I did a different blog planning workflow this time:
- I listed my workflow key i.e. O = outline, D -= draft F = Final I = Images P = Pinned to Pinterest after posting
- I used the Frixion erasable stamps to create the hearts to mark off when that workflow task is completed
- I used mini number stickers to number each of the blog posts
These numbers then referenced back to the weekly spread.
![]()
This was a good idea that saved space in the daily boxes although I do prefer to cluster blog things together.
There was plenty of list planning space – I still have some leftover at the end of the week (which doesn’t happen very often!)
Related: Why I plan my day using planner stickers (and why you should too!)
Stationery Used:
Planner Stickers
I used a variety of planner stickers this week including tiny icons, icons and quarter box labels. I wanted the spread to have lots of different colors so didn’t color code and instead just used whatever pens and stickers would keep the rainbow overall theme. I was more thoughtful behind my color choices than week 33 when I just picked any color and the spread ended up looking a lot prettier. I also used less colors which helped prevent it from looking ‘overdone’.
All of the stickers in the spread were made by me and are sold in my sister’s planner supplies shop
- Payday sticker (similar stickers)
- 0.25″ mini icons and numbers I used for the blogging workflow (variety)
- 0.5″ Date dots (includes the plane icon sticker)
- Blog header stickers
- Meal plan header stickers
- Bin day stickers
- Meal planning stickers
- Sewing / craft icons
- Depart and arrival time plane stickers
- Mini icons
![]()
Pens
The Dong A Miffy Pens are ok. They were very expensive and there’s nice colors in the pack but the pen is needle tip. You have to hold the pen almost vertically or the ink skips or doesn’t write at all. They are the only needle tip pens I own and I doubt I’ll be buying any more needle tip pens.
![]()
Related: 5 expensive pen brands that are worth the money (I have no regrets for splurging on them!)
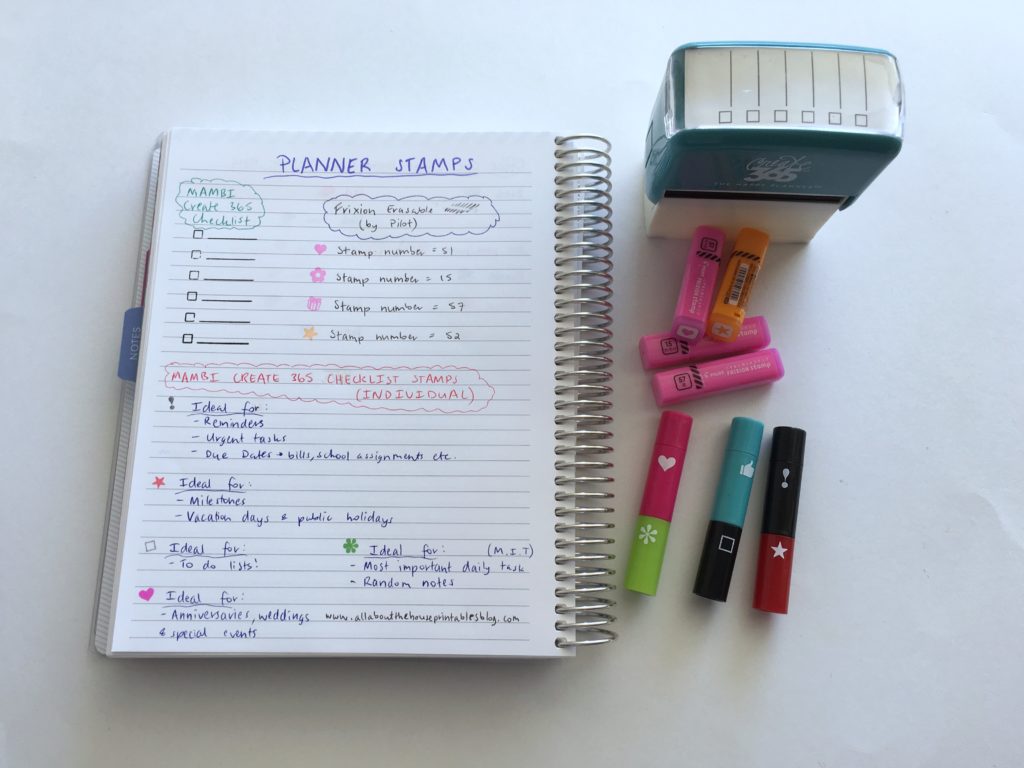
Stamps
I Used the Frixion Erasable heart stamp to create the spots to mark off for blog post workflow (although you could use any stamp – doesn’t have to be erasable). I also occasionally use the MAMBI checklist stamps.
Pros of planning using the Studio Stationery Notepad
- Lots of list space
- The days of the week are small so they don’t waste valuable planning space in the daily boxes
- Undated – start planning anytime
- Open-ended layout that can easily be used in a number of different ways
- The light blue color is nice 🙂
![]()
Cons of planning using the Studio Stationery Notepad
- The graph box was a bit small for habit tracking – there wasn’t much room to write tasks. The black lines also made it a bit hard to see what had been written – it would’ve been better if they were grey
- The lines for the list are very small – you need tiny writing
![]()
Would I use this planner again?
This planner worked well but if I used it again I’d probably change how I used it.
This week things actually needed to get done on set days (normally I do things on any day of the week – doesn’t matter which day as long as it gets done) before I went away for the weekend so I did actually need the daily planning boxes. If I used it again, I’d keep the entire daily boxes strictly blog post title & workflow.
I’d change the bottom right box to have the habit tracking tasks and use numbers in the graph paper rather than writing out the habits as the black gridlines made it hard to see what had been written.
The layout would be more functional if the right side of the page was split into a 2 column checklist at the top with 1 large graph paper habit tracking section at the bottom of the page similar to week 14.
Catch up on past week’s of the challenge
- Week 34: Review of the Planner Pad Weekly Planner
- Week 21: Using Microsoft Word to plan your week
- Week 13: Using a Kmart lists book to plan your week (planning by task, rather than by day)
- Week 9: Customising the Erin Condren hourly planner for task based planning
Related Posts:
- Best paper planners if you have large handwriting (and planners you should avoid)
- 7 Planner supplies I don’t regret splurging on
- How to make lined note paper DIY planner insert refills in Photoshop (quick and easy step by step tutorial)
- What type of pens write best on correction tape? (gel pens vs. ballpoint vs. marker pens)
Leave a Reply