Do you need a DLSR camera to photograph the northern lights?
The northern lights are probably on most people’s bucket lists (including mine!) so I when I found you could see the northern lights in Rovaniemi (where I was going to visit Santa!) I immediately started researching how to photograph the northern lights.
After much Googling I was doubtful my point and shoot camera would be able to capture the lights and not wanting to splash out for a fancy DLSR (that would have far too many buttons and functions than I’d know what to do with), I decided to join a northern lights photography tour.
Can you photograph the northern lights without a DLSR?
I rocked up in Finland with my camera (the Canon PowerShot SX730 (affiliate link) – it’s better than a standard point and shoot camera but it’s certainly not a DLSR). The tour guide for the northern lights tour I booked, to her credit, tried various settings to see if the camera would work but every time it was just a black image.
Then she showed me the camera she uses…. cue the laughter. When I asked her how much that camera cost I converted the amount in euro and it was about $20K AUD including the various lenses. And here I was with my $500 AUD camera…
So how can you get photos if you don’t have a DLSR
I get those people who want to ‘live in the moment’ on their holiday… so maybe you’re not too fussed if you get a picture or not. But I like photos I can take home and use to make into photobooks to remember my holidays. So if you want your own photos of the northern lights without paying more than the cost of getting to the northern lights, the best way to do this is on a photography tour.
I found one called Photography Tour: Discover the Northern Lights that I booked through Viator (tour company was Beyond Arctic – this is not a sponsored post). I spent hours Googling camera settings etc. so I was quite certain my camera wouldn’t work. $145 AUD per person for a tour is a lot cheaper than if I’d bought a new flashy camera that I probably wouldn’t know what to do with, and by joining a photography tour you know you’ll get some good photos.
On the photography tour I took, we could tell the guide what we wanted included in the photos (lake, a row boat they had, trees etc.) and she’d do all the camera settings etc while we could enjoy the night not stressing about getting good photos.
I would like to mention that the tour company’s advert for the tour states they’ll take you to 2-3 locations on the night however we were only taken to 1 location. The multiple locations was a selling points for us as it meant a higher chance of seeing them. There is another cheaper tour you can do that doesn’t include the photography teaching part which is cheaper, but the other tour group that did this arrived much later than we did and they only saw the lights for half an hour before they disappeared.
So what happened on this photography tour?
This is what happened on the tour I took from Rovaniemi
- The tour guide picked us up at our accommodation in a minivan (there were 4 of us and since September is off peak, it ended up being a private tour :). The pickup time varies depending on time of year. It only needs to be dark not necessarily winter. You don’t need to be staying at a hotel – they’ll pick you up from whatever address you tell them
- Drove about half an hour out of Rovaniemi to one of their locations
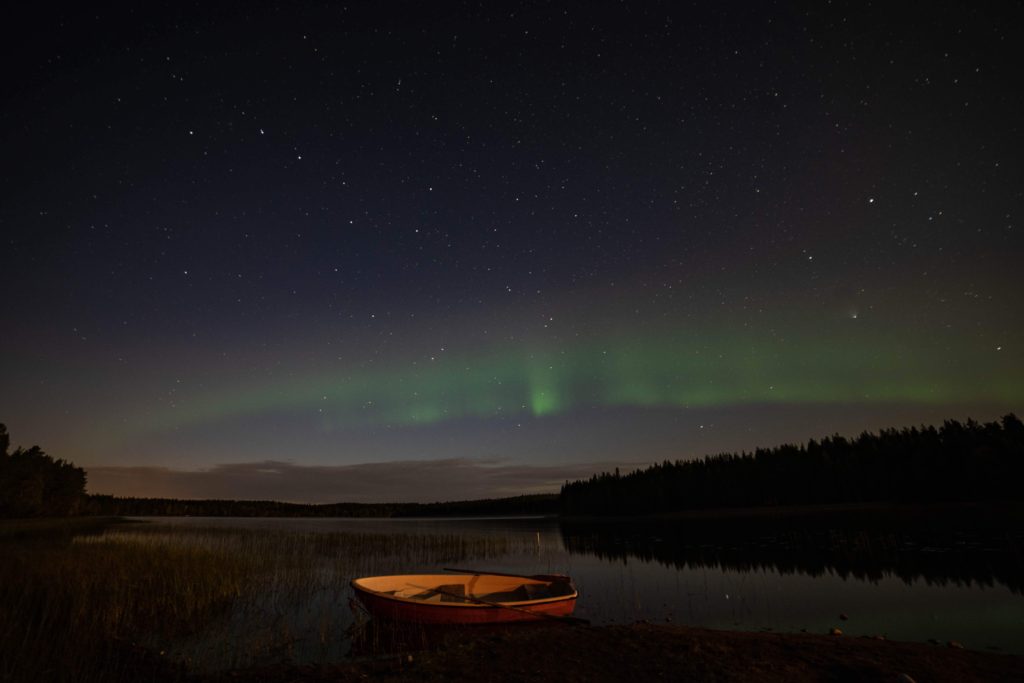
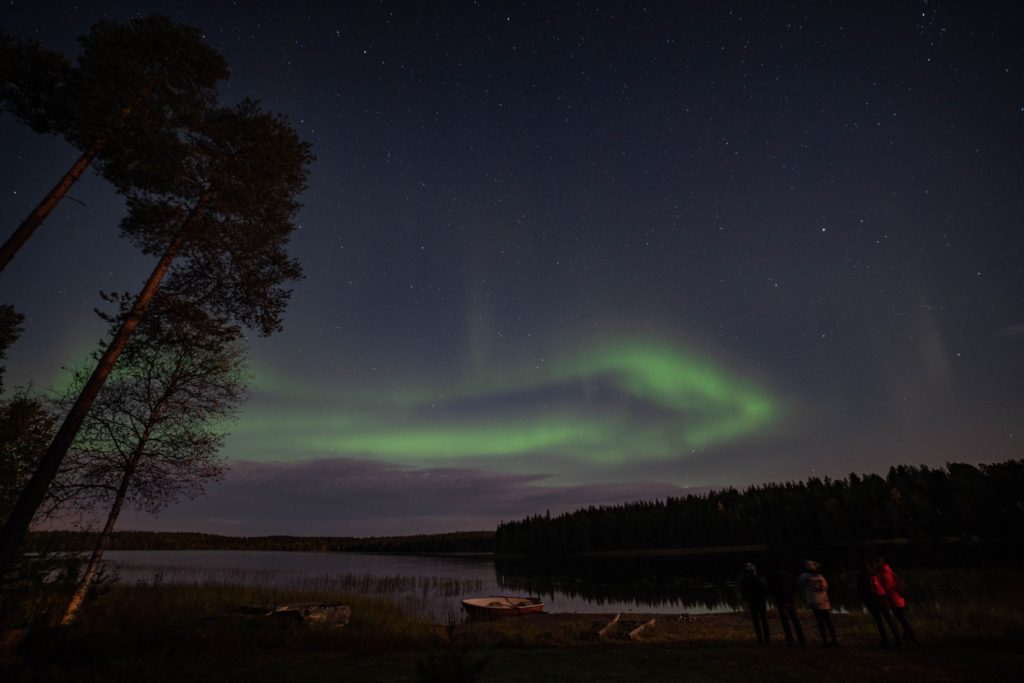
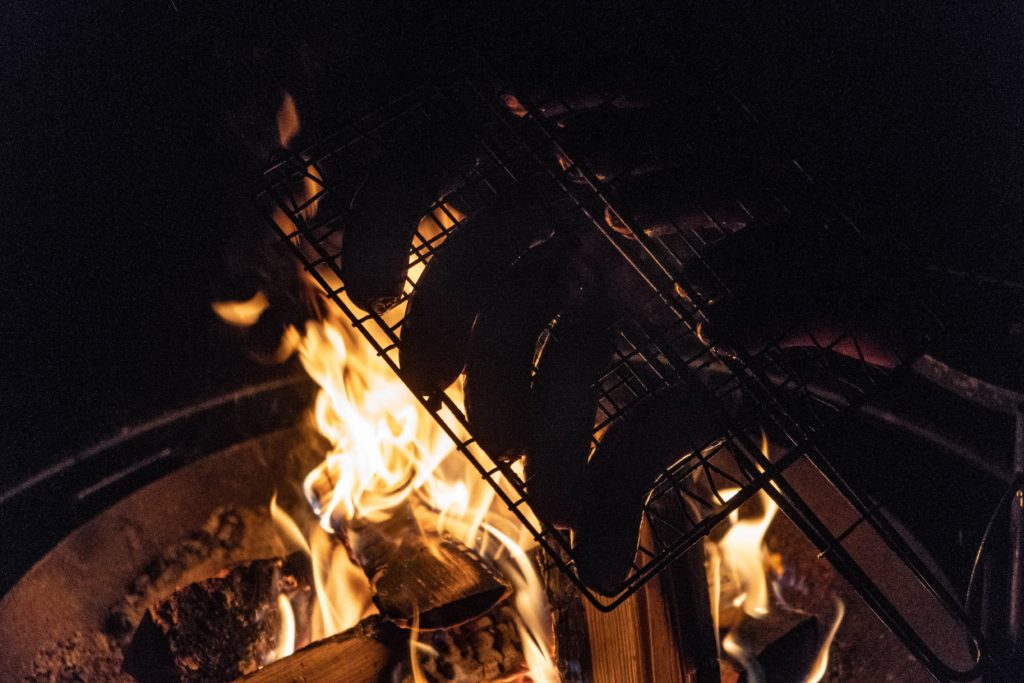
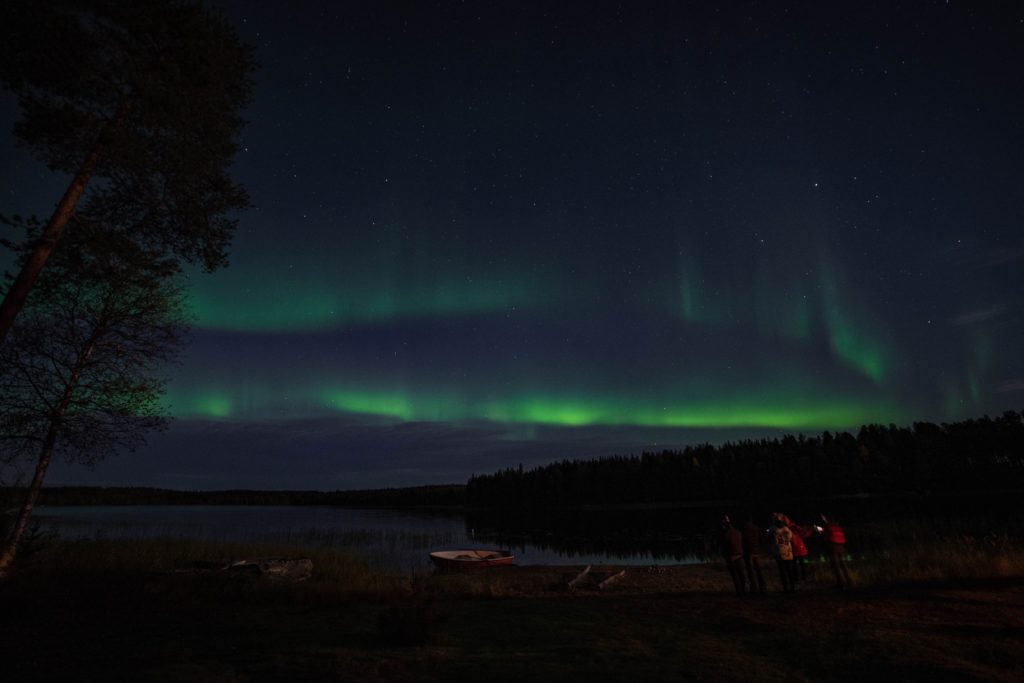
- They had a setup with a boat in the foreground of a lake, a fire pit where they roasted sausages if you want them, there’s a forest of pine trees and a log cabin. Basically it’s an adorable and quaint setting. The log cabin had a toilet too – no need to pee in the woods!
- Showed a video of what causes the northern lights
- Showed me the camera settings to use and changed the settings on my own camera as well as her professional camera
- Provided a big snuggly coat to keep warm outside. It was 0 degrees when I visited in September which may not seem that cold to some, but coming from Queensland it sure felt cold – my fingers and toes were numb I had to keep running in and out of the cabin to stay warm
- If you don’t have a camera they’ll use theirs to take photos of you, the people you’re travelling with, group photos, photos without you etc. You can tell them exactly what you want in the photo and they’ll email them to you afterwards
There’s no guarantee you’ll get to see the northern lights – some nights are better than others and some nights they just don’t appear – so I recommend you do this on your first night in the Arctic Circle so you can rebook and do another tour on another night and get another chance to see them.
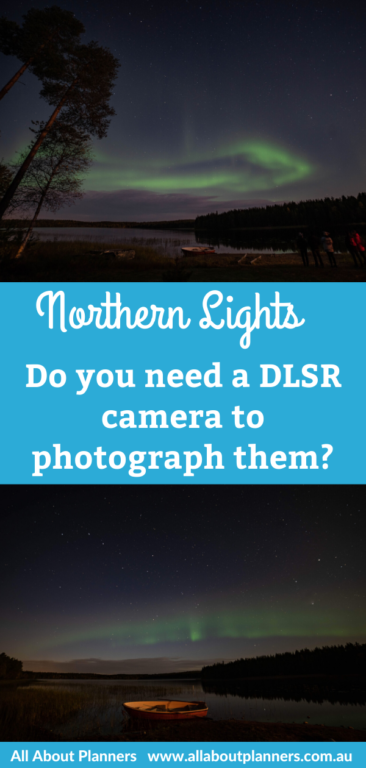
What do the northern lights actually look like?
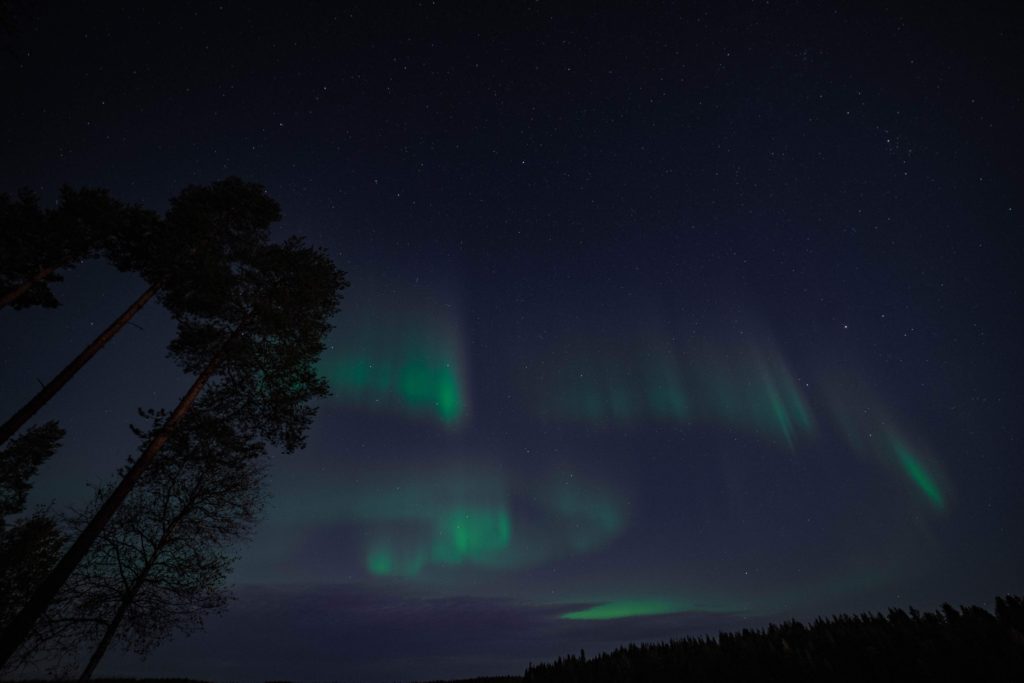
To the naked eye.. not a lot. To be honest, I was underwhelmed. After all this hype and to me it just looked look like a light grey cloud amongst the black sky. But then the tour guide took a photo on her fancy camera… and I understood the hype. Bright mint and green streaking across the sky. And if you look closely (close your eyes and re-open them and face away from any buildings with lights), then you can start to see the lights moving. At first it was an arc across the sky (similar to a rainbow shape), then they starting dancing into 2 lines, circle etc.
The northern lights only lasted about 2 hours before they disappeared.
I’m glad I did the tour but if I do another one (or if you only have the chance to do it once), I’d go in winter for even prettier photos with the snow in them and stronger lights. It probably also didn’t help that 2019 )when I went) was a solar minimum. If you’re patient enough to wait 11 years for the next solar maximum and I’m sure the lights will be much more spectacular!
Are the northern lights actually worth doing?
While the tour was expensive and the northern lights outside Rovaniemi weren’t amazing I’m really glad I did it. The pictures turned out great!
I definitely want to try and see the lights again (in winter though) in Northern Norway or somewhere even closer to the Arctic.
So why doesn’t a point and shoot camera or your iphone work?
- Need 30 second timer to let enough light in
- Self timer so you don’t bump the camera when you take the photo
- Need a tripod to hold the camera steady. And by tripod I mean a real tripod… that’s at eye level with an adult (as tall as a child… try fitting that in your suitcase and keep within the weight limit)
- The tour guide was a proper photographer and was experimenting with various lenses and camera settings – it really depends on the night. This takes time which means you may not get that many shots if the lights don’t last that long
- Most point and shoot cameras don’t have low enough exposure to let enough light in
If you do somehow master the settings on your camera to capture the lights, the next part is actually finding them. There are apps you can use but you need to be away from any light pollution i.e. out of town … which you’ll probably need a car to drive to.
What if you do have a DLSR?
These are the camera settings the photographer / tour guide recommended:
Switch to the manual setting on your camera:
- ISO – 800 – 1,600 (note that 1,600 could produce a grainy photo)
- F = aperture and lens speed. Choose F2.8 at 15 – 20 seconds or F/4 at 30 seconds (the lower my camera could go was 4 i.e. not lower enough)
- Shutter speed = 1/20 – lower the number, the more light gets in. If the lights are bright and moving fast change to shorter. Can also try 10 and 15
- No flash
- Choose a focal point – a tree, tent, boat etc.
- Zoom out completely, you can crop the photo later
- Use the rule of thirds when deciding what to include in the photo
Batteries drain faster in the cold. Put them in a zip lock bag to avoid condensation. If they do get condensation, leave the lens out and let it dry before retracting or capping the lens.
If you have any tips or recommended camera settings for photographing the northern lights please comment below!
More Finland posts
- Favorite stationery shops in Finland (Helsinki & Rovaniemi)
- Guide to visiting Rovaneimi in Lapland, Finland (the home of Santa Claus!)
- Visiting Santa Claus Village in Rovaniemi – is it worth it when there’s no snow?
Found this post helpful? Pin it!