How to add your own text to printable labels (plus FREE printable cleaning labels!)

I recently added some printable labels to the shop!
![]()
They match this printable recipe binder (which is also available in my shop!):
![]()
If you decide to purchase them you’ll receive ALL 13 pages of labels (all 156 labels included in the bundle are listed below) so you can print and choose which stickers you want to use AND there’s also the 2 sheets of blank labels (lined and no lines) so you can add your own titles. Watch the video below to see how easy it is to add your own text using Canva (free online image editing software) – you could also use Picmonkey.

Note that the preview images in this blog post have been compressed to meet Wordpress’ image size limit. The file you receive is a 300DPI high quality file (in both JPG and PDF file format!)
Page 1:
Lined – use these to organize anything – especially useful if you want to hand-write your labels to make sure your writing is straight
![]()
Page 2:
Blank – choose your own titles! (you can add your own text to the JPG file using FREE image editing software such as Canva or PicMonkey – as shown in the video tutorial above)
![]()
Page 3:
Contents _____ (write what is in the jar, container, storage bin, Tupperware container, box etc.) – good for long term storage and things like Christmas decorations, moving boxes etc.
![]()
Page 4:
Content (2 styles on the same page)
‘F: ___/___/___’ for the date it was frozen on, or ‘B: ___/___/___’ for the recording the best before date
![]()
Page 5:
• Sugar
• Brown sugar
• Caster sugar
• Plain flour
• Self-raising flour
• Baking soda
• Cocoa
• Coconut
• Rolled oats
• Chocolate chips
• cookies
• Icing mixture
![]()
Page 6:
• Cornflour
• Tea
• Granola
• Oatmeal
• Coffee
• Trail mix
• Candy
• Snacks
• Nuts
• Dog food
• Cat food
• Pet treats
![]()
Page 7:
• White rice
• Brown rice
• Basmati rice
• Jasmine rice
• Wheat flour
• Baking powder
• Pasta
• Cereal
• Chips
• Crackers
• Sprinkles
• Bread crumbs
Page 8:
• Organic
• Vegan
• Gluten-free
• Sugar free
• Popcorn
• Kids snacks
• Bread flour
• Instant rice
• Kids cereal
• Beans
• Corn starch
• Quick oats
![]()
Page 9:
• Pasta shells
• Pasta macaroni
• Pasta penne
• Pasta fettuccini
• Pasta spaghetti
• Pasta fuselli
• Pasta rotoni
• Gluten-free pasta
• Quinoa
• Pretzels
• Croutons
• Egg noodles
Page 10:
• Sesame seeds
• Pin nuts
• Macadamia nuts
• Pistachios
• Raisins
• Walnuts
• Pecans
• Hazelnuts
• Almonds
• Sunflower seeds
• cashews
Page 11:
• Muesli
• Wild rice
• Weetbix
• Buckwheat
• Mixed grains
• Grits
• Protein powder
• Coffee beans
• Ground coffee
• Canned food
• Boxed food
• Granola bars
Page 12:
• Dates
• Almond flour
• Coconut flour
• Steel cut oats
• Dried fruit
• Wheat germ
• Shredded coconut
• Desiccated coconut
• Sea salt
• Spelt flour
• Strawberry jam
• Chick Peas
Page 13:
• Cleaning spray
• Glass cleaner
• Bathroom cleaner
• Laundry detergent
• Vinegar
• Stain remover
• Hard floor cleaner
• Dish soap
• Furniture cleaner
• Oven cleaner
• Fabric softener
You can download the sheet of cleaning labels from this set for FREE when you subscribe to the blog (and access the rest of the free printables library!)
![]()
HOW TO MAKE YOUR OWN LABELS
- Print the sticker sheets onto full sheet sticker paper. I have a list of places where you can purchase label paper from in this blog post. Note that it doesn’t really matter what brand of label paper you use – Avery label paper can be expensive and I’ve found that not as well-known label paper is just as good as Avery and far cheaper!
Note that most printers require you to place the label paper face down (i.e. with the side of the page you want the label to print on facedown when you feed it in the paper tray) – I recommend doing a test print in black and white first to make sure.
- Cut. I use a guillotine; you can also use a paper trimmer or scissors. I’ve kept the stickers close together to minimise cutting 🙂
- Experiment with the position of the label. Before you peel off the sticky backing, place the label on the side of the jar, storage container etc. and see if you want it higher or lower, in the middle, on the left or the right etc.
Tip! Use a dry erase marker to put a small dot at either corner of the label so that when you peel of the sticky backing you know exactly where to place the label. You may want to use a ruler (or tape measure if the jar is round) to make sure the labels are straight.
- Peel off the non-sticky backing and stick the label to the surface! Make sure you smooth out any creases – I find it helps to apply the label to the surface from the left to right (or vise versa) as it tends to result in less air bubbles. A cloth or ruler can also help get rid of any air bubbles and make sure the label is secured to the surface.
If you don’t have full sheet label paper or would prefer to use paper or cardstock instead, then I recommend laminating the labels. You can also use butterfly/binder clips to fix the labels to baskets, use with luggage tags, or punch a hole in one of the corners or the middle of the label and thread through ribbon. Velcro is another option for adding labels to fabric surfaces such as canvas storage bins.
You can either add your text before laminating, or use a dry erase marker after laminating.
If you’re going to be fixing the labels to storage bins or jars, then I recommend using either clear tape or clear contact paper. You can buy it on Amazon. If you live in Australia, you can purchase it from Kmart, or Officeworks.
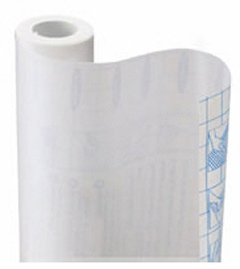
I recommend keeping a 0.25” border around each side of the label (so that the contact paper can stick to the jar). So if the label is 2.5 x 2.5” square, you’ll want to cut your piece of clear contact paper at 3” x 3”. Then peel off the non-sticky backing of the contact paper and place your label facedown on the contact paper. Then fix to your storage bin, jar etc.
![]()
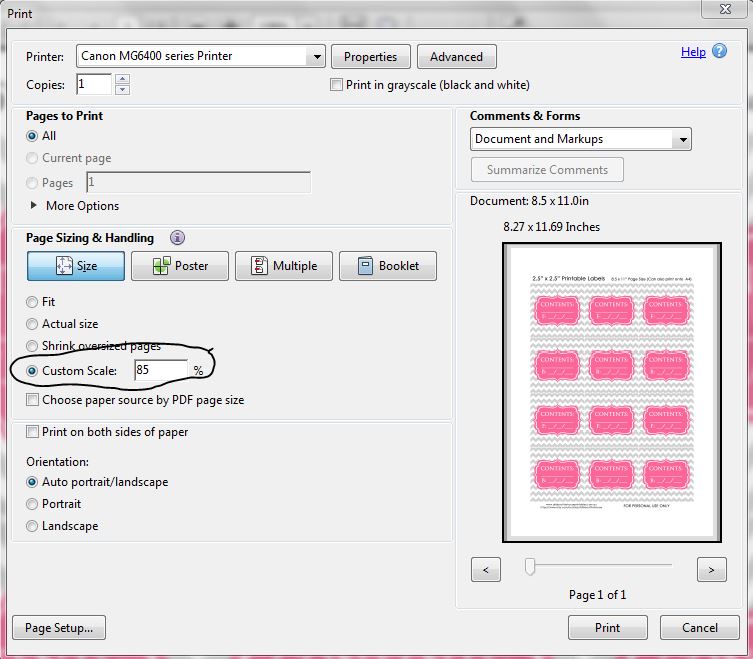
HOW TO CHANGE THE LABEL SIZE
If you would like smaller labels, just scale your printer e.g. to 85%.
Go to ‘file’ then ‘print’ then enter the % you would like them to print at in the scale option. So if you wanted labels that were 1.25″ x 1.25″ you would select 50% (as these labels are 2.5 x 2.5″)
This blog post has more printing tips if you’re interested.
Alternatively, you can change the size of the labels by trimming 0.25” of the chevron pattern off the top and bottom of each label (after printing at their normal size) if you would like 2.5” long x 2” high labels.
I really enjoyed making these labels so if you have any suggestions for types of labels you’d like to see in the shop, or want another color scheme – send me a convo via Etsy or email me at [email protected] 🙂
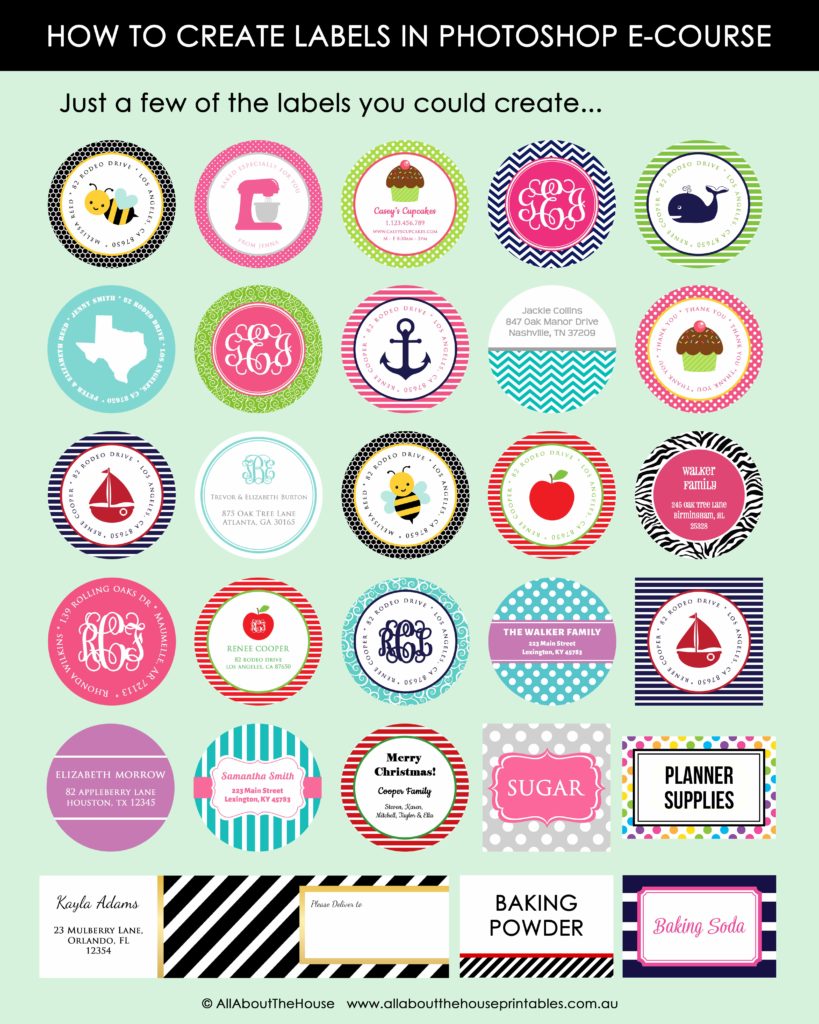
If you’re interested in learning how to make your own labels, you might like my ecourse: How to make labels in Photoshop. In the ecourse I show you how to make labels such as these: