The fastest and easiest way to resize printables
Today’s post is a quick tutorial for resizing any printable to any page size. You can follow the steps in this tutorial to resize printables to non-standard page sizes such as the Happy Planner classic. It’s also useful if you want to add printables to a discbound planner or ring bound planner and would like extra margins to allow for hole punching.
How to resize printables
As each printer is different, I’ll give you 2 options:
- Enter custom dimensions
- Scale the printable
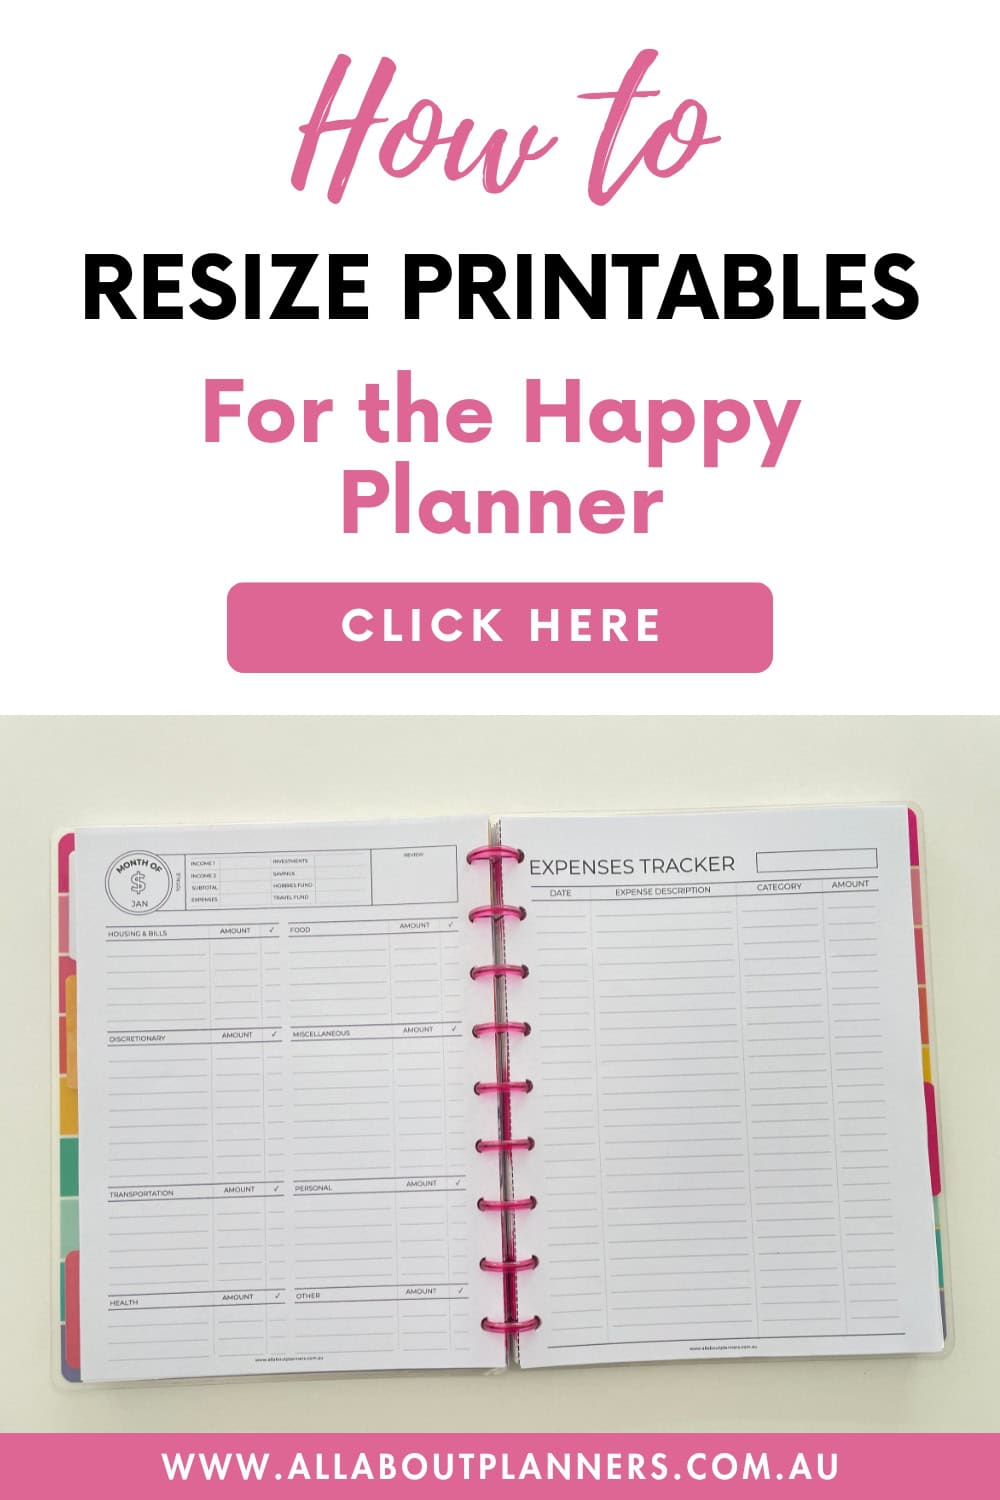
You can use these methods for resizing any printables, but for this example I’ll be resizing for the Happy Planner classic page size.
![]()
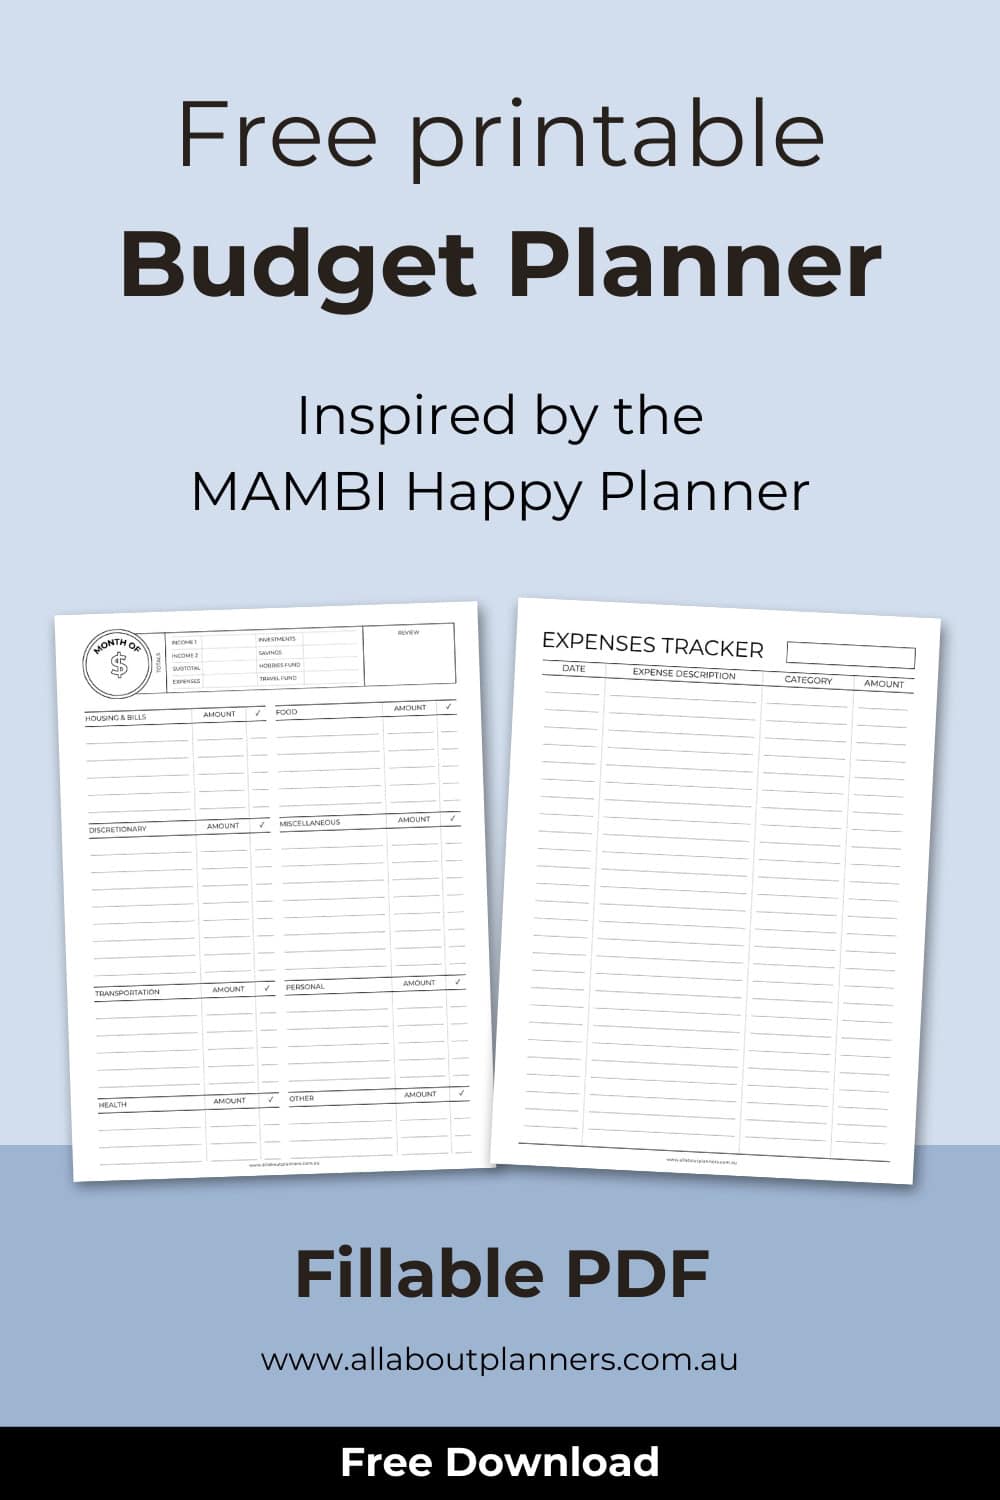
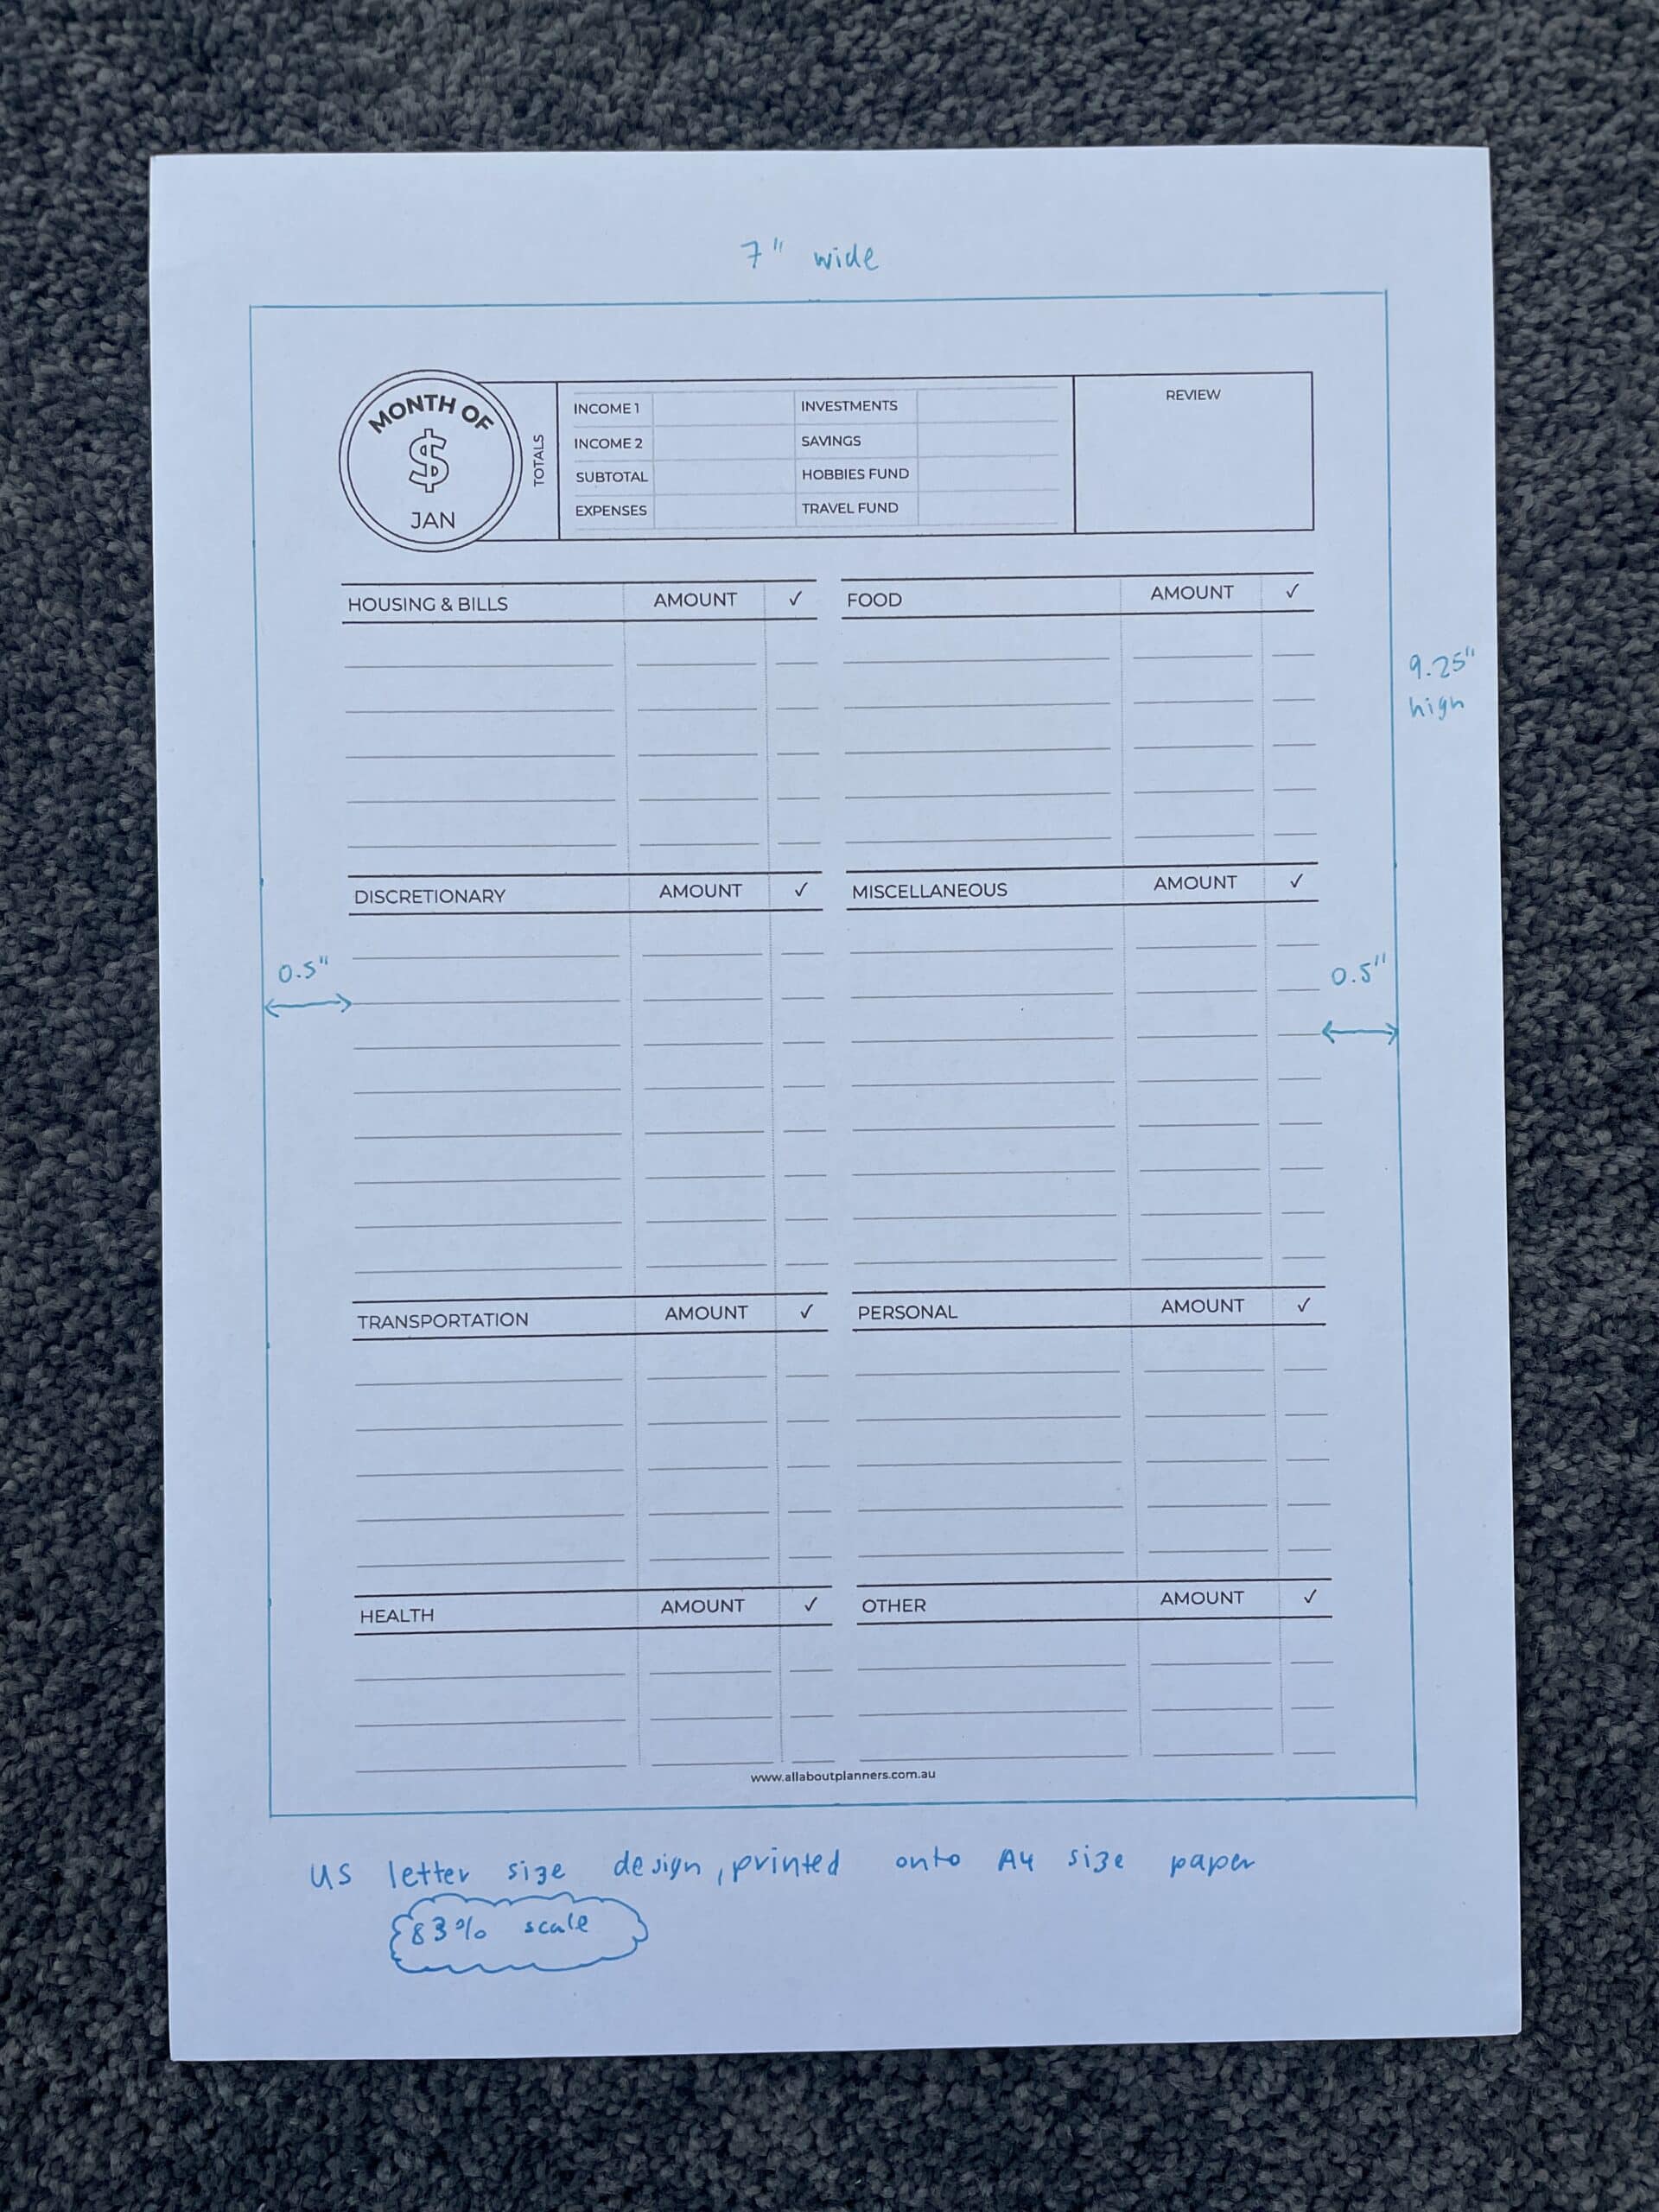
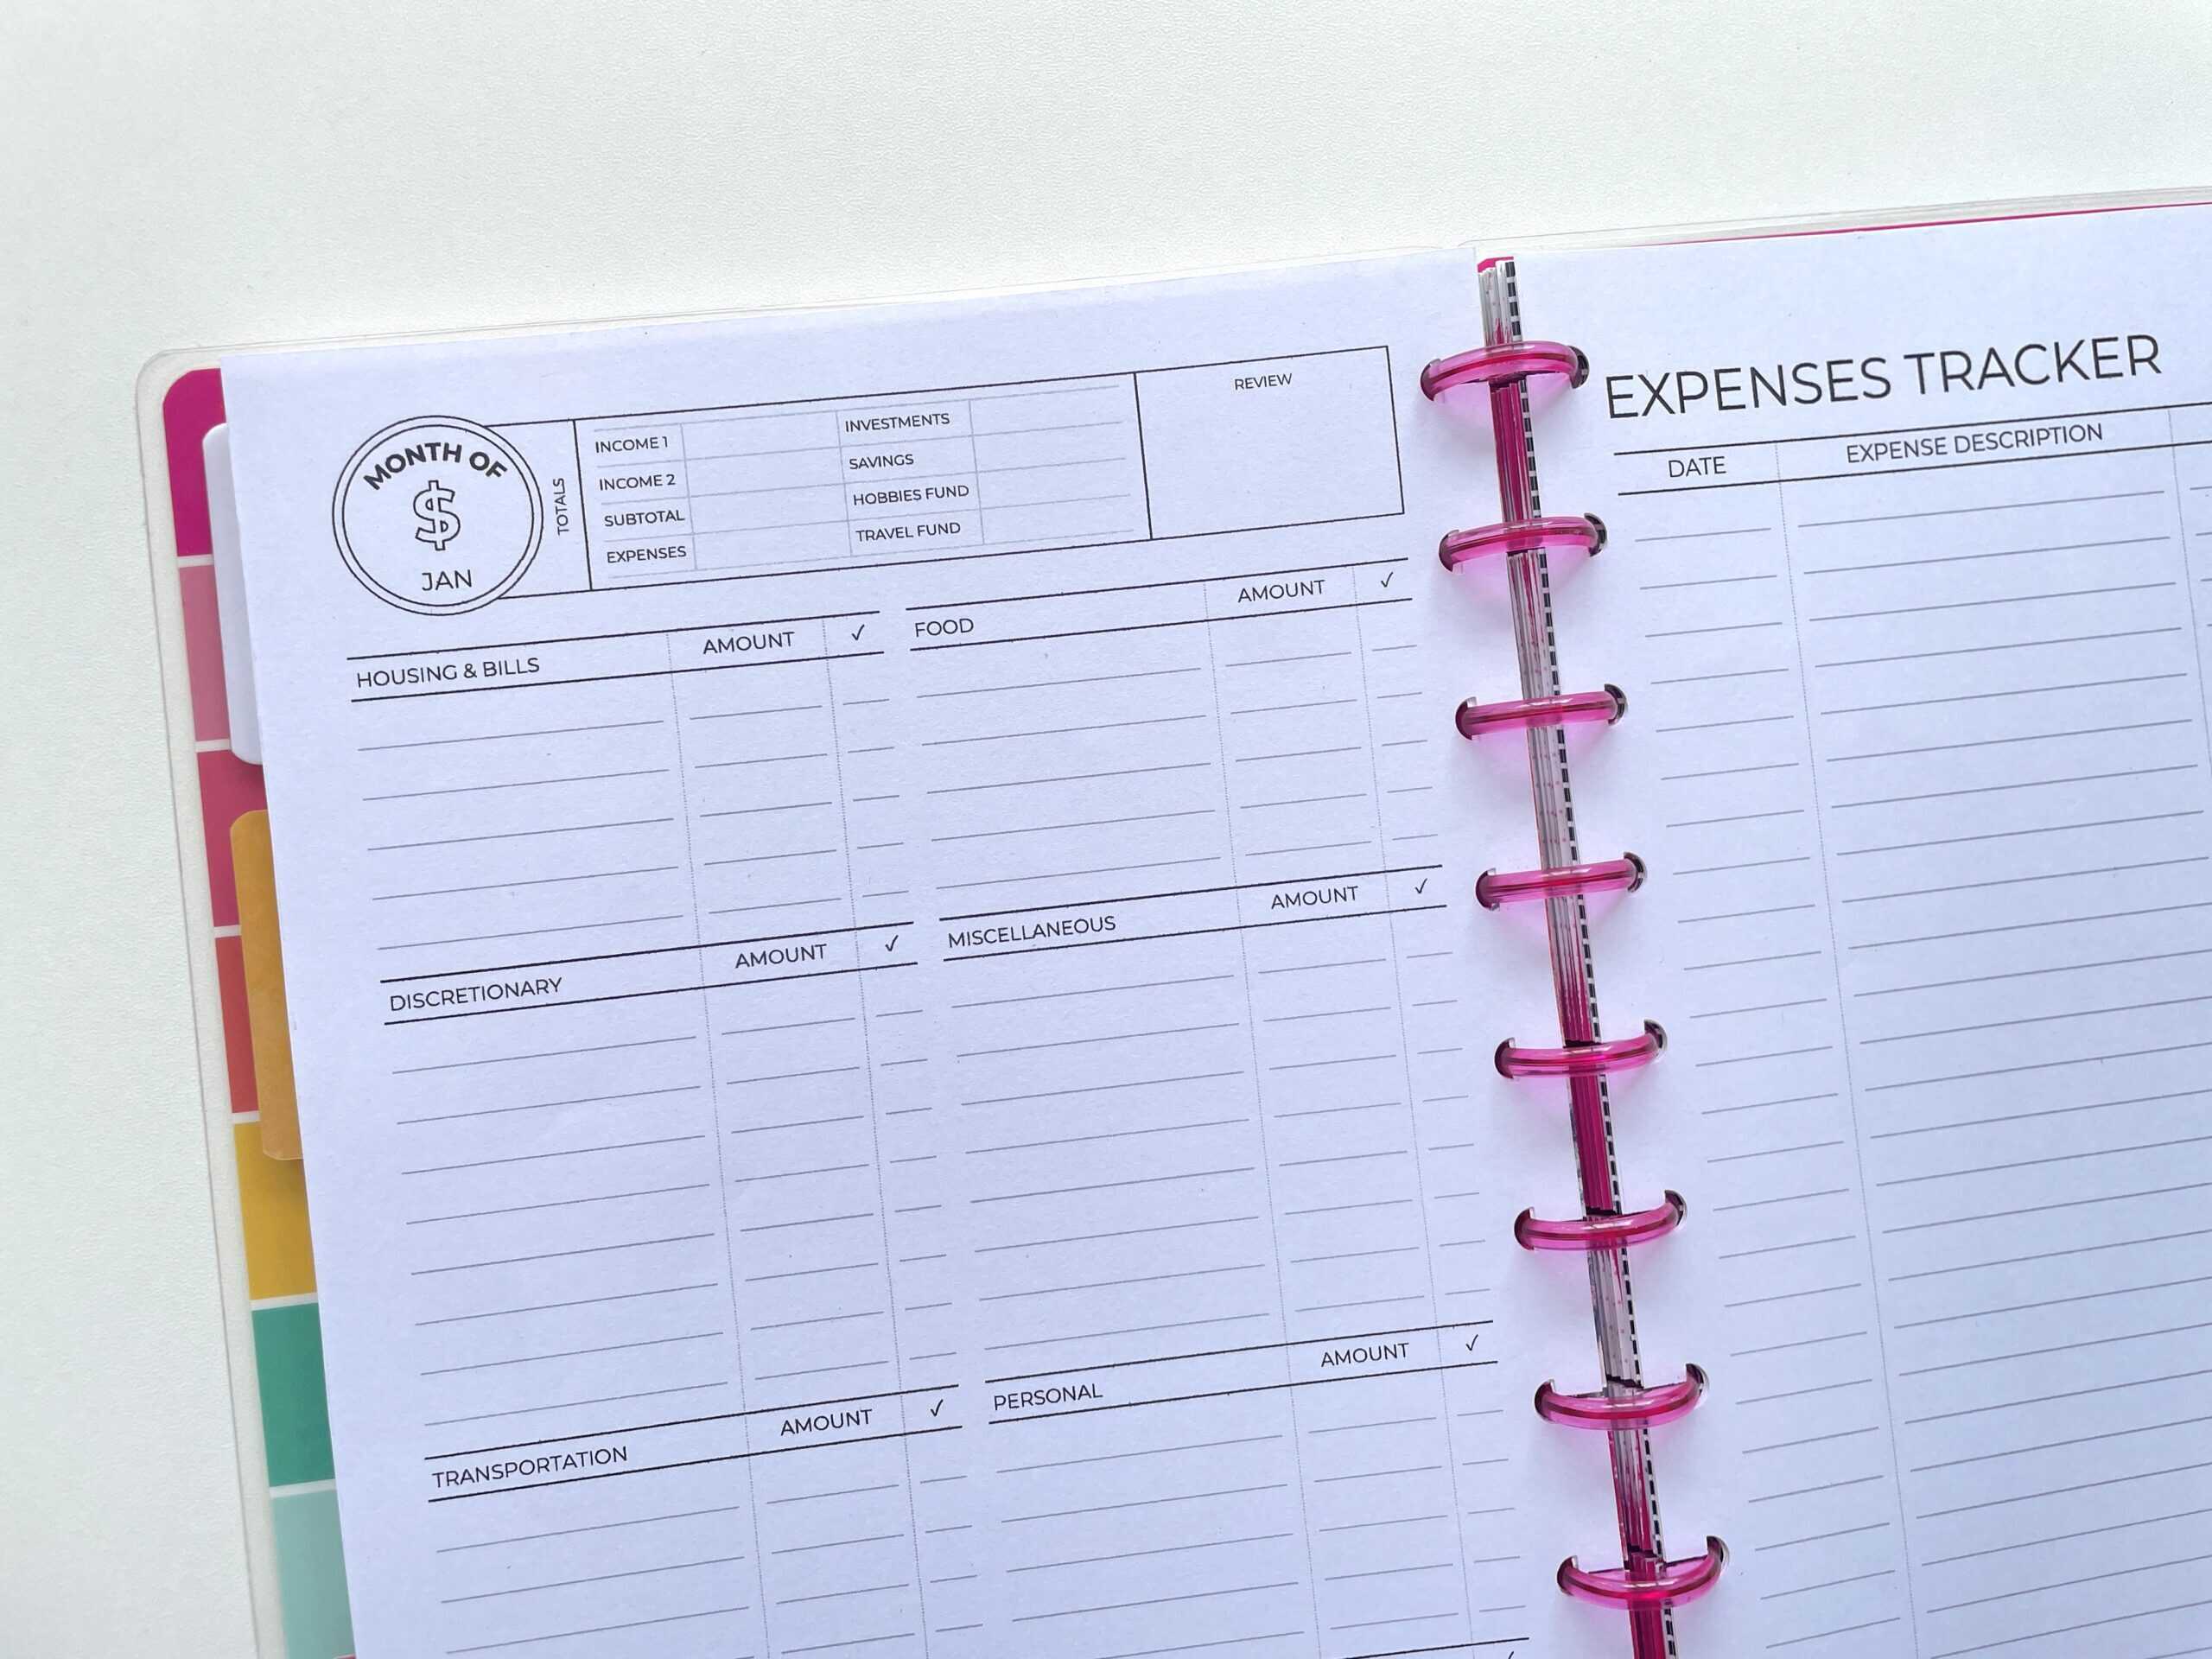
Want to test this out for yourself? Click here to download this free printable monthly budget and expense log tracker
![]()
To enlarge the screen of the video, click the square icon in the bottom right hand corner of the video (it will say ‘full screen’ when you hover your mouse over the icon).

Subscribe to my YouTube channel for more printing tutorials and stationery review videos
1. Option 1: Enter custom dimensions
This is my preferred method for resizing printables. It’s fast, easy and accurate.
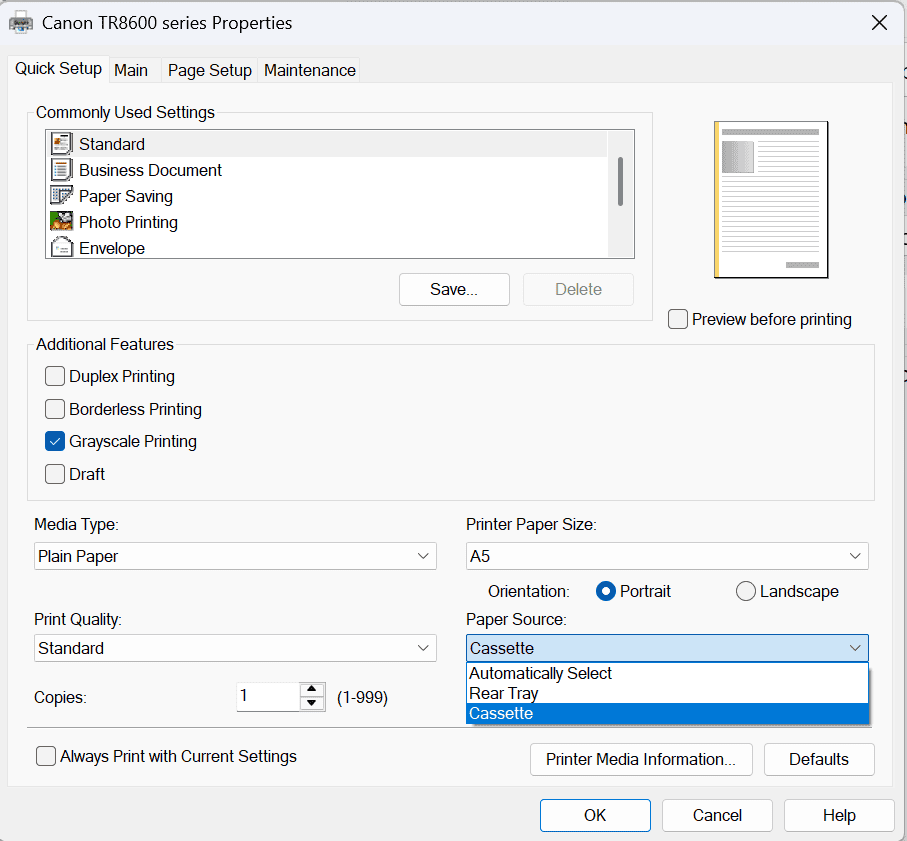
After you select print, most printers have a more detailed menu called something like ‘properties’ or ‘advanced’. Within that menu you can enter custom page dimensions.
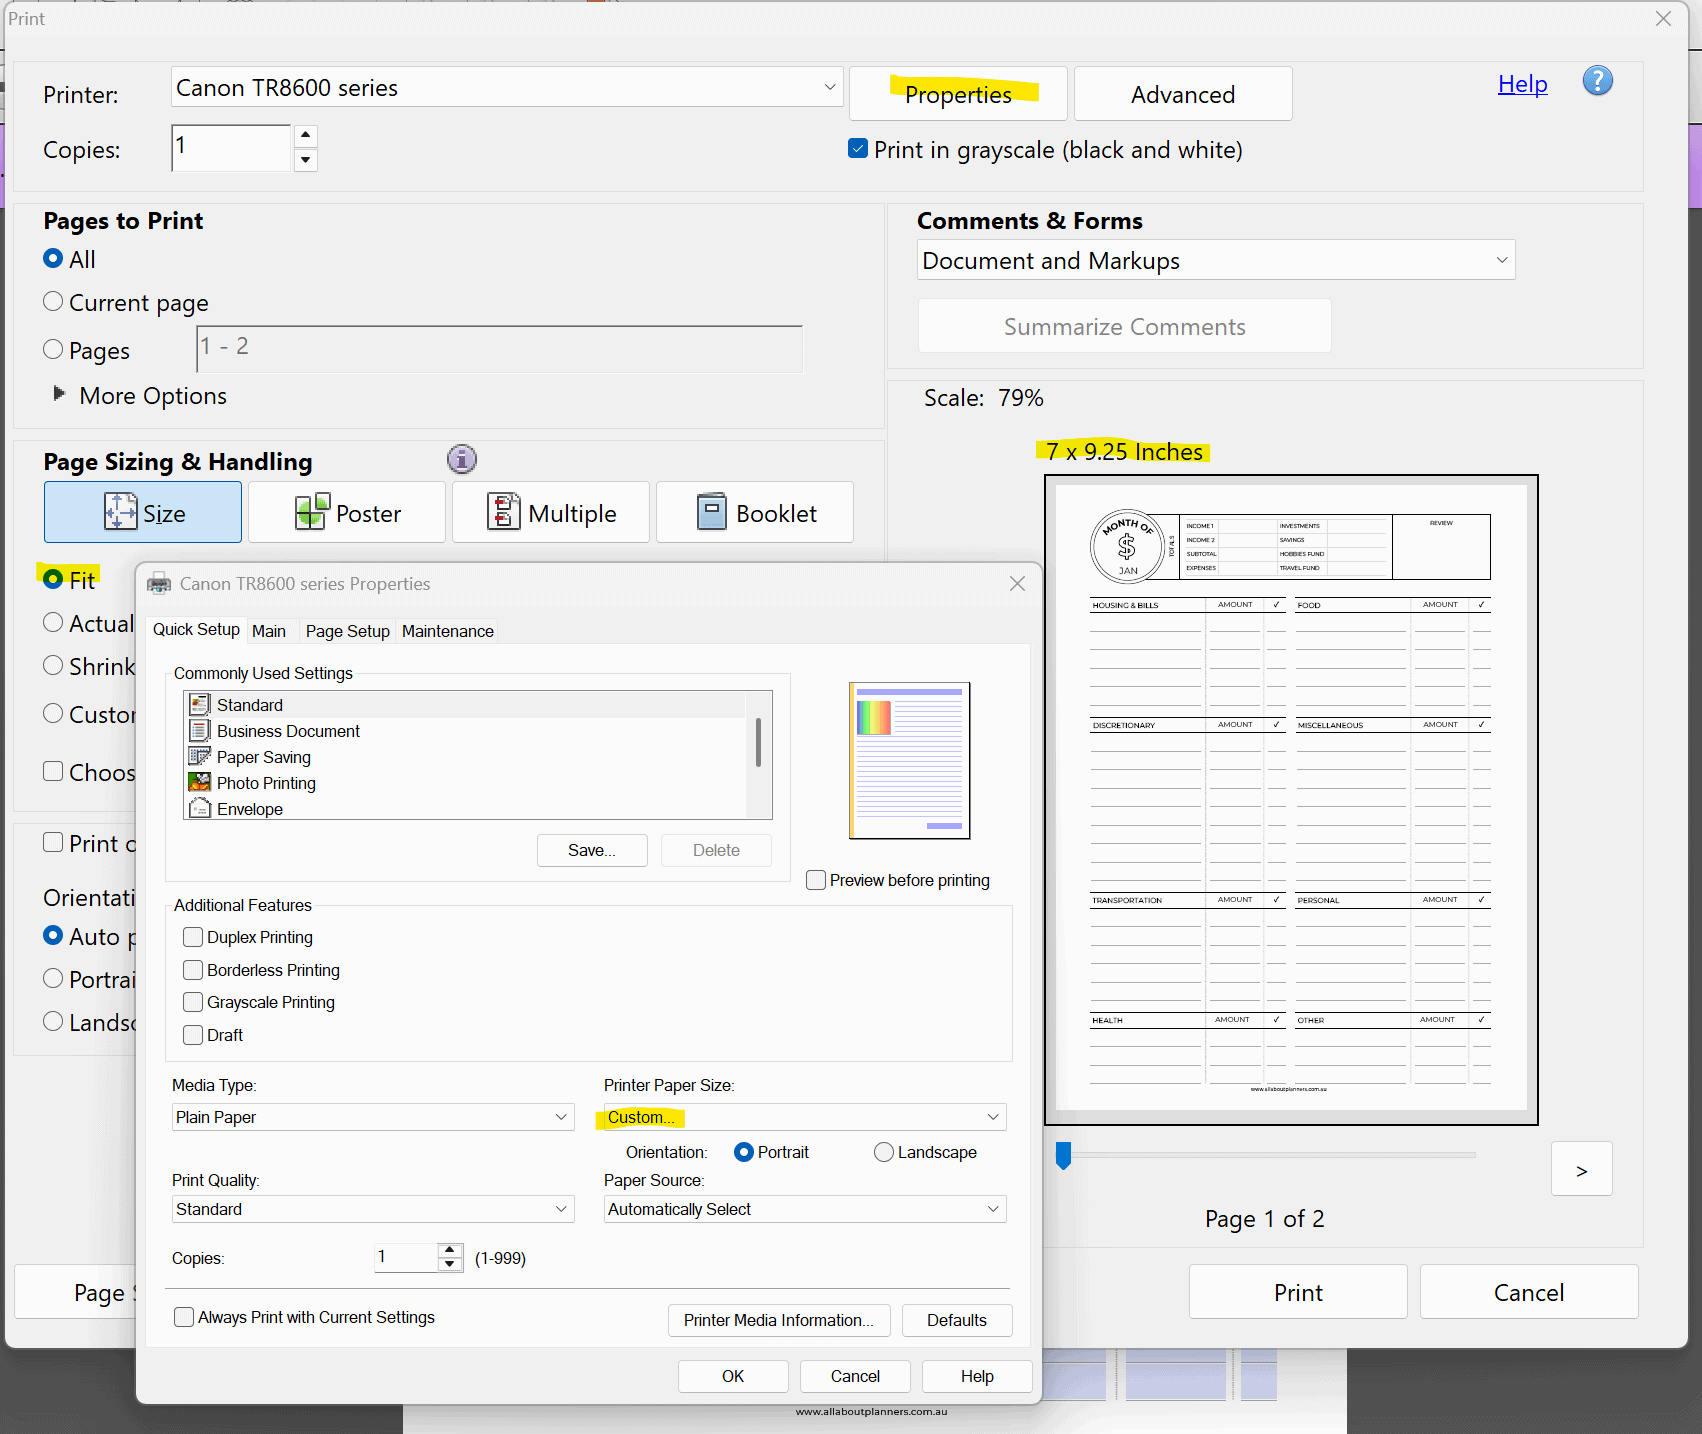
Most printers will save the setting within the custom menu, so you don’t have to keep re-typing the dimensions each time.
If you’re printing onto A5 I recommend entering the dimensions into your printer menu using millimetres, not inches.
I prefer to print onto A4 size paper (as I live in Australia and A4 is our standard page size). So I keep my page size at A4 and trim the design after printing.
My printer automatically formats it to print the design in the centre of the page which is slightly annoying as I have to add little cut marks in pencil then line it up with my paper trimmer. I’ve seen some printer brands that automatically centre the design at the top which makes it easier and faster to trim, but I’ve never figured out a way to do this with my Canon printer.
The other option is to print onto paper that’s already been cut to the final size.
If your printer gives you the option to take the paper from the rear tray or the cassette, I always choose the cassette (the front tray on the bottom of the printer). The paper lays flat before it feeds into the printer when you use the cassette so it’s less likely to print misaligned. It’s easy for the page/s to slip if you use the rear tray.
2. Option 2: Scale the printable
You may prefer to use the scaling method if you’ve found a printable you like, but the creator didn’t leave big enough margins for hole punching. One of my peeves is when the mushroom holes for the discs cut into the design on the page, so I allow a 0.5″ margin on both sides of my designs. That way you can print on both sides of the page and no part of the design will get cut into when you punch the holes.
If using the scaling method try:
- US Letter size template to Happy Planner classic size, printed onto US letter page size = 82%
- US Letter size template to Happy Planner classic size, printed on A4 page size = 83%.
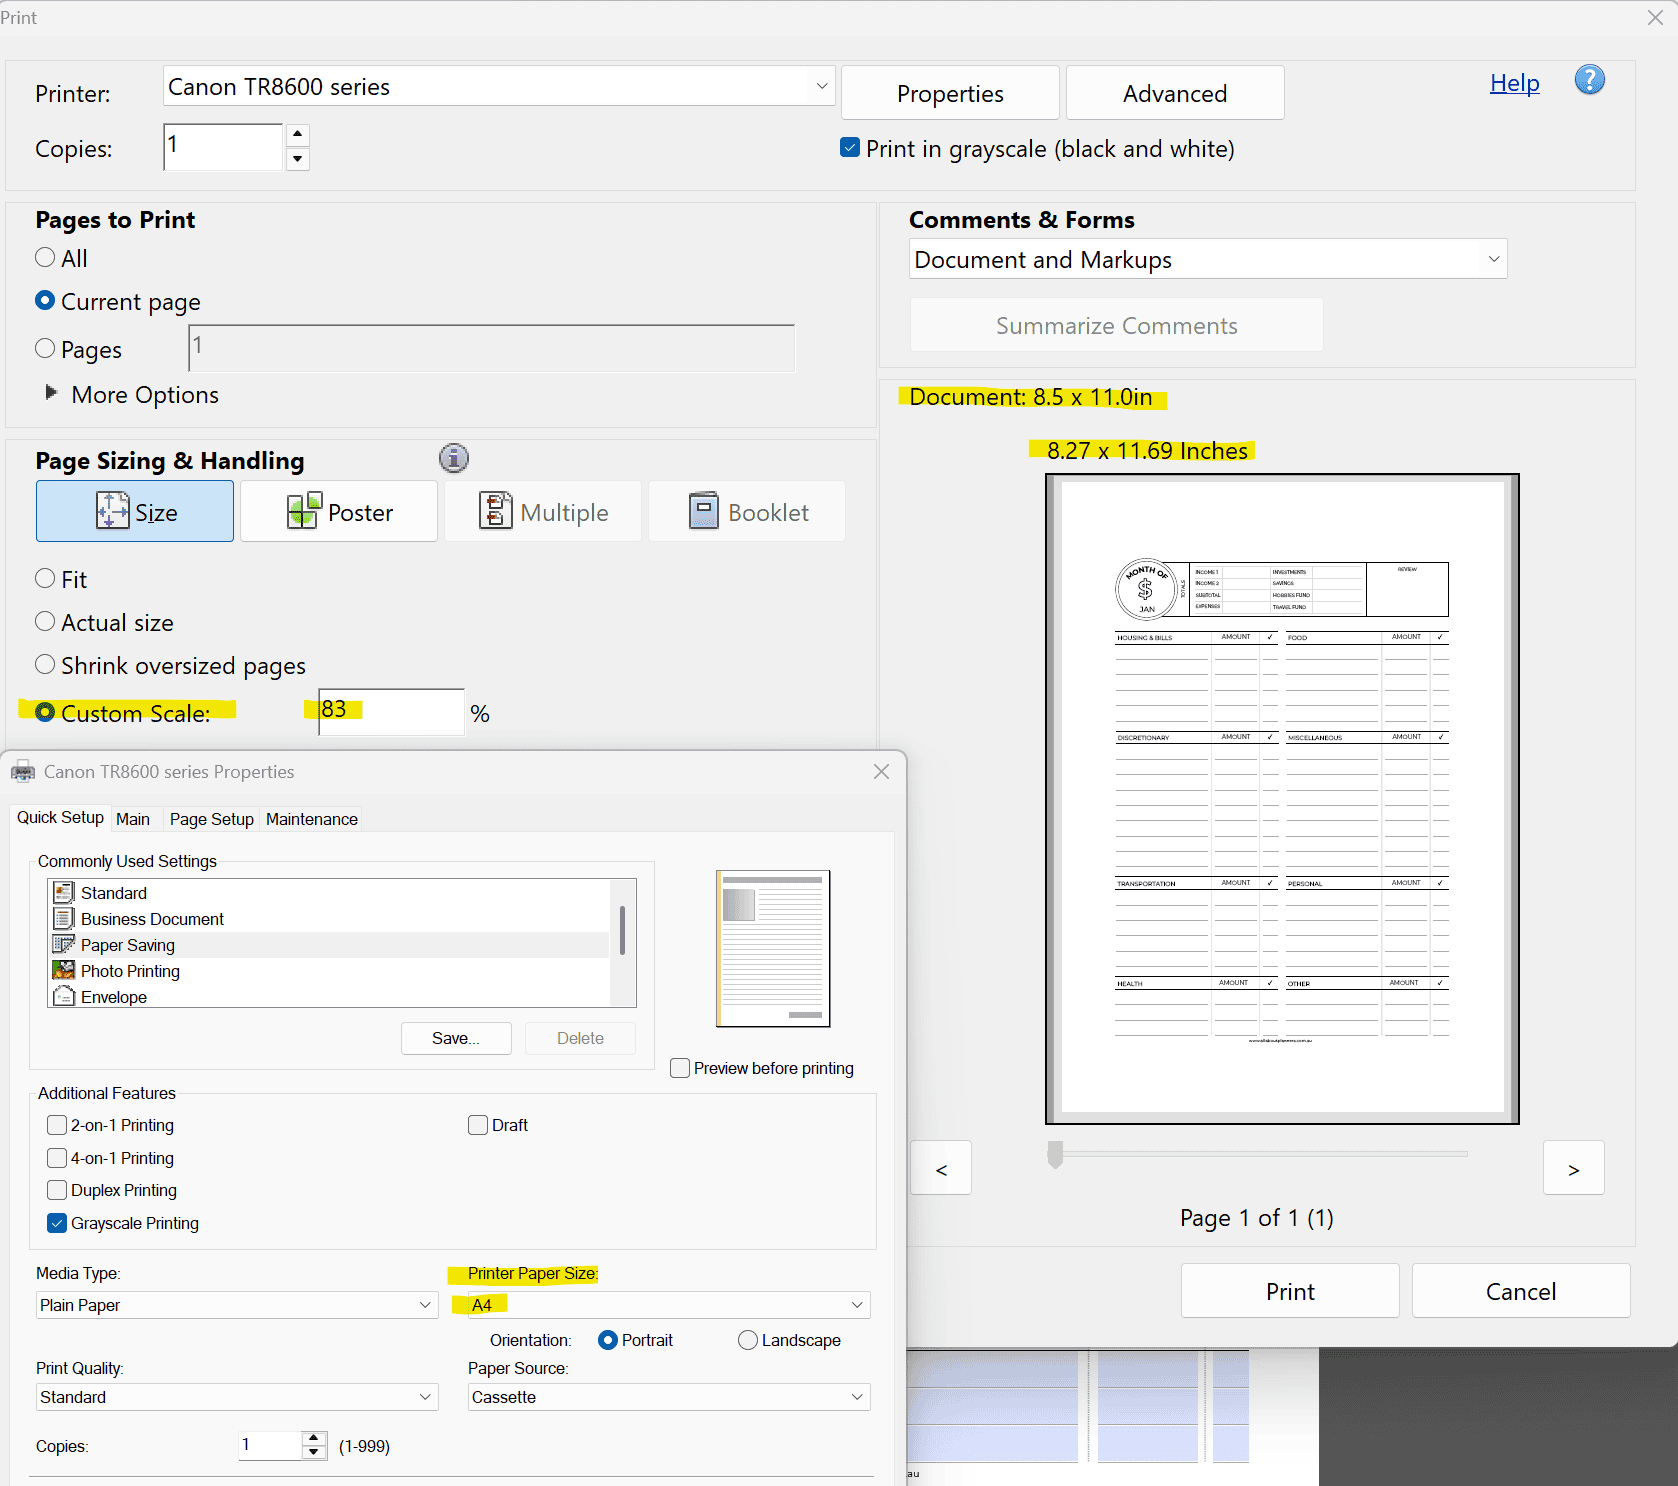
You can see in the screenshot below, even though I made the printable at US letter size to cater to my customers that live in the USA, I can still print that design onto A4 size paper.
Most printers will save the setting within the custom menu so you don’t have to keep re-typing the dimensions each time.
Here are some side by side comparisons – only slight differences with scaling.
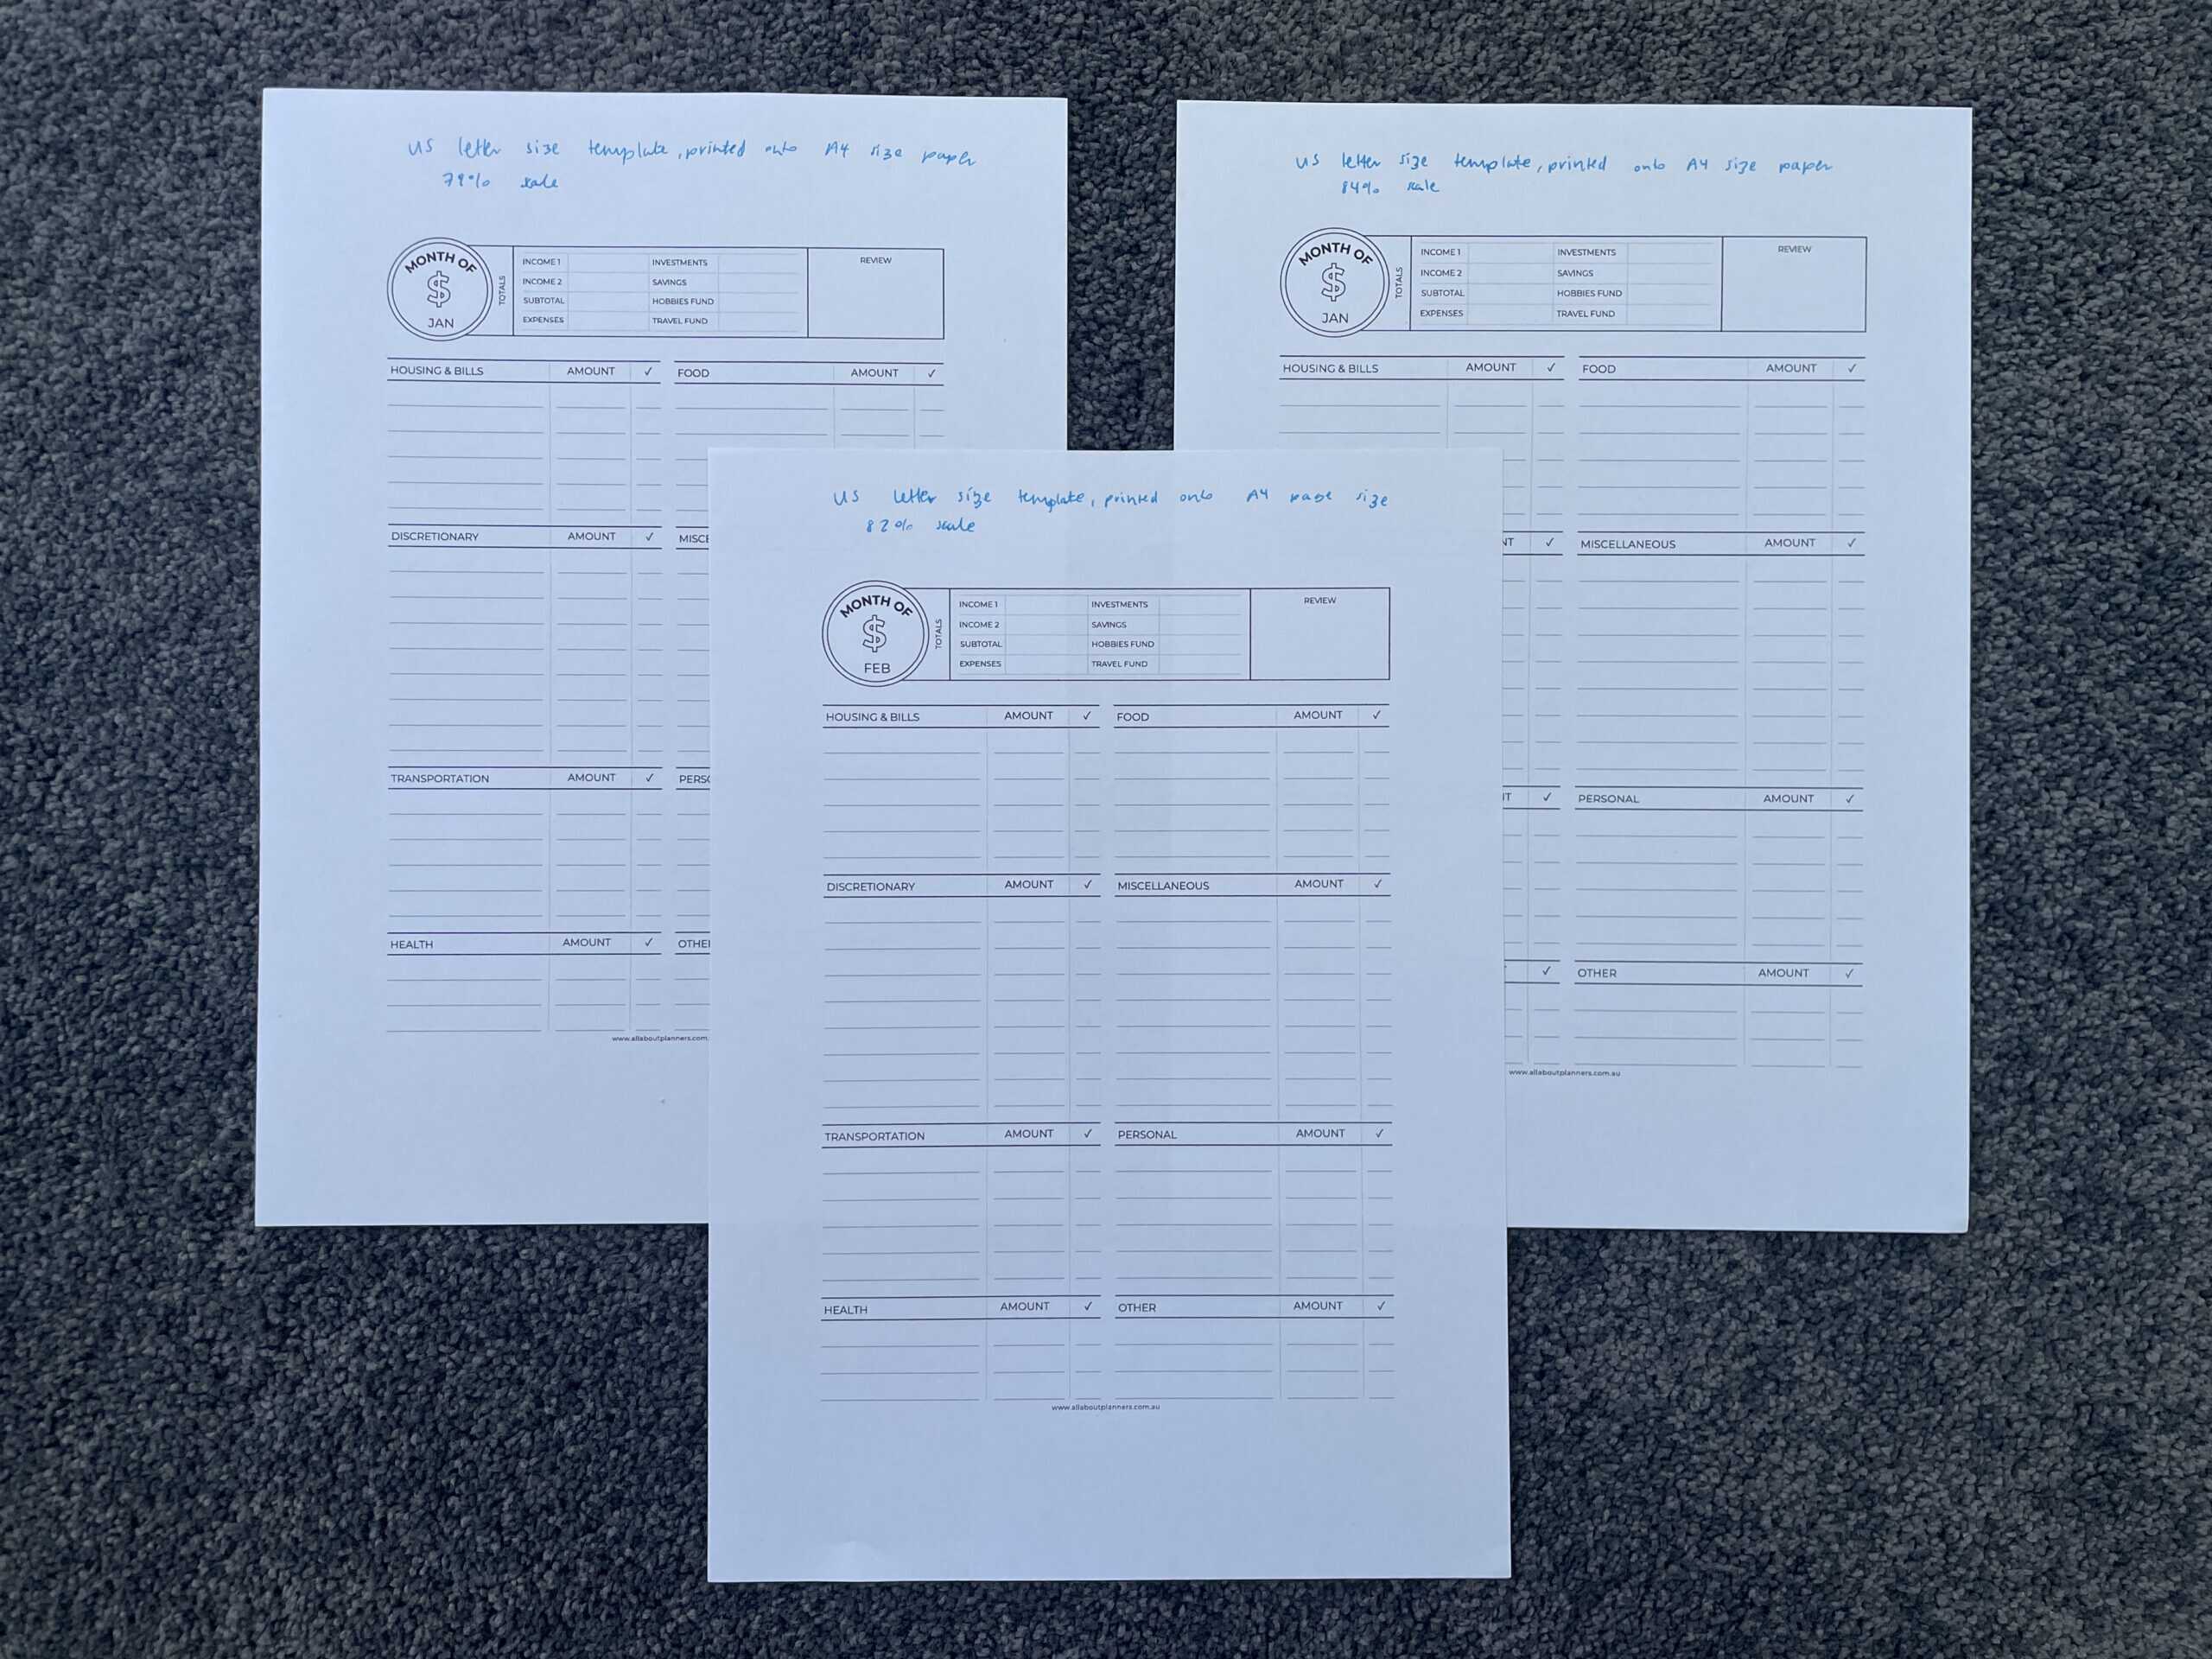
Resizing printables using different size templates
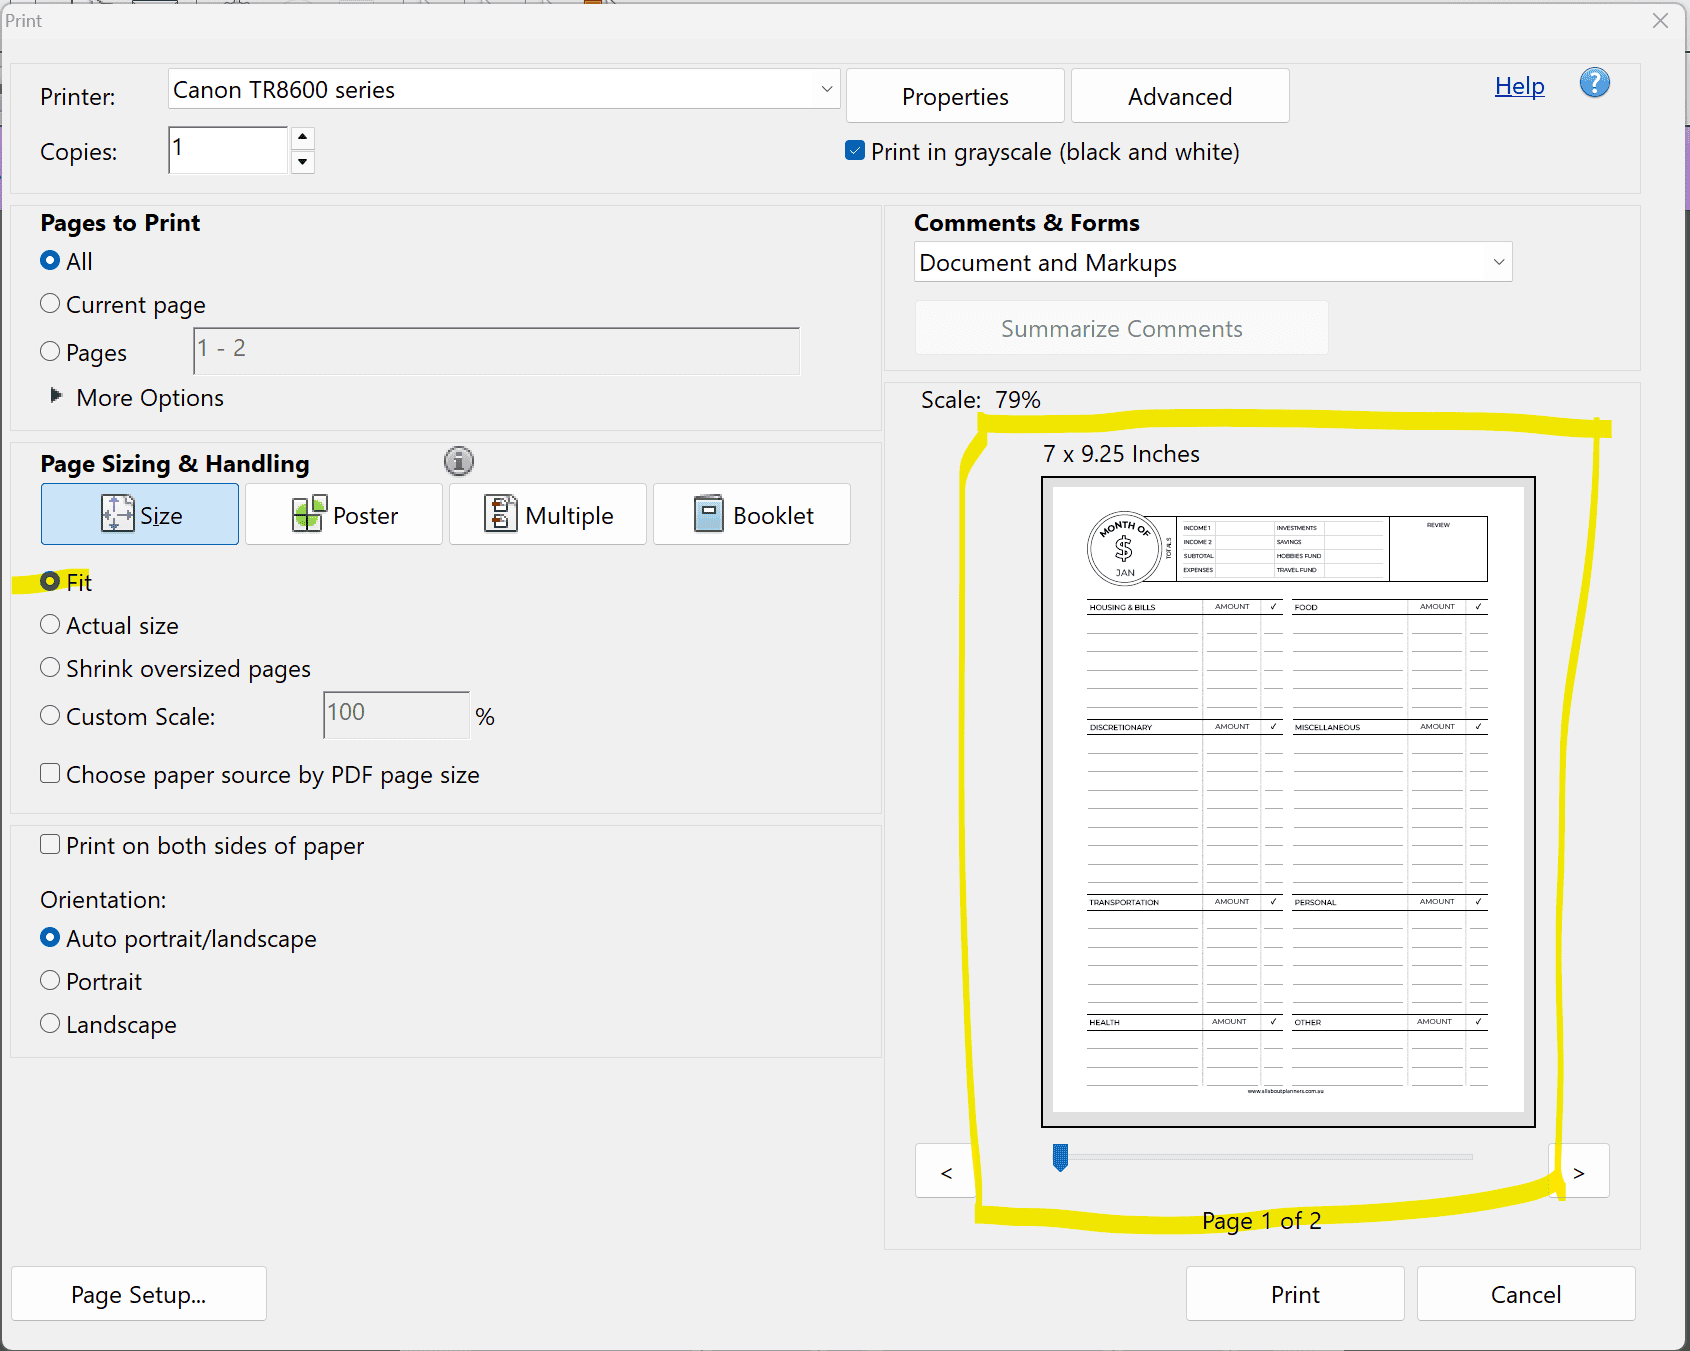
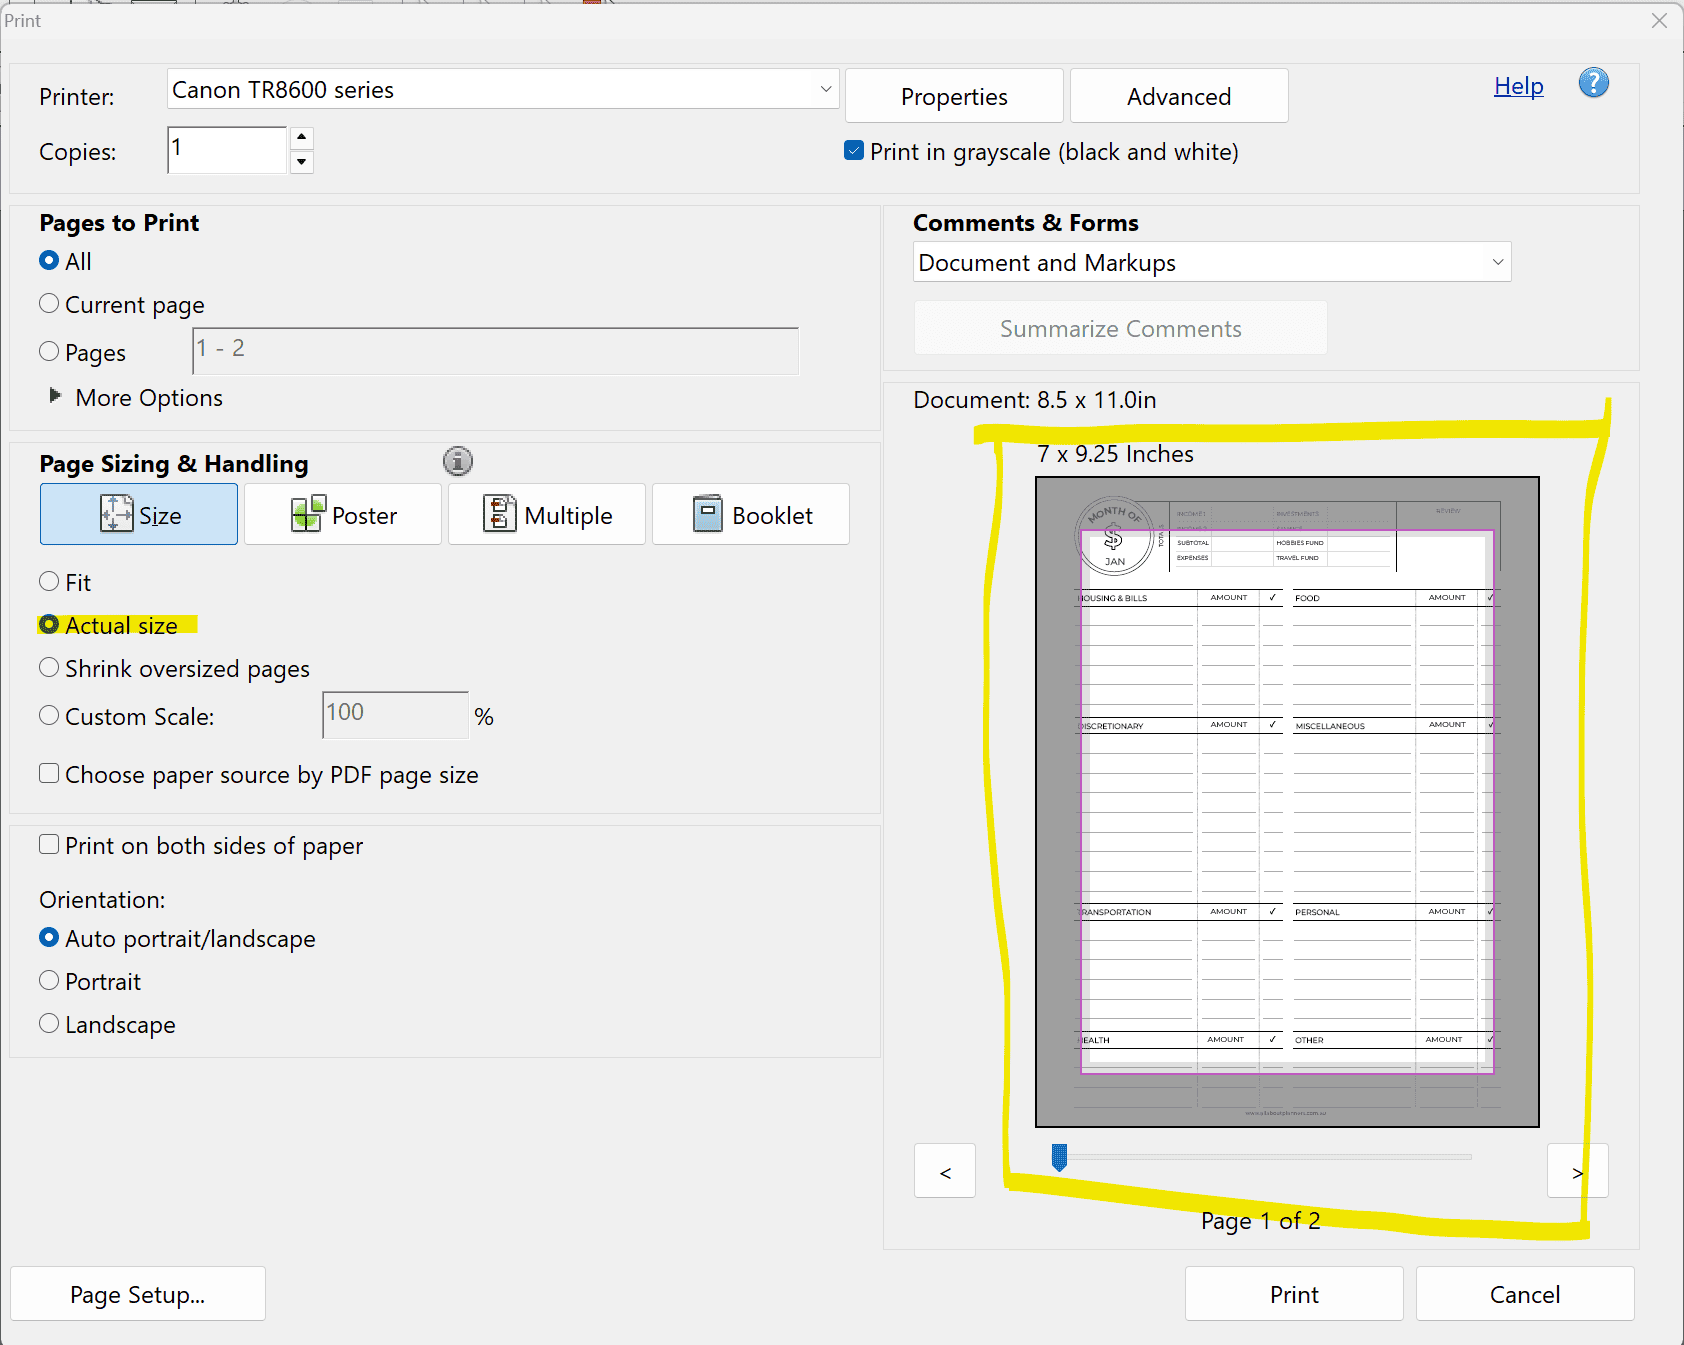
Whenever you scale a printable down, the most important thing to check is whether ‘actual size’ or ‘fit to page’ in your printer’s menu needs to be selected.
You want to make sure no parts of the design are cut off on the page preview.
The screenshot below is correct:
The screenshot below is not correct. If you printed this, parts of the design will get cut off. You need to make sure ‘fit’ to page is selected instead of ‘actual size’.
How is the size of the design affected?
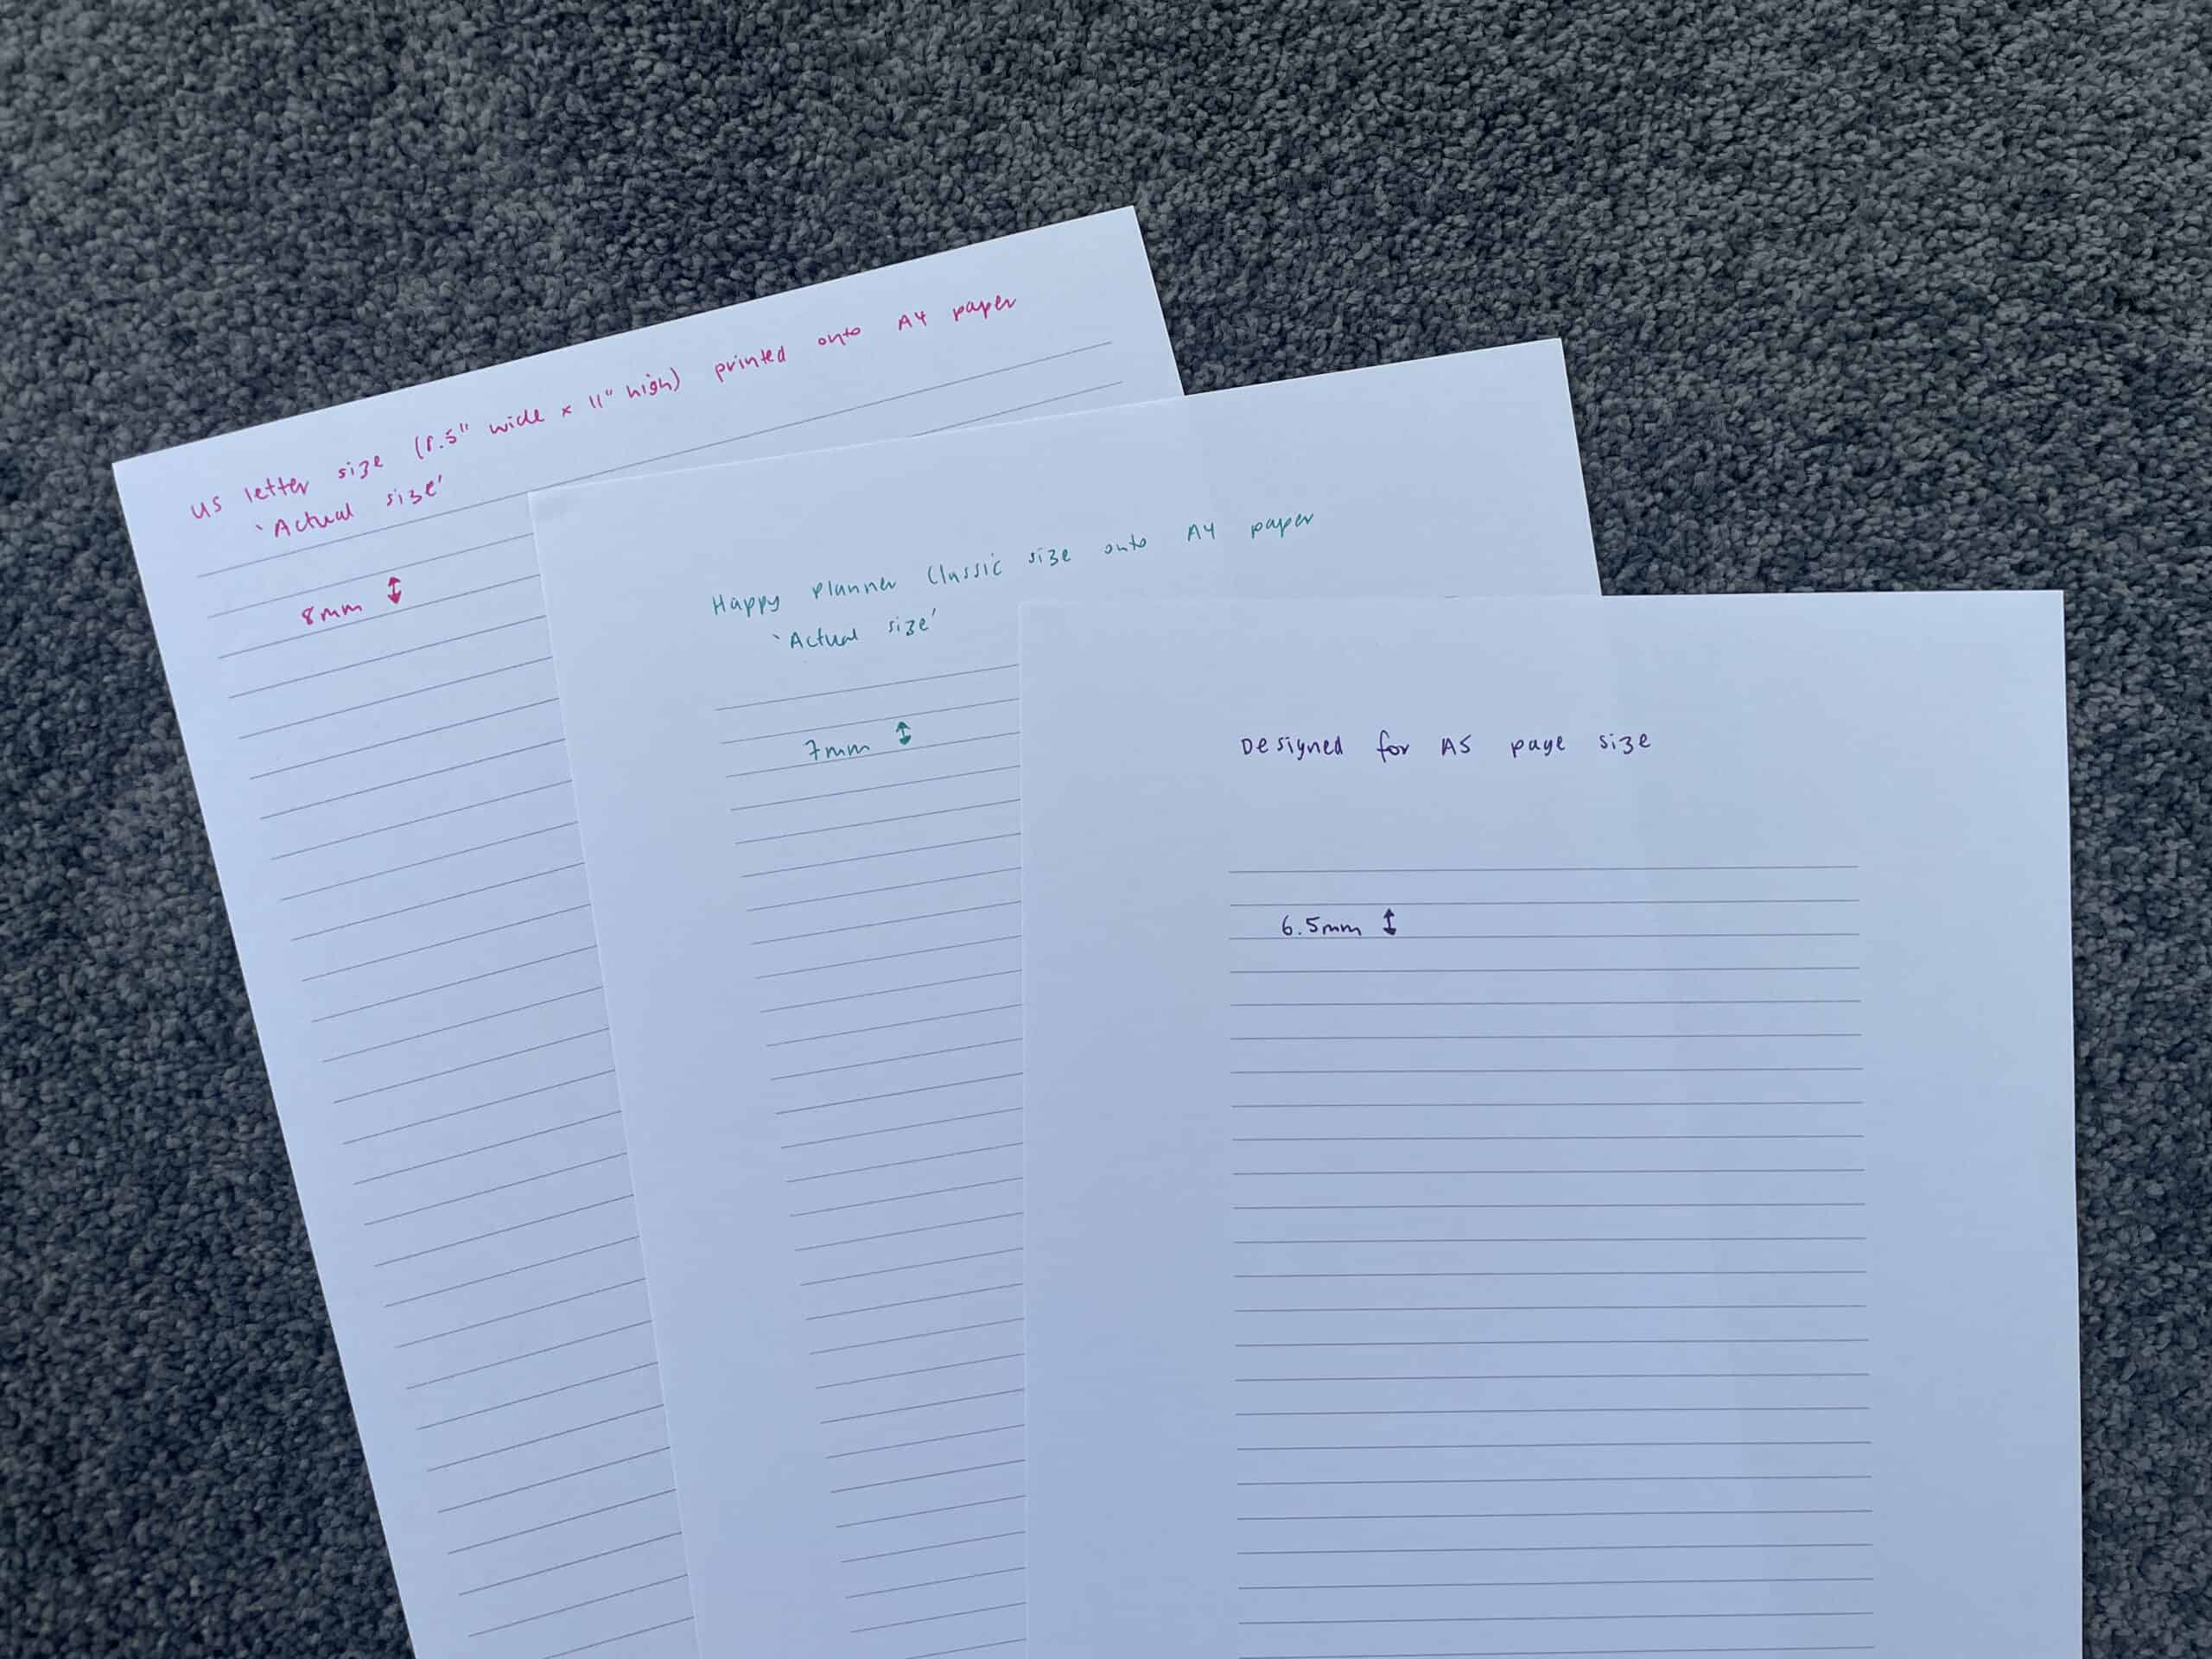
Whenever you resize anything, your printer will maintain the proportions as best it can, and shrink everything down to suit. Let’s take a notes page for an easy example.
For me, with my Canon printer, using a printable notes page I made:
- The line spacing on a US letter size notes page is 8mm.
- When the US letter size notes page is resized to Happy Planner classic size, the line spacing becomes 7mm.
- When the classic size notes page is resized to A5 page size, the line spacing becomes 6.5mm
Troubleshooting Common printing issues
My printer menu looks different
Open the printer using Adobe Reader. It’s free to download, here’s the link: https://get.adobe.com/uk/reader/
If you open the PDF file in your internet browser and print from there, there are usually less options to choose from.
Design prints crooked on the page
Load more paper into the tray. Even if there’s a few sheets in there your printer may struggle to pick them up, I have more success having a paper tray loaded with approx. 5mm thick stack of paper.
You can pre-cut paper and print straight onto it, but I find my printer works better if I print onto full size paper then trim to size.
If you do duplex printing, some printers can struggle to align it correctly when it holds the paper before printing the back side. If this is happening to you, try printing on one side, loading it back into the paper tray, then printing the other side.
If you have the option to feed paper via the cassette or rear tray, I always use the cassette (the paper is less likely to slip as it feeds into the printer).
Colors aren’t bright
See this post for printing tips: 7 Ways to make colors POP when printing using an Inkjet printer
It might also be time to do a printer clean (there’s instructions for doing one in the above post).
Something about the design is off
Check if ‘actual size / 100% (no scaling)’ is selected. Then the printable will print true to size.
I feel like I go through ink quickly
If you’re printing black and white only inserts, then a laser printer will be more economical. Plus the black and grey will be more crisp than printing the same thing with an inkjet printer.
The resized design prints in the middle of the page
I think this one depends on your printer brand. If the design is smaller than the page size I’m printing on, my Cannon printer prints the design in the middle and centre of the page. However, I’ve seen other planner brands that automatically print the design in the middle at the top of the page. Unfortunately I’ve never figured out a way to do this with my Canon printer.
There’s not enough space for hole punching
I make all my printables with a 0.5″ margin on both the left and the right side. That way you can print double sided and not worry about punching into the design on the backside of the page. You can also print and punch a bunch at a time without having to plan ahead if you want to place a particular page on the left or right side of your planner.
If you don’t have enough space for hole punching, then reduce the percentage so that the margins are wider.
My printer doesn’t save the custom page size
Mine doesn’t either! Some printers don’t have the ability to save a favorite custom page size, you may need to enter the custom dimensions each time you print.
What paper trimmer should I use?
I prefer to use a paper guillotine, it’s easier to see where the cut is going to happen on the page. I can cut more pages at the same time using a paper guillotine than a paper trimmer.
I recommend the Swingline Paper Cutter, Guillotine Trimmer, 12″ Cut Length, 10 Sheet Capacity (affialite link).
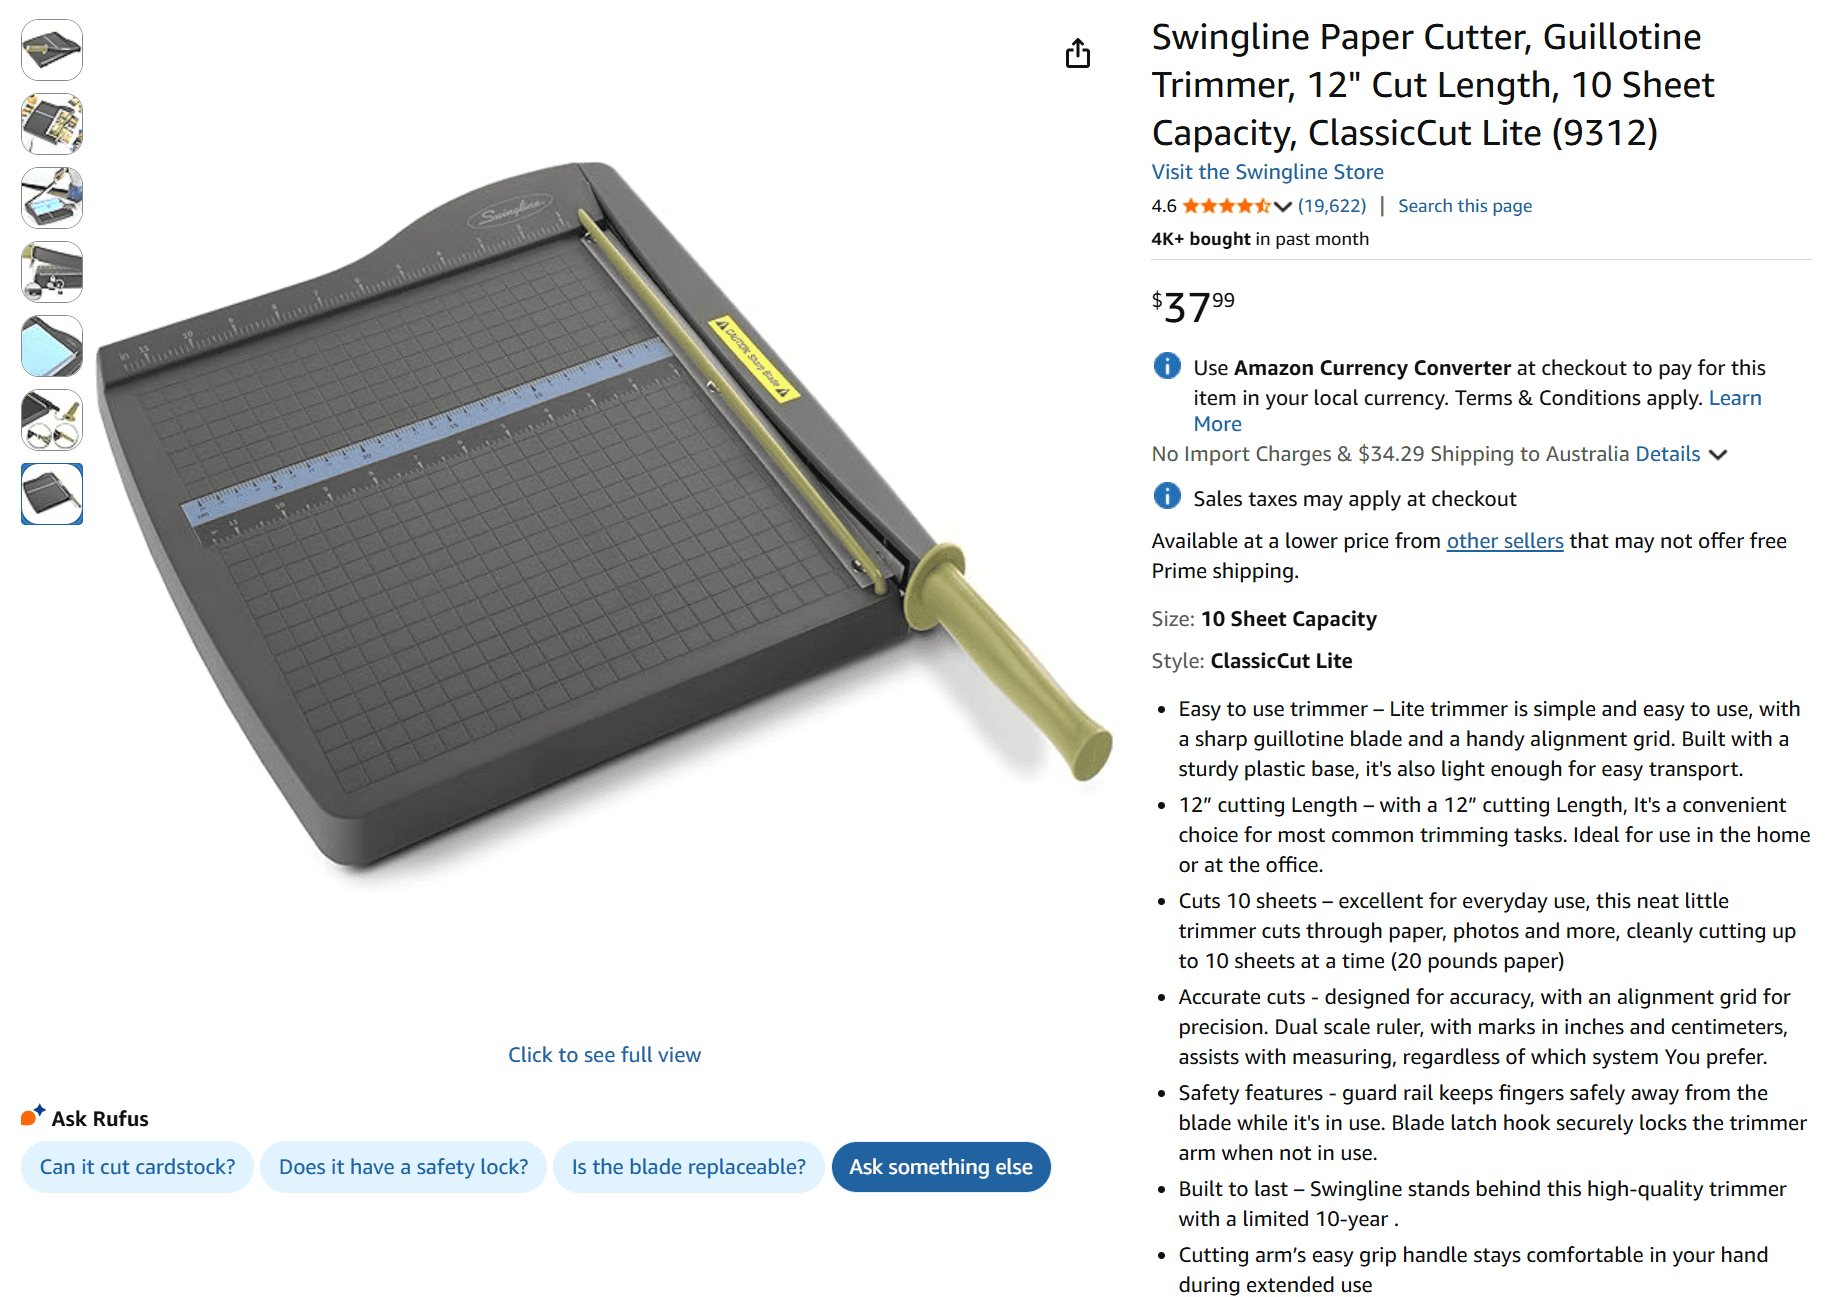
If you do want to use a paper trimmer, try Fiskers Sure CutPortable Paper Trimmer 12 inch (affiliate link).
If you can’t purchase either of these brands, then look for one that has guides for different page sizes, and dimensions stated in both centimetres and inches on the vertical and horizontal axis.
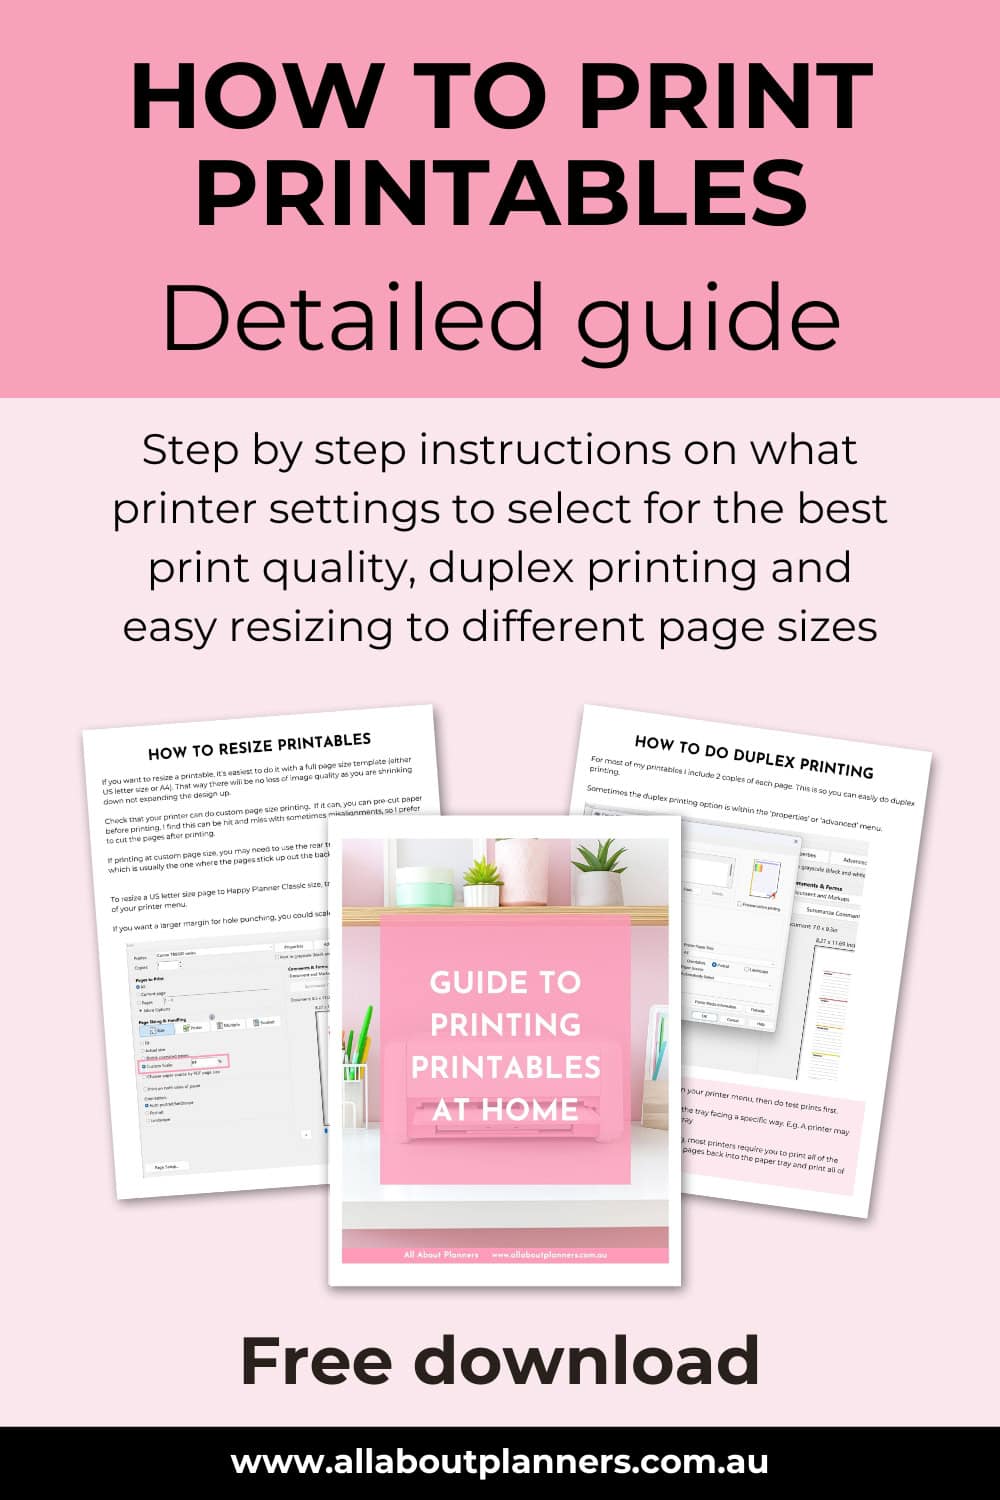
Want more printing tips? Download my guide (it’s free!)
Liked this post? Pin it!
![]()
![]()