How to add digital planner stickers into Goodnotes (2 ways)
There are 2 ways to bring stickers in your Goodnotes digital planner:
- Individual PNG files
- Cropping stickers from a page of stickers
I’m going to talk about the first method in this post (it’s my favorite method).
For a tutorial on method 2 (cropping images from a PDF, JPG or PNG file sticker sheet in Goodnotes), see this post.
How to add stickers to your Goodnotes digital planner
Most digital stickers (including mine!) will come in individual PNG file format. What does this mean? It means each sticker is in a separate file with a transparent background. You can place it anywhere you like – on a white background, colored background, dot grid paper etc. and you’ll only see the sticker design (unlike JPG which has a white background behind the sticker). So if you purchased the urgent sticker from my spread below, it comes in 10 colors and each color would be a separate file.
With individual PNG files, you don’t need to worry about cropping stickers from sticker sheets, you can just save the images in a folder on your devices’ camera roll and add them via the image button.
Step 1 – Download the files
Download straight from your device, or download on your computer, email the files to yourself and open the email on your device and download.
Step 2 – Unzip file folders
Because there is an individual PNG for each sticker it means there’s a lot of files so they’ll be in a zipped file folder.
See this post for a tutorial I did on unzipping file folders on an iPad. In that tutorial I show how to save the images to your camera roll.
Step 3 – Import into Goodnotes
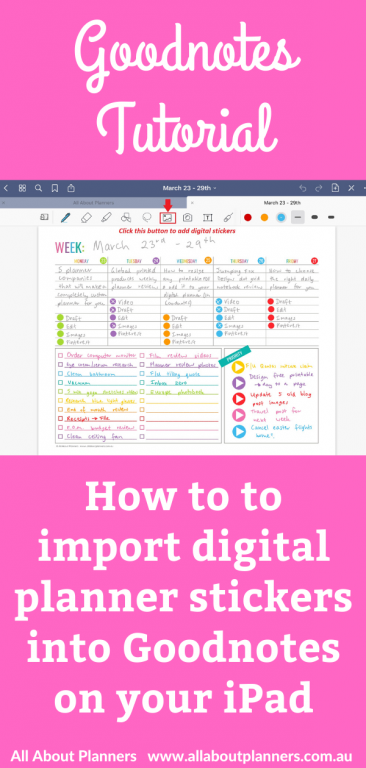
Click the picture button (I’ve drawn a box around it in the image below).
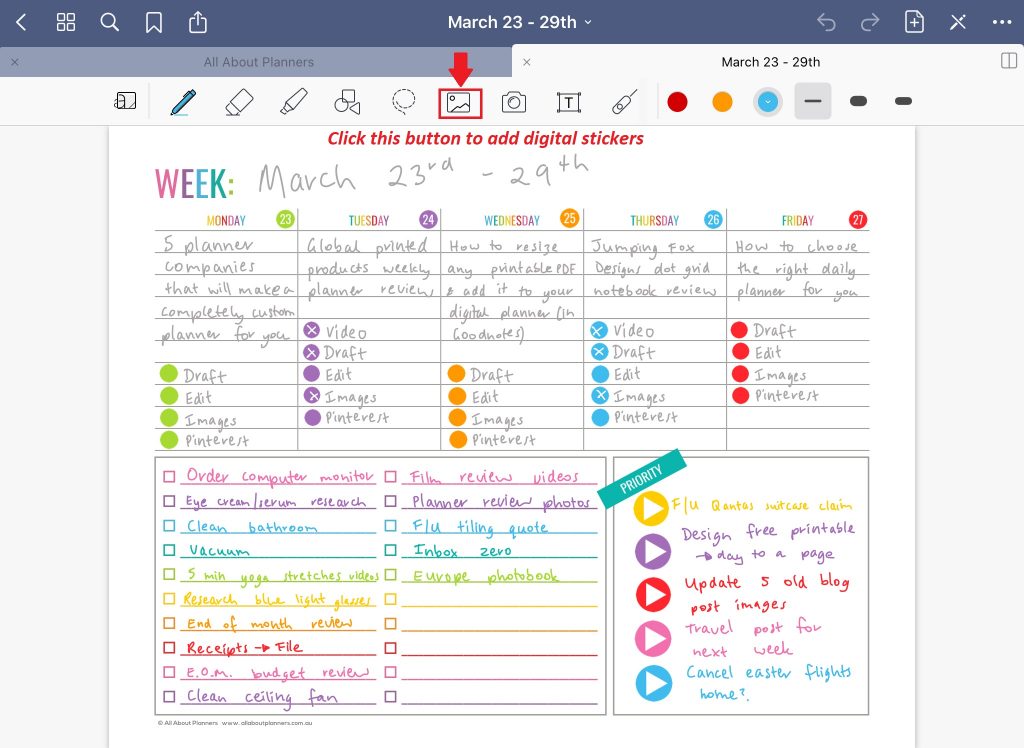
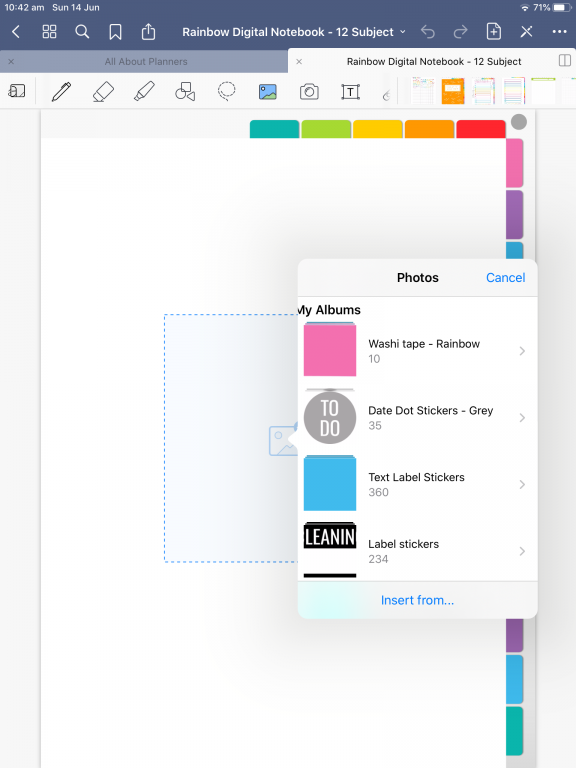
It will bring up this pop-up menu where you can choose the sticker file from your recent images or a folder.
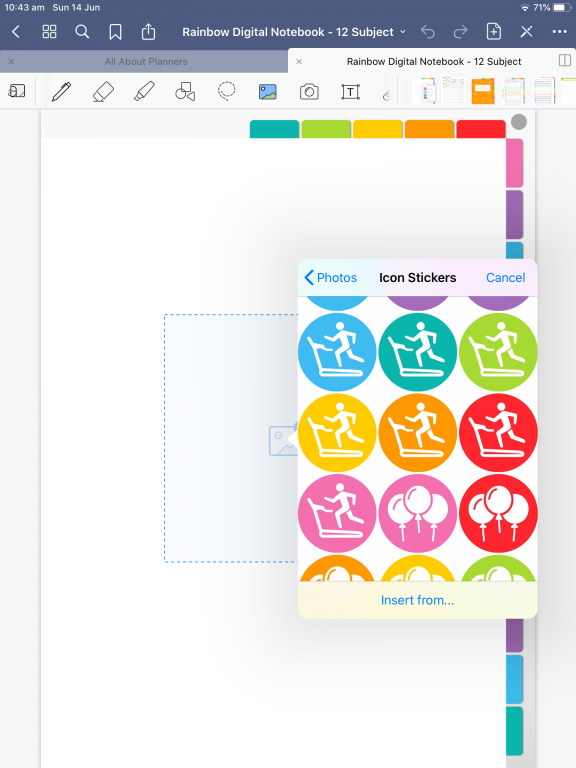
Tap on the sticker you want and it’ll appear on your page in Goodnotes.
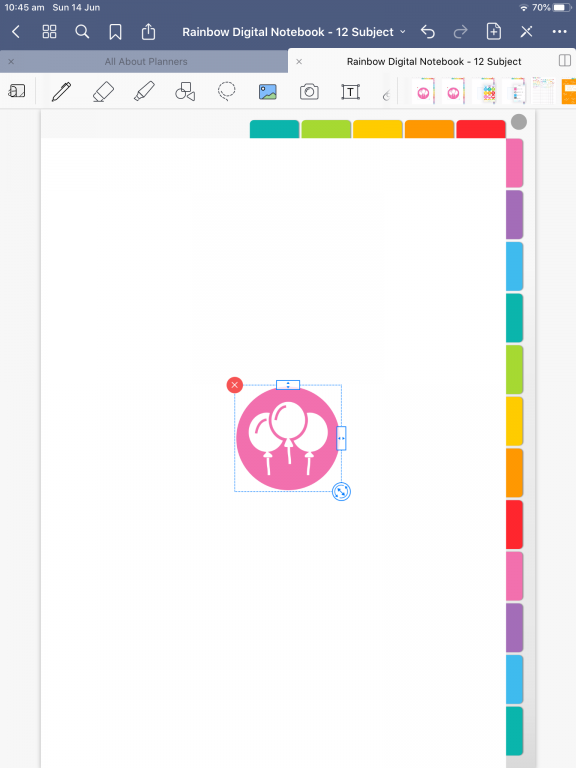
If you purchase one of my stickers I make sure the image is big enough that you can scale it up or down without loss of image quality.
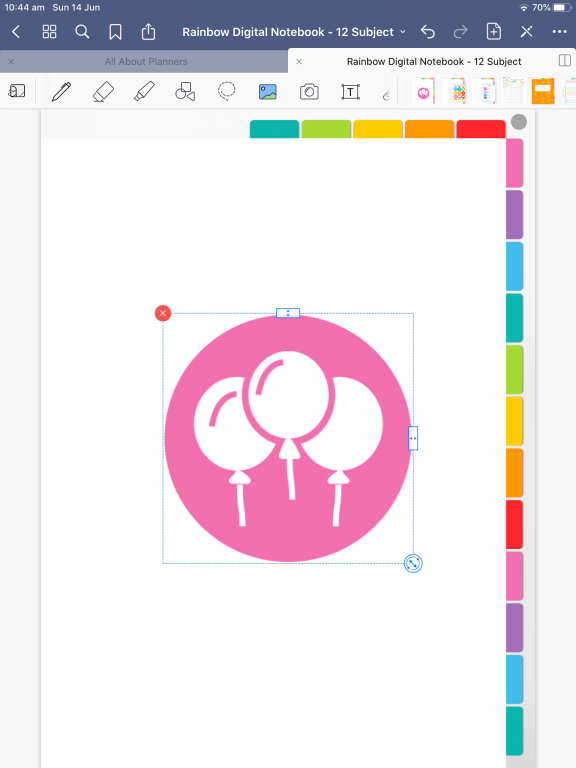
To resize stickers, tap and hold the bottom right corner (the blue circle with the arrow going up and down) and drag inwards to reduce the image size. Drag outwards to increase the image size.
This digital notebook with the rainbow tabs is available in my shop!
Why I prefer this method
This is my preferred method for using digital planner stickers. It’s much quicker, you don’t need to waste time cropping (as they’re already cropped). I also like to keep them all arranged in folders on my device by type of sticker, but you could organize by color as well.
You could create a digital sticker book in Goodnotes whereby you follow the steps in this tutorial for each sticker and add them to a separate notebook in Goodnotes that is only for stickers. I haven’t done this yet as it would take a while to setup and by the time you go back and forth between notebooks on Goodnotes, I think it’s just as quick to find the sticker from an album in my photo files.
Planning tips
- 15 Productive Things You Can Do In 15 Minutes or Less
- How to color code bill paying in your planner (7 different ways)
- 50 Tips for writing a better to do list that will make you more productive
![]()
Found this post helpful? Pin it!