
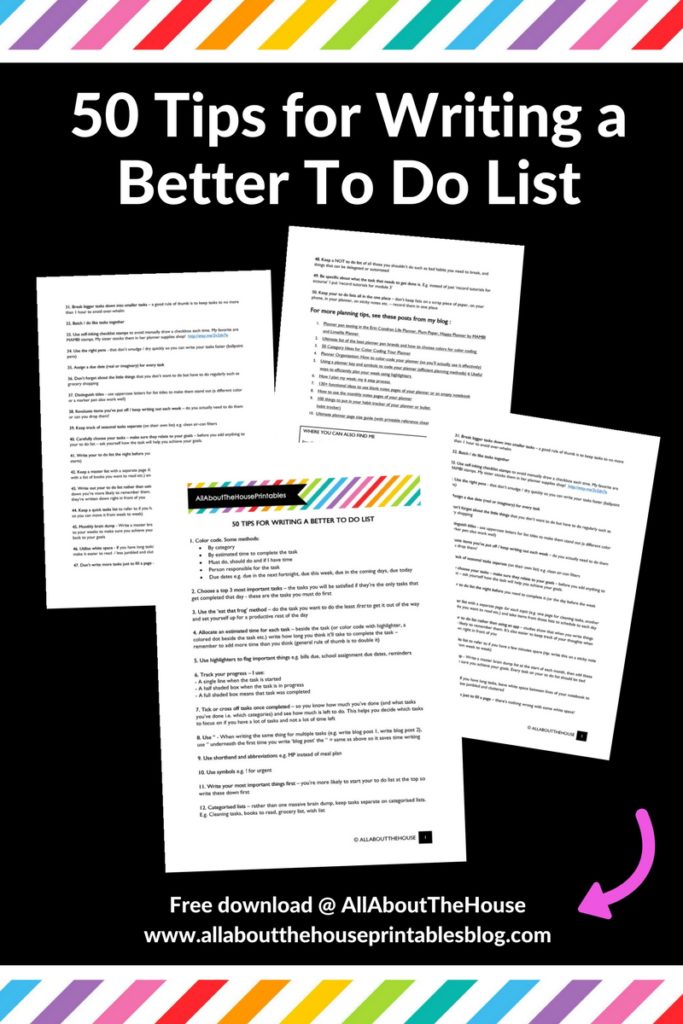
50 Tips for writing a better to do list that will make you more productive
We all keep to do lists – but are you writing your to do list the right way?
Download a printable version of this list to keep in your planner and refer back to later
50 tips for writing a better to do list
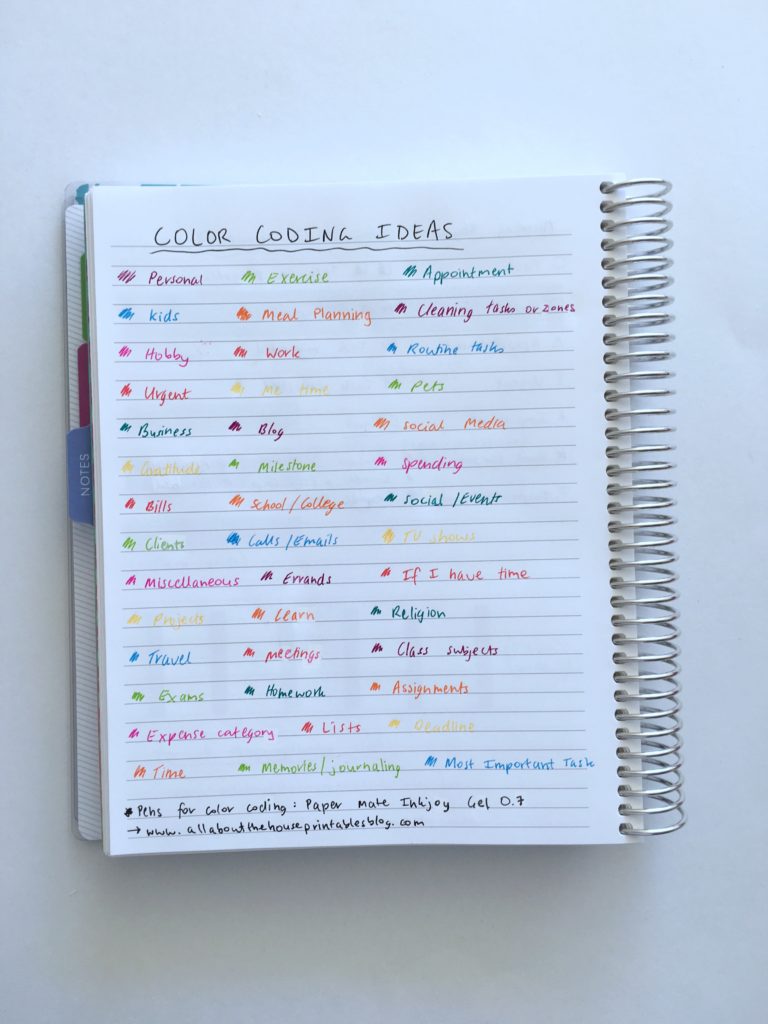
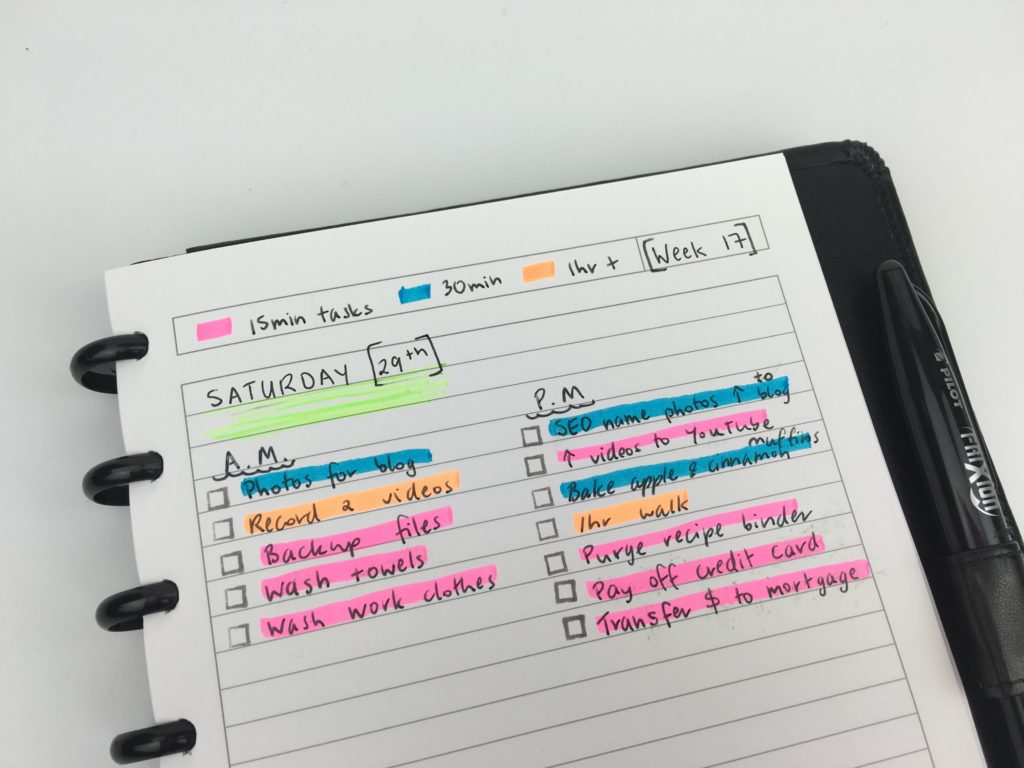
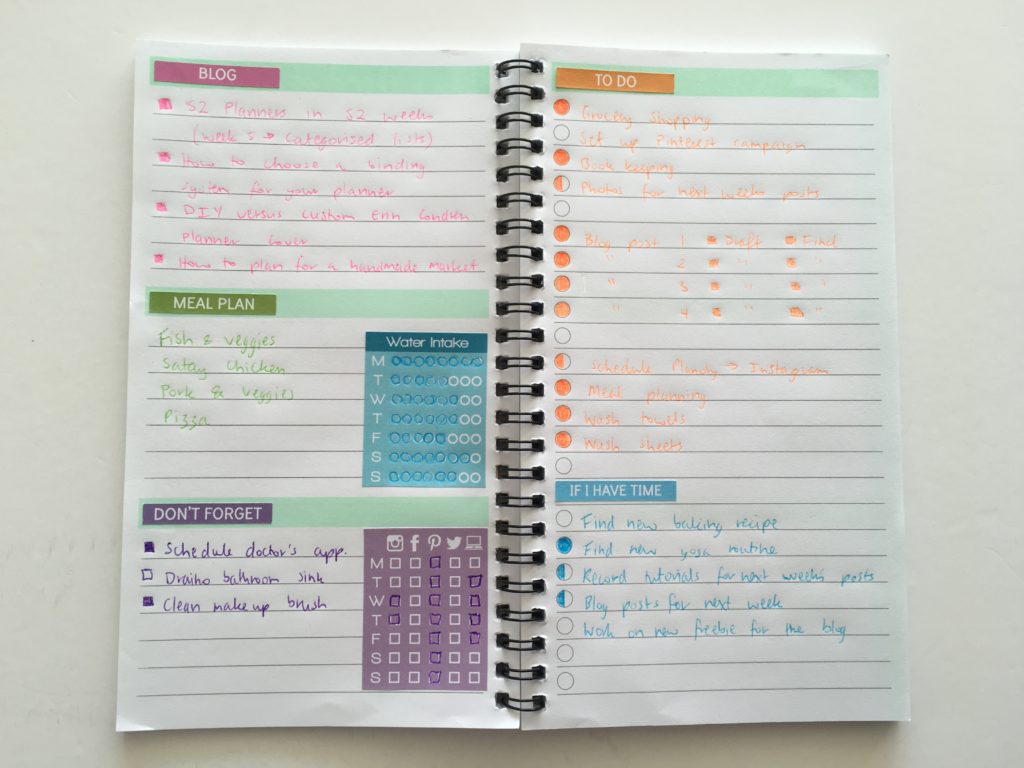
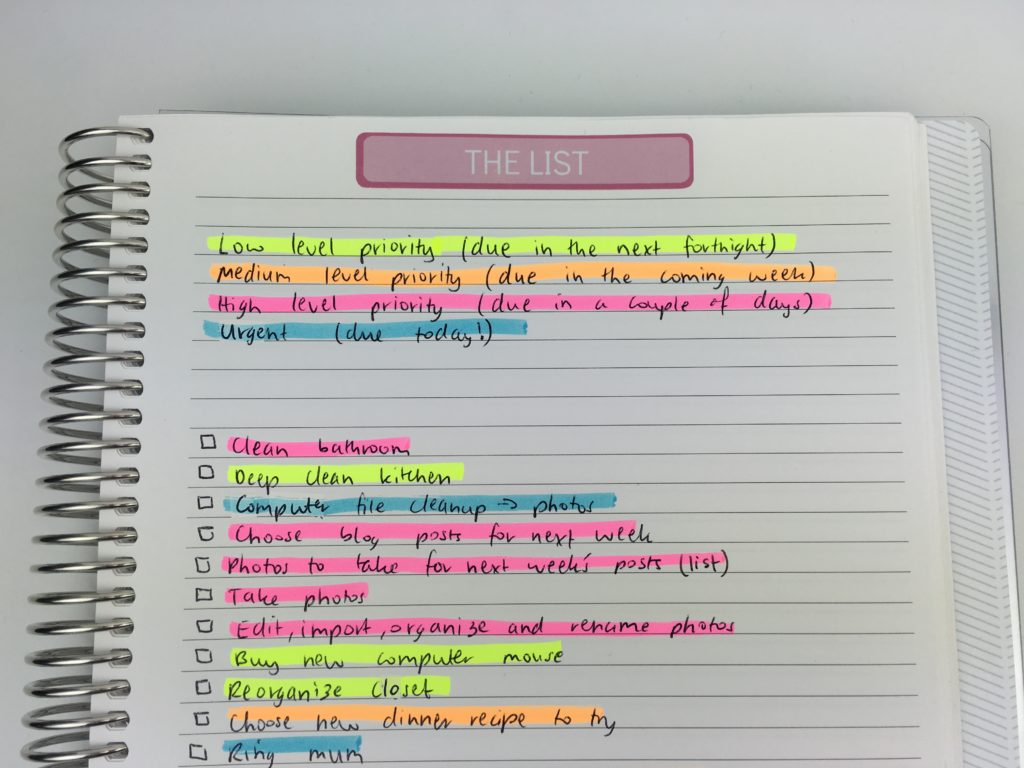
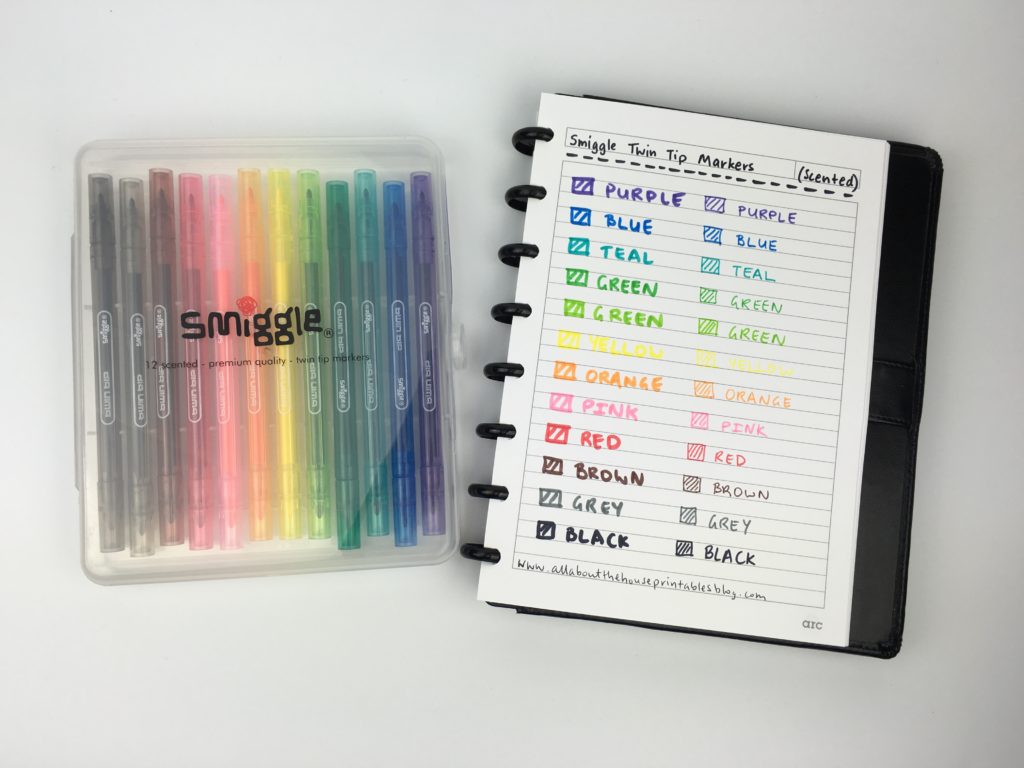
1. Color code.
Some methods:
- By category
- By estimated time to complete the task
- Must do, should do and if I have time
- Person responsible for the task
- Due dates e.g. due in the next fortnight, due this week, due in the coming days, due today
- Time of day e.g. AM, PM and evening

I don’t recommend using more than 5 colors to color code.
I’m a huge fan of color coding tasks, here are some other posts I’ve written about color coding:
- How to color-code your planner (so you’ll actually use it effectively)
- Favorite color coding planner supplies for less than $5
- Ultimate list of the best planner pen brands and how to choose colors for color coding
- 50 Category Ideas for Color Coding Your Planner
- 6 Ways to color code your planner to increase productivity
- Color coding your planner: how to choose which colors to use
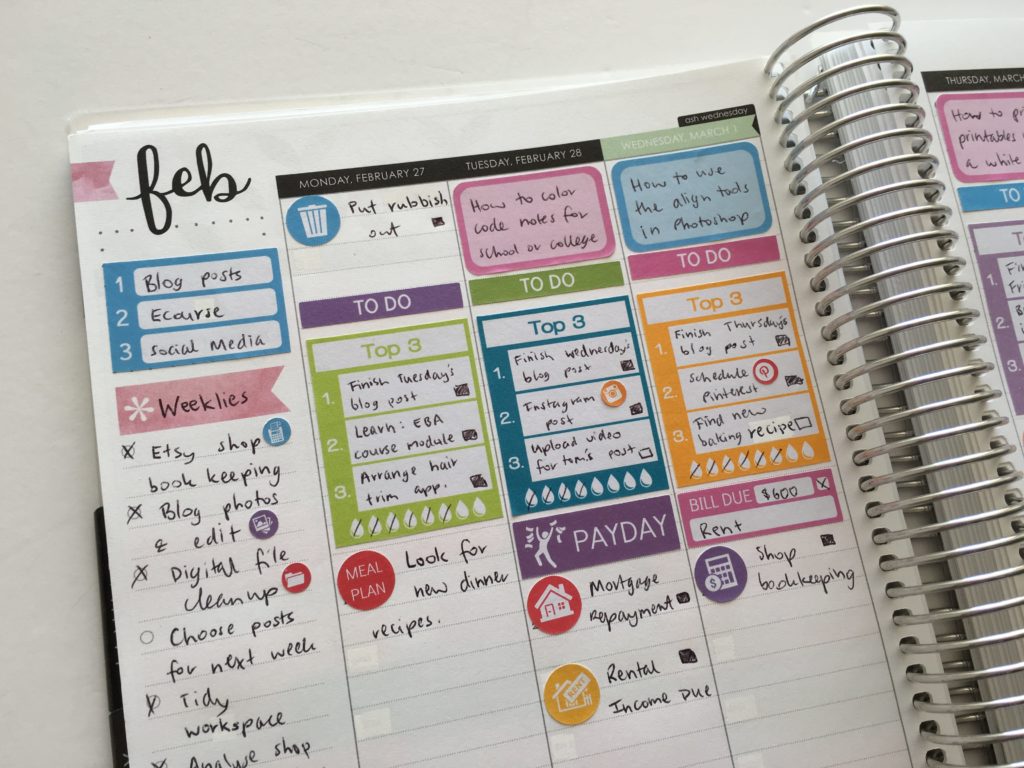
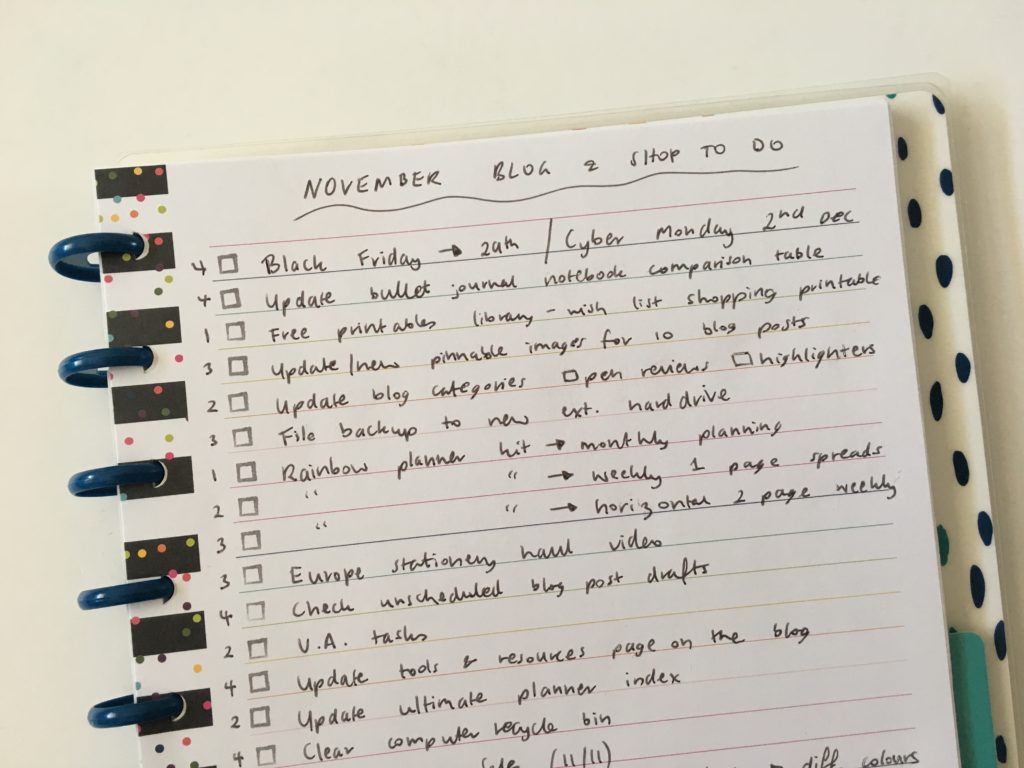
2. Choose your top 3 most important tasks
I always choose a top 3 tasks for annual, monthly, weekly and daily planning. These are the tasks that you’ll be satisfied if they’re the only tasks that get completed that day – these are the tasks you must do first.
Flag these tasks to yourself by:
- Writing or highlighting the task in a different color
- Numbering
- Placing an asterisk beside that task
- Using star shaped highlighters to flag as important
- Using stamps such as the Frixion erasable ones – they’re self-inking so there’s no mess!
- Using a top 3 tasks sticker
- Or another way that works for you that makes the tasks stand out!
Related: Week 9: Customising the Erin Condren hourly planner for task based planning
3. Eat that Frog
Use the ‘eat that frog’ method – do the task you want to do the least first to get it out of the way and set yourself up for a productive rest of the day.
My typical ‘eat that frog’ tasks include book-keeping, bill paying, cleaning, backing up computer files and other mundane tasks.
I get these tasks out of the way first so I can enjoy the things I want to do more, without having to think about those other annoying tasks.

Download this to printable do list here. Existing subscribers can login to the library to download here.
4. Allocate an estimated time for each task
Beside the task (or color code with highlighter, a colored dot beside the task etc.) write how long you think it’ll take to complete the task – remember to add more time than you think (general rule of thumb is to double the time you expect the task to take).
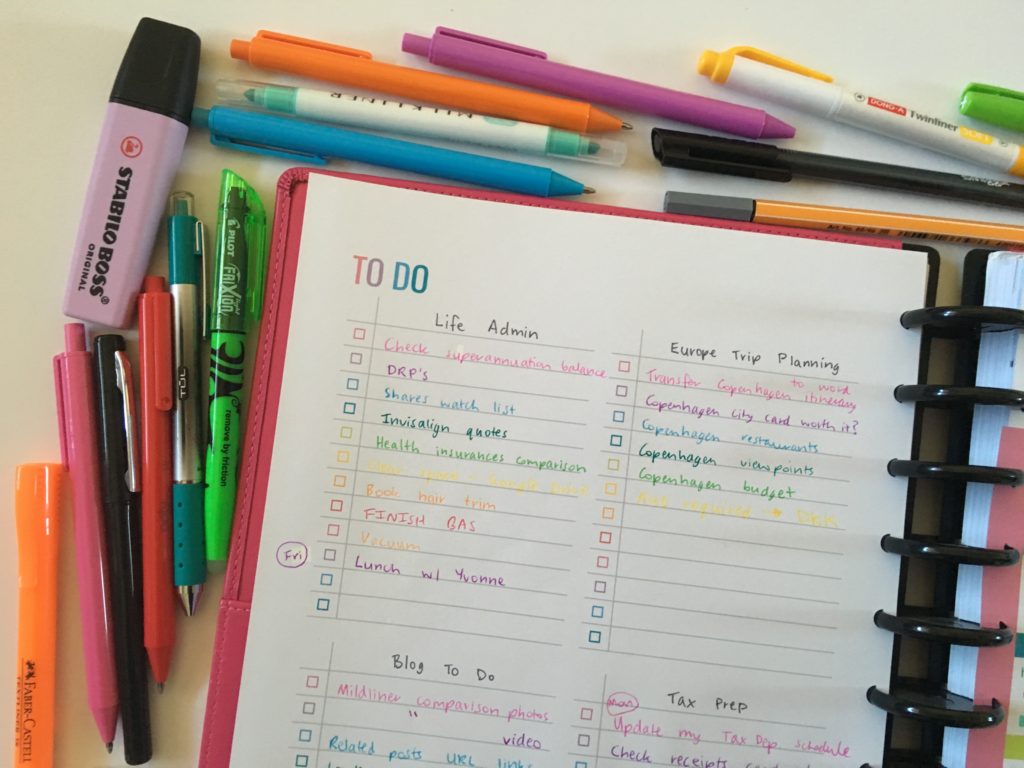
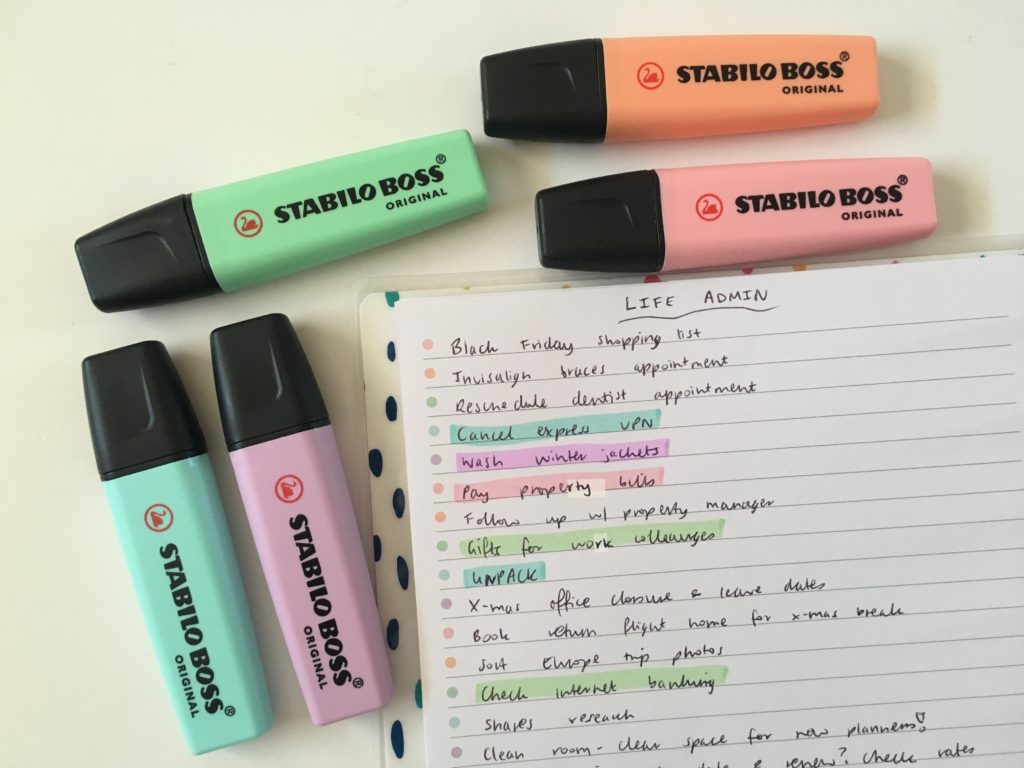
5. Use highlighters
Highlighters are ideal for:
- Color coding
- Flagging important things e.g. bills due, school assignment due dates
- Reminders
A cheaper alternative is to use zooms.
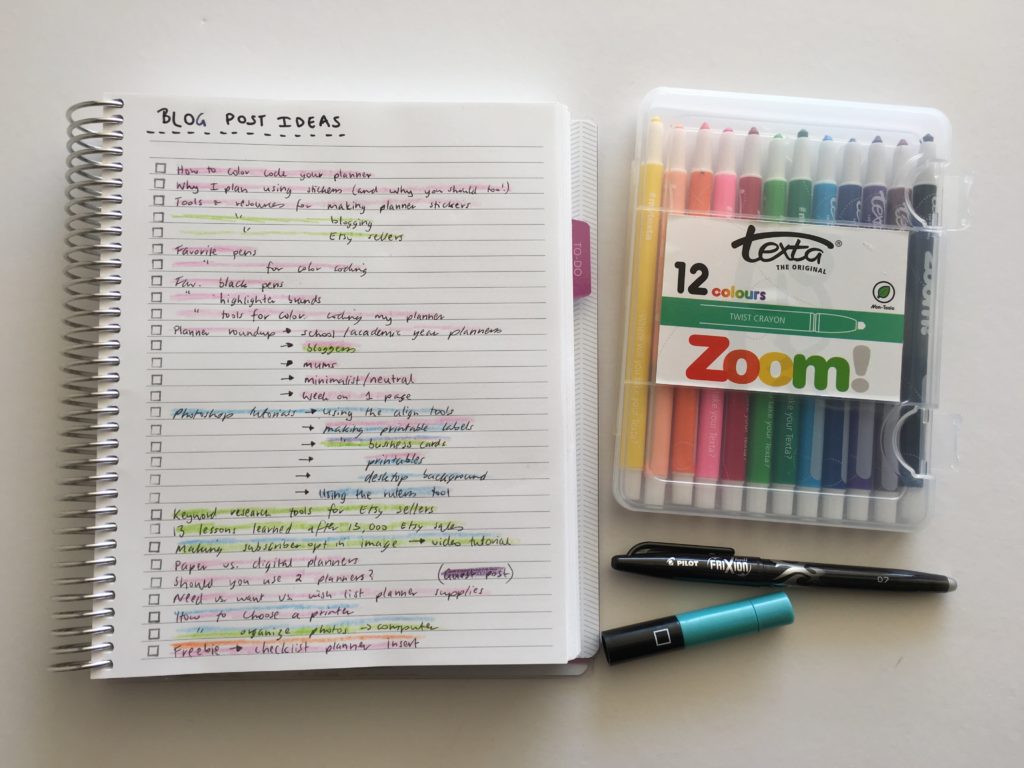
Related: Simple method for organized brain dumping of blog post ideas using a notebook and zooms
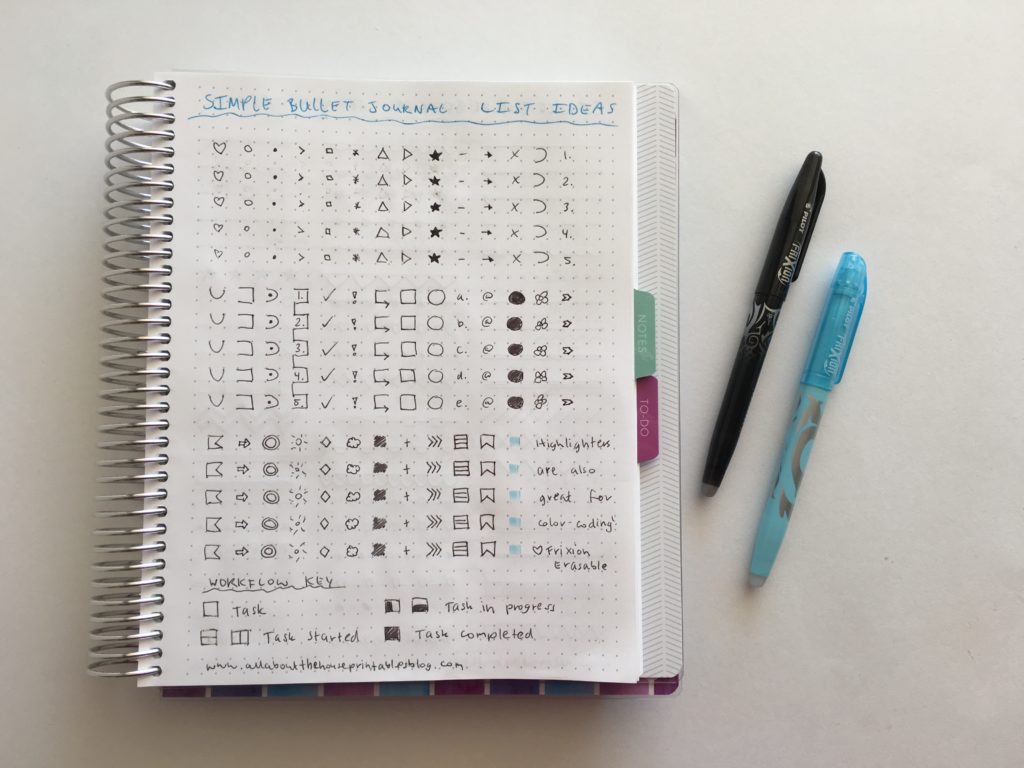
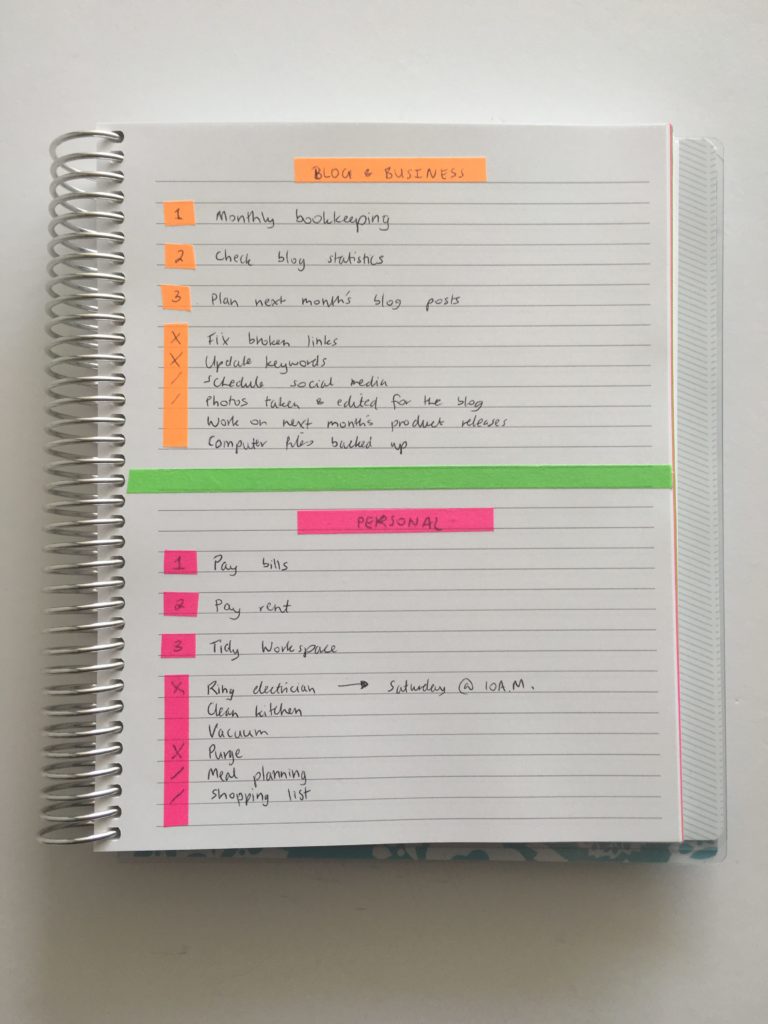
6. Track your progress
I use:
- A single line when the task is started
- A half shaded box when the task is in progress
- A full shaded box means that task was completed
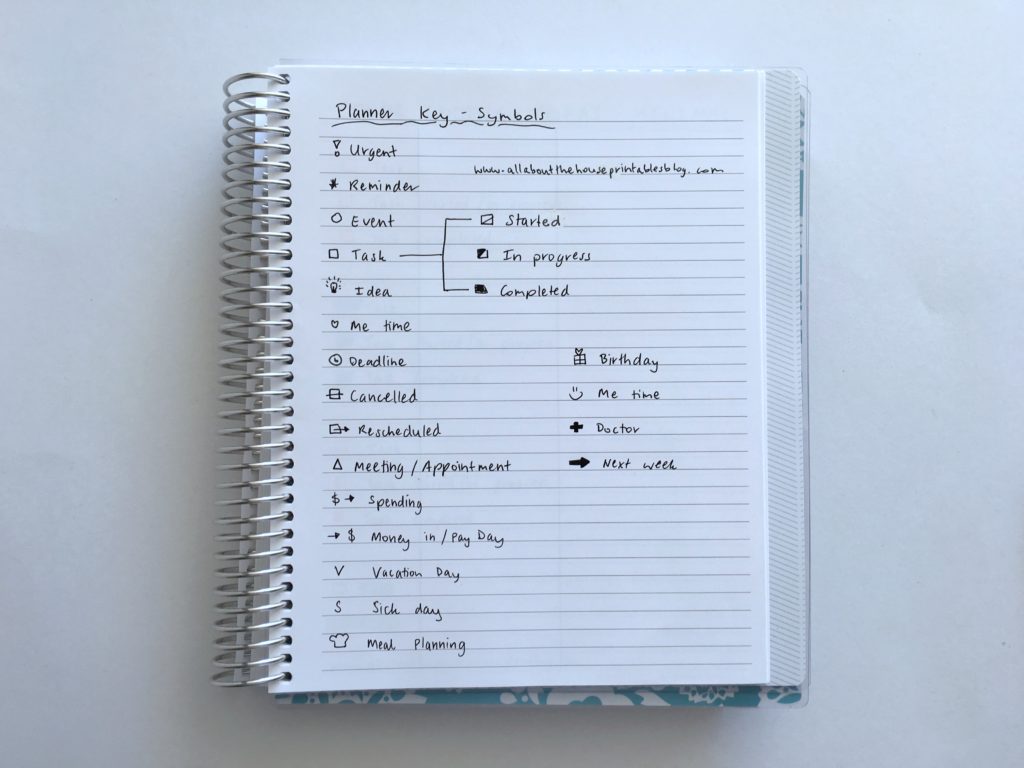
Related: Using a planner key and symbols to code your planner (efficient planning methods)
7. Tick or cross off tasks once completed
Tick or cross off tasks once completed so you know how much you’ve done and see how much is left to do. This helps you decide which tasks to focus on if you have a lot of tasks and not a lot of time left.
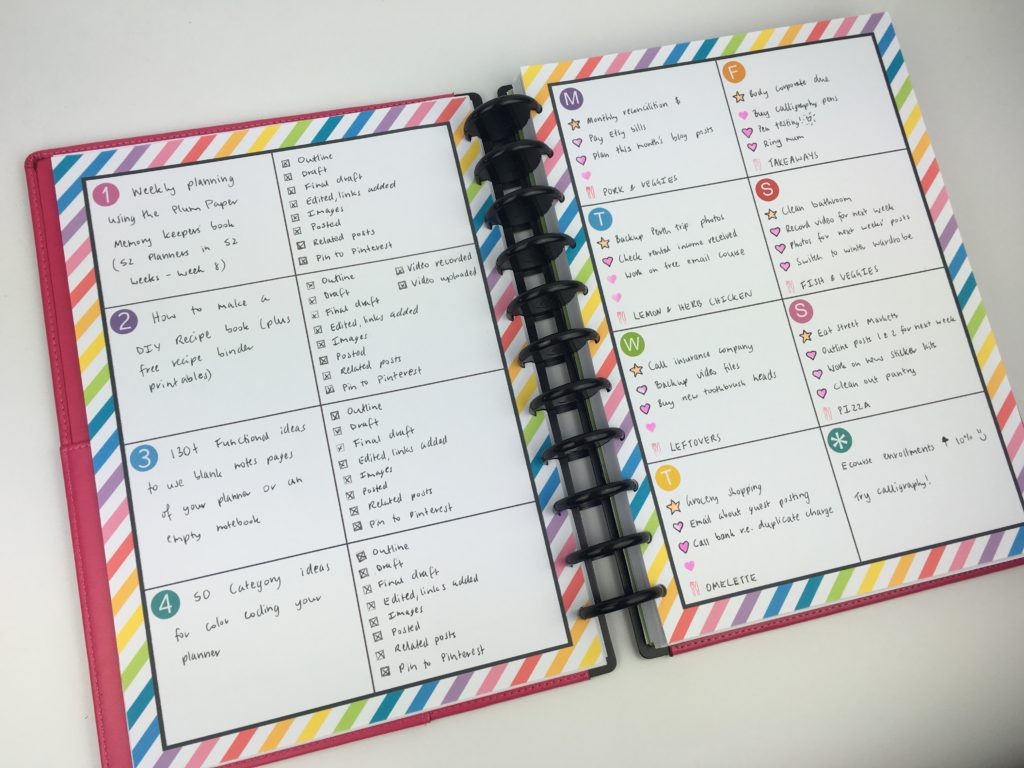
8. Use ” for repeat tasks
When writing the same thing for multiple tasks (e.g. write blog post 1, write blog post 2), use “ underneath the first time you write ‘blog post’ the “ = same as above so it saves time when planning.
Click here to download the list!
9. Use shorthand and abbreviations
To save time, come up with abbreviations and keep a list of these at the front of your notebook or planner) along with your color code key. Some examples:
- MP = meal plan
- BP = blog post
- PP = Pin to Pinterest
Add these to the front of your planner with your planner key.
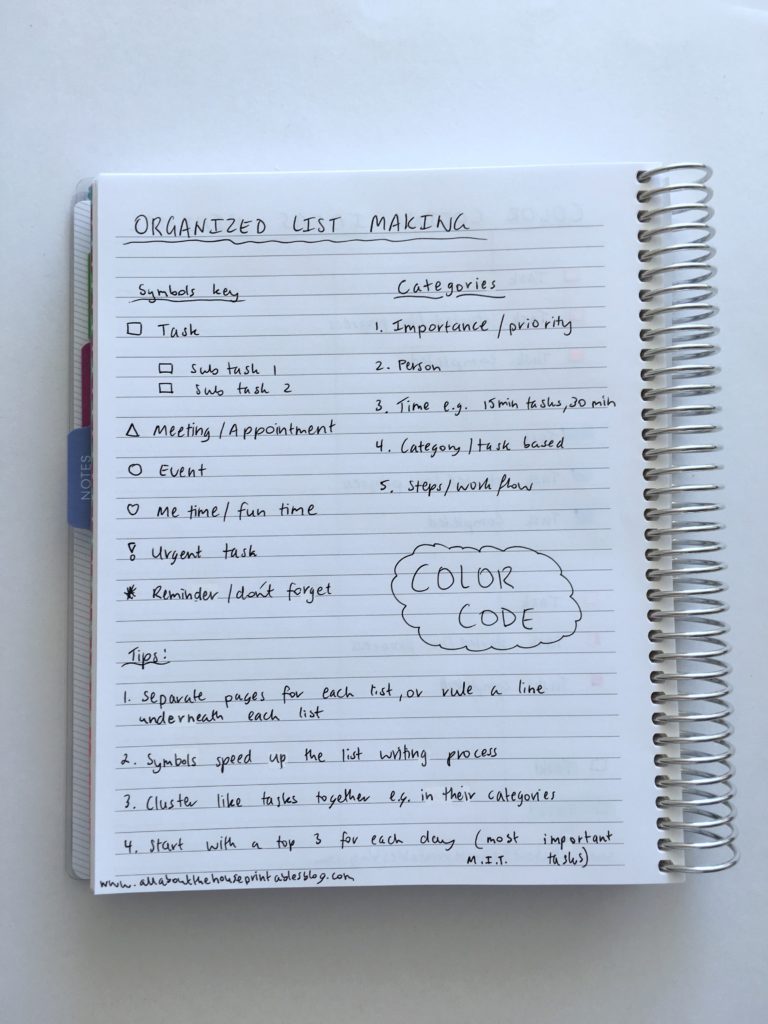
10. Use Symbols
If you’re good at drawing or are a visual person, use shapes and images to code your list. Some examples:
- ! for urgent
- Triangle = events
- Different shapes for each family member or category that you plan
Related: Using a planner key and symbols to code your planner (efficient planning methods)
11. Write your most important tasks first
You’re more likely to start working on the tasks at the top of your to do list first, so write down the most important tasks first.
When I’m doing a brain dump of tasks, I tend to write the mundane things I know I have to do at the bottom (e.g. grocery shopping), and then the most important tasks at the top.
I try and avoid using a large page size as I find I’m more inclined to fill in the gap between the 2 lists and overwhelm myself with too much to do!
12. Categorised lists
Use categorised lists rather than one massive brain dump, and keep these categories on separate pages, or rule up the page to keep them all separate and organized.
Planning by category and clustering like tasks together is my favorite method of planning!
See this post for 50 category ideas.
Some examples would be separate pages for:
- Cleaning tasks
- Books to read
- Grocery list
- Wish list
- Etc.
Related: List makers printable planner – EDITABLE
Related: Week 13: Using a Kmart lists book to plan your week (planning by task, rather than by day)
13. Use a separate page for each type of list
This keeps your notebook neat and avoids your lists becoming messy when you try and cram too much on the page, or don’t allow enough space between lists. If you’re notebook is neat and organized it will make it so much easier to see what needs to be done!
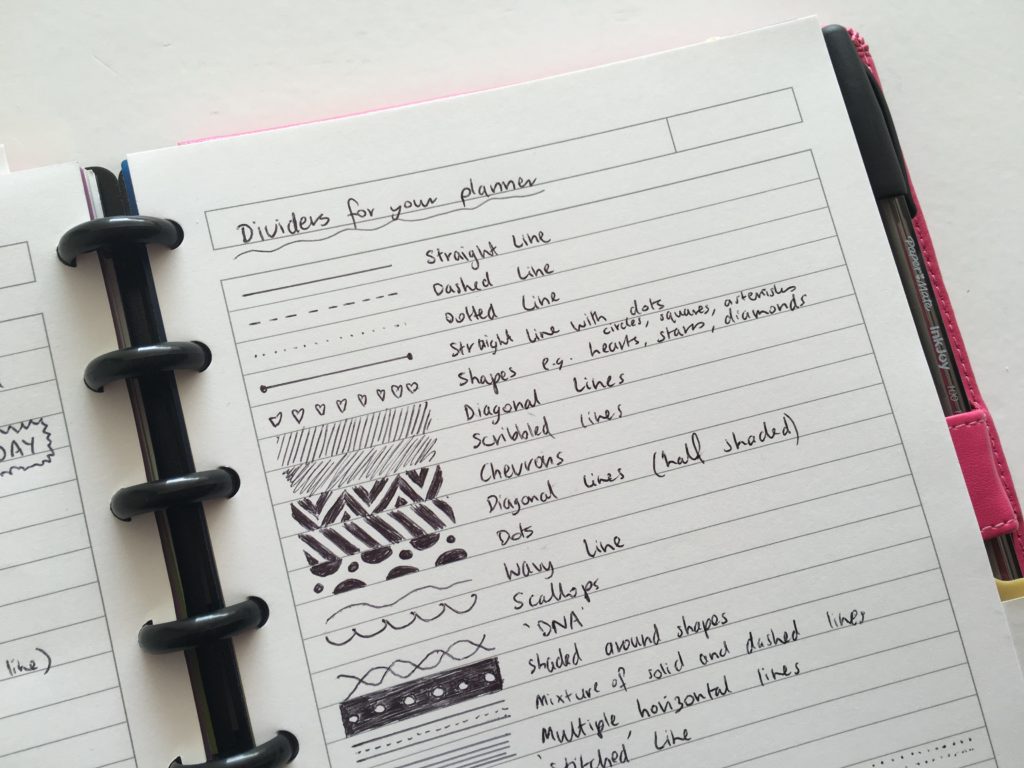
14. Divide up the page
If you have short lists that are only a couple of lines and you’re using a large notebook where you know you won’t need the entire page, use something to divide up the page such as washi tape, draw a wavy line between the list etc.
15. Use an index
Similar to a recipe index, keeping an index of your lists ensures you don’t accidentally create duplicate lists for the same thing, and saves time as you’re not having to flick through the entire notebook to find the list you want. The longer it takes to find the list to record it, the more likely you are to forget what it was you wanted to make a note of. Plus, if it takes forever to find it you’ll be more inclined to do a brain dump and then you’ll end up with notebooks filled with messy scribbles you can’t make sense of.
Related: List makers printable planner

16. Use tabs
I always use tabs to organize my notebooks (you could even just use sticky notes) and for frequently accessed pages. It saves so much time trying to find what you’re looking for. If you don’t want to create an index and number all of your pages, then tabs are a good alternative – especially if you don’t have a lot of lists, but each type of list that you have extends over multiple pages.
Officeworks have sticky note tabs which are handy as temporary tabs (they’re paper so they’re not very sturdy for long term use) when you’re working out what pages to put where in a new planner, household binder of it you use a blank notebook to keep track of all your lists. This is not a sponsored post, I just like the sticky notes they sell 🙂
If you want to type on your tabs before printing, I created this Microsoft Excel template.
A bit of washi to mark the page works well too.
Related: Favorite washi tape for planning, planner decorating & color coding
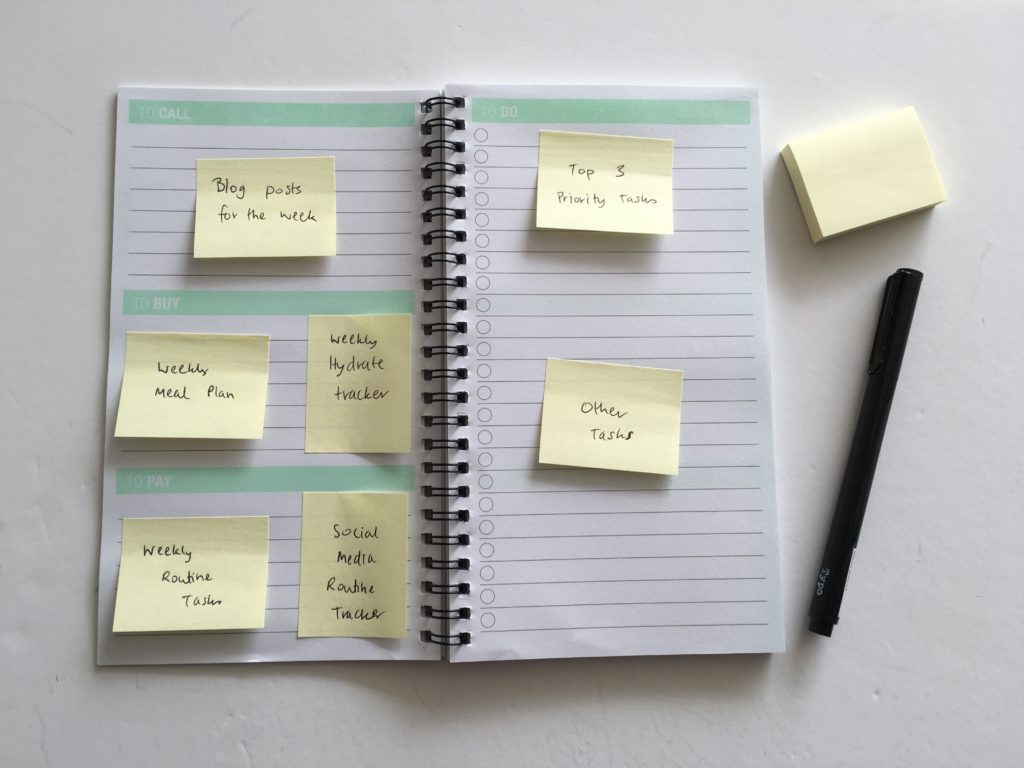
17. Use transparent sticky notes
Place transparent sticky notes over the top of your tasks to see what to focus on first (your top 3) – use a different color sticky note for each category if you have a lot of tasks. Note that this type of sticky note is not good for writing on – the material means the pen ink just wipes off.
Here in Australia, I’ve seen transparent sticky notes at Stacks, Kmart and Daiso.
I’ve also placed sticky notes over my list of favorite recipes as a quick way to meal plan. I use different colored sticky notes for chicken, beef, seafood etc. and yellow for leftovers / lunches.
Related: Color coded monthly meal planning using sticky notes
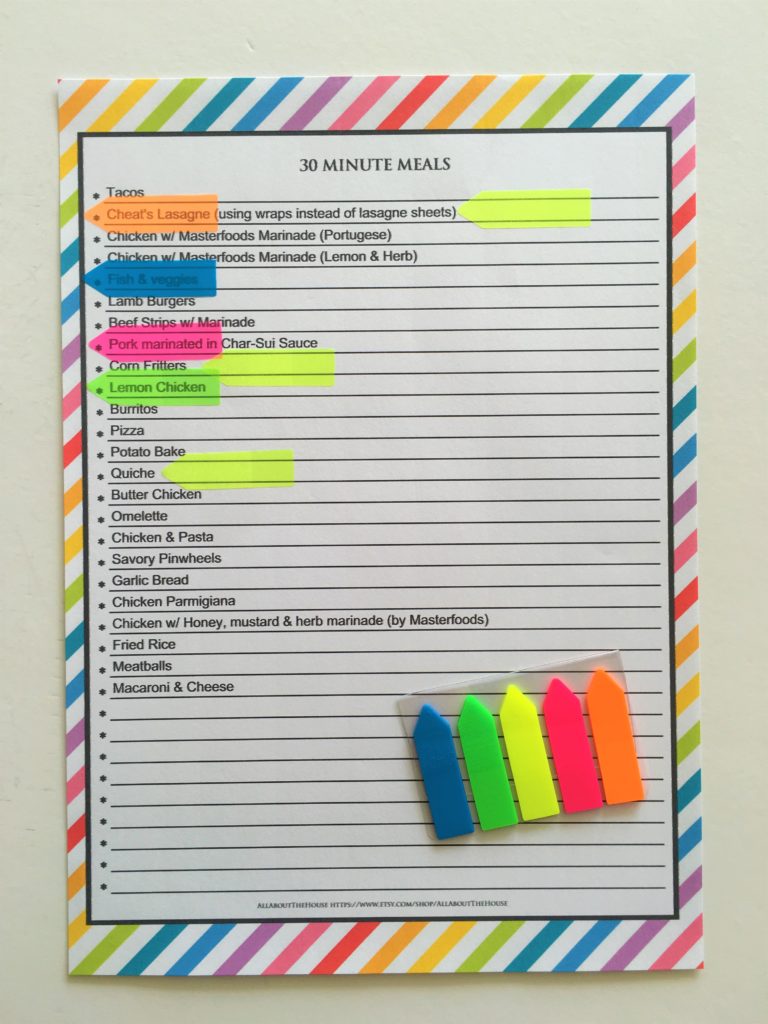
This 30 minute meals list is from this recipe binder kit.
18. Mark your pages
In the top corner of the page, place a colored dot sticker or scribble in pen to keep track of different categories of your lists, see what page you’re up to in your notebook and make it much easier to find the list you’re looking for.
Folding down the corner of the pages you frequently refer to also works well – I alternate between folding the top and bottom corners to avoid making the notebook too fat.
19. Leave buffer time between tasks
To avoid over-scheduling – leave a bit of buffer time between tasks and track how much you actually finish at the end of the day so you don’t schedule too much. Using the pomodoro technique also helps – where you spend 25 minutes on 1 task, followed by a 5 minute break before starting the next task.
If you’re not sure how long a task is going to take, break it down into steps, with each step being a separate task – this also makes it less overwhelming.
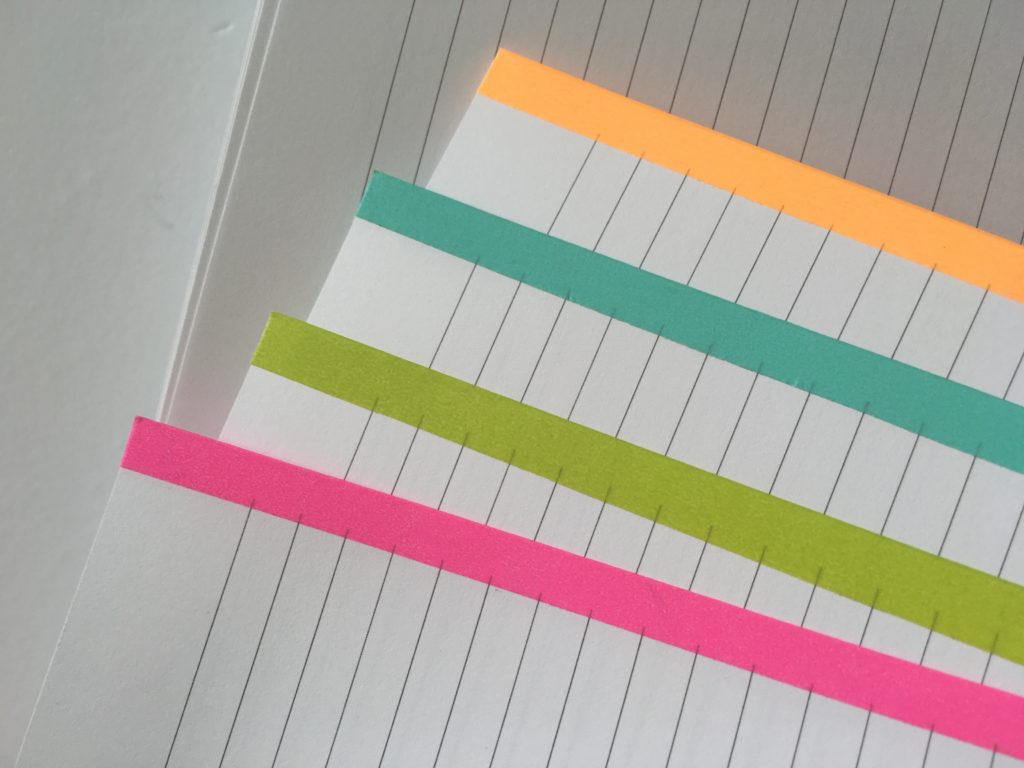
20. Use lined paper
Pre-lined paper will keep your to do lists neat and legible. I find that if I use a planner that is unlined, my writing gets really crooked and messy.
Using color coded pages is also ideal for color coding your to do list – or use a separate page / color to color code by day.
Related: 50 Category Ideas for Color Coding Your Planner
21. Use erasable pens and / or highlighters
If you want to keep your list neat, use the Frixion erasable pens or highlighters. Smiggle and Typo also have erasable highlighters.
Related: My all time favorite planner pens: Pilot Frixion Erasable Pens Review
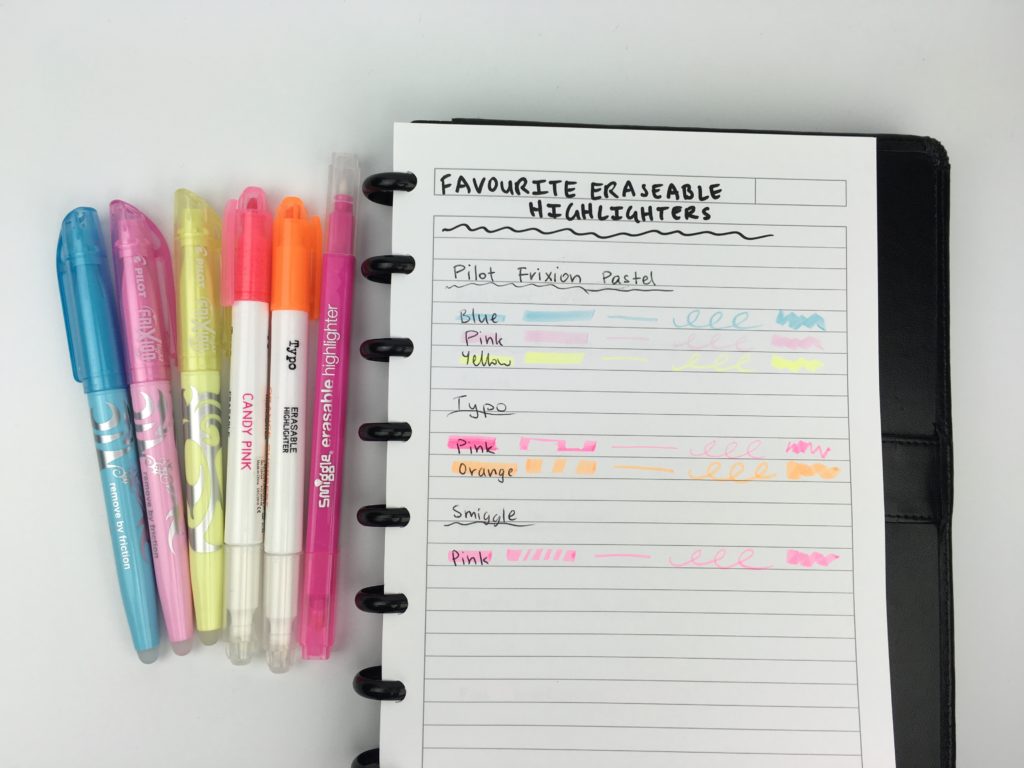
Related: favorite erasable highlighters for planning
22. Don’t be afraid to make mistakes
There have been plenty of times where I’ve accidentally used the wrong colored pen or highlighter when color coding – you can always cover up mistakes using whiteout or a bit of washi tape. Your planner doesn’t need to look ‘insta-worthy’ – it needs be functional and do what it’s supposed to do: be a tool to help you plan your life and get stuff done.
Related: What type of pens write best on correction tape? (gel pens vs. ballpoint vs. marker pens)
Sticky notes are ideal for pre-planning your week.
Related: Using a Kmart lists book to plan your week (planning by task, rather than by day)
23. Factor in one-off events
Don’t forget to factor in your personal life – you want to maintain a balance of personal and work tasks. When scheduling tasks, take into account any one off events that will reduce the amount of time you have to complete your tasks e.g. a birthday party, and plan accordingly. Don’t plan to complete as many tasks as you normally would – your to do list is not a wish list.
Related: Overwhelmed by the planner community? Read this post
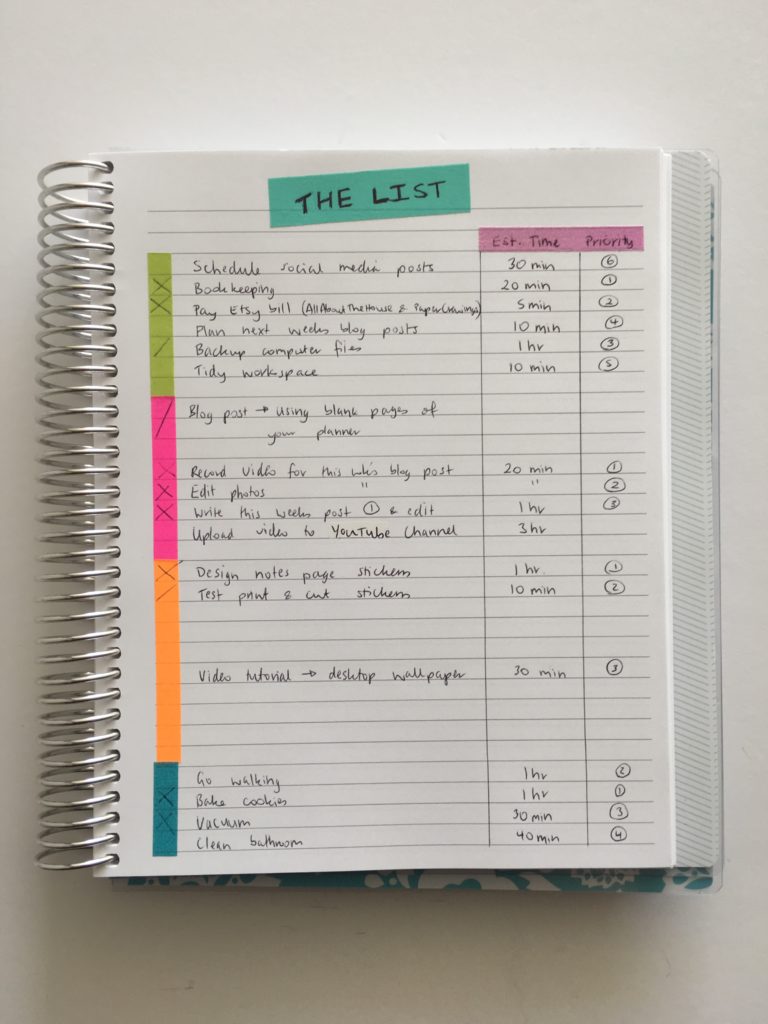
24. Allow for tasks to take longer than you think they will
Don’t over-estimate how much you need to get done. If you’re prone to doing this, adding an extra ‘estimated time’ column to your list will help keep you accountable.
Work out how much time you have left to spend after deducting hours spent for:
- Work
- Cleaning
- Grocery shopping
- Cooking dinner
- And any other recurring, non-negotiable tasks
Then jot down the other things you need to get done, with an estimated time required for each, and stop when you reach the limit of how much time you have.
I also like to number the tasks to prioritise which ones to start with to avoid overwhelm.
I color coded the list in the photo below using strips of thin washi tape. Green for Etsy shop tasks, pink for blogging, orange for products etc.
 Related: Best pens for writing on washi tape
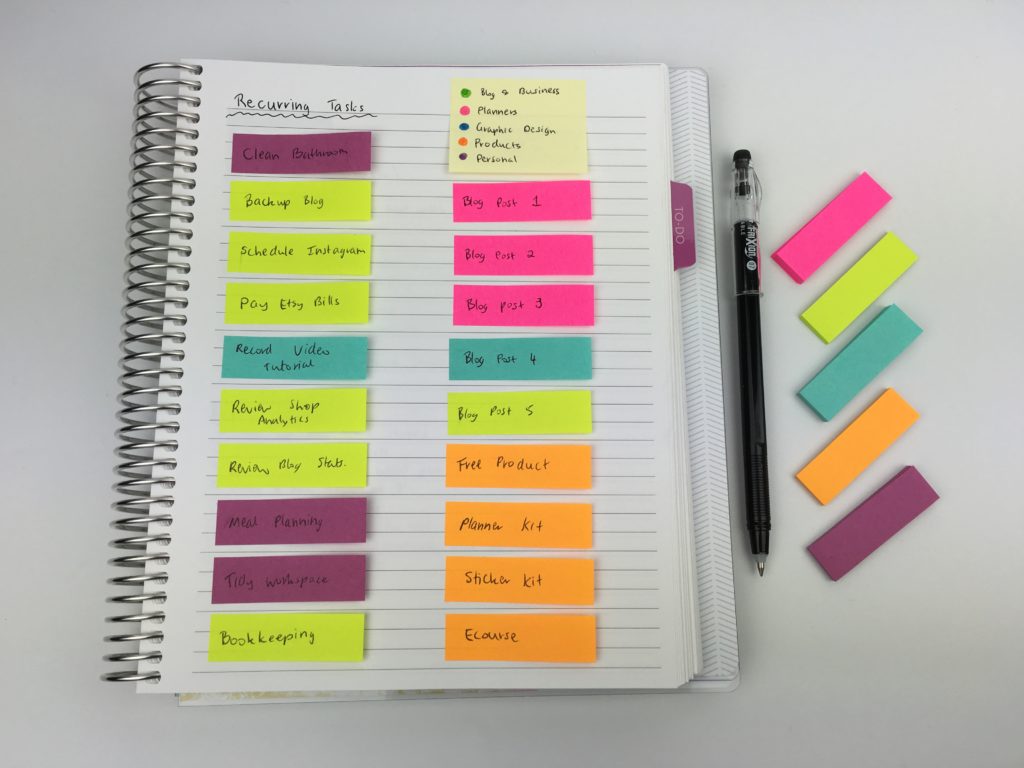
25. Use sticky notes for recurring tasks
Use sticky notes for recurring tasks to save having to re-write them out all the time. Just write them once then move them from week to week – you only have to write them out maybe once a month when they start to lose their stickiness. I use the post it note 3M as they’re super sticky. Avoid cheap tore sticky notes – they lose their stickiness quickly.
Some tasks that are ideal for sticky notes:
- Cleaning tasks
- Mundane things such as grocery shopping
- Kids after school activities
- Exercise
- Recurring work meetings
- Health check-ups
- Family catch ups
- Date nights
- Budgeting
- When bills are due
- Etc.
The bright colors of sticky notes also help the tasks stand out so you don’t forget.
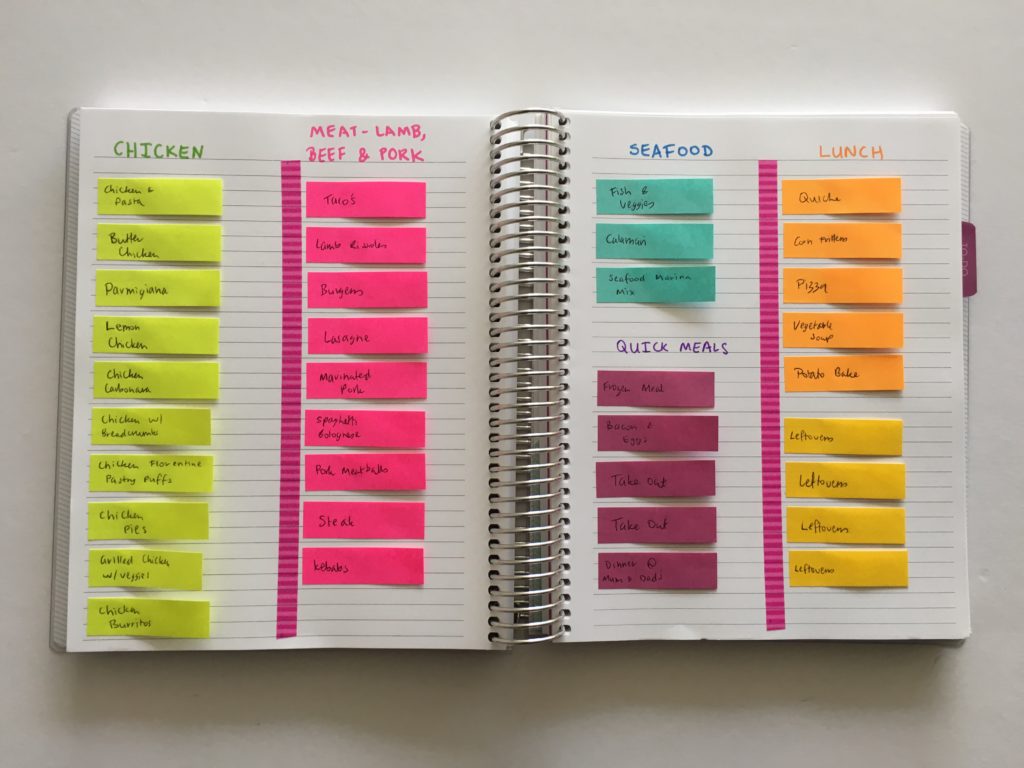
I like to use sticky notes for meal planning. I keep a recipe bank with a couple of pages of recipes I frequently cook, then I can just peel them off and place them in my planner. I take a photo of the meal plan and grocery list, that way I can refer back to it for a ready-made meal plan when I don’t know what to cook.
Related: Color coded monthly meal planning using sticky notes
26. Use sticky notes for ‘maybe’ tasks
Sticky notes are also ideal for things subject to change as you can easily peel them off and move them around.
27. Use sticky notes for flagging things
Because sticky notes are bright colors that contrast the white paper of a notebook, they’re ideal for flagging important tasks and due dates.
28. Use a habit tracker
A habit tracker saves a ton of space in your planner, is quick to set up and means you don’t have to keep re-writing the same tasks each day.
It also provides a good visual of what you did and didn’t achieve that month so you can work on improving your habits for the following month.
![]()
29. Review your to do list
Regularly review your to do list to make sure you’re staying on track. It’s not a case of ‘set and forget’ – reviewing where you’re up to also gives a better indication of how much time tasks take so you can plan better in the future.
30. Carefully consider each item on your list
Don’t schedule a lot of tasks you don’t like doing all at once – break them up and schedule them throughout your week.
31. Break bigger tasks down into smaller tasks
A good rule of thumb is to keep tasks to no more than 1 hour to avoid over-whelm. If a task is going to take longer than an hour, split it into 2 or more tasks.
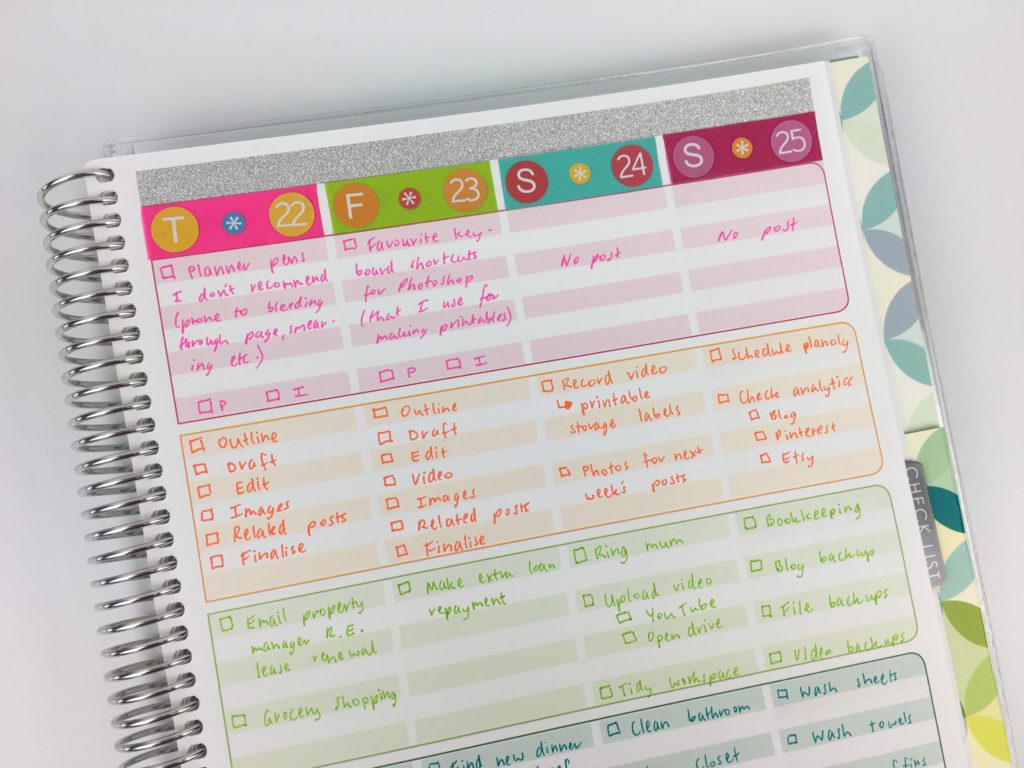
32. Batch tasks
Group similar tasks together, or those that relate to one another.
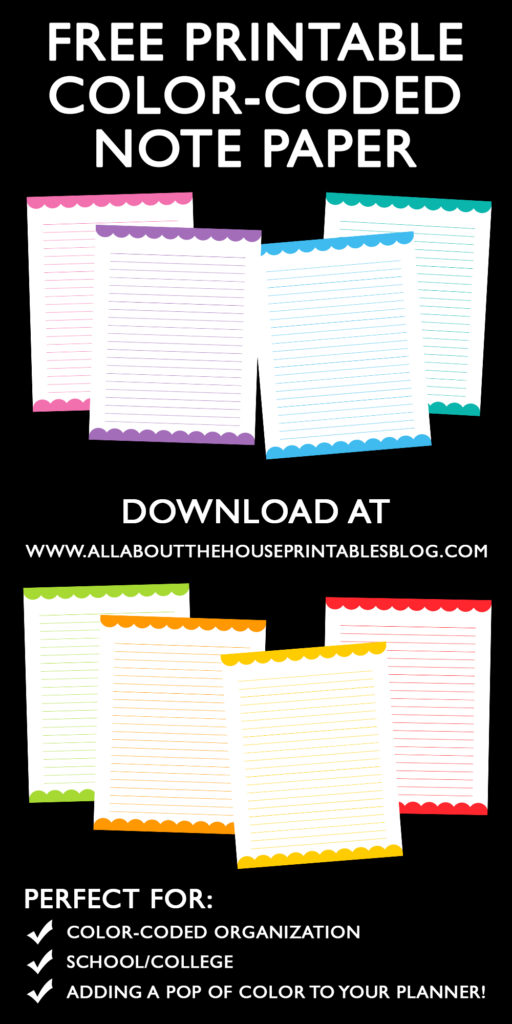
For example, for this free printable color-coded note paper I needed to:
- Create the printable
- Create the image to promote the freebie
- Creating the landing page and add the image to it
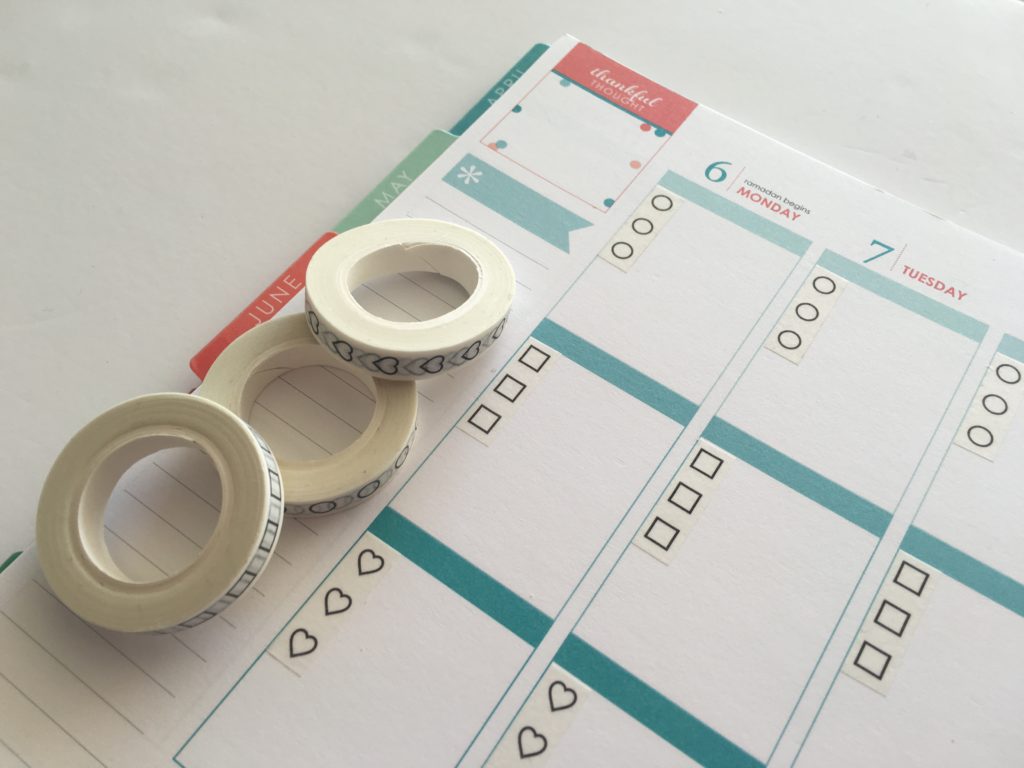
33. Use self inking stamps
I use the MAMBI checklist stamps to save having to manually draw a checkbox each time.
The Frixion brand also have erasable stamps in the shape of stars and hearts that I like using for list making.
I used stamps in week 18 of the 52 planners in 52 weeks challenge
Another alternative is checklist washi tape (my sister has it in her planner supplies shop!)
34. Use the right pens
Use pens that don’t smudge / dry quickly so you can write your tasks faster. I prefer writing using ballpoint pens to gel pens as they tend to break in faster and can also write faster.
Related:
- How to choose the right planner pens: what to look for when buying planner pens
- Ultimate list of the best planner pen brands and how to choose colors for color coding
- Best pens for writing on washi tape
- Planner pen testing in the Erin Condren Life Planner, Plum Paper, Happy Planner by MAMBI and Limelife Planner
- My all time favorite planner pens: Pilot Frixion Erasable Pens Review
- How to choose the right planner pens: what to look for when buying planner pens
- Favorite places to buy planner pens (online)
- Planner pens I don’t recommend (prone to smearing, bleed through etc.)
35. Give tasks a due date
Assign a due date (real or imaginary) for every task – especially those you don’t want to do. Unless there’s a due date you’ll keep putting it off.
36. Don’t forget about the little things
Don’t forget to add the little things that you don’t want to do but have to do regularly such as grocery shopping – these things still take time to complete.
37. Distinguish titles
Use uppercase letters for list titles to make them stand out (a different color or a marker pen also work well).
Some of my favorite marker pen brands for headings are:
- Triplus Color 1.0mm
- Typo ‘make your mark’
- Crayola
- Smiggle twin tip markers
Related: Favorite pens for writing headings in my planner
38. Review the items on your list
Re-evaluate items you’ve put off / keep writing out each week – do you actually need to do them or can you drop them, delegate them, or re-schedule them for a later date?
39. Keep seasonal tasks separate
Keep track of seasonal tasks on their own list e.g. cleaning air-con filters should be kept separate to your weekly cleaning tasks.
40. Carefully choose your tasks
Make sure the tasks relate to your goals – before you add anything to your to do list – ask yourself how the task will help you achieve your goals. If it doesn’t relate to a goal and it isn’t a necessary mundane task such as grocery shopping then it probably shouldn’t be on your to do list.
41. Write your list before you need to complete it
Write your to do list the night before (or the day before the week starts). This way you’ll know exactly what you need to do when – you’re not wasting time trying to figure out what to work on next. I personally prefer to plan by week rather than by day, to avoid getting bogged down in the details.
Related: 52 Planners in 52 Weeks
Writing your tasks before you need to complete them ensures you don’t forget anything. That’s why I use a travel packing checklist and a before we leave checklist (which I progressively added items to these lists over a number of weeks when creating the travel planner printable kit to make sure I didn’t forget anything).
Related: Printable travel planner
Related: The Process Behind Making a Printable Planner
42. Use master lists
Keep a master list with a separate page for each topic (e.g. one page for cleaning tasks, another with a list of books you want to read etc.) and take items from those lists to schedule to each day. By keeping a master list to refer back to you;re less likely to forget things.
43. Write your tasks
Write out your to do list rather than using an app. Studies show that when you write things down you’re more likely to remember them.
I personally find it easier to keep track of things when they’re written down right in front of me, rather than hidden away in an app or a tab of my internet browser. With pen and paper you can also take it with you without having to worry about an app syncing to your calendar – plus it’s quicker to just write something down than open up an app and type in the task.
44. Keep a quick tasks list
Keep a quick tasks list to refer to if you have a few minutes spare
This is a sticky note to do list I found at Officeworks – so handy if you run out of space in your weekly spread, and for recurring tasks each week. I’ve been thinking about laminating the checklist and hole punching to create an insert that can be moved from week to week.
Related: How to make a DIY Erin Condren Planner Cover for less than $2 (plus free printable cover)

45. Monthly brain dump
Write a master brain dump list at the start of each month, then add these to your weeks to make sure you achieve your goals. Every task on your to do list should be tied back to your goal.
I do a brain dump list at the start of each month then write the week number I intend to do that task. Week 1, 2 etc.
46. Utilise white space
If you have long tasks, leave white space between lines of your notebook to make it easier to read / less jumbled and cluttered.
![]()
47. You don’t need to fill up the entire page
Don’t write more tasks just to fill a page – there’s nothing wrong with some white space!
Related: Week 25 – converting the Erin Condren lesson planner into a weekly planner
48. NOT to do list
Keep a NOT to do list of all those things you shouldn’t do such as bad habits you need to break, and things that can be delegated or automated.
49. Be specific
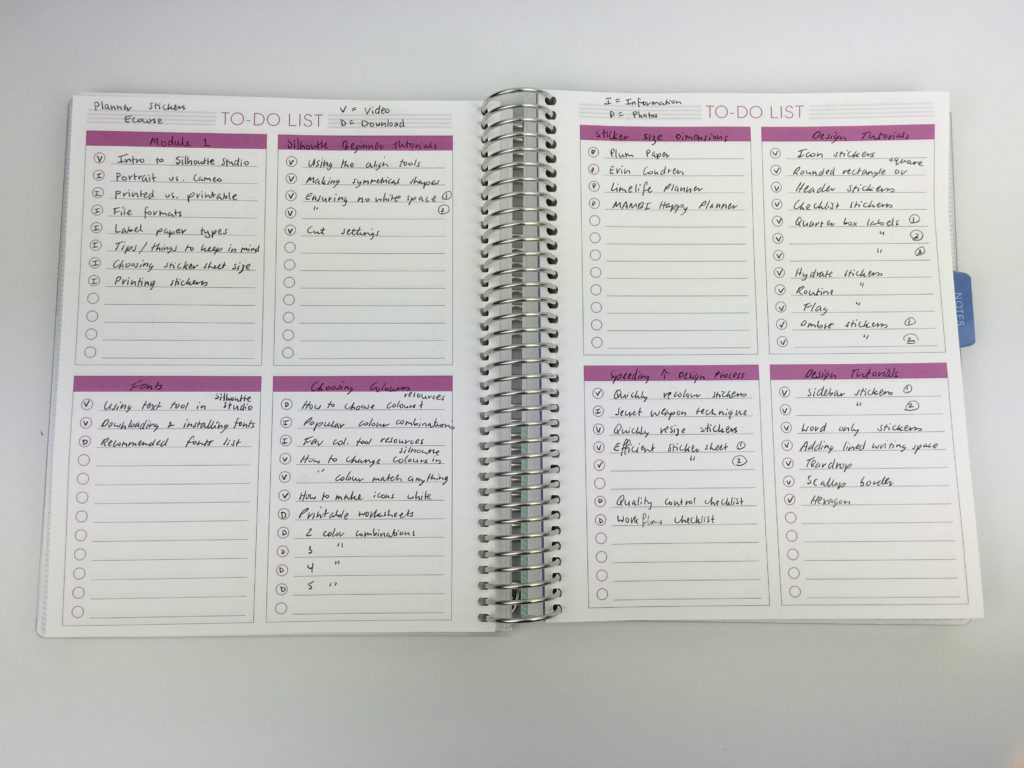
Be specific about what the task that needs to get done is. For example, instead of just ‘record tutorials for ecourse’ I put ‘record tutorials for module 3’ – you may need to break things down into their own list.
50. Keep your to do lists all in the one place
Don’t keep lists on a scrap piece of paper, on your phone, in your planner, on sticky notes etc. – record them in one place. I like to use my ARC and Happy Notes discbound notebooks – I can add, remove and rearrange pages as often as needed.
Related posts
- Planning 101: Planner lingo (what does it all mean?)
- How to choose a binding system for your planner (comparison and which one I like the most)
- 7 Planner supplies I don’t regret splurging on
- Using a planner key and symbols to code your planner (efficient planning methods)
- Daily versus weekly planners: which is right for you?
Download a printable version of this list to keep in your planner and refer back to later
Found this post helpful? Pin it!


Omg girl! It takes more time to make the lists than to do the tasks. I could see a list for appointments and groceries and what’s for dinner. Birthdays. But color coding. I would have thrown my planner across the room! I just write what I need to do on one page and cross it off when I’m done i im senior i guess things are differently now. I would have to skip my list and take a nap. Then if I remember what I had to do after nap, I would take another nap then go to bed and try again tomorrow