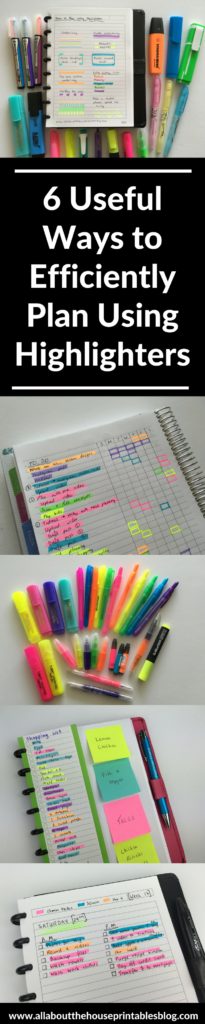
After pens, highlighters are my favorite tool for color coding my planner! There are a couple of ways I use highlighters to efficiently plan my week:
How to use highlighters for planning
To enlarge the screen of the video, click the square icon in the bottom right hand corner of the video (it will say ‘full screen’ when you hover your mouse over the icon).
Subscribe to my YouTube channel for more planner related videos & graphic design tutorials!
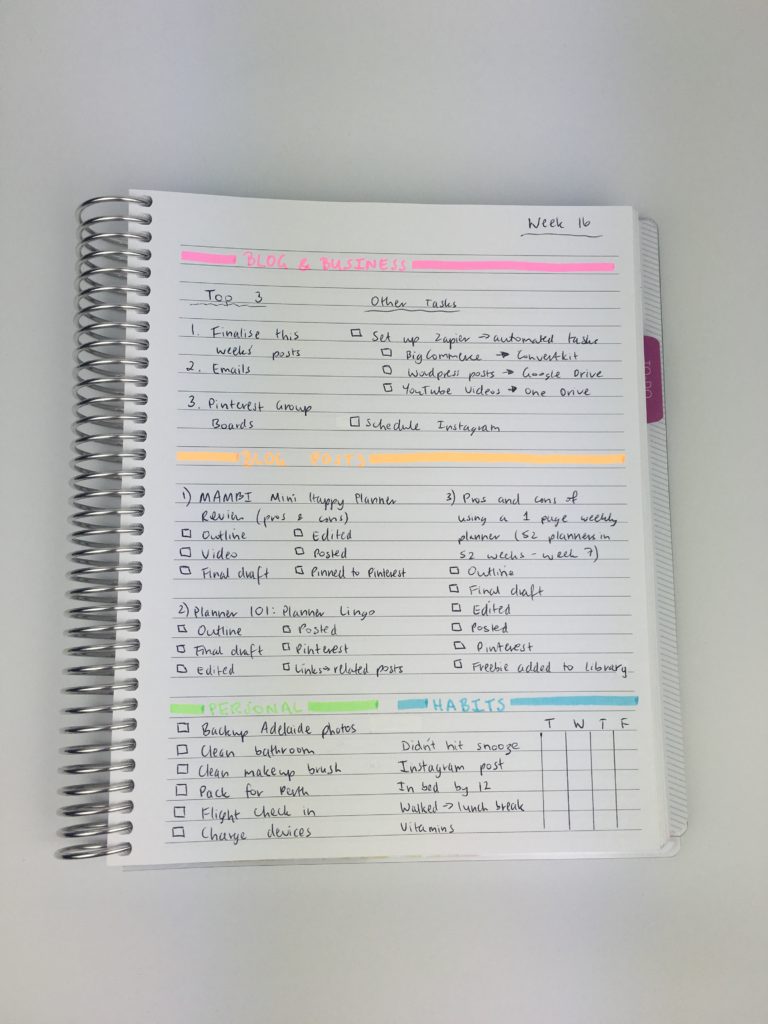
1. Highlighting titles
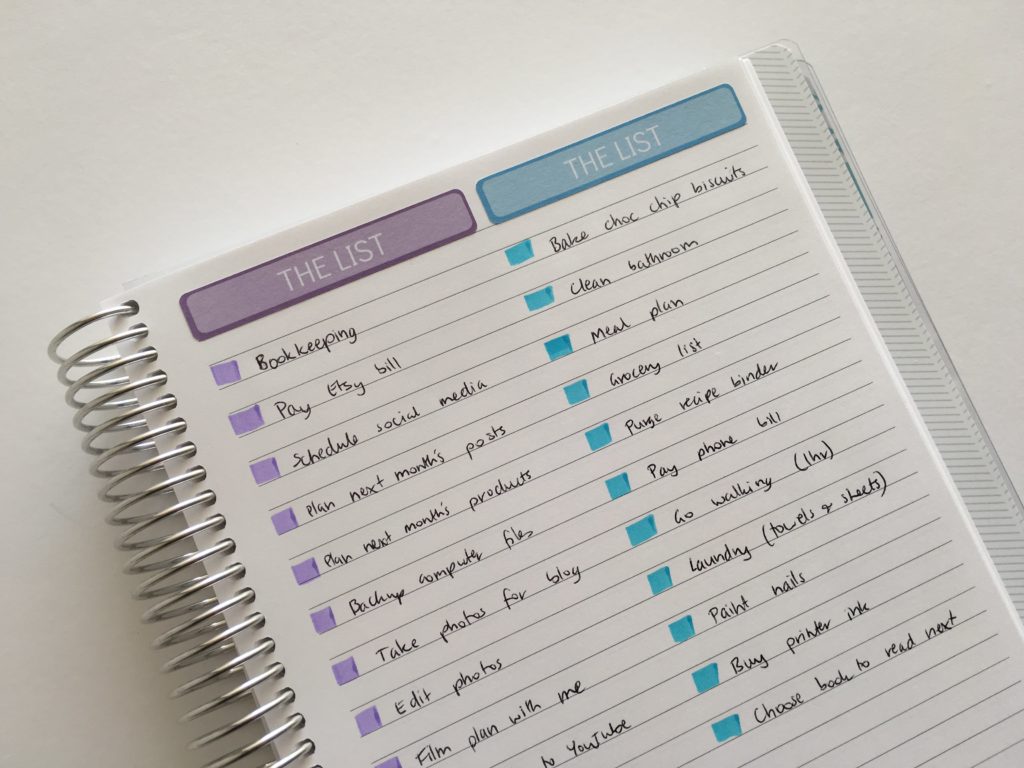
Highlighting titles makes them stand out more. I especially love highlighting titles for list making, particularly if I have a collection of lists on the same page.
It’s also a good idea if you’re making multiple lists in the notes sidebar of your planner.

Related post: 12 Bullet journal annual planning page layout ideas
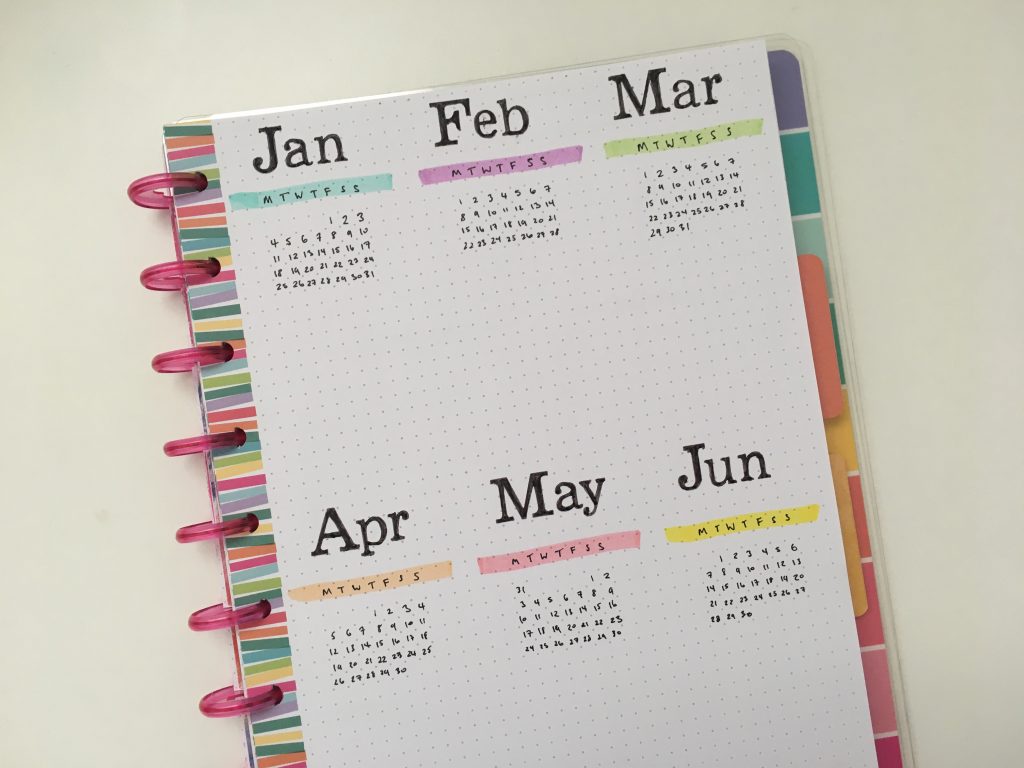
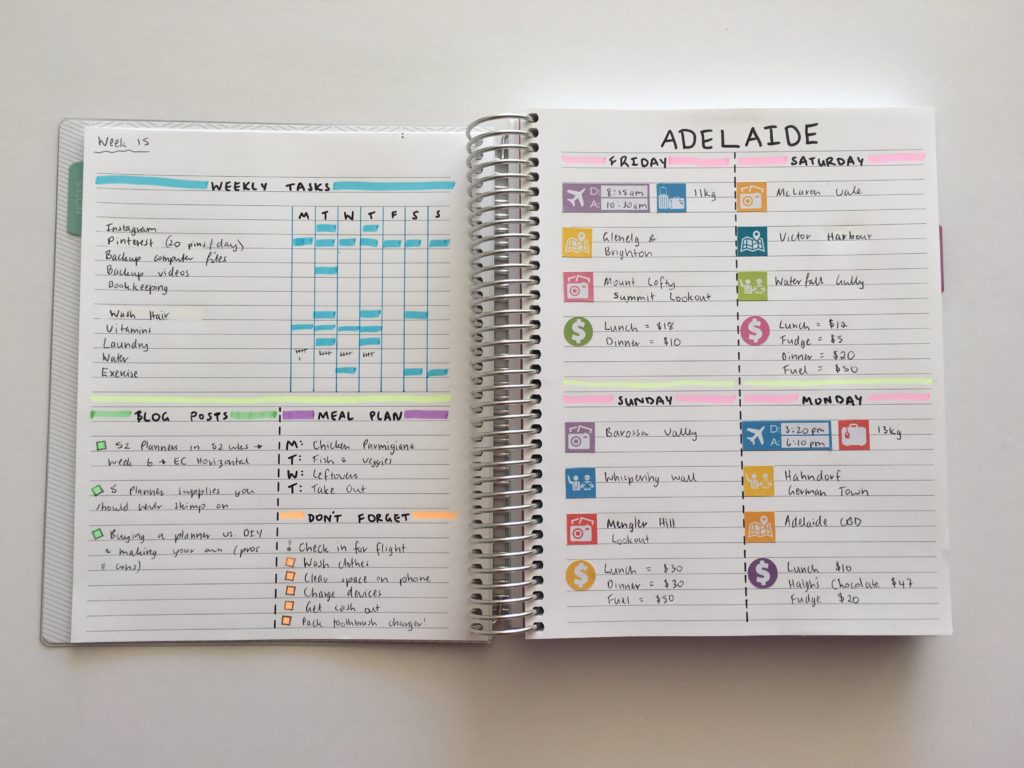
2. Dividing the page
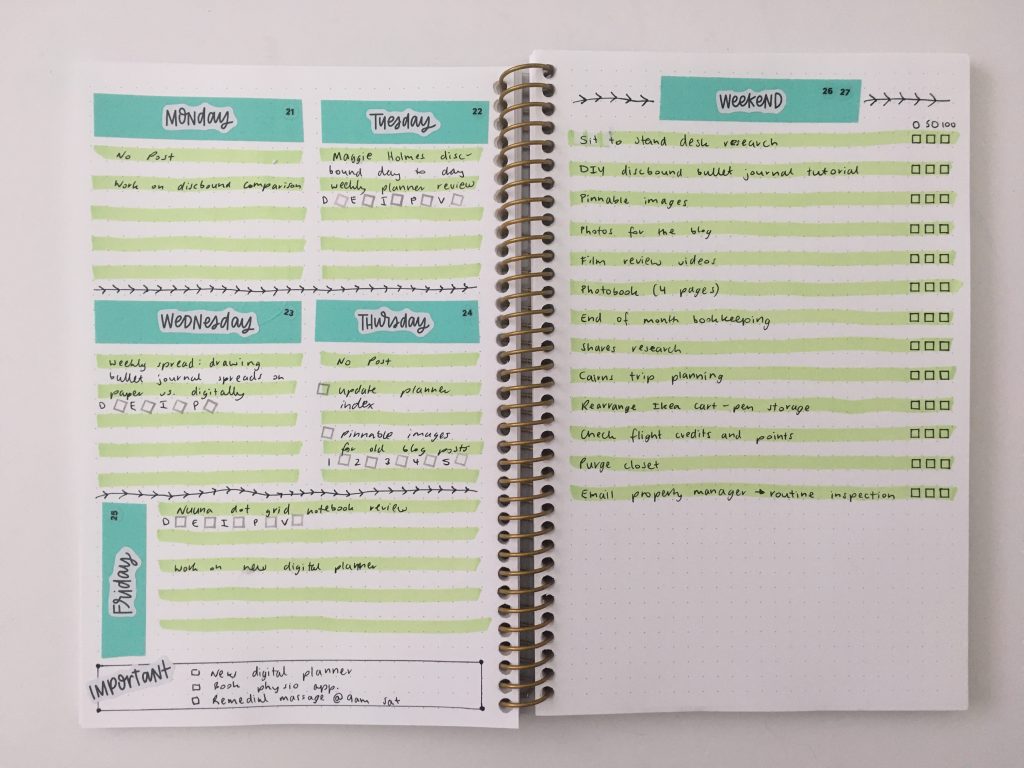
Highlighters are a quick and easy way to split a page into multiple sections for list making, or to split up the page if you’re creating your own planner spread.
Related: Week 16: Minimalist 1 page categorised planning using black pen & highlighters
For variety, instead of using a solid line try these:
- Diagonal lines across the width of the page
- Dashed line
- 2 lines – 1 thin and 1 fat
- Using multiple colors to create a rainbow line
- Use the thin tip to draw scallops or loops / swirls
- Wavy lines
Related: Week 15: Trying a freehand weekly planner inspired by bullet journalling
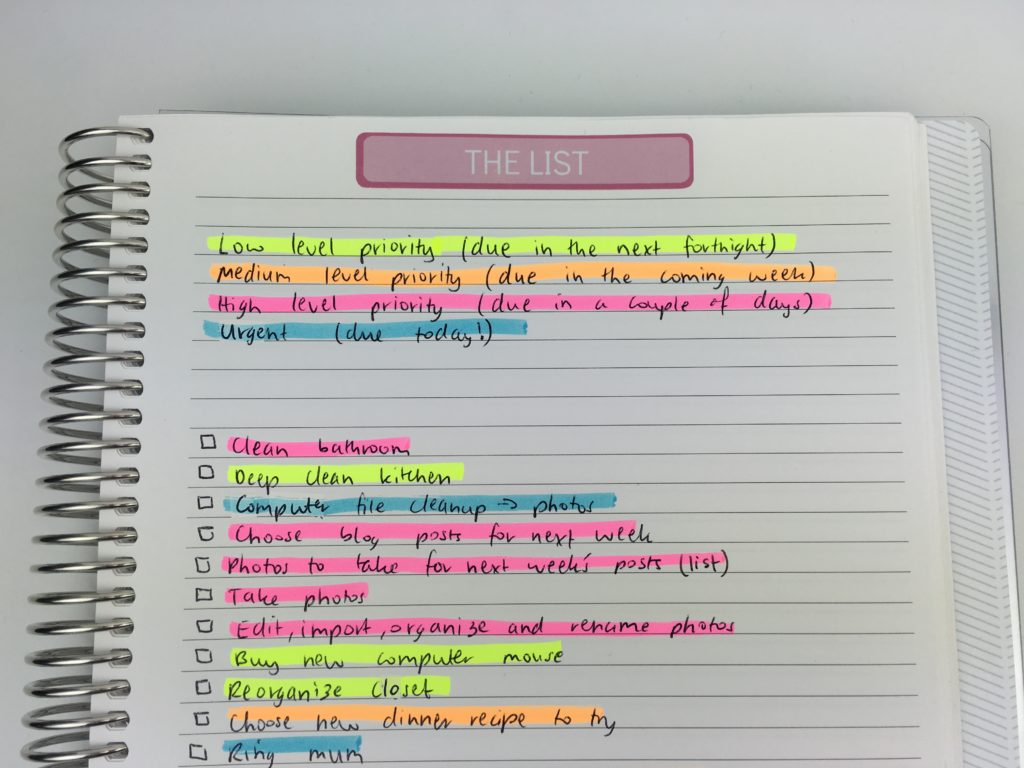
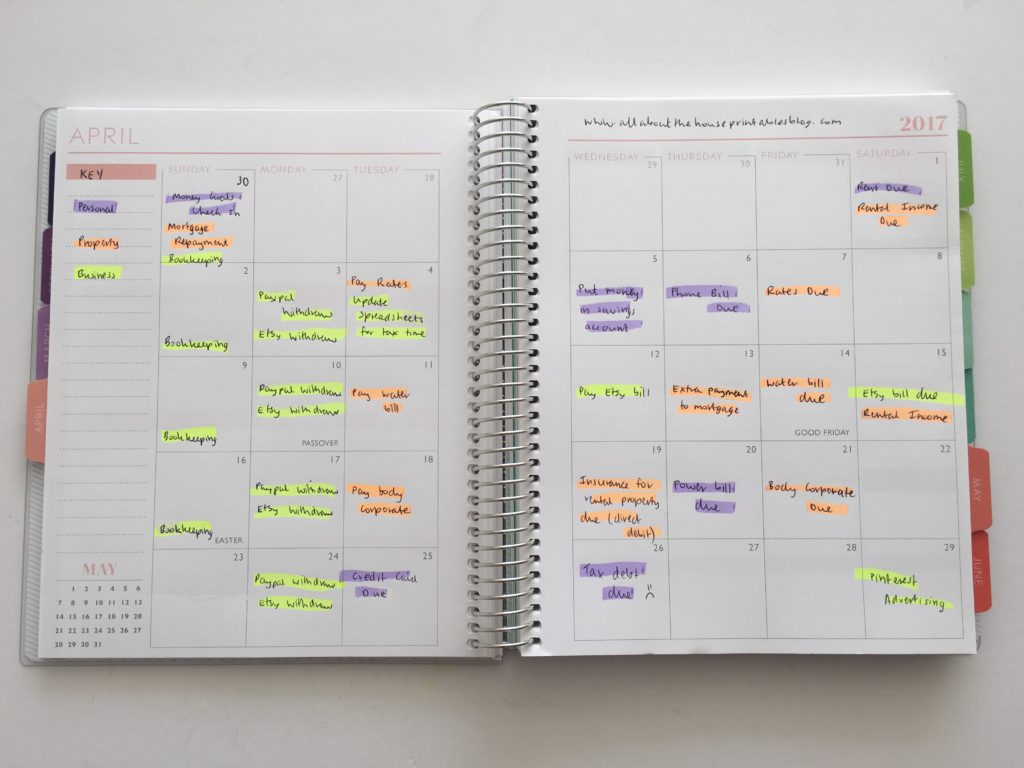
3. Due dates
Drawing a box around things that are important helps distinguish them from the rest of your plans.
Examples:
- Due dates (such as bills)
- School assignments and exams
- Birthdays
- Events
- Your children’s milestones
- One off tasks (such as seasonal tasks you’re likely to forget about)
- Urgent tasks / reminders
Because due dates can change, I recommend using erasable highlighters.
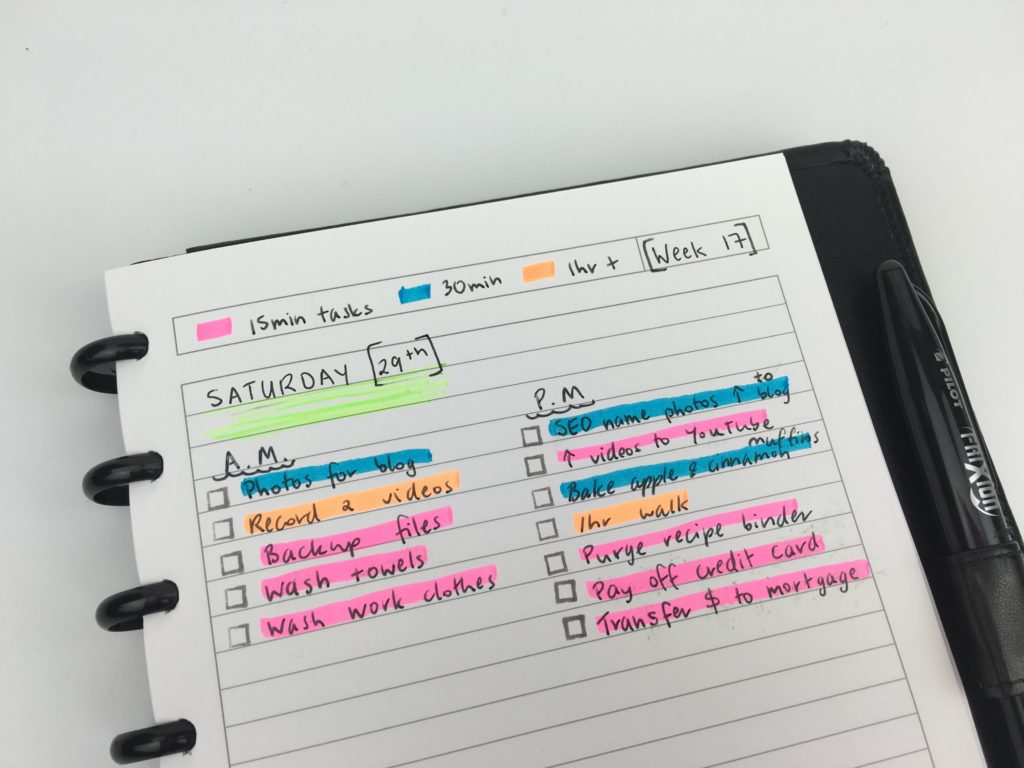
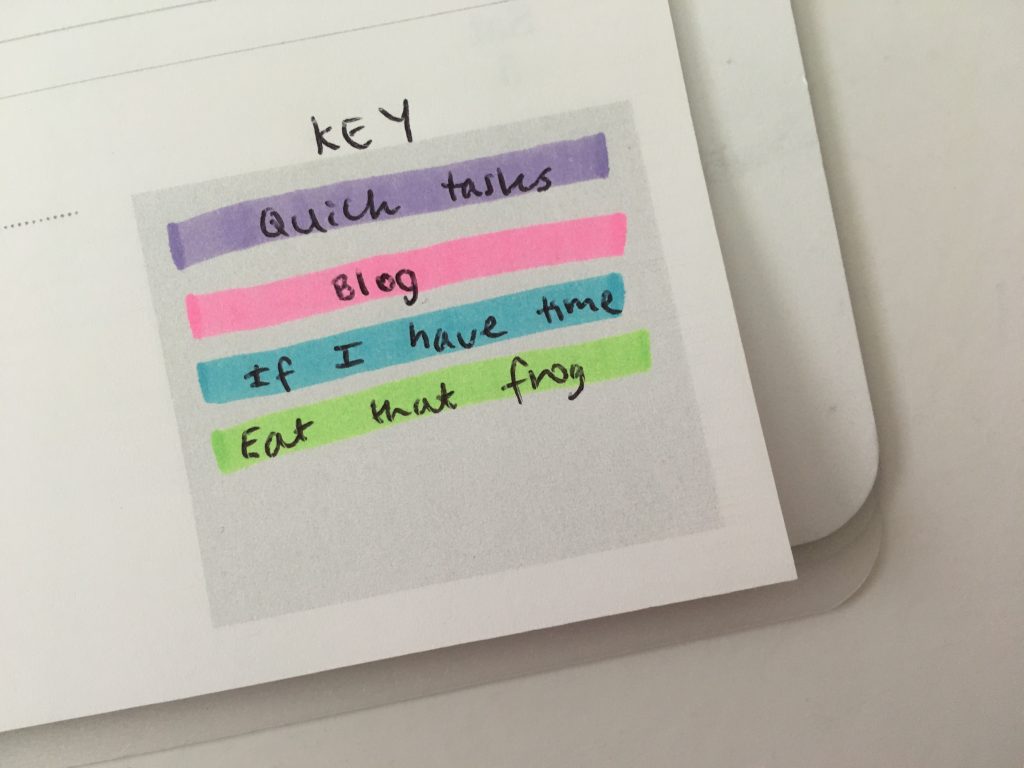
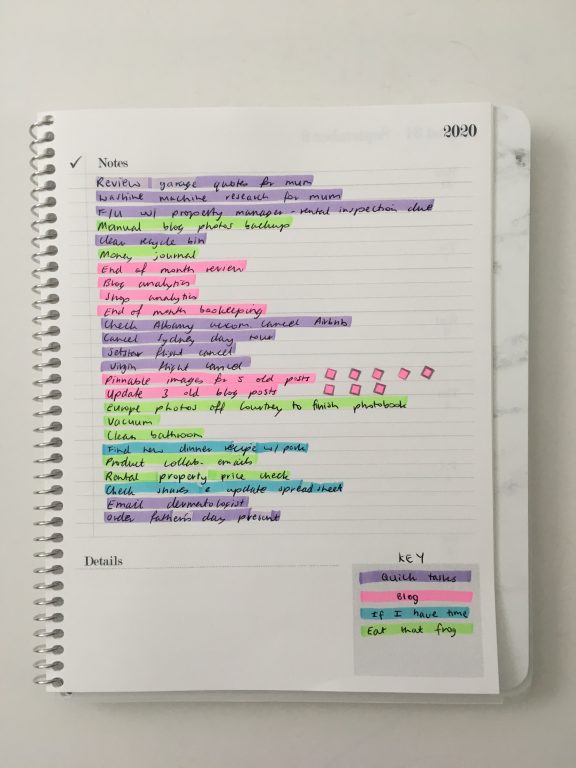
4. Color coding by time
I prefer to use highlighters if color coding by time as I can do a massive brain dump then color code the tasks. I tend to stick to:
- 15 minutes
- 30 minutes
- 1hr +
If a task is going to take longer than 1 hour I split it into 2 smaller tasks.
Highlighters are better than pens for color coding using this method, as you don’t need to worry about switching between pens – it’s much more efficient to get everything down on the page then color code them according to estimated time. It’s quicker to color code using a highlighter than colored pen.
Highlighters are also a good method for highlighting tasks by priority
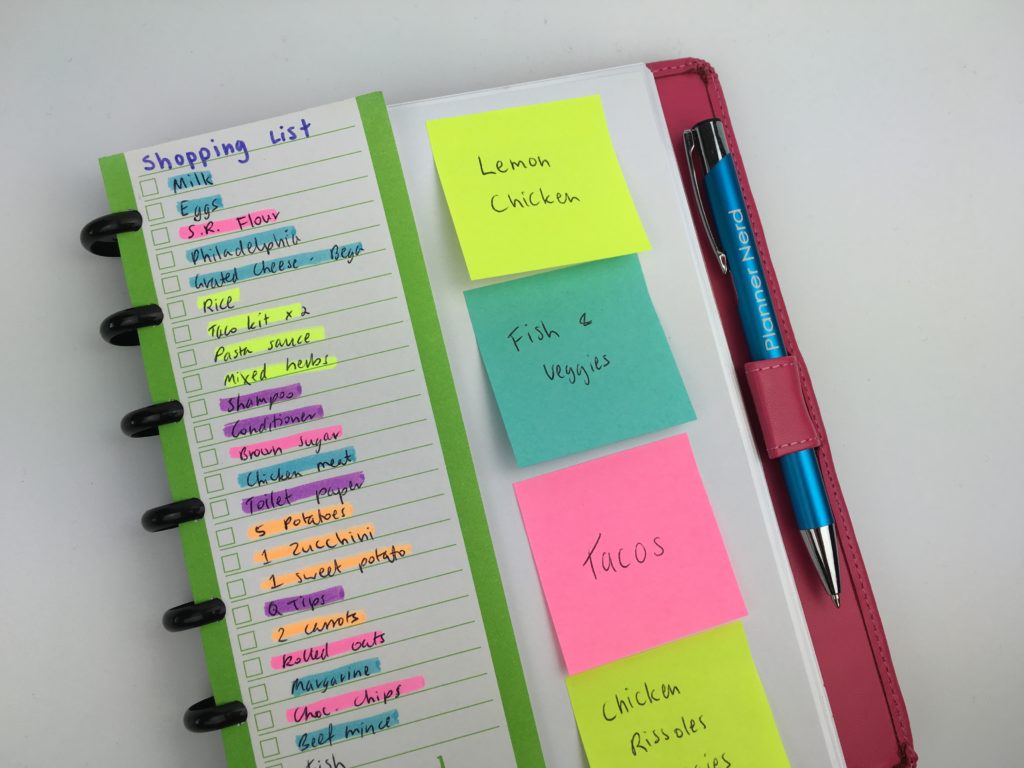
5. Color coding your grocery list
I’ve made printable grocery lists in the past with the categories pre-printed but it didn’t work for me – some weeks I’d need more space for one category but less of another.
So instead I just write 1 list and highlight to color code by store section – much easier and quicker!
Related: The Process Behind Making a Printable Planner

6. Color coded bill paying
If you like to color code using pens, highlighting bills when they’re due will help them stand out more.
It’s also a good idea to use highlighter if you use a monthly calendar to keep track of bills, and use the same calendar for birthdays, events etc. as the calendar can get a bit crowded with too much text.
Related: Color coded monthly meal planning using sticky notes
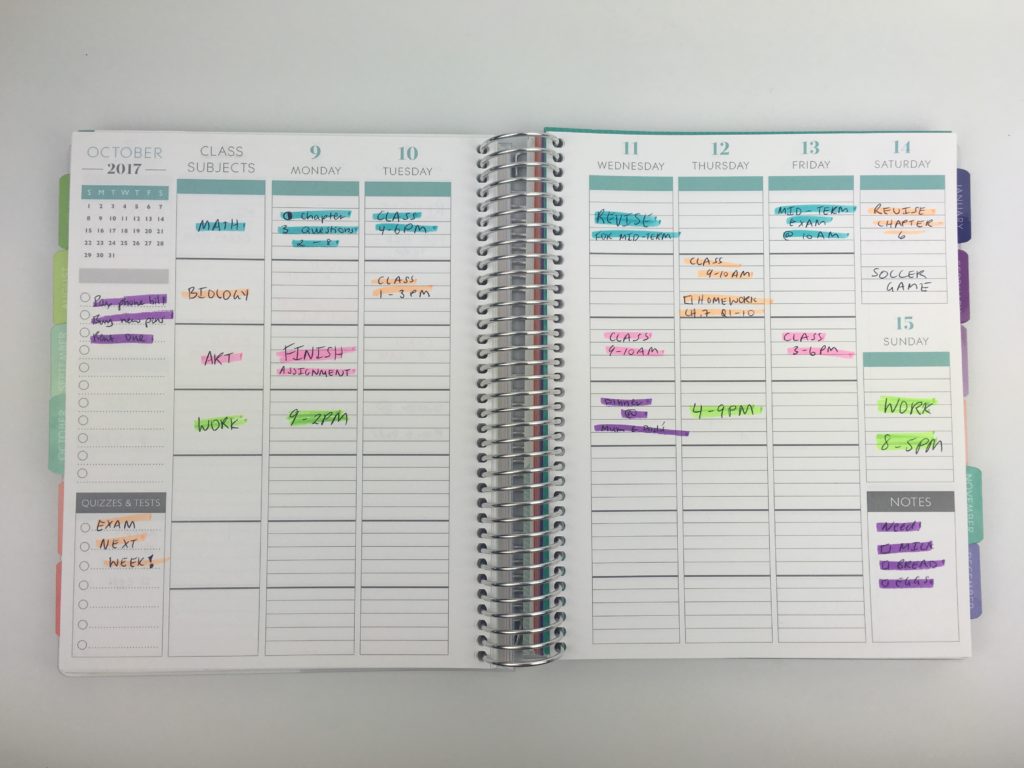
7. Highlighting tasks when completed
If you’re not keen on checklists or you’re short on space in your planner (which is usually the case for vertical style planners), then highlighting the task is an ideal way to signify that you’ve completed the task.
A single line through the task with the thinner tip of a highlighter is a good way to distinguish when you’ve started a task / it’s in progress, and then use the fat chisel tip to highlight the task once completed.
If you don’t have colored pens with you, using a small highlighter swatch instead of drawing a checkbox in a different color is another option for color coding (that’s also quick!)
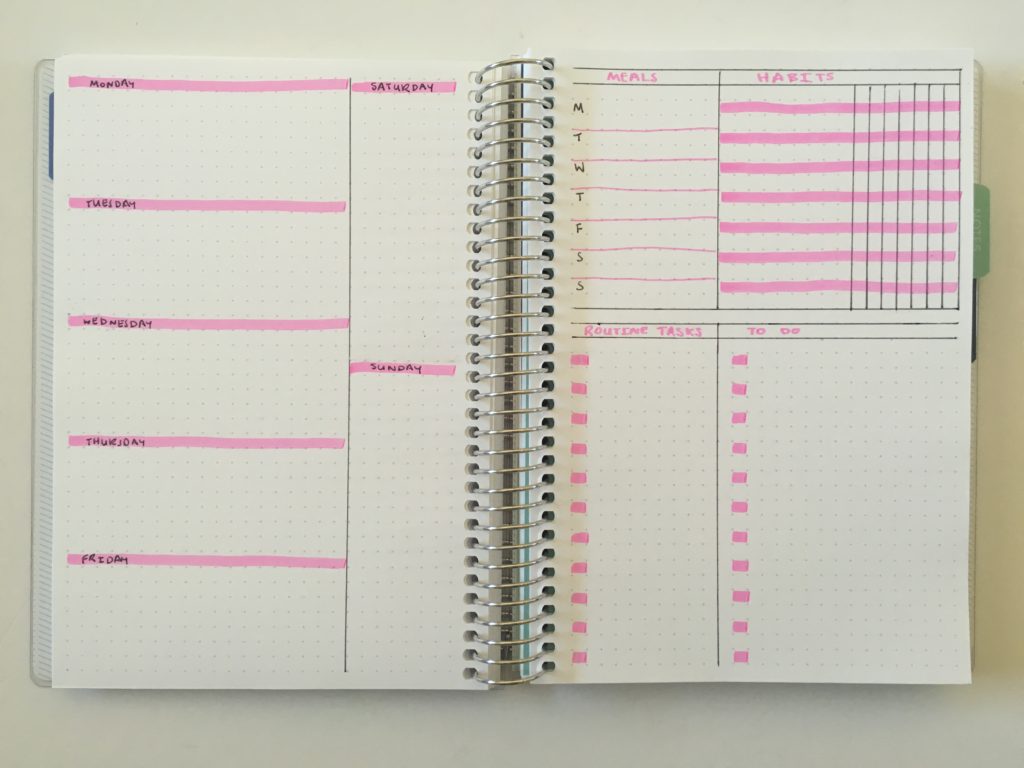
Another way I like to use them if with a routine / habits tracker.
For week 1 of the 52 planners in 52 weeks challenge I used only a habit tracker for weekly planning. I drew a border around the box of the day I planned to do the task. This method is ideal for those once a week tasks or those that only need to be done every few days rather than every single day of the week.
![]()
Once the task was completed, I shaded in the box. It made it very easy to see which tasks had been completed and which tasks still needed to be done.
Related: Week 1: Using a daily habit/routine tracker to plan your week
![]()
8. Lines
If you have a notebook with faint dots, using highlighters to create lines to write on helps (plus it looks good).
Read more: Quick and easy washi tape and highlighters weekly spread
Related Posts
- Week 18: Making a DIY printable planner with a flexible layout
- Ultimate Comparison: Erin Condren Life Planner versus Plum Paper Planners – Which planner is better?
- Planner companies that will let you download, print and try their planner layout for free
- 6 Ways to color code your planner to increase productivity
Highlighter reviews
- Brush pens versus highlighters: which is better for planning?
- Pens & Highlighters Smear Testing: Which ones don’t smear
- Favorite erasable highlighters for planning
- Best pastel highlighters for planning and bullet journaling
- Favorite dual tip highlighters for planning (roundup)
- Highlighter Brands Comparison (And My Favorite Highlighters for Each Brand)
- Highlighter swatches and thickness comparison (38 brands compared)
- 7 Highlighter brands that aren’t neon colors
Found this post helpful? Pin it!

Leave a Reply