How to Set Up ConvertKit and Make a Subscriber Opt In Image
Following on from last week’s post about how to start a blog (and why your Etsy shop needs one), another one of my biggest regrets when it comes to my blog and online business is not starting an email list sooner! Don’t wait 3 years like I did, start your email list TODAY (it only takes about an hour to set it up).
Which email software should you use?
I know a lot of people use Mailchimp (I’ll admit I was enticed by their free plan for up to 2,000 subscribers – weren’t we all?) but I wouldn’t recommend it. I started out using Mailchimp and hated it for a couple of reasons:
- It’s expensive when you have a lot of subscribers
- You can’t tag/segment lists if you want to pitch a product
- There’s nowhere near the number of form templates that ConvertKit has
- I found it hard to navigate and not user friendly
- Duplicate subscribers – if you have multiple opt in forms and the same person signs up for each, they will count each signup as a new person and charge you for it
Why I prefer (and use) ConvertKit
- Recommended by numerous popular bloggers
- It was easy to carry over the subscribers I had in Mailchimp (and it’s super easy to add new subscribers)
- You can tag/segment subscribers
- Easy to use
- Analytics (more on that later in this post)
- You can set up free email courses such as my mini course: How to make patterns in Photoshop
The only downside to Convertkit is the price. I’ll admit it’s a bit pricey, but I pay it because:
- Unlimited forms, landing pages, emails etc. there’s no limit to how many emails you can send
- They have extensive help pages if you get stuck including lots of quick and easy to follow step by step video tutorials
- Fast response times if you send them an email and need help with something
- If you forget to pay the monthly subscription fee (or in my case, forget to transfer money to my traveller card – one of 5 main ways I save money in my online business), they don’t cancel your account, they simply send you a friendly reminder email and give you a couple of days to pay
- If you sign up to be an affiliate they literally give you email scripts you can copy and paste
- Schedule emails – you can choose to send emails only on weekdays, send follow up emails a certain number of days after someone subscribes
- You can redirect to your own landing page (I’ve not tried this yet but it’s on my to do list!)
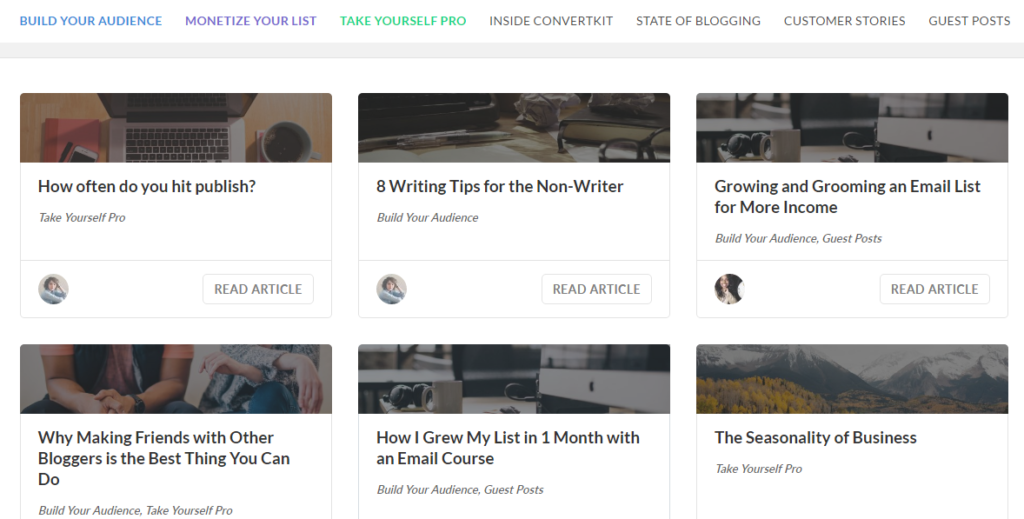
- They hold regular webinars and publish regular blog posts to help you grow your email list
- I’m yet to find a plugin that ConvertKit does not integrate with
Getting started using ConvertKit
Once you set up your ConvertKit account, you’re going to want to set up an opt-in box. I recommend creating an image that people can click on which will take them to a landing page. For example, this is my mai
n subscriber sign up landing page.
I created the image in Canva – see below for a video tutorial.
To enlarge the screen of the video, click the square icon in the bottom right hand corner of the video (it will say ‘full screen’ when you hover your mouse over the icon).

Subscribe to my YouTube channel for more planner related videos & graphic design tutorials!
How to increase your subscribers
Make sure your newsletter opt in box is in multiple locations:
I try and include a text link such as this one in all of my blog posts.
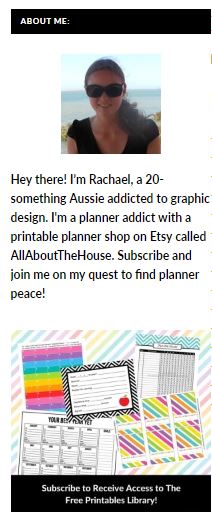
Add a signup box to your blog sidebar, directly underneath your about me excerpt. In my about me excerpt I have a call to action and literally say ‘click the image below to subscribe to my blog’
If people want to download any of the free printables on my blog, they have to subscribe to access the printables. Some examples:
- FREE Printable To Do Checklist Planner Insert (For Erin Condren or Any Planner)
- What Expenses Can I Claim? FREE Printable Checklist of 100 Tax Deductions
Try a pop up box – whether you love em or hate em they’re effective
This is the form I created that is embedded in blog post. Try it out 🙂
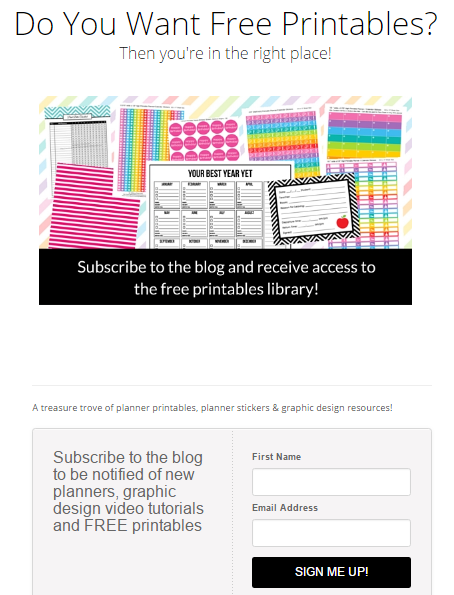
Add an incentive. Please don’t put something like ‘subscribe for updates!’ – very few people are going to be enticed by that. You need a free download, video, checklist or printable to encourage people to subscribe. For example, I created 2 free printables for tracking which Facebook groups you’re a part of, posting days, group rules etc. which I shared in this post with 60 Facebook Groups for Planner Addicts.
![]()
I’ve had more success with landing pages that show the printabes they’re going to receive (so in the example above, the printables for tracking Facebook groups) rather than a generic image showing some of the printables in the free printables library (even though subscribers also gain access to that when they download the Facebook tracking printables). I.e. the landing page should match the opt in image. The landing page is the last ‘push’ to get people to subscribe so if you botch the landing page, you’re losing subscribers.
Related: How to make planner printables (advice from a planner addict that’s made over 4000 printables)
I’ve found that I have a higher conversion rate with landing pages that are links to an image such as this one.

Here’s the statistics for comparison:
An embedded sign up form
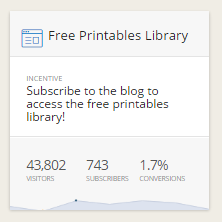
Versus a landing page

44% versus 1.7%!
I think it’s time I go and make some more landing pages ;p
Related post: 7 Tips for Creating Blog Post Titles
Reasons why I think landing pages convert better:
- There are no navigational links – the only thing people can do is enter their details to opt in or close the tab. When you remove lots of options it eliminates analysis paralysis and people don’t get distracted clicking on other blog posts or other pages of your website
- The sign up button is the focus of the page – it’s impossible to miss it which can be the case with sign up forms embedded in the sidebar of your website, and images can blend in within the body of blog posts
Tags & Segments
You can set it up so that people who sign up via certain opt-in forms will be ‘tagged’ then you can use these tags if you want to pitch a product, or if you blog about multiple topics and only want to send posts about one topic to half your list. It’s also useful for Beta testing.
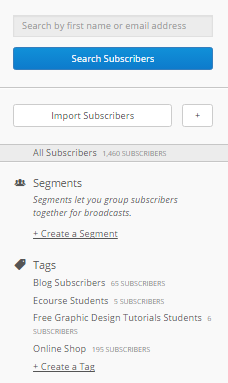
Importing Subscribers
If you made the mistake I did of initially using Mailchimp you can import all of your subscribers to ConvertKit. All you need to do is download a CSV file then upload it to ConvertKit (takes less than 5 minutes).
I also use the feature for people who join my mailing list at craft shows and markets (I have a printed out newsletter sign up form they write their name and email address on).
Related post: Printable Craft Show Planner for Handmade Markets and Trade Shows (Editable)
Analytics
ConvertKit analytics also has a graph to give you a visual of how your email list is growing, and highlights each of your signup forms in a different shade of blue so you can see which are proving most effective. Here’s a snapshot taken from today:
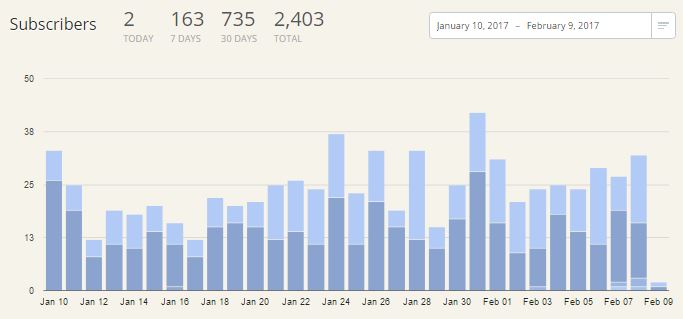
I do wish you could choose a color for each form and color-code them but at the moment Convertkit doesn’t have this feature 🙁 and shows each form in a different shade of blue. If you hover your mouse over the shades of blue you can see which forms are proving most effective.
Set up email sequences
Here’s a peek at what is looks like when you want to set up an email sequence (I use this for my free ecourse: How to make patterns in Photoshop)
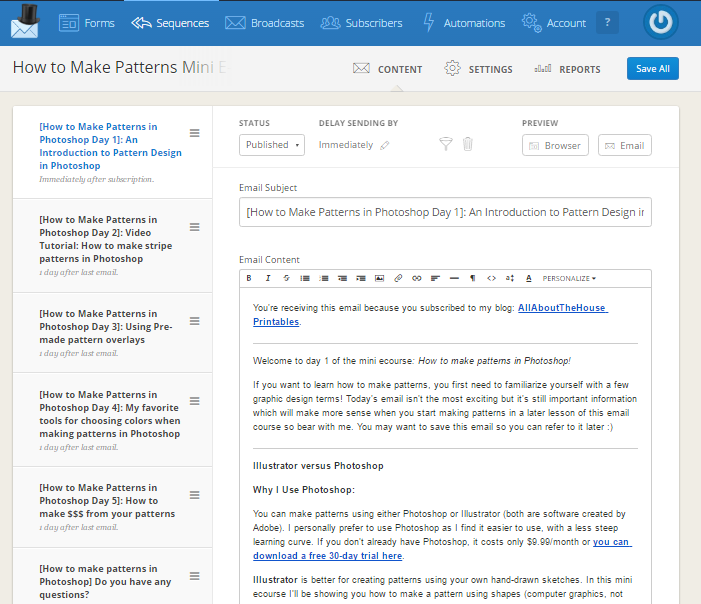
It’s very similar to writing a post in Wordpress, you can choose when to send each email by select the ‘delay sending by __’ feature.
Just remember to hit save after you type each email.
How much does ConvertKit cost?
Pricing starts at $29 for up to 1,000 subscribers, then $49/month for 1,001 to 3,000 subscribers with the price going up incrementally the more subscribers you have.

I’ll admit I was hesitant to pay the cost of ConvertKit in the beginning but now I’m so glad I did it. My email list has grown from 0 to 1,500 in 6 months and all I did was set up 3 opt in forms and a free email course, all of which took 2 hours to set up and create the opt in images.
If you want to get started growing your email list, click here to sign up to ConvertKit.
Obligatory disclaimer: This post contains affiliate links. I only recommend products I actually use. If I’ve taken the time to write a detailed blog post (such as this one) to promote a company then you know it’s a product I would recommend even if I didn’t receive a small commission (at no extra cost to you) if you choose to sign up through my affiliate link!
Related Posts
- How to start a blog (step by step tutorial)
- 7 Tips for Creating Blog Post Titles
- 101 Blog Post Ideas (for any type of blogger)
- How to keep track of blog post ideas on your phone (no paid app required)
- How to do market research for your Etsy shop or online business using Marmalead (review includes video tutorial)
- Simple spreadsheets to keep track of business income and expenses for tax time
- How to add an Etsy shop preview to your blog
- 13 Lessons learned after 13,000 Etsy Sales