How to start a blog (step by step tutorial)
In this week’s business & blogging related post I’m sharing a tutorial I’ve been meaning to post for a while now: how to start a blog! If blogging is something you’ve been thinking about doing for a while now but you’re not sure how to start – this post will show your step by step how to start a blog.
Starting a blog has many benefits if you have an Etsy shop or online business including:
- Drives traffic to your Etsy shop or online store = more people visiting your shop = higher chance of making sales
- When you link to items in your shop that increases the number of views so those items rank higher on Etsy
- The more links you have coming from outside websites to your Esy shop or online store, the more reputable your site appears to search engines like Google and the higher you’ll rank
- You can answer FAQ’S and share information about how to use your products (such as tutorials)
- If you’re already on YouTube you can embed YouTube videos into your blog posts to increase the number of views on your videos (and hence, your ad revenue)
- When you start a blog and share information you show people that you’re a real person. People want to buy from a real person so are more likely to buy from you
How to start a blog
I use Wordpress for my blog and host it via Bluehost. You need a host such as Bluehost so your domain name doesn’t include .wordpress before the .com part of the URL. By purchasing a domain name you can get rid of the .wordpress part. If you want to monetize your blog with advertising revenue such as via Google Adsense, then you need to have a self-hosted blog to run ads on your site.
Why I chose Bluehost
- Cheap! Like, really cheap! If you click the image below you can become self-hosted for just a few dollars per month! Bluehost had the cheapest hosting rate I could find
- Bluehost offers technical support including live chat (and they’re quick to reply)
- Discount for purchasing 12 month plan (although you can cancel and refund the remainder of your 12 month plan if you change your mind
- Can get a free domain name when you sign up for a 12 month plan (remember you can cancel before the 12 months is up if you are unhappy with the service and receive a refund for the remaining months)
- Wordpress is still free if you switch to Bluehost (you only need to pay for the Bluehost hosting)
- Highly recommended by numerous bloggers that make multiple 6 figures per year. I figured if they were still using the hosting service when their blogs receive hundreds of thousands of page views, that Bluehost could handle a lot of traffic, and I would haven’t to switch to another host as my blog grew. If it’s good enough for 6 figure bloggers then I figured it would be good enough for me! J
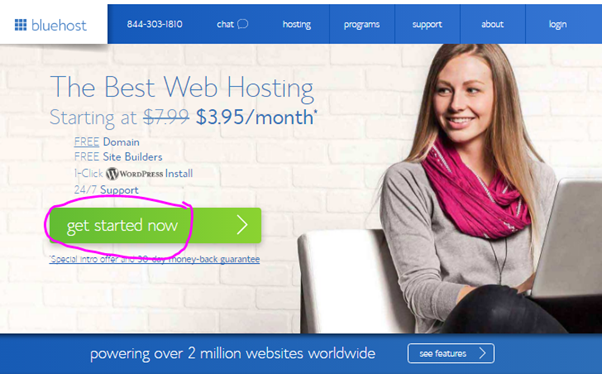
How to start a Wordpress blog on Bluehost
Go to Bluehost and click ‘get started now’
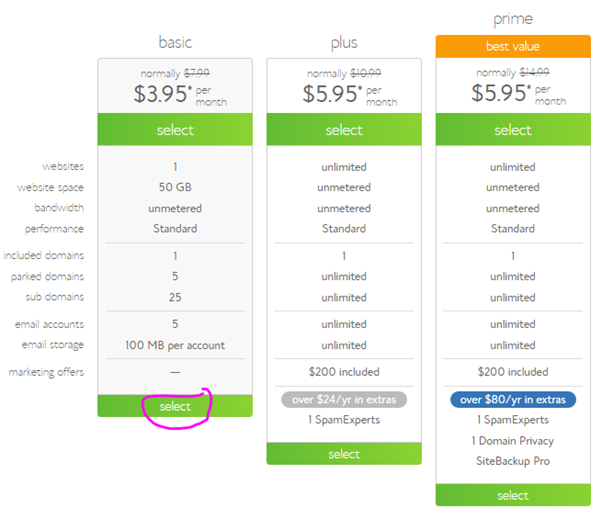
Choose a plan
I use the basic plan – you can always upgrade to one of Bluehost’s bigger plans if you need to at a later date.
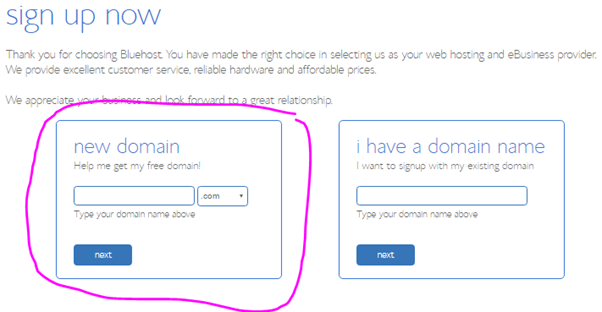
Choose ‘new domain’
Make sure your domain name is:
- Easy to spell (avoid ‘cute’ spelling or words e.g. kupcakse instead of cupcakes)
- Easy to remember
My domain name is www.allaboutthehouseprintablesblog.com – I wish I didn’t include the ‘blog’ part so that is was simply alllaboutthehouseprintables. I could change it but all my marketing images for my shop include the URL and it’s too much effort to change it. Don’t make the same mistake I did!
If the domain you want isn’t available, try using different variations or synonyms of some words. Bluehost will also offer you some alternative suggestions.
I don’t recommend changing your URL from the common .com because when most people type in a URL they add .com. If your URL is .org or .net it may come up with a ‘site not found’ error message – you want to make it easy for people to find your blog!
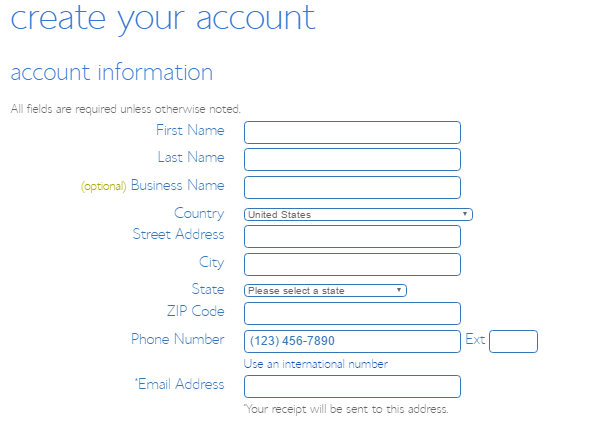
Create an account
Then choose your package
I recommend the 3 year plan since it’s the cheapest. If you want to cancel your plan later on you can easily do so and they’ll refund you for the unused portion. They also do a full refund withi 30 days of signing up If you change your mind so you have nothing to lose!
If you choose the month to month plan it’s more expensive and if you forget to pay the monthly fee your site will be down which won’t be a good look for visitors to your blog.
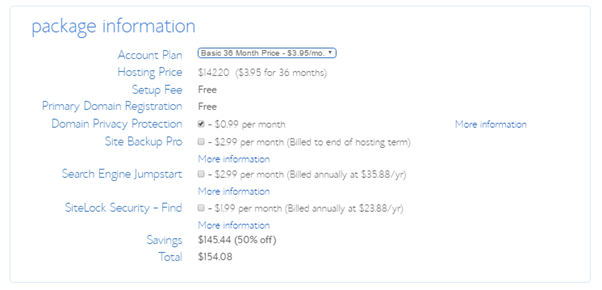
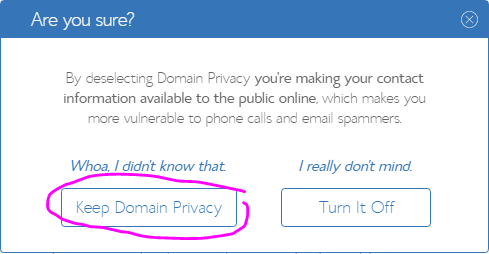
I also recommend adding domain privacy protection so your address isn’t available to anyone on the internet. It’s only an extra $0.99 per month. Remember that blue hosting is a tax deductible expense.
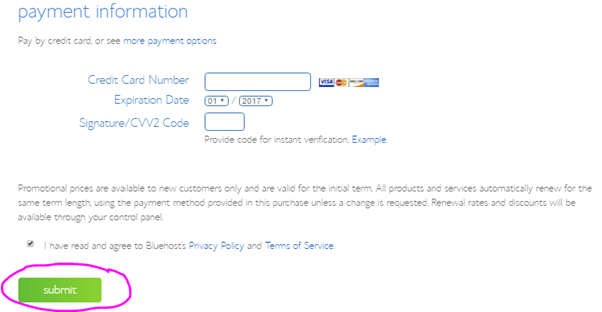
Then enter in your payment information
All payments are made via USD. If you live in Australia like I do I recommend getting a travellers card and loading it with USD – that way you avod cross currency conversion fees when using a credit card. I recommend the Multi-Currency cash passport.
Once you’ve entered your payment information click the ‘submit’ button.
Install Wordpress on Bluehost
Within the hosting menu of Bluehost
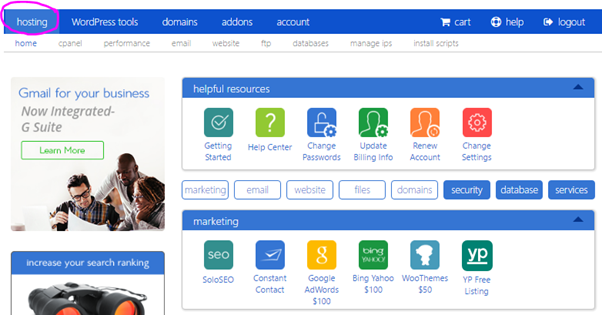
Scroll down and click the ‘install Wordpress’ button
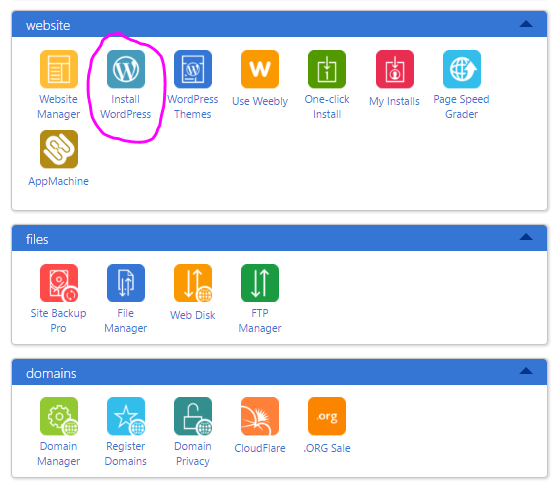
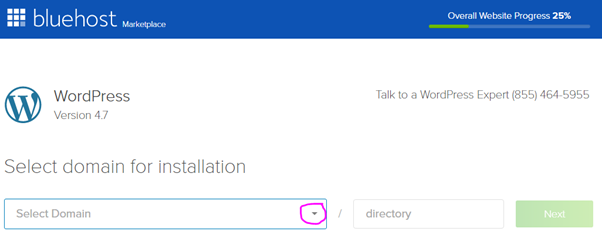
On the next screen that appears click on the dropdown arrow and find your domain that you want to install.
Then click next.
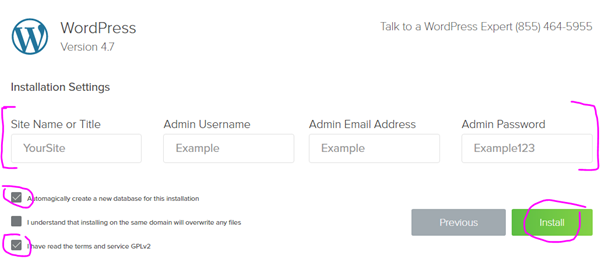
Last step:
Fill out the details highlighted bellow including an admin username and password. Don’t use ‘admin’ as the admin username pick someone more unique and include numbers and/or symbols so people won’t be able to hack your website.
Then click ‘install’ and you’re ready to starting blogging! 🙂
Logging in to your Wordpress blog
To access the admin/backend area of your site, type your website address and add /wp-admin to the end e.g. www.myblog.com/wp-admin
Wordpress should also send you an e-mail with a link to your admin (make sure you check your spam/junk folder if you can’t find the email).
Use the username and password you picked to log-in.

Choosing a blog theme
To avoid complicated back end coding which would take hours to learn, bloggers use blog ‘themes’ which are basically just a template they customise to suit their brand.
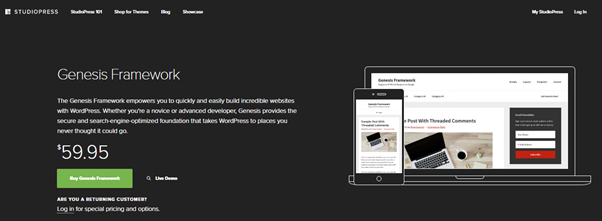
To ‘host’ these themes you’ll need the genesis framework which costs $59.95 but before you go rush and buy it – if you buy a blog theme from Studio press(which is associated with Genesis framework), then the cost of the Genesis framework is cheaper.
If you’re cringing at spending the money on the Gensis Framework and a paid theme I can assure it’s worth it.
While you can always try a free Wordpress theme for a while and change to a paid theme later on, it will probably slow the growth of your blog.
Before I was using one of the free Wordpress themes and my site looked, well, tacky. My old blog is still there with the .wordpress URL if you want to see what I mean! https://allaboutthehouseblog.wordpress.com/
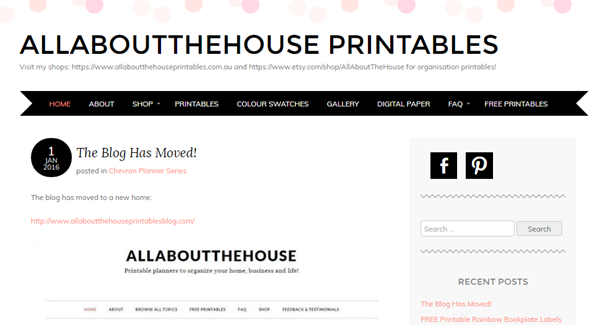
My old site design using one of the free Wordpress themes
When I purchased a paid theme:
- People viewed my site more often – my page views increased substantially
- You can do so much more customisation such as color, fonts etc.
- My site looks way more professional using a paid theme than WordPress’ free themes
- If you do use the free ones your site will look like everyone else – you can tell if people are using the free Wordpress themes because so many blogs use the exact same themes and since the free Wordpress themes don’t really allow for any customisation they all look the same (not good for brand recognition!)
Numerous sites sell blog themes (not just Studiopress/genesis), however they can get really expensive and not all of them offer support/tech help if you get stuck.
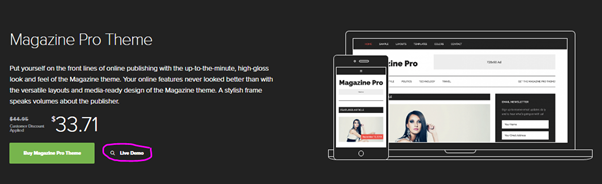
The blog theme I use is a paid theme from Genesis/Studiopress. If you’re not sure what colors or direction you want to take your blog, I recommend choosing black as this will go with everything.
IMAGE
They also have a ‘showcase’ where you can see examples of sites that use their themes and the different ways you can customise and make it your own.
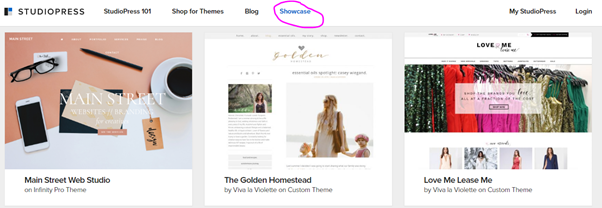
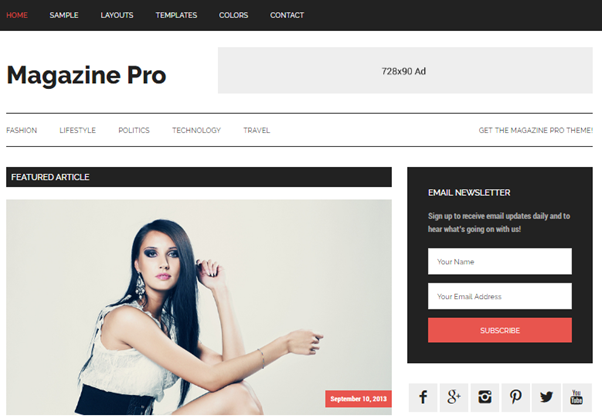
If you find a theme you like, click on ‘live demo’
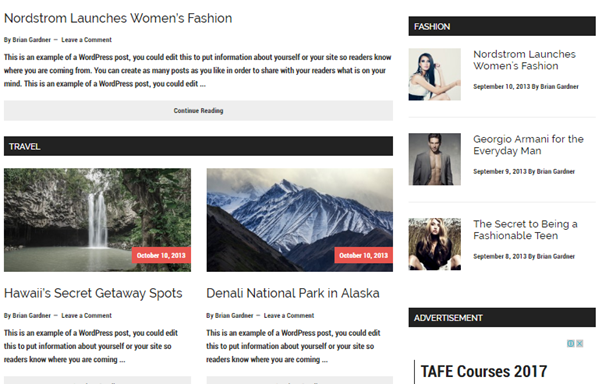
And you’ll be able to see how the blog looks in ‘real life’ – you can click on everything to see what a blog post page looks like, what the about page would look like etc. you can take a complete virtual tour.
Love this theme… hmmm maybe a site redesign is in order…
You can filter their themes to only show those with 1 column,2 columns, those they recommend for food bloggers etc.
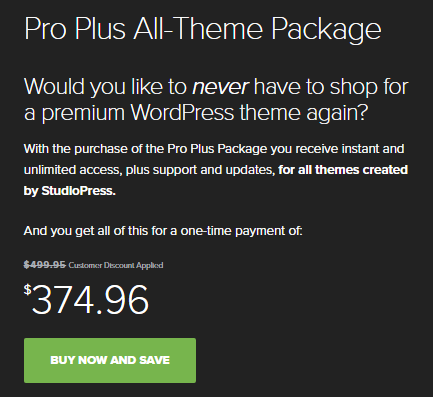
If you’re super indecisive you can purchase ALL of their themes for a discounted price but you may want hold off on that in the beginning 🙂
How to install the Genesis Framework to your blog
Once you’ve chosen a theme and purchased it with the Genesis framework you’re ready to install it.
To install a Genesis theme, go to appearance’ then ‘themes’ then ‘install’ if you get stuck the friendly folks at Studiopress/Genesis will help you if you email them J They also have extensive help pages on how to edit/customise each of their themes on their website.
Installing a Theme
To install a theme Go to the ‘appearance’ menu then ‘themes’ and click the big plus sign that says ‘add new theme’
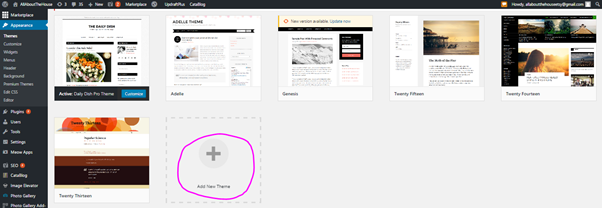
Then follow the instructions to install the theme you just purchased.
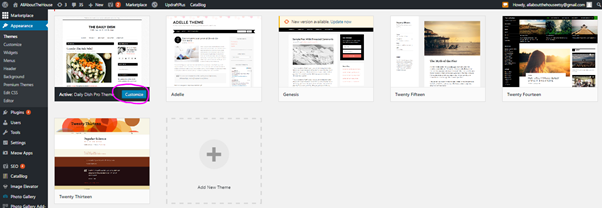
Customising your Theme
If you want to make changes once you’ve installed the theme (or later on down the track) just click ‘customize’ button next to the theme you’re currently using.
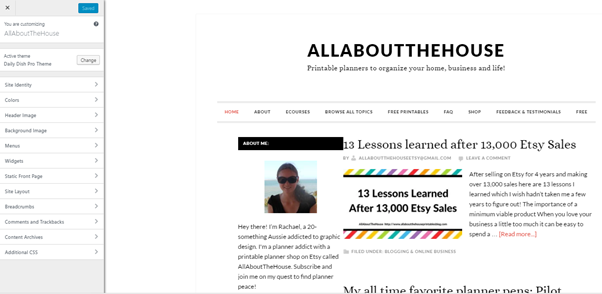
And it will bring up this menu on the left where you can change the colors, site layout, fonts, header image, main menu etc.
Tips for blogging with Wordpress
Save your username & password somewhere safe (I use a password log)
When you’re logged into the back end of your site, you can make changes using the left hand menu
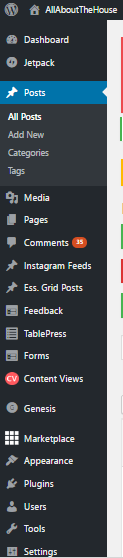
You can add a new post/s by clicking on ‘Posts’
If you want to add a page, click on ‘page’
If you want to add an image, click on ‘Media’
To add items to your sidebar, go to ‘appearance’ then ‘widgets’ (no idea why it’s called widgets)
SEO Optomising your blog
I recommend changing permalinks so they are SEO optomised.
Go to the main menu and choose ‘settings’ then ‘permalinks’ and make sure you select ‘post name’ from the options
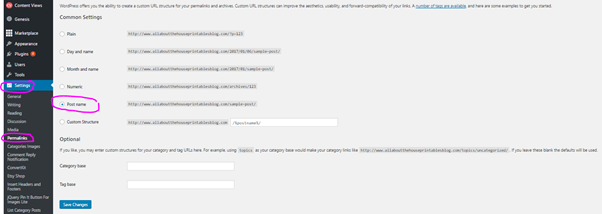
That way the URL’S for your blog posts will look like this:
https://allaboutplanners.com.au/13-lessons-learned-13000-etsy-sales/
Rather than a bunch of random numbers at the end of the URL.
Don’t forget to click ‘save changes’
Now that you have a blog, it’s time to create some content! I recommend these posts:
- 7 Tips for Creating Blog Post Titles
- 101 Blog Post Ideas (for any type of blogger)
- How to keep track of blog post ideas on your phone (no paid app required)
If you want to set up a mailing list (which I highly recommend you do!) I use and highly recommend Convertkit. You’ll want to start collecting subscribers from the get go (I totally regret waiting 3 years to start my mailing list).
I’ll be doing a detailed step by step guide on how to set up ConvertKit next week. For now, focus on writing a couple of posts for your blog – make sure you link your new blog in the comments below so we can check out your blog 🙂