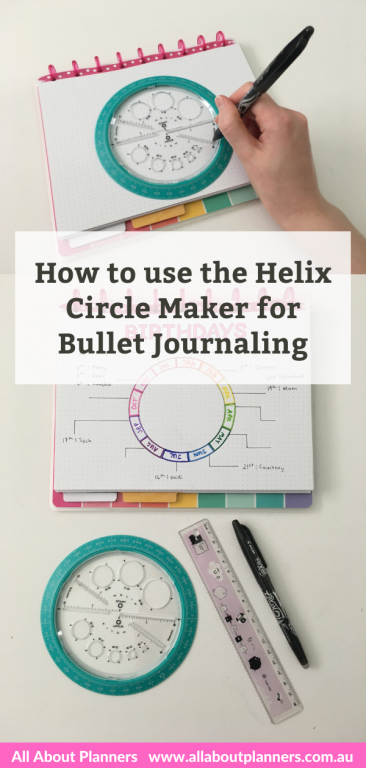
How to use the Helix Circle Maker for bullet journaling
In today’s post I’m going to show you how to use a very handy tool for bullet journaling – the helix circle maker.
This post contains affiliate links. If you make a purchase after clicking one of these links I’ll receive a small commission in exchange for referring you (at no extra cost to you).
This nifty tool can make circles at many different sizes perfectly rounded, no need to muck around with a protractor, compass or try and draw circles freehand. There are stencils with circle templates but the circles end up being really small, so this is where the Helix Circle maker comes in.
How to use the Helix Circle Maker for bullet journaling
I purchased the helix circle maker on Amazon.
Step 1: Choose your circle size & page size
You can use the circle maker in an A5 size notebook such as the Leuchtturm, but it will take up most of the page and it’s more difficult to use as there’s no space around the circle to mark up the split into either 31 days for a dated calendar, or 12 section for a monthly calendar (or however else you want to use the circle maker).
if you’re not sure about sizing, try this on a scrap piece of paper first.
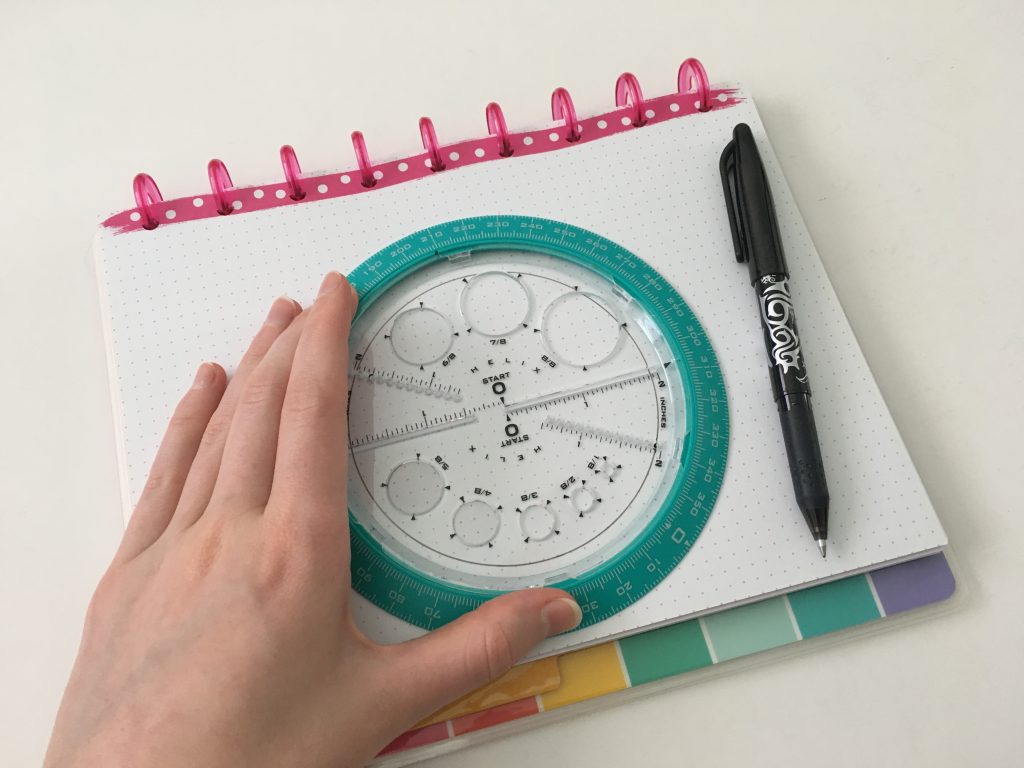
Step 2: Position the circle maker on the page
This is the Happy Notes classic size notebook.
I use the Frixion erasable pens just in case my hand or the circle maker slips. I placed the circle at the bottom of the page to leave space at the top for a heading.
Step 3: Draw the circle
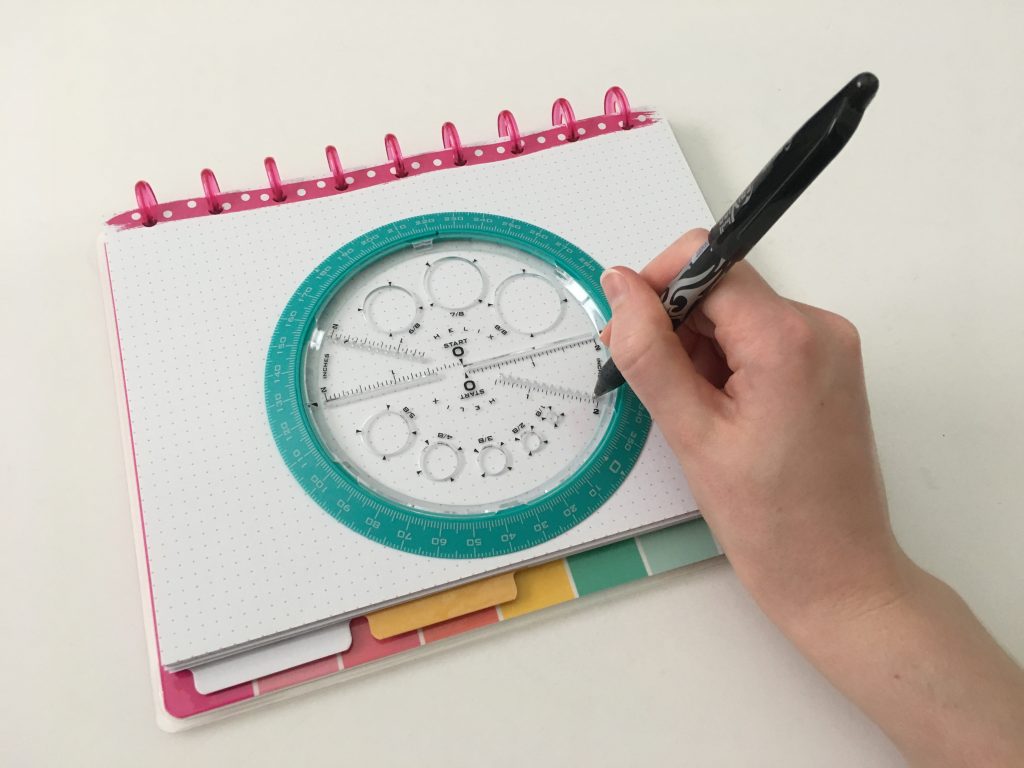
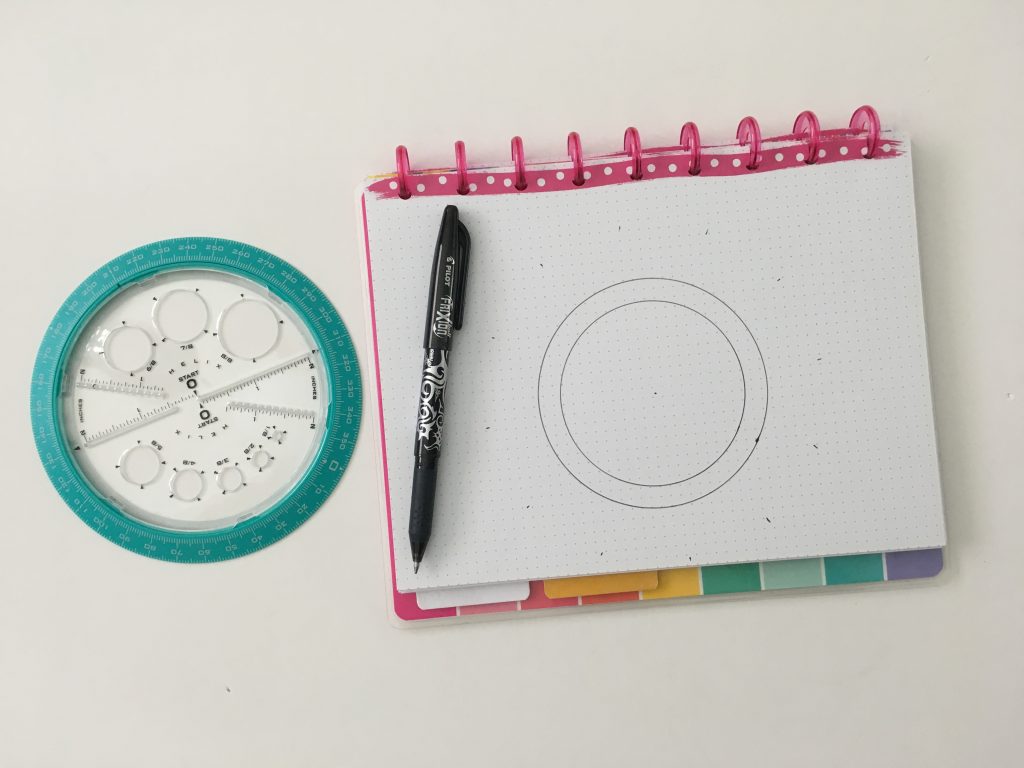
You can use the outer edge of the circle but I find it makes it too big. Instead, I use the small circles in the clear part of the stencil. Place the tip of your pen in one of the mini circles (refer photo above), hold the circle maker with your other hand, then push your pen down and guide it around the page.
Step 4: Draw your inner circle
Decide how wide you want the space where you’re going to write to be. I usually count 3 – 4 dots in from the one I used to draw the outer border of the circle. Just like we did in step 3, place your pen in the circle, push down and guide the pen around until it creates a circle.
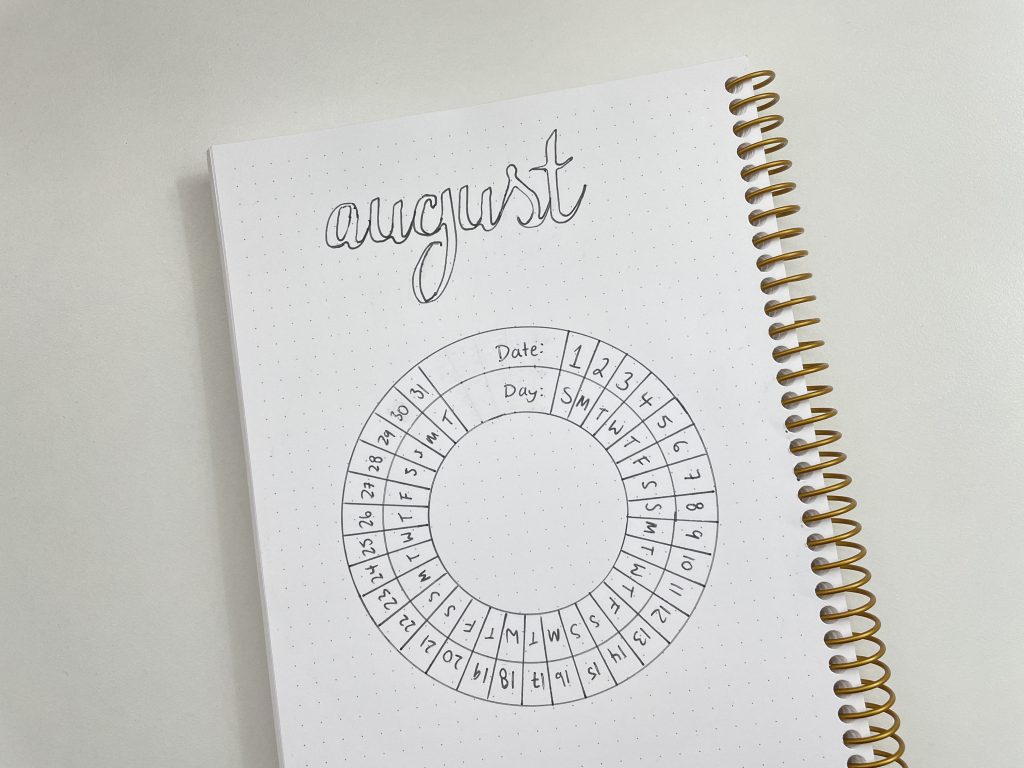
Step 5: Mark your spacing
If you want to do 30 or 31 days for a monthly calendar, planner or habit tracker, I put a mark at each 10 degree point on the circle. You’ll end up with a few spare at the end where you can write ‘day or date’ or anything else you need.
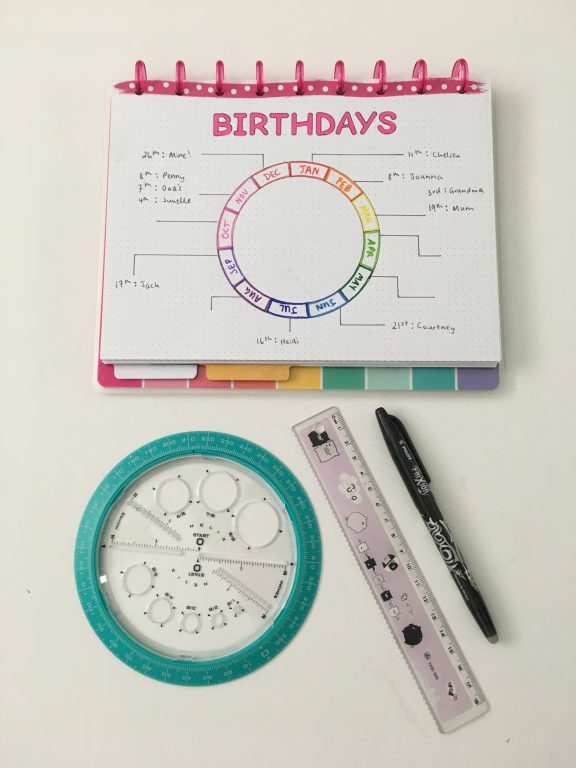
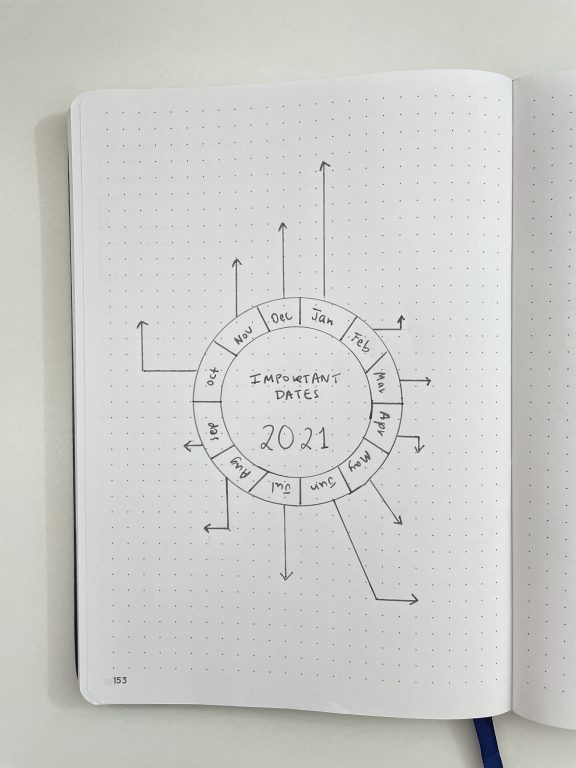
For a 12 month annual overview or birthdays / events calendar I put a mark every 30 degrees (360 degrees in a circle / 12 months = 30 degrees for each month)
![]()
Step 6: Add your titles

Step 7
You can put as much beside each month as you like, just keep in mind how much space you’ll need when you draw the lines coming out from each month. So for this birthday tracker I only put the people’s names for those I’ll be buying presents for. You could add your pet’s birthdays too!
![]()
Step 8: Decorate
Add some washi tape, color code each month, add a title with stencils, doodle in the centre of the circle or add any other decoration you like.
![]()
I added a tab to mark the page for quick reference in the future. You can get these customisable tabs in my shop.

You can also use the helix circle maker for monthly planning (habits, goals, events. mood tracker, no spend etc.)
Related post: 100 things to put in your habit tracker of your planner or bullet journal (plus free printable habit tracker)
And make mini ones for an annual overview for goals, cleaning tasks, seasonal to do’s, life admin for things often forgotten (e.g. health check ups).
Related post: 52 Life admin tasks to add to your planner this year
I purchased the helix circle maker on Amazon.
More time saving planning tools
- 7 Quick and easy ways to make your bullet journal less boring
- The best time saving tool for bullet journaling (Ink by Jeng Row & Column Stencil)
- 12 Monthly planning bullet journal spreads (you can do in 5 minutes or less)
Found this post helpful? Pin it!