
Planning with a functional minimalist DIY weekly planner printable (52 Planners in 52 Weeks – Week 35)
Given that I’m more than halfway through this planner challenge I decided to take stock of what I do and don’t like in terms of planner layouts and design a printable that was more custom to my liking, rather than adapting a generic ‘off the shelf’ planner.
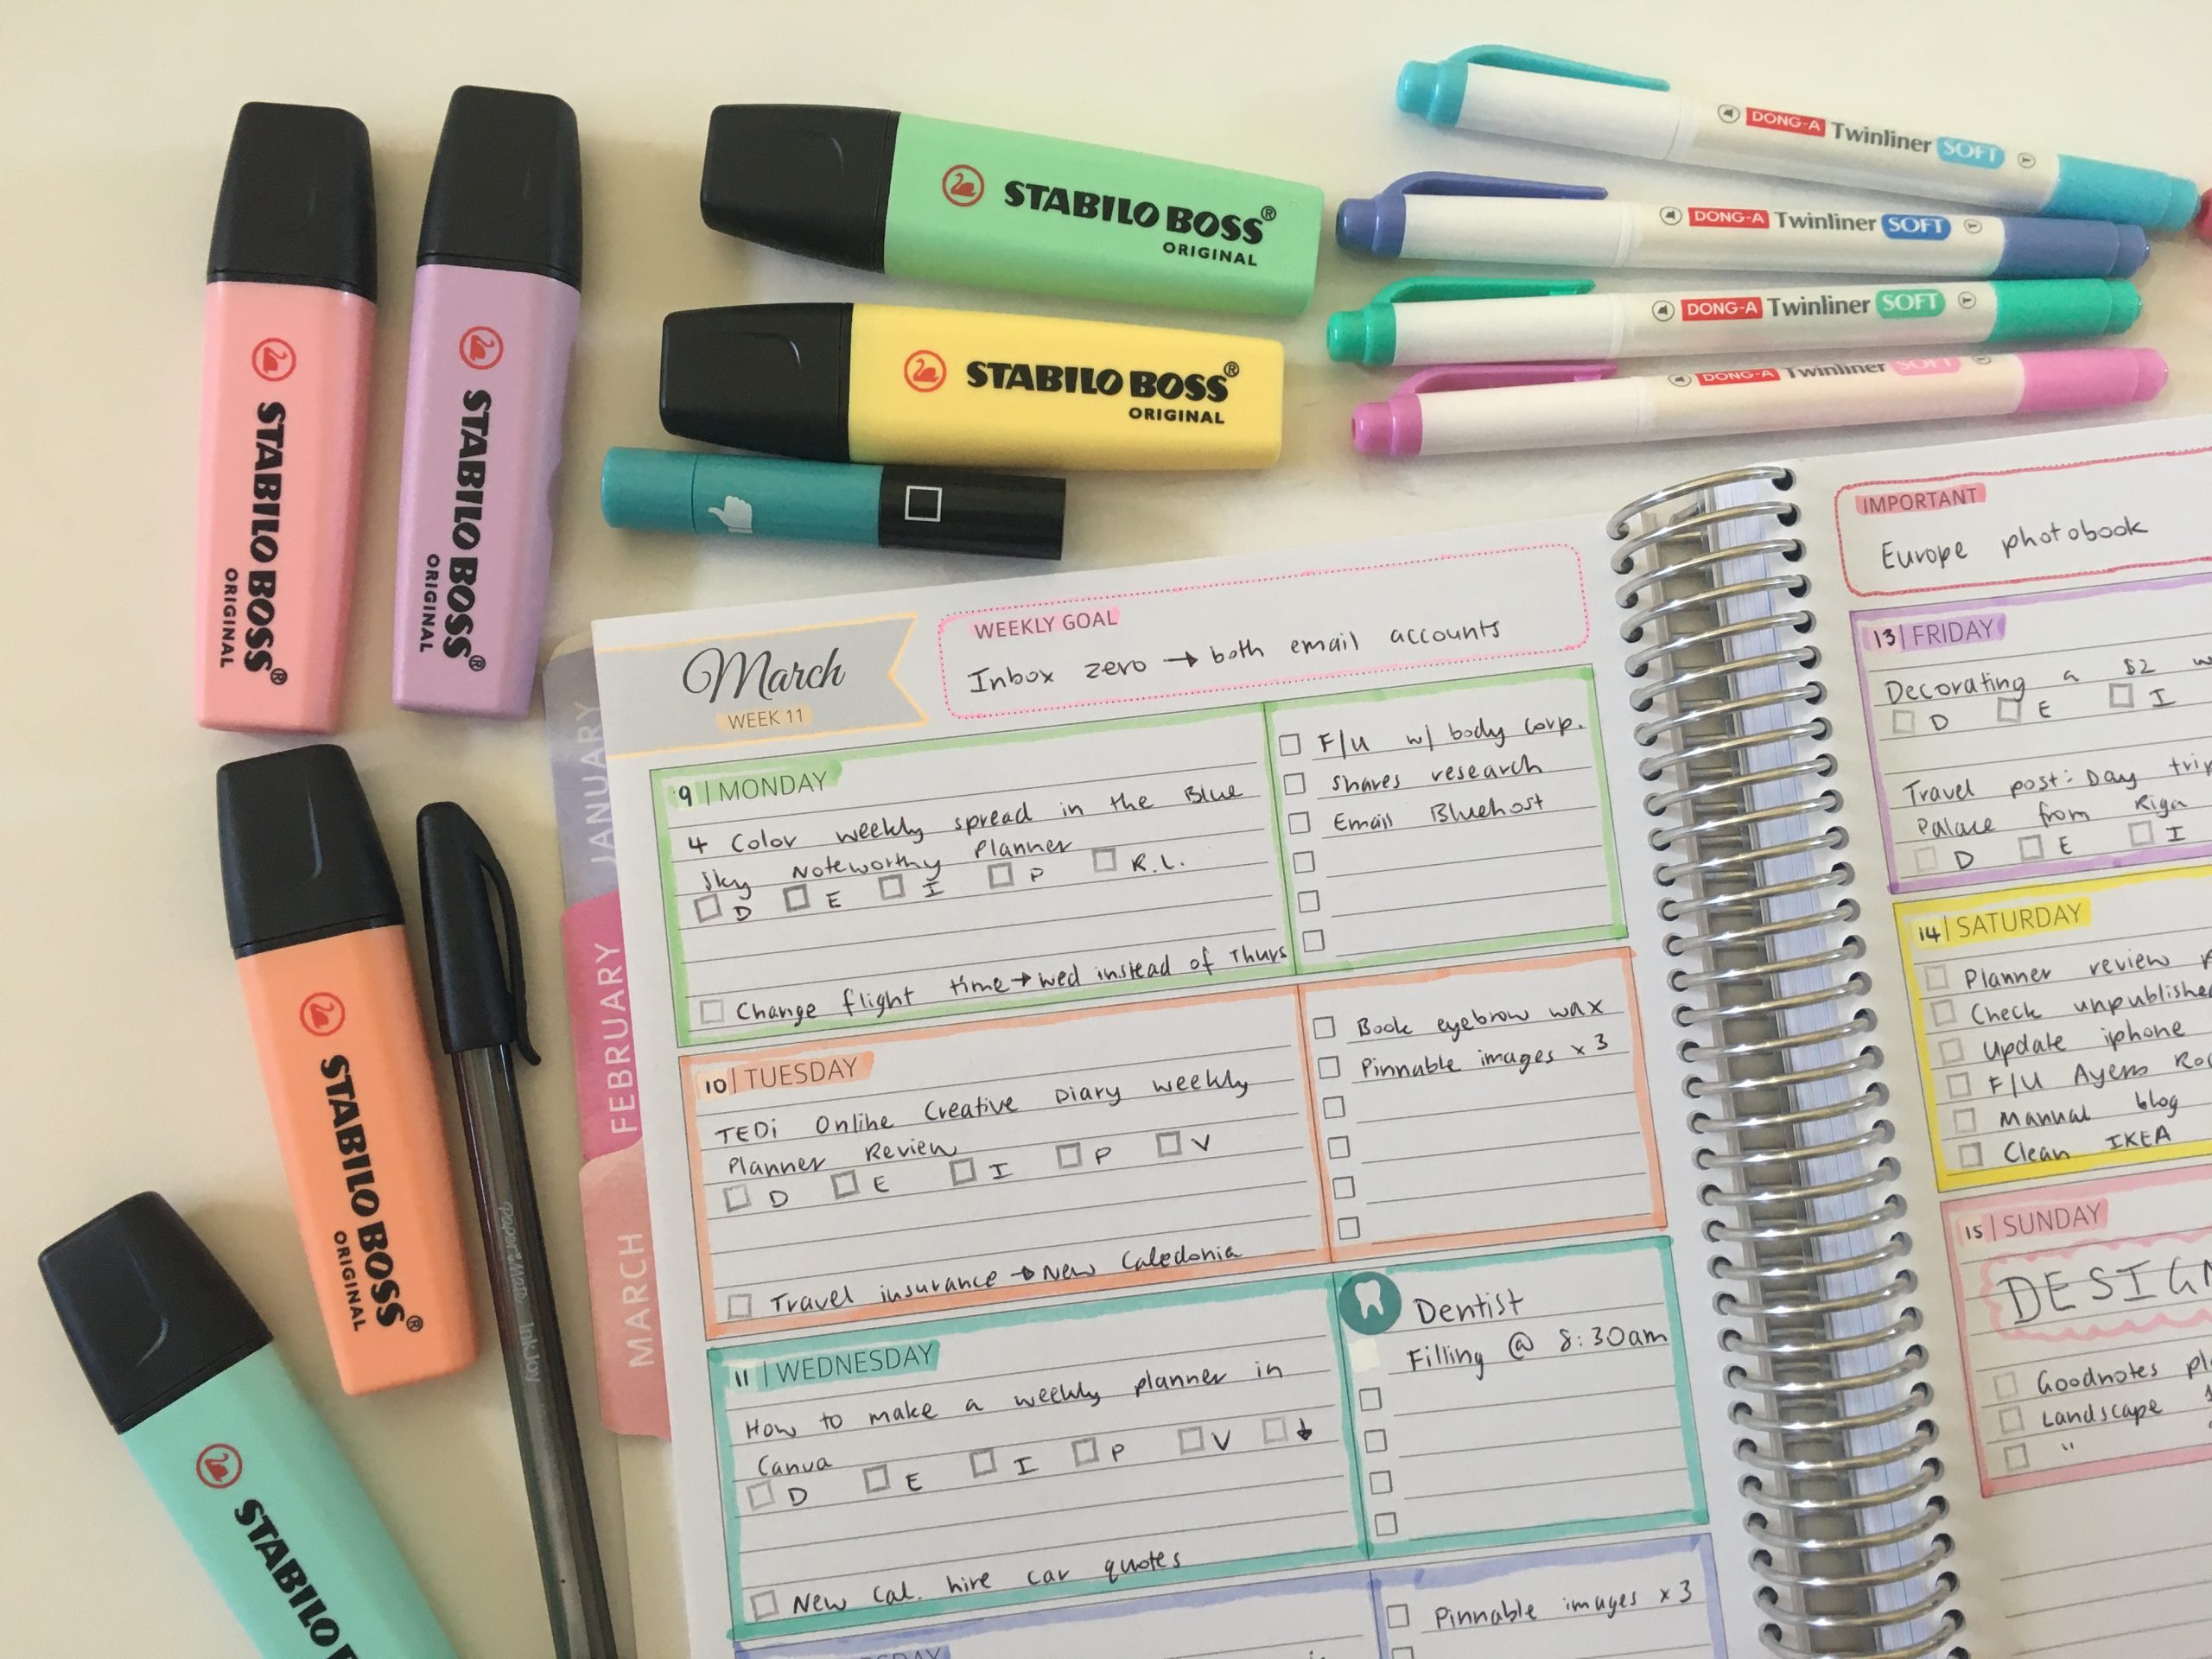
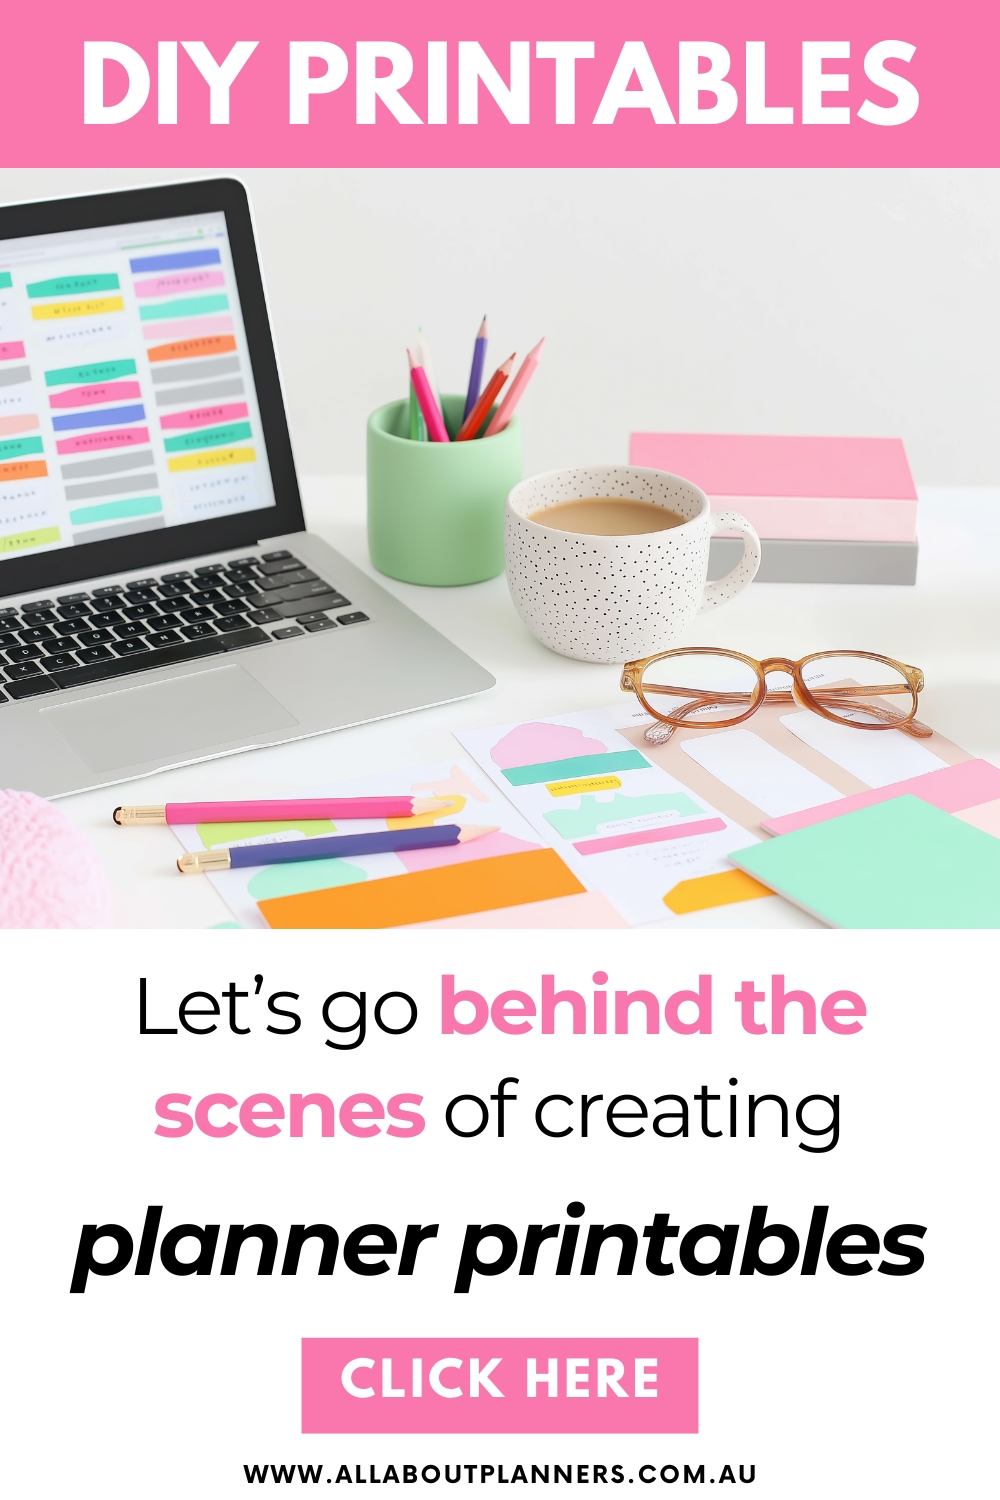
This week I decided to pair it back with a simple black and white weekly spread I designed in Microsoft Word. I looked back at the previous weeks spreads and tried to pinpoint the elements that I liked and compile those into a custom weekly planner. Hint: keep reading if you want to download a copy of the printable for free and try it for yourself.
Choosing the layout
Planners seem to be either:
- Very open-ended with large spaces for each day leaving the customisation up to you, or
- The weekly spread is very structured with few opportunities to make minor tweaks to suit your planner needs
I tried to achieve a balance of both with this planner.
Setting up the Week
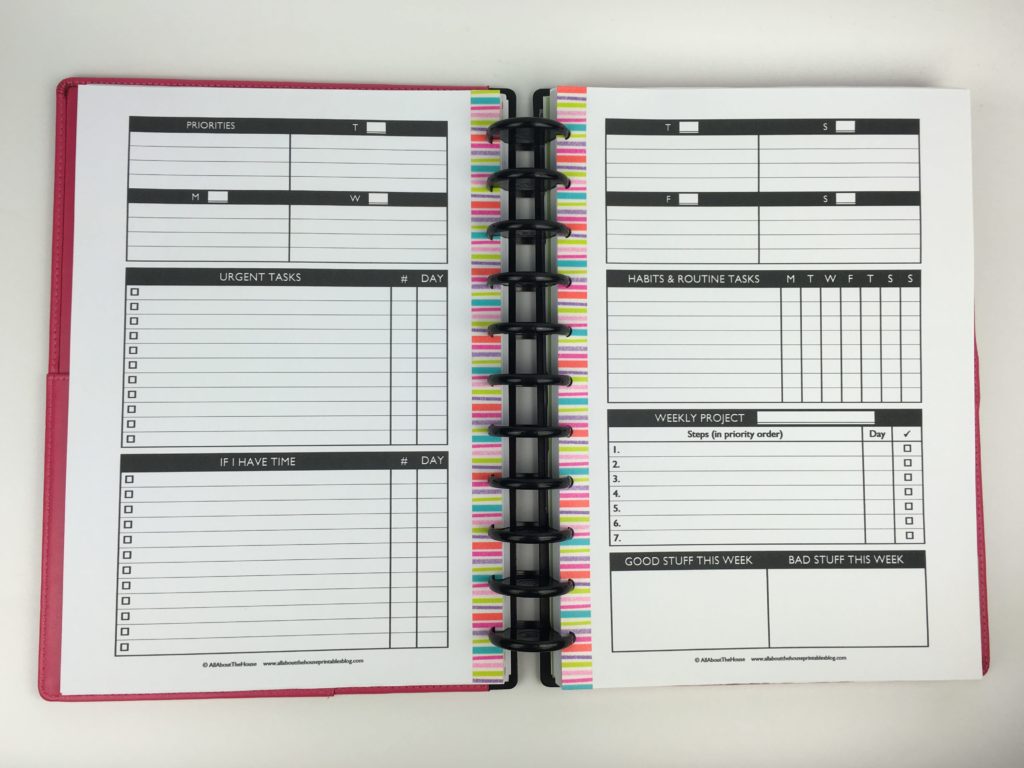
I created a simple weekly planner in Microsoft Word using black as the only color. I was originally going to create a 1 page planner by decided I needed more space so added more list sections – can never have too much list planning space!
Read more: How to make printables in Microsoft Word
The printable us from the create your own planner kit.
I printed the pages using my home printer (see this page for printing tips) and punched the pages with my discbound Arc punch.
Related: Planner Organization: Why I use the Arc Planner instead of binders
I left a wide margin on the pages so I could add some washi tape.
This Week
While I wanted to use a minimalist weekly spread – that’s doesn’t mean I didn’t want any color on the page – this is me we’re talking about! 🙂
I raided my stash of washi and found a cute multi-colored stripe on from Doodlebug (my favorite washi tape brand – a bit pricey but oh so worth it). The Tombow twin tone markers had recently arrived and the colors were almost a perfect match with the washi tape.
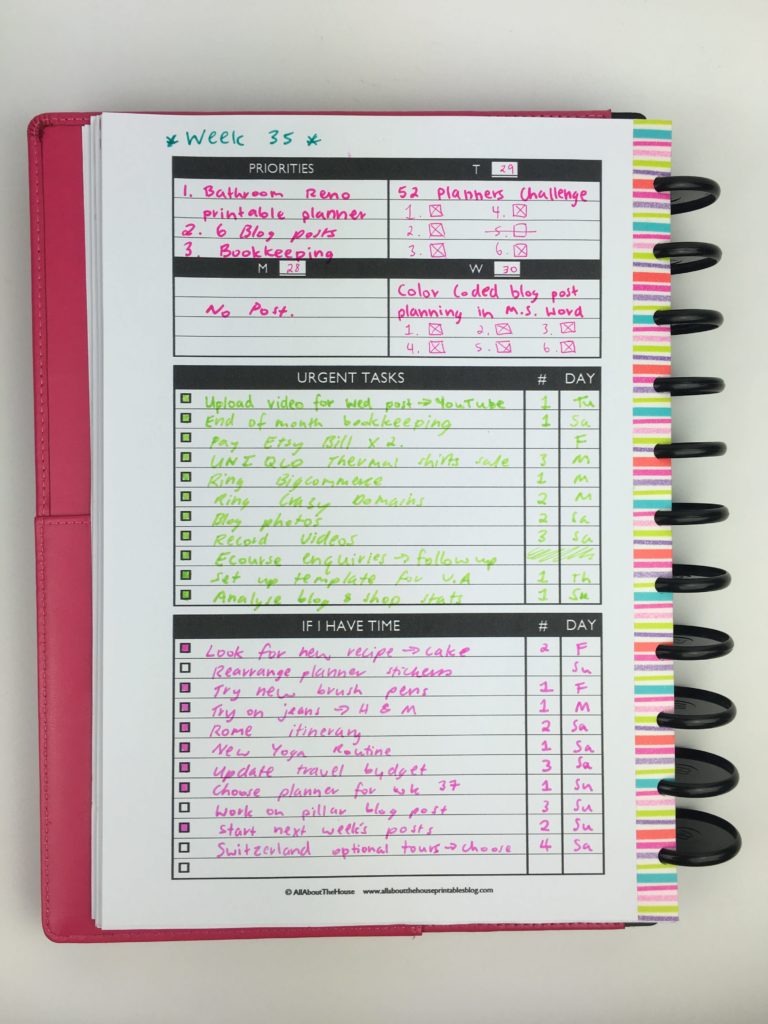
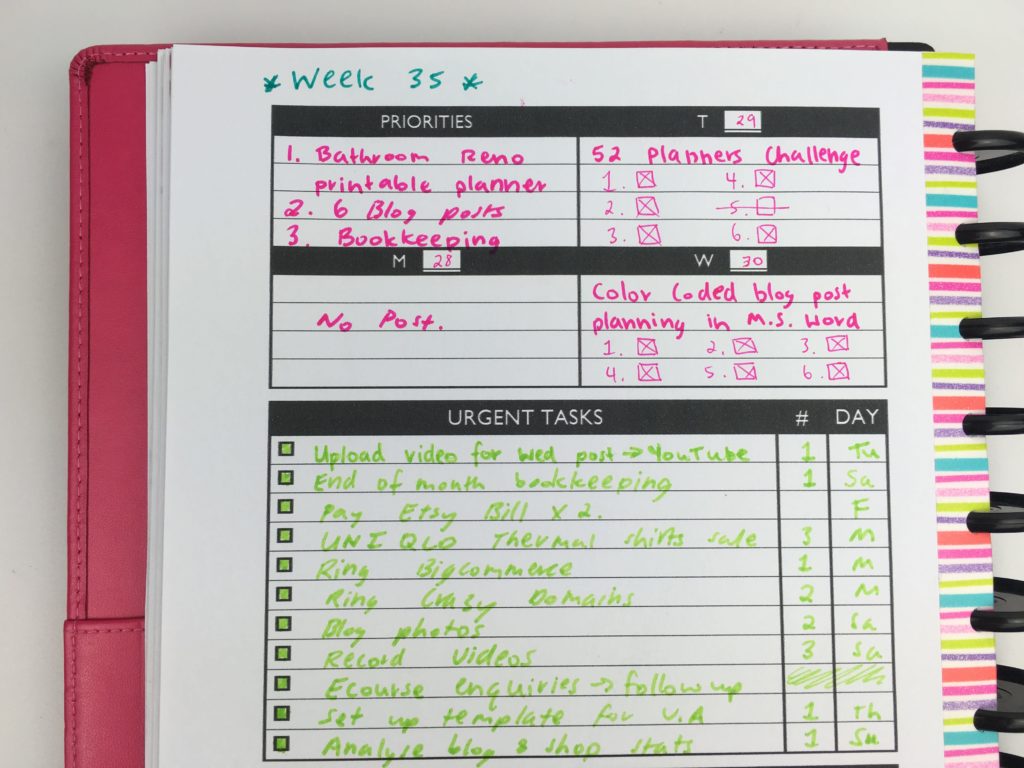
I designed the planner to start with the weekly priorities. I like using top 3 as a guide for the week. This week my top 3 most important must-do tasks were:
- Finish the bathroom renovation planner (it’s available in my shop)
- Post 6 times on the blog
- Do the shop bookleeping (tax time)
Left side
Right Side
I like that if you make your own printables, similar to bullet journalling, you can change the layout each week to suit your needs. This week I was working on a new planner – bathroom renovation planner so wanted to add a weekly project space – something most weekly planners don’t have.
I also added 2 extra columns: one to allocate the day to work on each step of the project and another for marking off when that step was completed.
![]()
I used the top part of the both pages for blog post planning. There was just the right amount of space for the blog post title and the workflow tasks.
Can you spot the error? I accidentally had Thursday and Friday swapped around (that’s what you get for making a planner at 1am!)
I used a black marker pen (the Uni Pi’s) and the Sakura Gelly roll pen in white to fix up the mistake.
Note: if you want to download this planner and try it out the error has been fixed 🙂
![]()
Because I made the planner I was able to pick how many habit tracking spaces I needed so no space on the page was wasted!
The photo below shows the difference between the 0.3mm and the 0.8mm ends of the Tombow twin tone markers – the 0.8mm definitely stands out more.
![]()
I didn’t color code this week. I considered just using any pen when I needed to write something but it would’ve looked messy – it was much neater to use a different colored pen for each section on the page.
![]()
There was just enough space for tasks.
I definitely prefer the fatter 0.8mm tip of the Tombow twin tone pens – the 0.3mm is too fine for my liking.
Instead of just an ordinary to do list I decided to add 2 extra columns – space to number the tasks in the order of importance (i.e. the order to complete them) and the day I intended to complete them. I much prefer planning by category so I don’t end up with large boxes for each day which usually end up being half empty (which makes me feel the need to write more to fill in the empty spaces).
The 2 lists – urgent and if I have time – were great at working out my priorities for the week and what tasks to work on first.

If you want to learn how to make your own printables, click here!
Stationery Used
- This multi-colored stripe washi tape from Doodlebug
- Tombow Twin tone markers bright (I prefer the 0.8mm – fatter – end of the markers – the 0.3mm is a bit too small). The fine tip also didn’t write well over white out correction tape.
- Weekly planner printable us from the create your own planner kit
- Download this weekly layout for free (existing subscribers can login to the free printables library here)
Pros of this spread
- Habit tracker (really good space saver in planners)
- Dedicated project planning space so I could keep everything together rather than scattered throughout the week
- Just the right amount of space for blog planning
- Plenty of tasks space – there was space to order the tasks and allocate a day of the week to complete them
- No ‘dead’ / wasted space on the page
Cons of this spread
- The spread ended up looking ok when I added the different colors but otherwise black being the only color would be a bit plain and dull if I used this same spread every week
Would I use this layout again?
I quite liked this spread! Although I just about ran out of room at the end of the week I was determined not to add a sticky note for overflow tasks as is my usual fashion. Due to the structured layout it did make me stop and think about whether I did actually need to add that task to the page – whether I was creating a to do list or a wish list so it helped prevent me from over-scheduling. I ended up completing almost everything on my to do list!
Lots of elements fit on the pages – by adding the days of the week columns to the task sections there was no ‘dead’ space on the page as can be the case when you have a traditional horizontal or vertical planner layout but you have more tasks for one day and less for other days. For me I usually have too much space on the days of the week and not enough planning space on weekends!
In terms of design, the planner was a bit too plain for my liking – it needs a bit more color on the actual planner page, a pattern background or something to make it a bit more interesting!
![]()
Want to try this layout? Click here to download!
The printables can be printed at half page size if you prefer – see this post for printing instructions.
![]()
Want to learn how to make your own printables? Click here!
Catch up on past week’s of the challenge:
- Week 7: Pros and cons of using a 1 Page Weekly Planner
- Week 22: Using Erin Condren size planner stickers in the Mini Happy Planner
- Week 26: Using a weekly planner notepad to plan the week
- Week 31: Using the Ashley Shelly Planner for weekly planning
Related Posts:
- How to make printable graph paper in Photoshop (perfect for habit tracking and bullet journalling!)
- How to make a planner bookmark (DIY Page Markers Tutorial)
- How to make planner printables (advice from a planner addict that’s made over 4000 printables)
- How to make a DIY Erin Condren Planner Cover for less than $2 (plus free printable cover)


One Comment