Using Erin Condren size planner stickers in the Mini Happy Planner (52 planners in 52 weeks – Week 22)
A while back I posted a review of the Mini Happy Planner. I’d been wanting to try the planner for the 52 planners in 52 weeks challenge for a while. After being asked numerous times if Erin Erin Condren size planner stickers fit in other planners, I decided to test out the theory! So I grabbed one of the sticker kits I’ve made for my sister’s planner supplies Etsy shop, Carefully Crafted and experimented with using it in the mini Happy Planner.
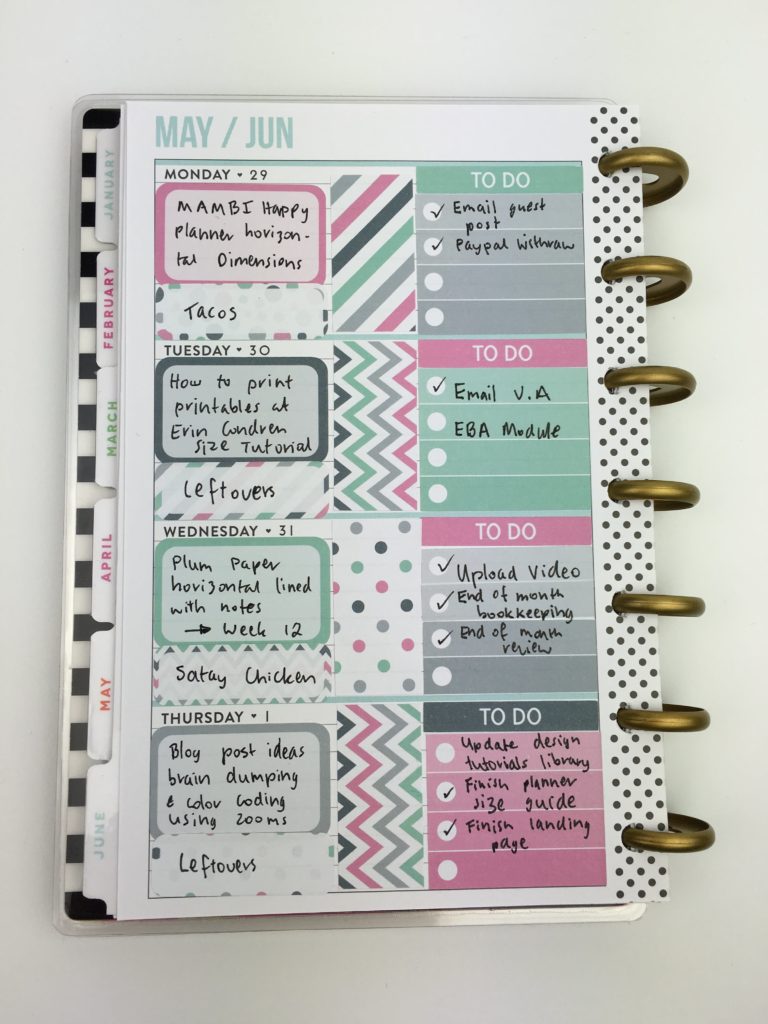
Setting up the week
The Mini Happy Planner measures 5.5″ wide x 7.5″ high. The week starts on a Monday.
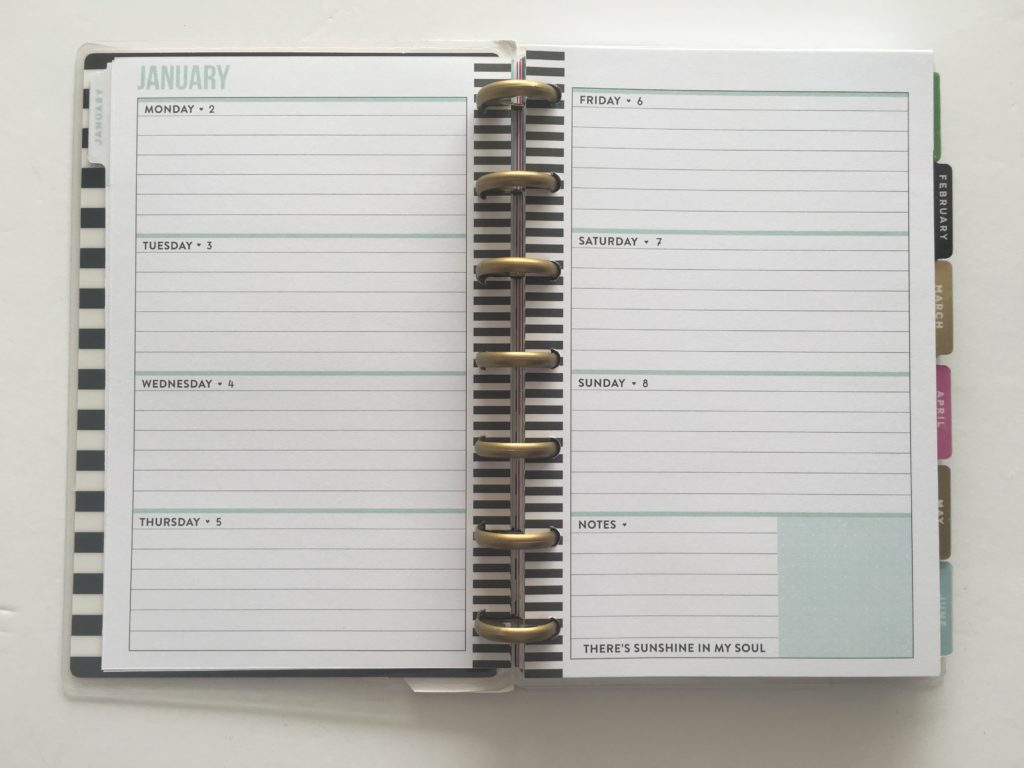
Most Erin Condren size stickers do fit the Mini Happy Planner.
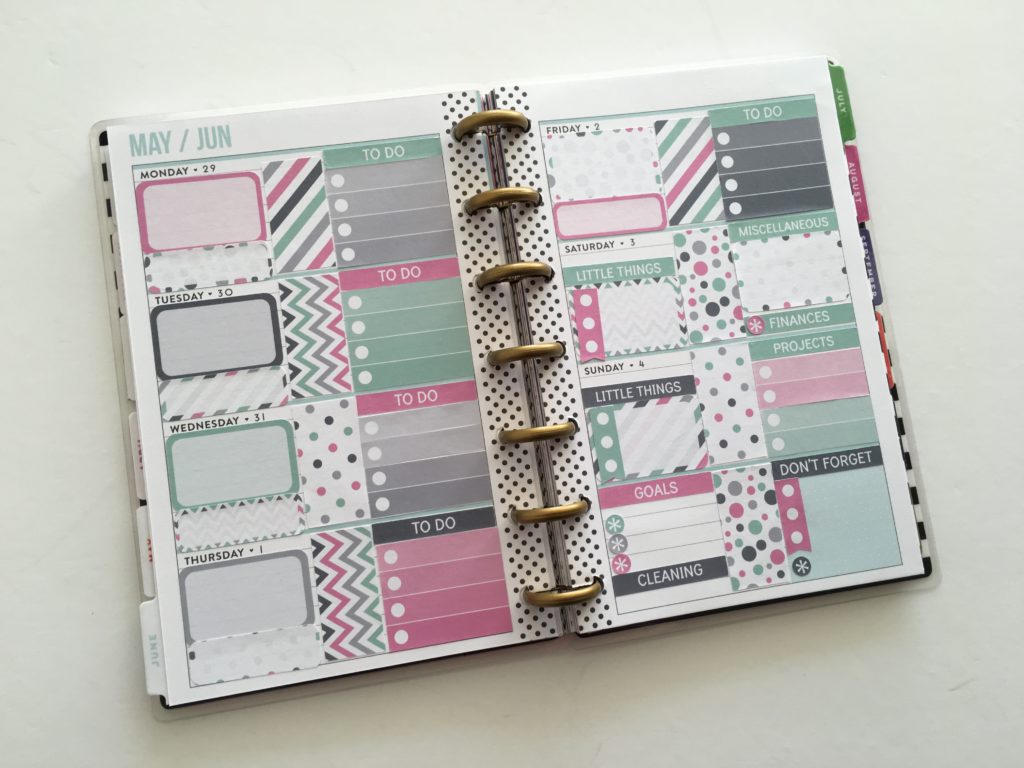
A half box (1.5 x 0.95″ high) and a quarter box sticker (1.5″ wide x 0.5″ high) just fit the height of the daily planning boxes.
I cut the full box size checklist stickers to size – 4 checklist spaces and a header sticker fit the height of the daily planning space perfectly.
I cut the pattern boxes (they were full box Erin Condren size) and that gave enough for 2 (with a bit leftover) pattern dividers for the awkward space in the middle of each daily planning space.
Mini asterisk stickers (0.25″ diameter) work with any planner and are ideal for flagging important tasks and highlighting your most important task of the day
I did a bit of sticker layering – if you were to do this every week you might need to upgrade to the larger discs as sticker layering makes the planner fatter!
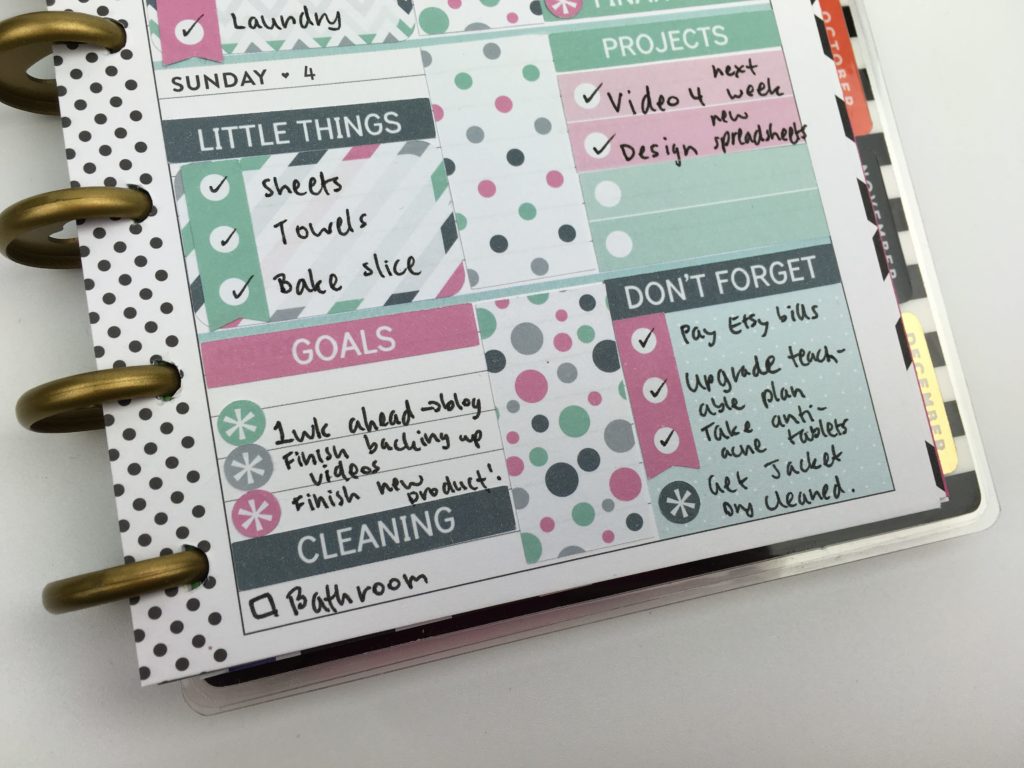
Note that the flag banners won’t be compatible as the lines are quite close together in the mini Happy Planner – because of this, flag stickers sized for the Erin Condren planner won’t work. So instead I used the half box (Erin Condren size) flag stickers on top of a half box sticker.
Related: Which planner stickers are right for you?
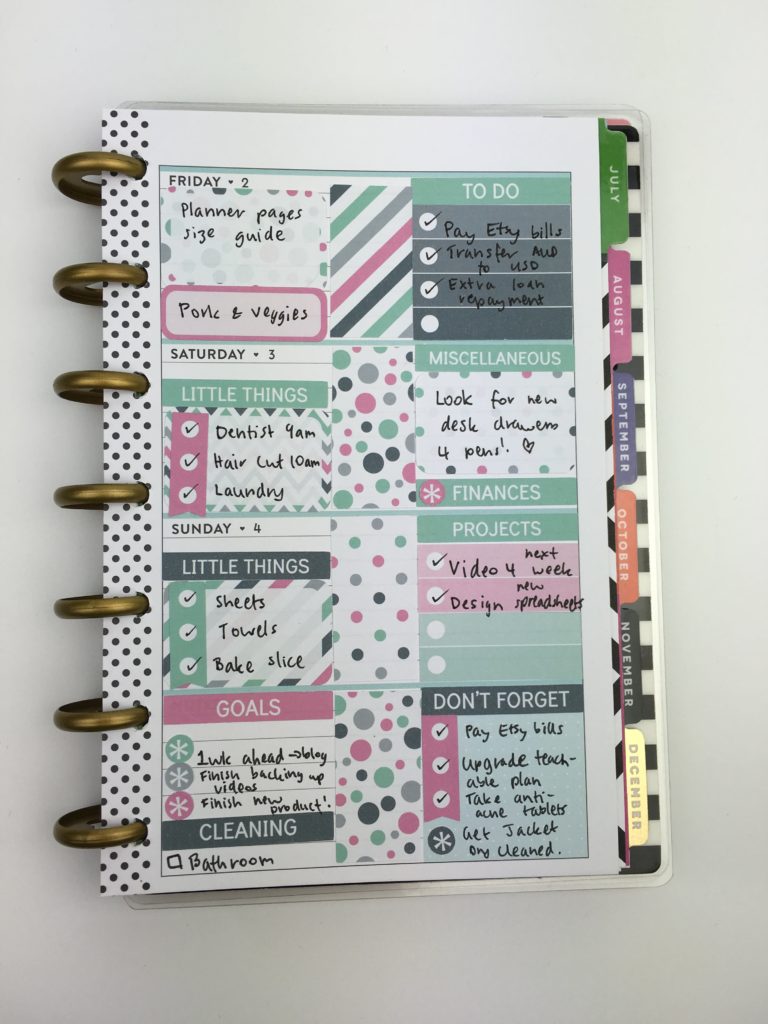
Using the Mini Happy Planner
The width of this planner is rather awkward – it’s not quite enough writing space for 2 columns but it’s slightly too long for just 1 task per line.
One of the reasons I ditched using vertical planners was because there isn’t enough room to write (as you can see in the photo below, I had to use 2 lines just to write a 3 word task). Having the same task written over multiple lines looks messy and it’s more annoying trying to make sure all of the text fits within the confines of the sticker.
Related: How to print printables at MAMBI Happy Planner Size (step by step tutorial)
I’ll be honest, this week was more of a wanting to try a planner purely because other people have raved about it and the fact that I wanted to use a cute sticker kit.
I do like how the colors of the spread turned out – the planner pages look pretty (let’s just not talk about the fact I spent like, half an hour, deciding where to stick the stickers…)
Because I planned using stickers I couldn’t color code as colored pens would’ve clashed with the colors of the stickers – one of the reasons I tend to stay away from using themed sticker kits.
I used the Typo I’m So Fine tip pen (0.4mm) to plan this week.
I ran out of space at the end of the week so ended up adding tasks that wouldn’t fit to the lists book I used for week 13: Using a Kmart lists book to plan your week (planning by task, rather than by day)

Pros of the Mini Happy Planner
- The colors are a lot nicer than the colors used for the Erin Condren Planner and the weekly spreads have 1 color only making it easier to coordinate if you want to plan using stickers
- All days get the same amount of planning space
- Simple, clean, minimalist design
- Lined writing space
- Different colors between the months
- Because it’s small it’s very light and portable – it can easily fit in your handbag
- Discbound – I shared why I love disc-bound planner here: why I use the Arc Planner instead of binders
Cons of the Mini Happy Planner
- Not much room for planning – the lines for each day are very close together – if you have large hand-writing this would not be a good planner for you
- The planner itself is very small (5.5″ wide x 7.5″ high) – too small for most people. However, if you’re someone that uses apps on their phone but can’t quite give up using paper completely, this would be a good planner for you
Related: MAMBI Happy Planner horizontal dimensions & measurements (classic size) for making planner stickers
Would I use this planner again?
No, the mini happy planner was way too small, I ended up going back to the lists notebook I used in week 13 for tasks that wouldn’t fit on the pages. While I thought the small size would be good to prevent me from over-scheduling, I’m finding that 9 x 7″ (Plum Paper & Erin Condren size planners) seem to be the ideal size for me. If I hadn’t used a sticker kit I would’ve been able to fit more tasks on the page… but it wouldn’t have looked as pretty!
While using sticker kits and doing no white space planner spreads looks nice, I personally find it too time consuming. If I had more time, I’d probably do it more often but I just don’t have the time to spend 30 minutes to half and hour unnecessarily stressing over where I’m going to stick each sticker so that the colors co-ordinate and the spread looks aesthetically pleasing. I love experimenting with colors and making sticker kits, but I’m very much a functional planner so stickers such as icons are definitely a better fit for me.
Catch up on past weeks of the challenge:
- Week 13: Using a Kmart lists book to plan your week (planning by task, rather than by day)
- Week 17 (Part 2): Daily planning using to do lists categorised by time
- Week 2: Planning using daily checklists
- Week 5: Planning by category and task, rather than by day
Related Posts
- Planner pen testing in the Erin Condren Life Planner, Plum Paper, Happy Planner by MAMBI and Limelife Planner
- MAMBI Mini Happy Planner Review (pros, cons, should you buy it?)
- Honest review of the Happy Planner by Me and my Big Ideas (MAMBI)
- MAMBI Happy Planner Recipe Organizer Review
If you’re tired of drawing up weekly spreads, this printable bundle of 52 different 1 page weekly planners (you can mix and match to create 2 page spreads if you prefer), is available in my Etsy shop and online store.

Liked this post? Pin it!