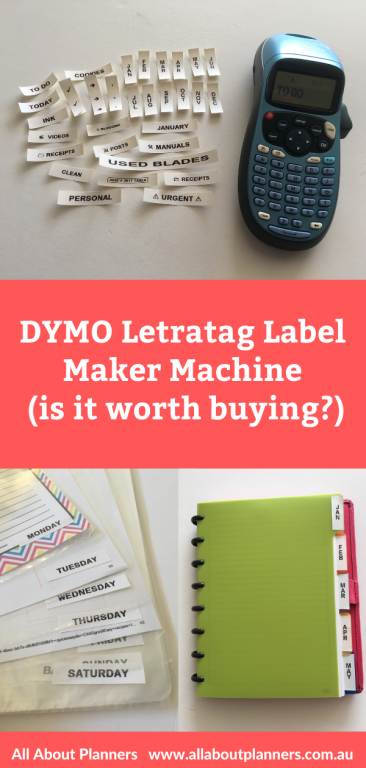
DYMO Letratag Label Maker Machine Review (Is it Worth Buying?)
Label makers have been around for years and I finally got around to getting one (after doing a lot of research into the best one!). It was a toss-up between the Epson Labelworks LW-400 and the DYMO Letra Tag. I ended up choosing the DYMO Letra Tag (the machine and tape refills were cheaper and it was more readily available).
Features of the DYMO Letra Tag:
- Uses 4 AA batteries
- Can use white, clear, colored or metallic labels
- Can type numbers, letters and 195 Symbols
- 5 font styles
- To turn off just hold down the off/on button
- Uses 12mm label size
- Can do 2 lines of text
- You can store up to 9 labels so if you wanted to use the machine for labeling your kid’s school folders, notebooks, pens etc. this will save you a ton of time
Cost:
I got it for $25 on sale at Big W (during back to school sales). 2 weeks later I saw it at Officeworks for only $19!
The tapes are $15 at Big W but you can get them for only $10.50 at Officeworks. Officeworks also had the clear labels and the neon colored labels if you wanted to make color-coded labels.
The Letratag comes in 2 styles. A flatter more bulkier style with big buttons and a more compact hand-held style (which is the one I chose). The height of the one with the larger buttons would probably be more ideal if storing in a drawer. I bought the blue version although there were also black and pink versions.
You can get this label maker on Amazon (affiliate link – if you purchase using my link I’ll receive a small commission in exchange for referring you). They usually have it on sale for around $18 USD.
How it Works
Pop in the ink cartridge, add your text and symbols, then press the print button, the knob on the right side is what you push in to cut the label once it’s printed.
To enlarge the screen of the video, click the square icon in the bottom right hand corner of the video (it will say ‘full screen’ when you hover your mouse over the icon).

Subscribe to my YouTube channel for more planner related videos!
You can get this label maker on Amazon (affiliate link – if you purchase using my link I’ll receive a small commission in exchange for referring you). They usually have it on sale for around $18 USD.
I may have gotten a bit excited and went crazy labeling everything – including the highlighters I use for color-coding!
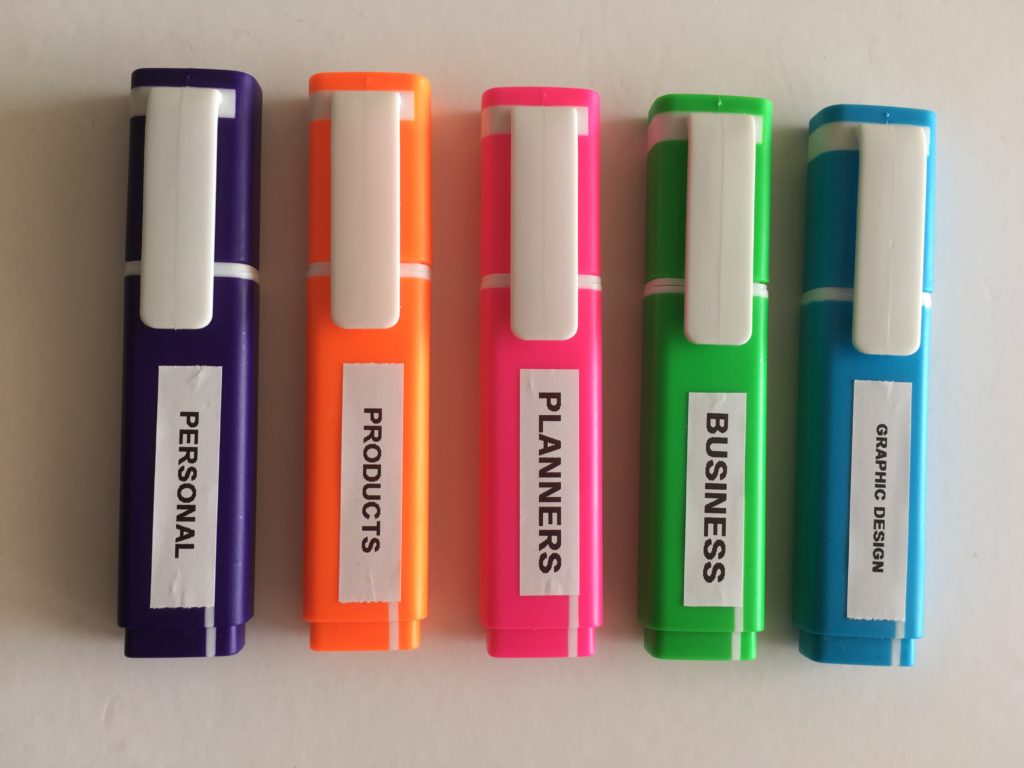
Related Post: How to color-code your planner (so you’ll actually use it effectively)
Tips for using the DYMO Label Maker
- Remember to cut after each label or you’ll have to manually cut the labels to separate them
- Never use large font size if the label has more than a couple of letters as it will turn out huge
- I don’t recommend using small and a border style as the text becomes too small and busy to read
- Check your label for correct spelling before printing, you can’t undo or stop the printing function once you send it to print – you can preview it by going to settings then ‘preview’
- Take the batteries out of the machine when you aren’t using them
DYMO label maker Pros
- Automatically turns itself off after a few minutes if you haven’t used it which is great for saving battery life. I take the batteries out if I know I’m not going to be using it for a while
- Quick to print a label
- Easy to hold in one hand (the machine is very light)
- Quick setup – once out of the packaging I had a label made in 2 minutes – very clear instructions (I took a photo of the icons reference so I didn’t have to lug around the large instructions book)
- Machine is cheap
- And refills are cheap
- The machine comes with a roll of tape when you buy the machine
- 2 year warranty
Related Post: How to make printable labels in Photoshop

DYMO label maker Cons
- It does waste a bit of tape because it automatically adds a 0.25” border on either side of the text – however all label makers do this based on the numerous reviews I read before choosing this one
- Readily available at your local office supply store
- The metallic and neon label tape is expensive (the white is cheap though)
- Make sure you place the labels under a flat surface to flatten them before sticking because they curl up easily and don’t stick down as well
- I don’t recommend anything less than medium size if you want to use a symbol
- I wish there was more color options for the color tapes – they only have yellow, red, blue and green – no pink or purple 🙁
- I wish there were more symbols – while it comes with a lot of them, most I’ll never use
- There’s also no option for colored text which would be ideal for color-coding – maybe I’ll use a highlighter to color code…
Using the Dymo Label Maker
Here are some of the things I’ve found after using the machine for a couple of weeks….
Vertical font size
I used this for tabs in my planner (I stuck them to the polypropylene tabs that go with the Arc notebook)
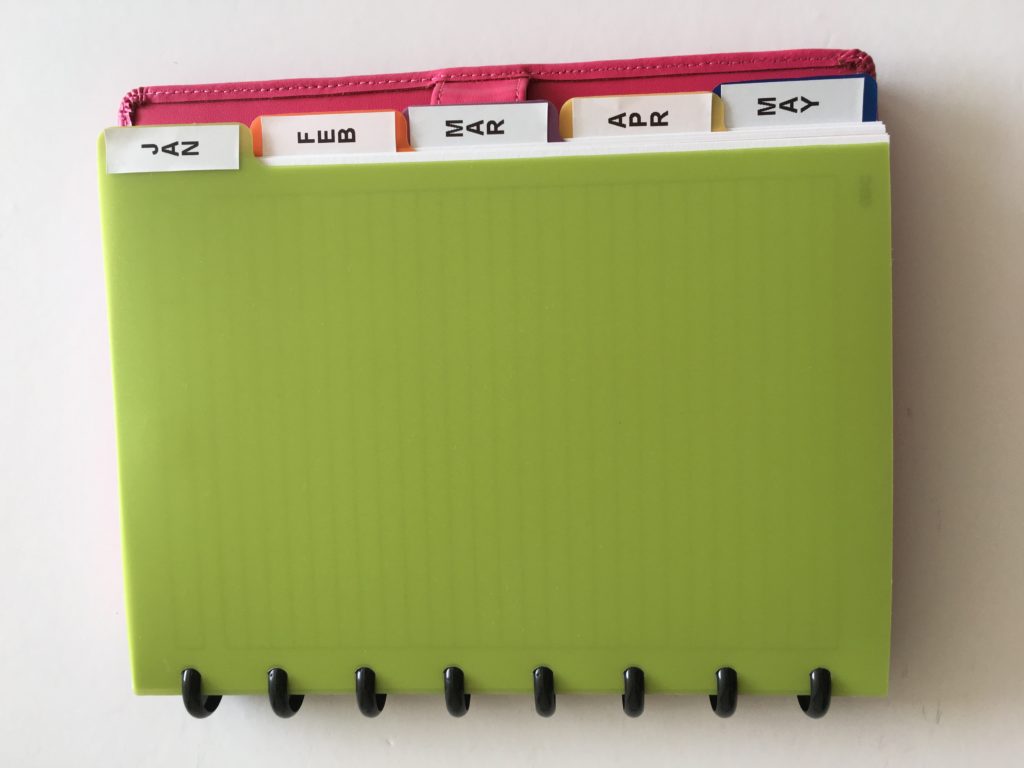
Related Post: Why I use the Arc Planner instead of binders
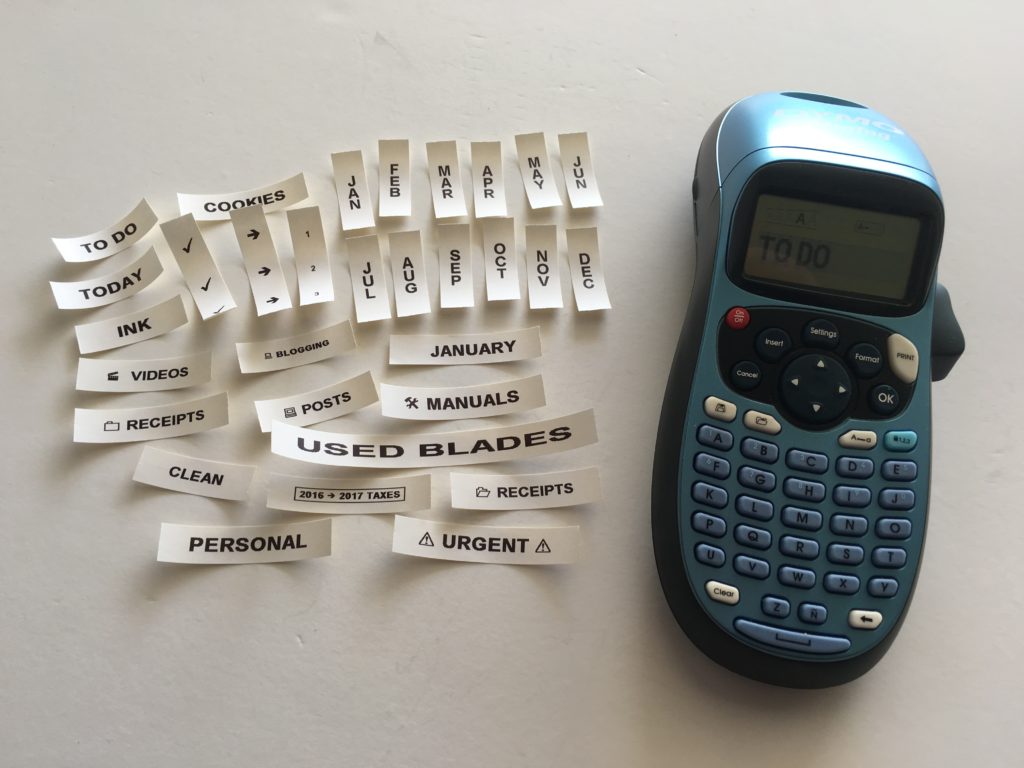
- Recipe binder tabs such as slices, cookies, 30 min
- Project folder labels – Today, tomorrow, this week, eventually
- tax planner tabs
- Receipts
Label Sizes
Extra large font size is way too big. My sister uses the silhouette machines to cut labels (if you’re reading this and have a silhouette machine, you know what I mean!) Sometimes a blade that was working fine when you used the machine yesterday will decide not to cooperate today. So my sister alternates between new blades and used blades. The blades she doesn’t use go into a plastic container so I made a label for ‘USED BLADES’ I printed it at extra large and it was super long (4.5″!). The longer the label the more prone it is to curl at the ends and it’ll also use up a lot of the tape cartridge.
After doing some experimenting I now use Medium font size for almost everything.
To increase the size of the label you could stick it to a larger piece of cardstock or scrapbooking paper (the clear tape, while more expensive, looks better if you want to do this).
Is it the DYMO Letra Tag Label maker worth it?
I think so. It’s a quick and cheap machine that makes it much faster (and neater) to label than your own messy hand-writing. I prefer it to label sheets such as Avery where you have to line up the labels. I’ve printed 100 labels so far (usually about 6 letters long per label) n the same roll of tape and it hasn’t run out yet. It’s also good for labelling things you can’t write on with pens such as the polypropylene dividers of the arc notebook.
This is not a sponsored post – I just really love this label maker!
More Planner Related Posts:
- Which planner stickers are right for you?
- Planner Organization: How to organize planner stickers
- The Process Behind Making a Printable Planner
- Ways to organize using binder covers (plus a free printable monogram binder cover)
- Printable budget binder/finance binder -EDITABLE
Click here to browse all posts on the blog.
Found this post helpful? Pin it!