
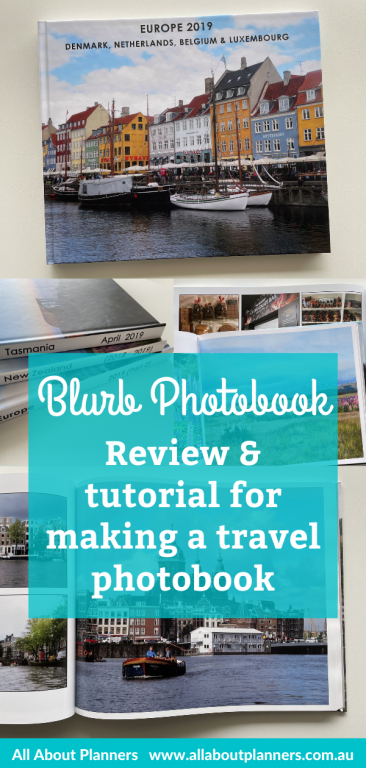
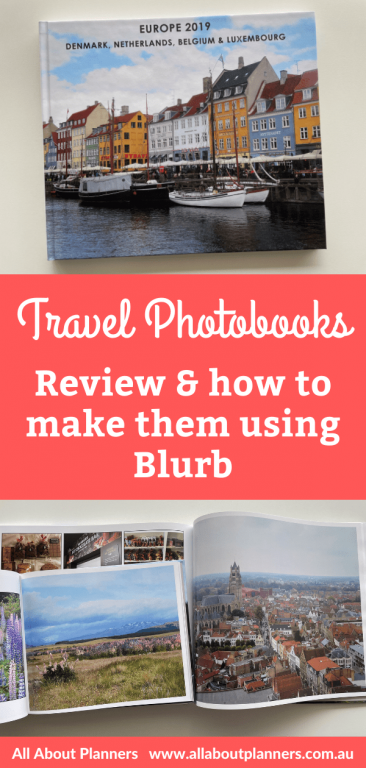
How I make my travel photobooks using Blurb (Detailed Tutorial and Review)
If you’ve been a long-time reader you might recall this post I did 2 years ago where I shared my process for making travel photobooks. In this post I want to expand on that and show you:
- How I actually make the photobooks using Blurb
- What selections I made (size, materials etc. if you want to replicate and make your own)
- Why I chose Blurb over other photobook companies
- Pros and cons
- The image and paper quality
- Pricing
- How long it takes to make
- Heaps of photos so you can see how some of my travel photobooks have turned out, if you want layout ideas for making your own
Why I chose Blurb
I’d seen other people’s reviews of photobooks on blogs for years but I hadn’t seen one in person for myself, until my neighbour showed me some of their family albums and travel photobooks, which they’d made using Blurb.
I liked the print quality of the images, page size, that you can choose your own layouts, fonts, number of pages, page order etc. I compared Blurb against numerous other companies (listed at the end of this post) and will explain a bit about why I chose Blurb, along with how I make the photobooks.
I’m not affiliated with Blurb.
Photobook size
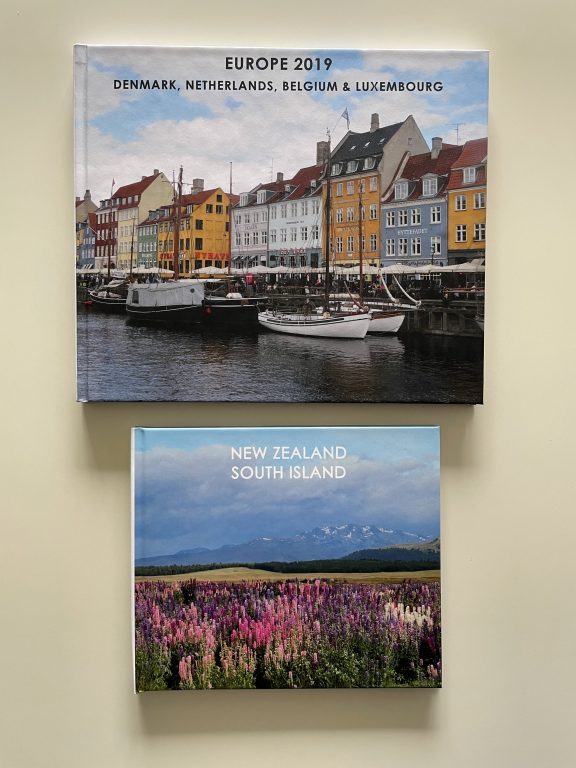
For a long international holiday, I use a large size (32cm long including the spine by 27.5cm high), so twice that size when both pages are open.
For a domestic holiday (usually up to 10 days), I use a smaller page size (24.5cm long including spine by 21cm high). Domestic trips are shorter, I have less photos to include and they’re less exciting than an international holiday. Plus it would end up being a thin book at a huge page size unless I combined multiple trips together and I’d rather keep them separate.
I found some of the Photobook sizing offered by other companies to be a bit disproportionate. Either very wide but not very high, or a perfect square, or just an awkward size to try and neatly fit photos on.
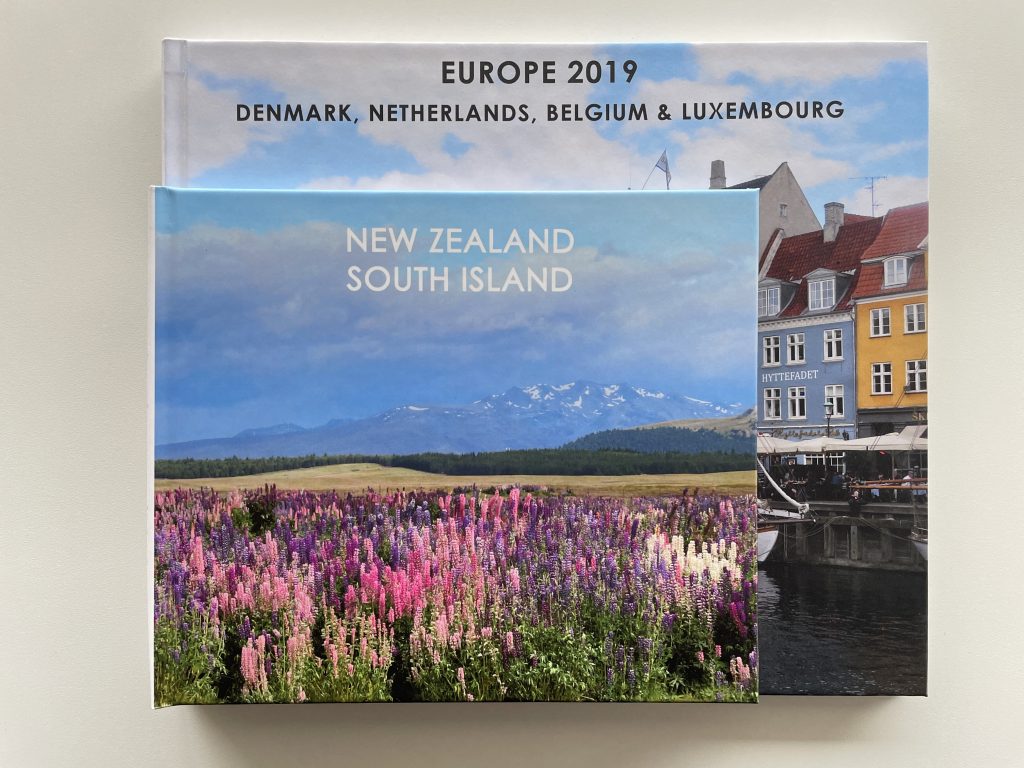
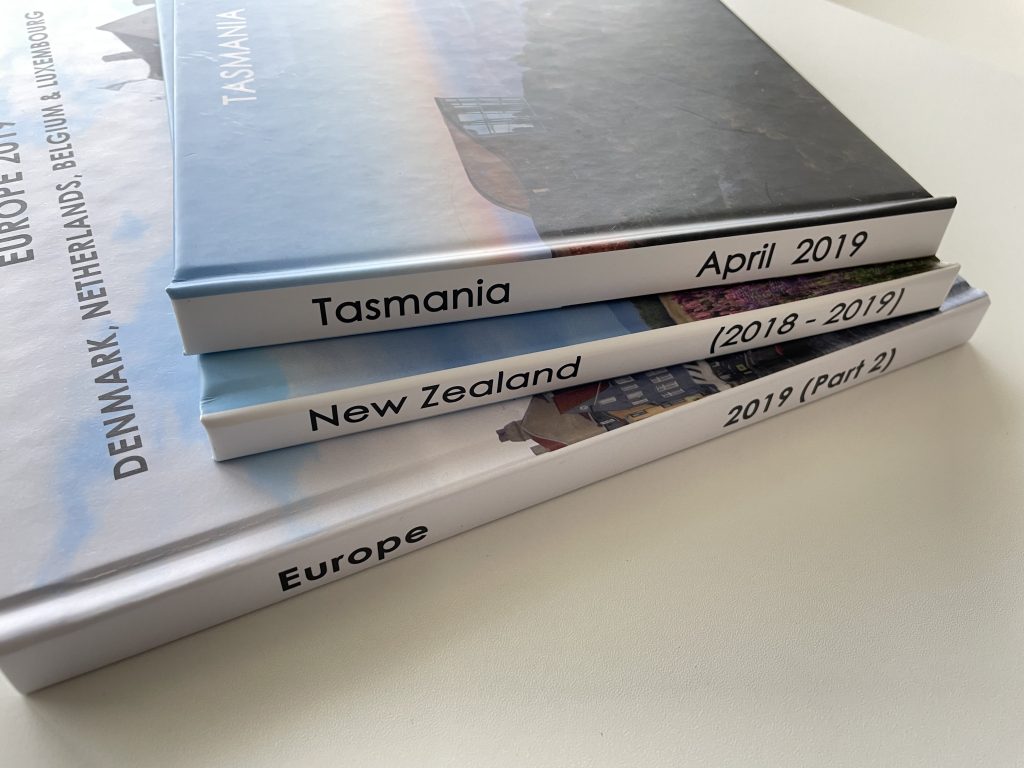
Photo Size
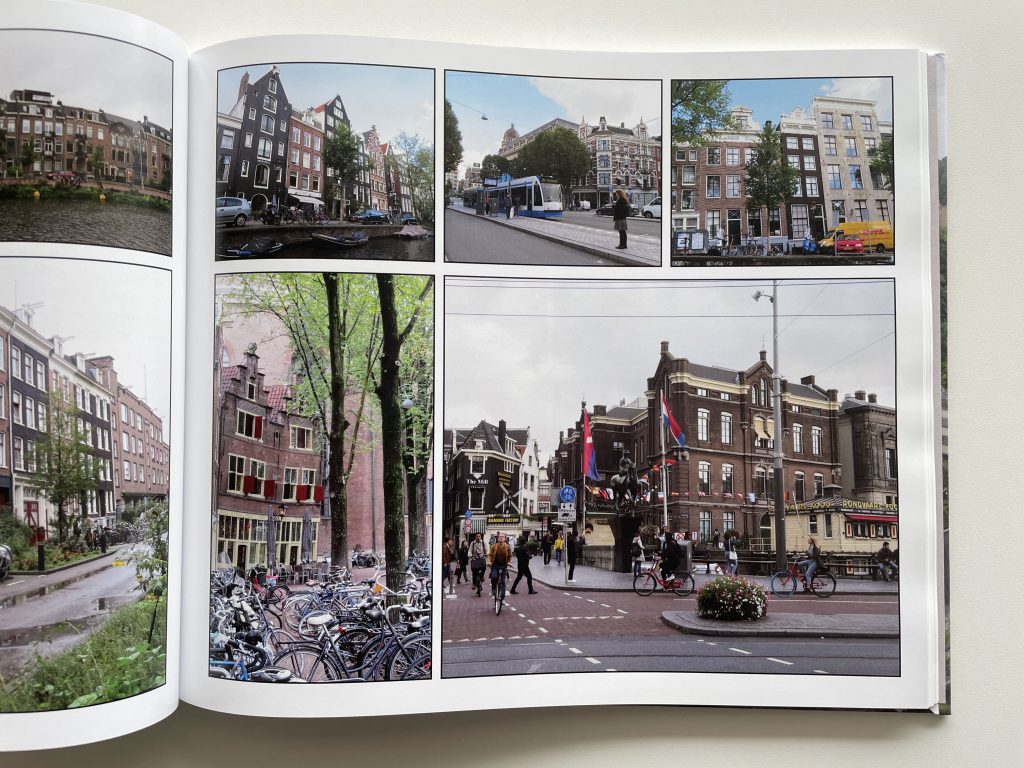
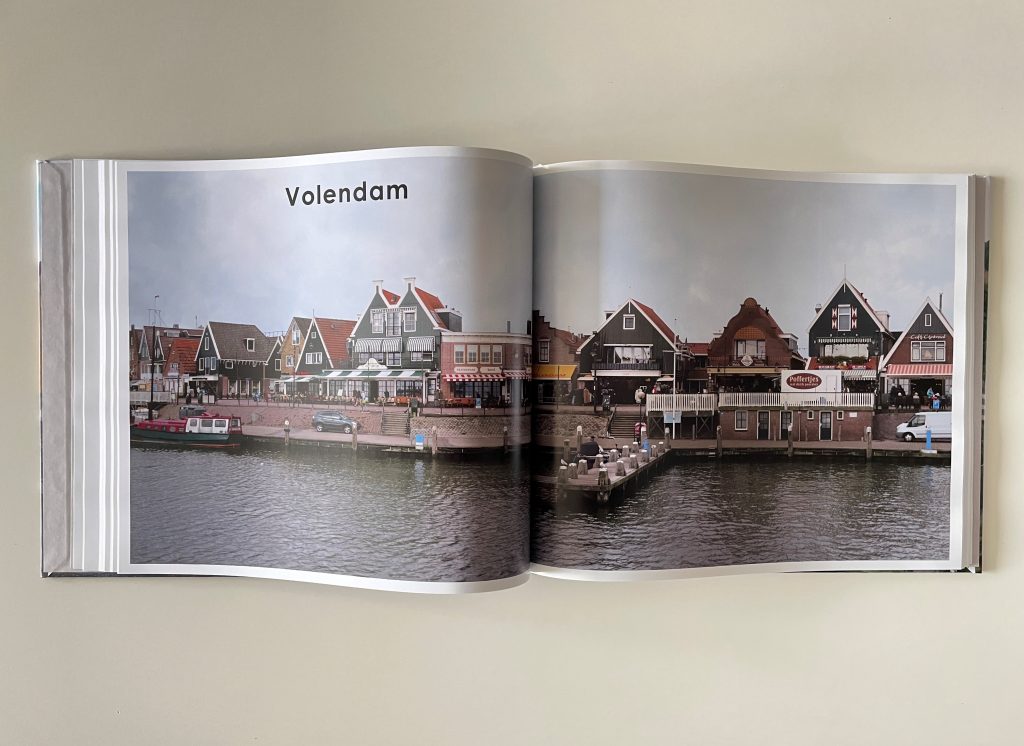
I prefer to stick to a ‘traditional’ photo album view of 4 equal sized photos on the page, unless I have a lot of photos of similar things e.g. food, in which case I’ll create a collage.
Using my default template of 4 landscape photos (and space to caption underneath)
- Small page size photobook, each photo is = 10.5cm long x 7cm high
- Large page size photobook, each photo is = 14cm long x 10.2cm high
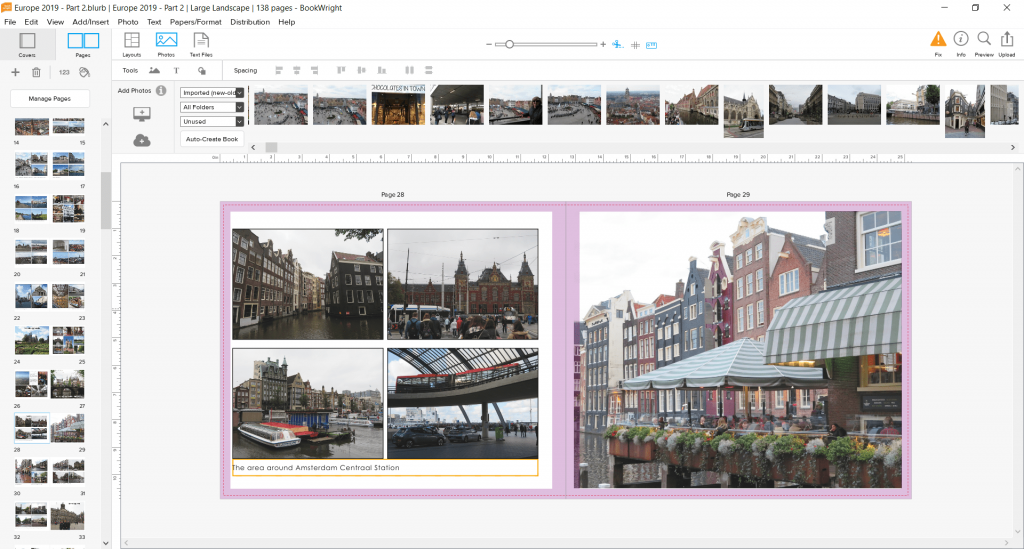
Using Blurb’s Bookwright software
Some photobook software, back when I was researching a few years ago, had a page limit while Blurb does not. However I have found with the Bookwright software, that is starts to freeze around the 120 page mark / approx. 300 – 400 photos per photobook (which is a lot!). This could be the software, or my laptop which is almost at it’s storage capacity – I’m not 100% sure.
If you have a lot of photos you can filter the photos within the software. You can import photos from an external hard drive into the software with no issues. I store my photos using cloud based storage (2 different providers) plus an external hard drive. Plus the photos are then stored on the main laptop hard drive via the photobook file.
Yes I could delete the photos off my external hard drive once I’ve added them into the photobook file but I don’t want to. I have peace of mind with multiple backups, external hard drives are cheap. Making photobooks from my travels is my souvenir from trips (and make great gifts for myself and to give to others who went on the trip with me), so I’m purchasing another laptop which I will solely use for making Photobooks that will hopefully remove the current issues with the Bookwright software too.
Keep in mind I also have the Microsoft suite of products, Adobe professional, Adobe Photoshop, Adobe Bridge, Affinity publisher, Affinity photo, Affinity Designer, Silhouette Studio, Backblaze (automatic file backups) and thousands upon thousands of files all on my laptop and am almost out of storage space so it’s probably best I get another laptop anyway.
But long story short, you’re probably going to need a semi-decent laptop (e.g. 8GM ram or higher) and some spare storage space if you intend to make a lot of photobooks.
Related post: 10 things to check before buying a laptop for graphic design
This is my process for making a photobook using Blurb’s Bookwright software
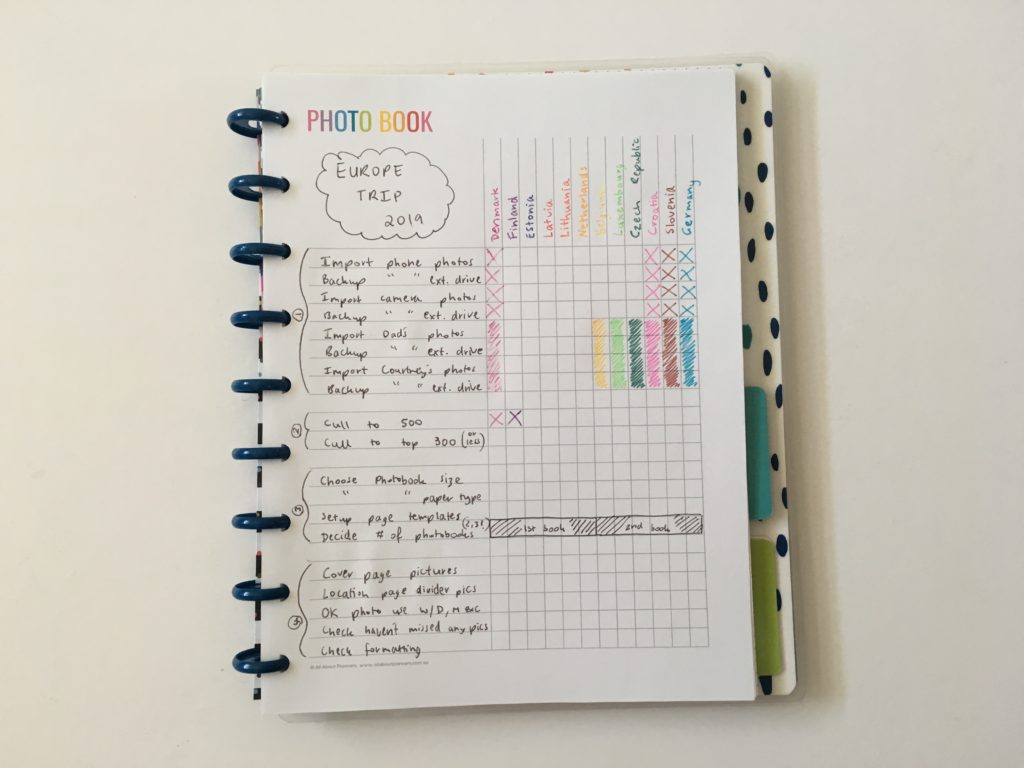
If it’s a big trip, I split the book into multiple parts. I split my 6 week Europe trip was split into 3 books. I’m terrible at culling photos and I want to include everything!
Step 1
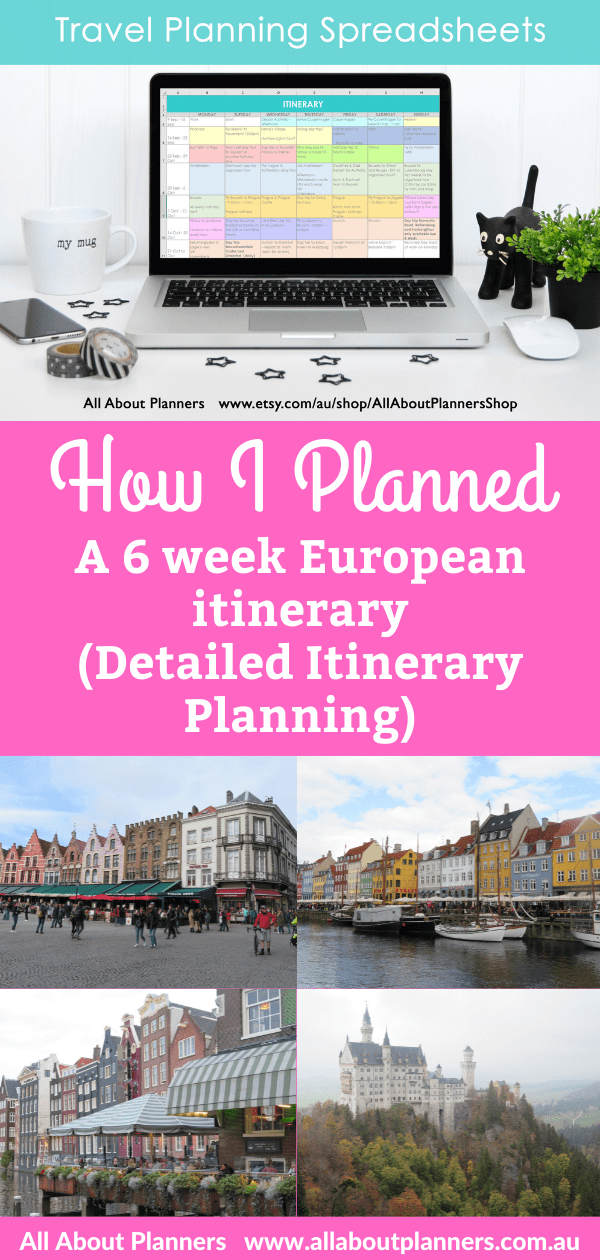
At the start of the book I include the itinerary overview which I make in Excel using my travel planning spreadsheets, and a color coded map I made using an online maps generator tool.
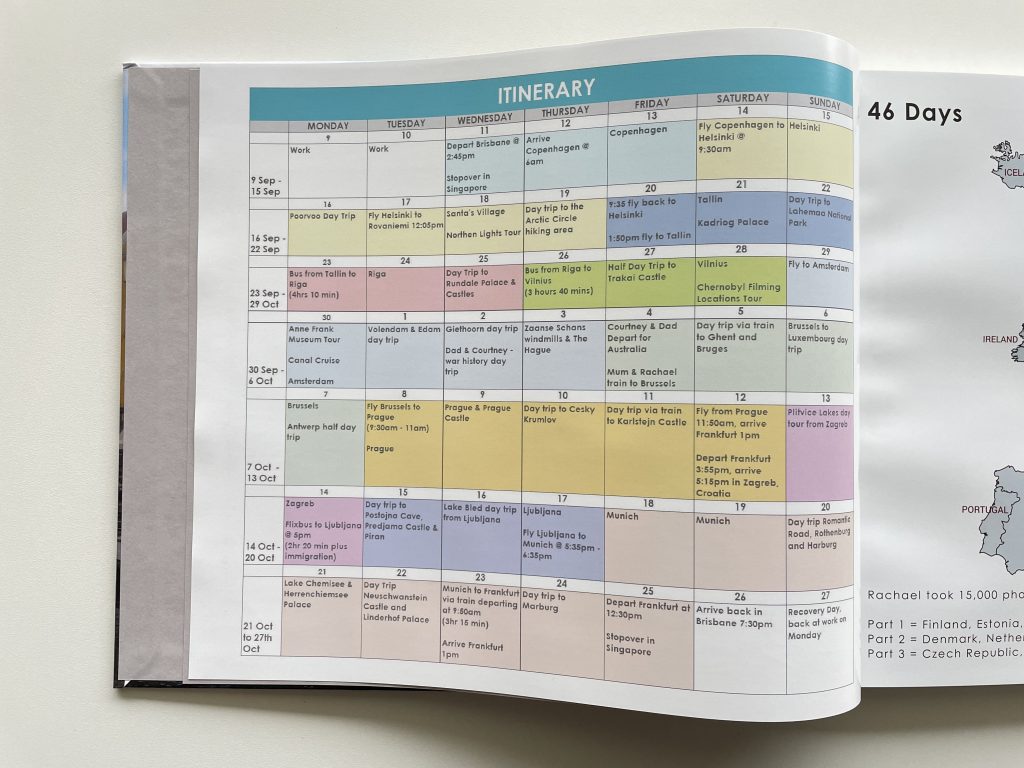

If you want to make a more detailed map e.g. for road trips, I use Google My Maps (tutorial here).
For more information about how I plan my itineraries, I have spreadsheets and a Word document with my detailed itinerary template.
Step 2
Gather all the photos from other people who went on the trip with me, my camera, my iPhone. I keep these in separate folders so I can find photos easier e.g. I might know that someone took a photo of me on their camera, and I prefer to use the camera quality photos before iPhone photos (iPhone photos are usually food or photos taken in wet weather where it’s easier to clean the lens and I don’t want to damage my real camera).
I have these folders setup on my computer for each photobook:
Folder: LOCATION E.G. NEW ZEALAND
- Sub-Folder: Favorite photos
- Sub-Folder: Photobook used
- Sub-Folder: Other photos
- Sub-Folder: Not Using
I could probably just delete the ‘not using’ photos but I have trouble deleting photos! I want to keep them all.. just in case.
Step 3
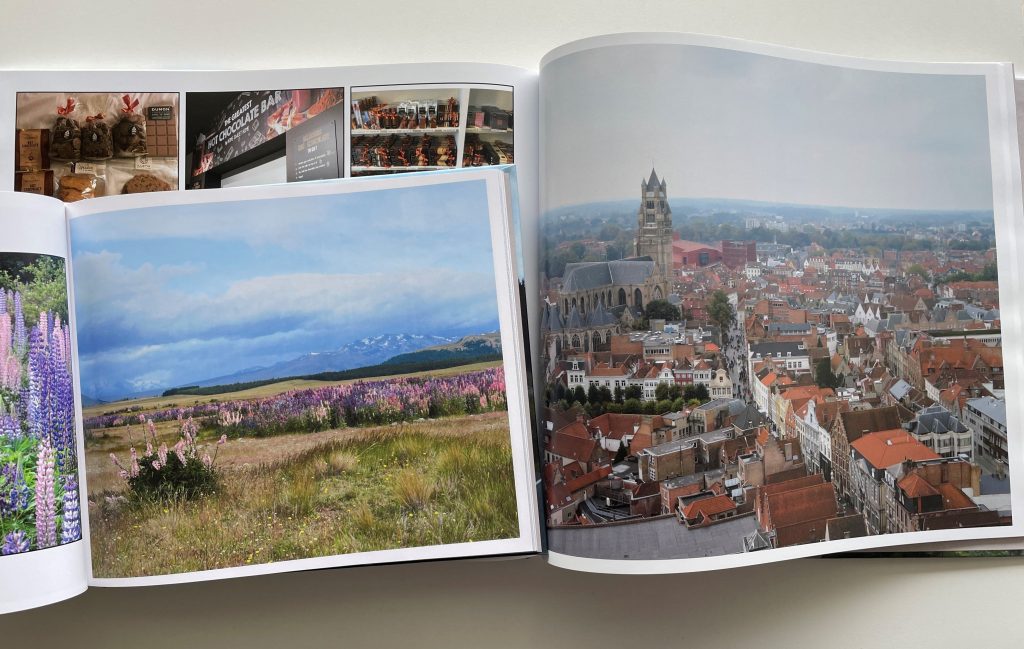
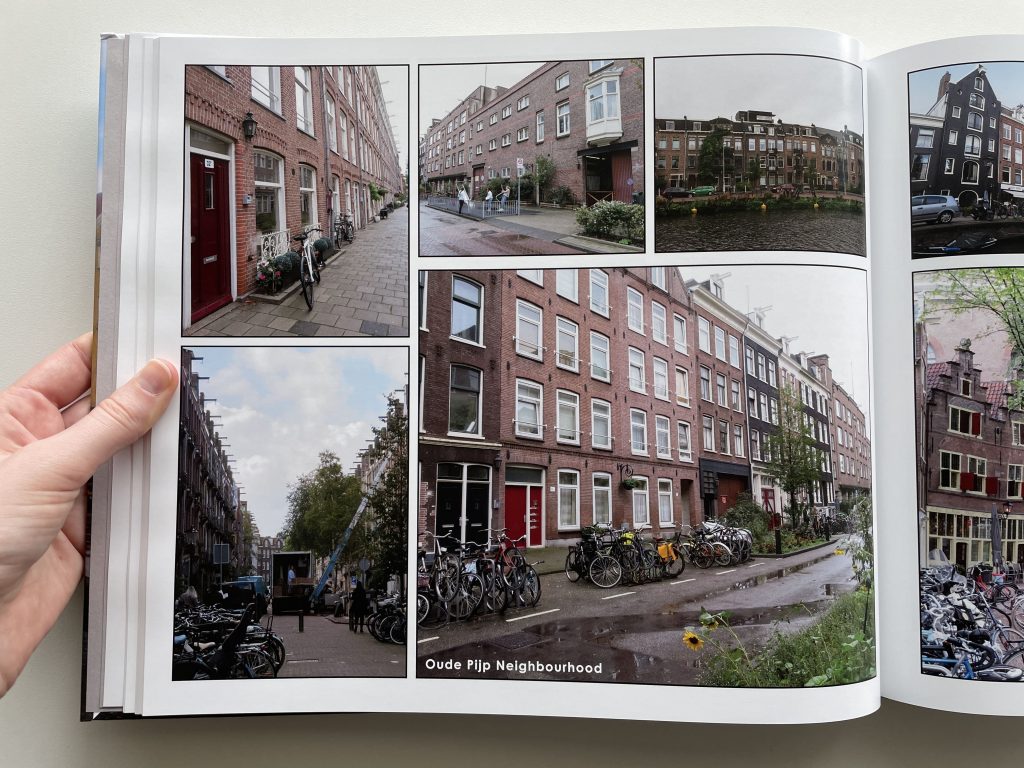
Review the photos I have, and decide on a rough page order. You can add text boxes in the software so sometimes I’ll make a themed page e.g. I’ll type food photos as a placeholder or cluster by location e.g. a viewpoint. If I’m doing a collage page, I’ll include a mix of buildings, street scenes, architecture etc.
I load the photos as I go. I prefer not to do a photo dump as I can see the photos clearer on my computer than in the software.
Once I’ve loaded a photo into the software, I transfer it to a ‘used’ folder within that destination’s folder e.g. Germany > Munich > Used
I do not compress the file size or edit the photos prior to adding them to the photobook. I used a Canon PowerShot SX730HS camera (until I dropped it and it broke). I have just started using a Canon Powershot GX Mark II.
Step 4
Location divider / cover page within the book.
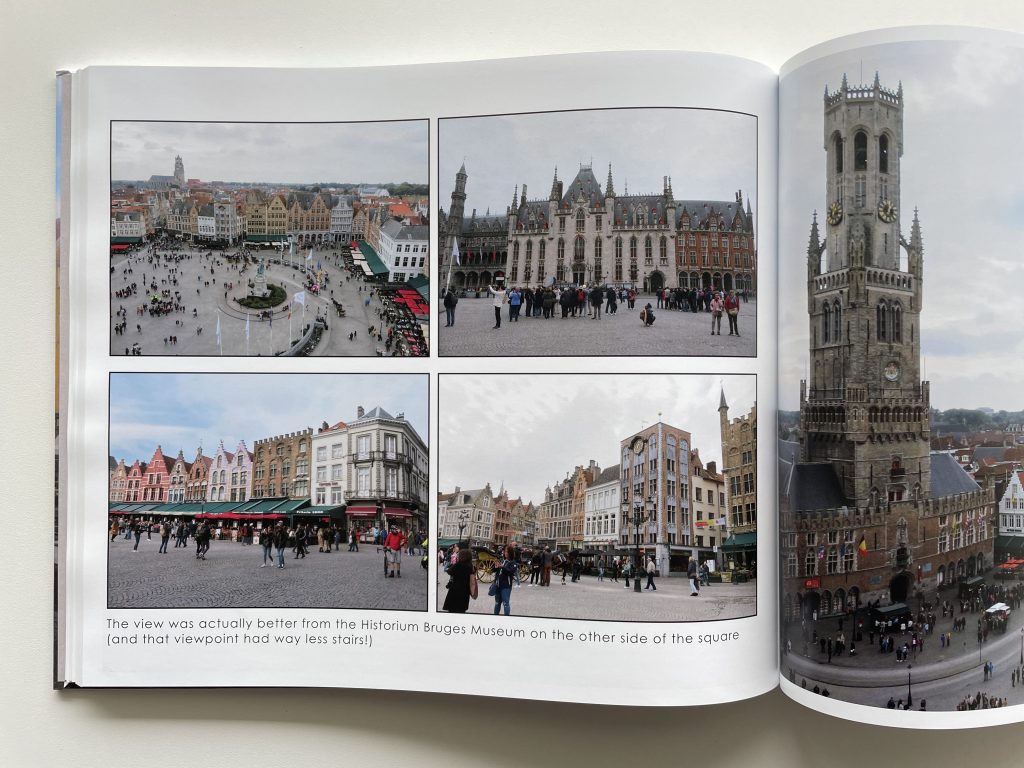
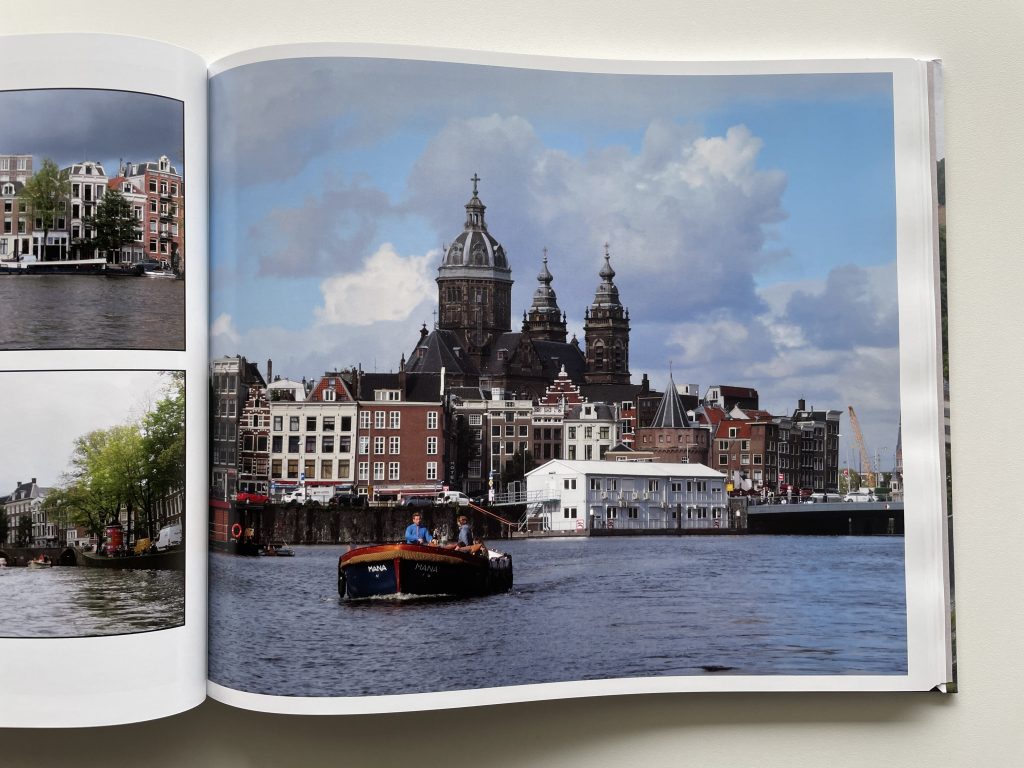
I usually put the most iconic, easily recognisable, touristy location photo from the trip e.g. for Rome I used a photo of the colosseum. Sometimes I do a one page spread, sometimes a 2 page spread.
Step 5
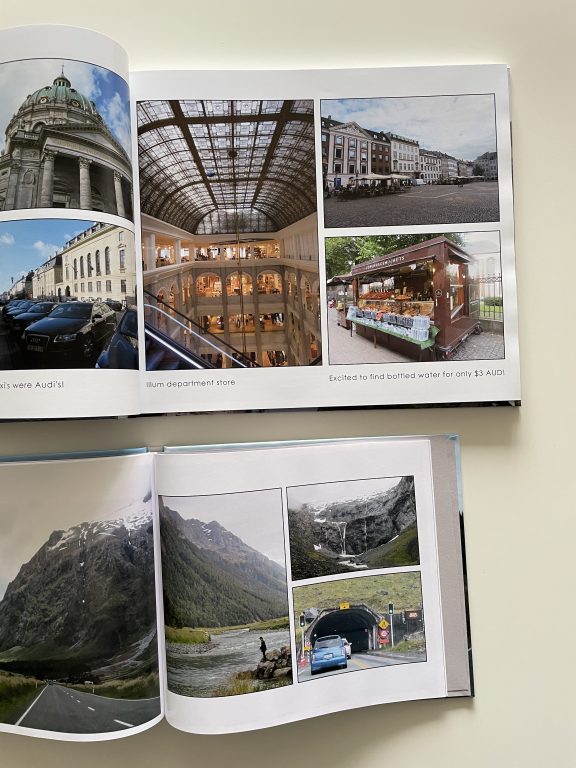
I cluster photos within the book by location. So all of one destination’s photos together e.g. France, and then within that, I’d group photos of Versailles together, photos of the Eiffel tower, all the photos taken from a viewpoint etc.
I don’t necessarily arrange photos in chronological order of when they were taken. However you could, and also take a journaling approach if you wanted to. E.g. On day 1 we went to ___ and then include photos of the place you went to and some commentary about what you thought of it, if anything funny happened, what you ate etc.
Step 6
Decide on a page layout. There’s usually some photos that I know I want to make full page, and if there are many photos of a destination, I’ll cluster them together 4 – 6 on a page if I’m using the larger book sized (32cm long including the spine by 27.5cm high) or maximum 4 per page on smaller book size (24.5cm long including spine by 21cm high).
I set up the page layout I want to use, and keep a blank template (i.e. no photos) at the back of the book file. Then I can just add new pages and copy and paste this template to make the process quicker.
Once you load the photos into the software, you can filter by ‘used’ or ‘not used’ which is helpful when you’re trying to find ‘filler’ photos to complete a page.
Step 7
Proof read and check things like bleed lines, consistent photo placement and distance from page borders.
I have a workflow template you can customise for your photobook. If you’d like to download the template for free, click here (existing subscribers can login here).
The Cover
I choose hard cover rather than softcover (not sure softcover is even an option with Blurb but I think it is with other photobook companies).
You can get a dust jacket but I always find those irritating to remove and put back on the book, the corners get scuffed and I just don’t think it’s necessary. I store the photobooks in large clip top bags on a bookcase and that is more effective at resisting dust on all surfaces of the book, including the edges of the pages, not just the cover like a dust jacket would.
You can add photos to the front and back covers, and whatever text you like on the spine.
![]()
Pricing
I order during Black Friday sales for 50% off. They give members (free to join) early access (usually a week early) so I can order the Photobook before the rush, get it in time for Christmas and focus on other Black Friday shopping on the actual Black Friday day / Cyber Monday weekend.
I order one copy to make sure I’m happy with it and then if I want to print another copy I can edit it (while I proof read it multiple times and have someone else proof read it too, one time there was a typo so I was able to fix that before the second book was printed).
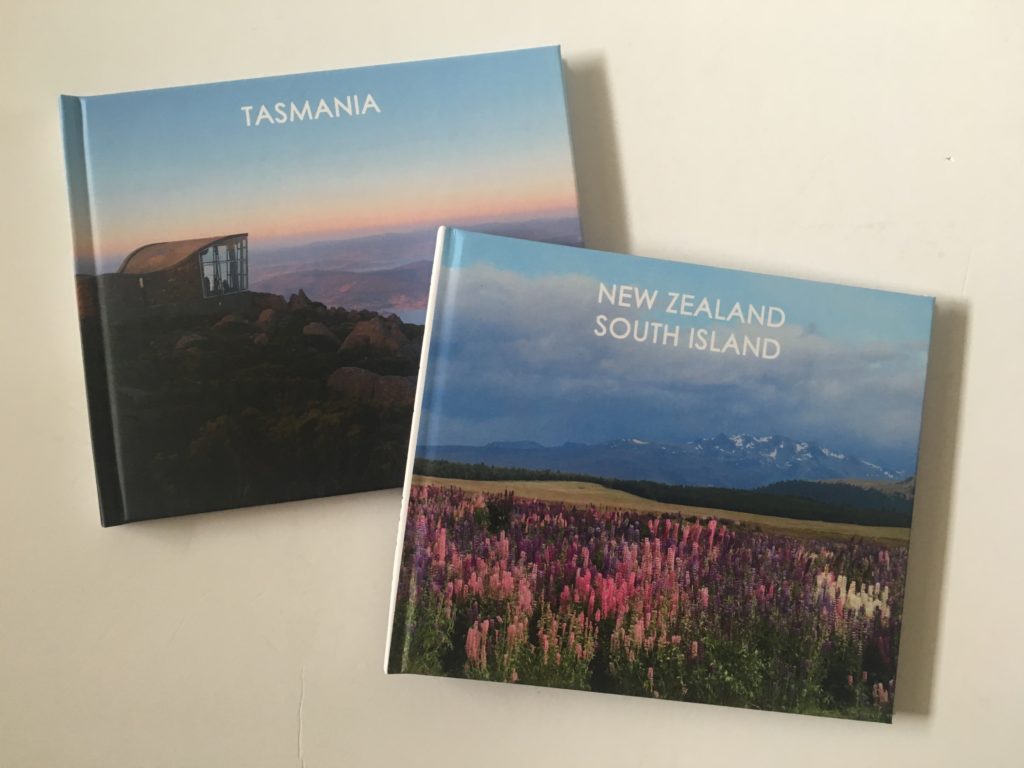
For a large page size 13″ wide x 11″ high, it cost $95.36 AUD.

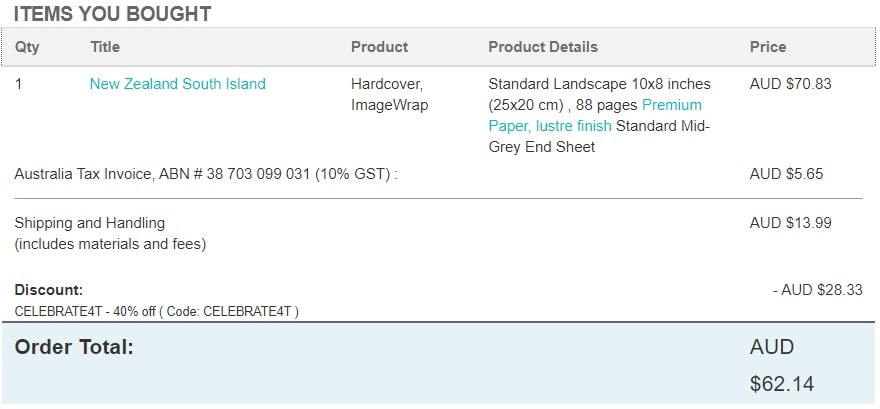
For a 10 x 8″ size photobook with 88 pages (ordered in 2019), it cost $62.14 AUD.
Blurb Image quality
I ordered my first book and was happy with the image quality, so ordered a second. The second had some white lines through some of the pages so I took photos and emailed Blurb. They re-printed the entire notebook and shipped it to me, for free. The re-printed version didn’t have the white lines and I was very happy with Blurb’s quick response to the issue and not charging me for it.
The main issue I have with Blurb
The Blurb software has to be downloaded to your computer, and when you import photos not the software, those are saved on your computer. I.e. it’s up to you to find the storage space for the original photos, plus the photobook software, plus the photos that are now duplicated on your computer when you import them into the software so you need a lot of storage if you’re making big photobooks.
Some other photobook companies have the book creator software as an online webpage, where they store the photos and the photobook template. I was a bit iffy about this as it means you have to rely on the photobook company never closing down. At least with Bookwright being an independent software on my computer I can generate a PDF proof at any point in time while making the photobooks so I always have a backup.
Time required
For an international holiday photobook, I think it took me up to 100 hours to do the first one. I haven’t timed it and I stop and start working on it over a month or two, but it took a long time to choose my page layouts and get the hang of the software, go through my many photos and choose the best ones etc. I don’t mind that it takes that long as I’d rather take my time and make sure I’m 100% happy with the final product. If you’re not a perfectionist and don’t take many photos, I expect it could take half as long!
I’m getting quicker the more I make as I’m re-using the same templates I’ve already set up in the Bookwright software. I think it took me about 50 – 60 hours to do the last international holiday one. Keep in mind sometimes I take 5 photos of the same thing (in case one is blurred, someone with a bright red jacket walks into the frame etc.) and the most time consuming part is choosing the best one.
Other companies that will make photobooks for you
I am not affiliated with any of these companies, just some I found when researching:
- Kmart or Big W
- Vistaprint
- Papier
- Photobook Australia
- Photobook Worldwide
- The Photobook club
- Momento
- Snapfish
- journi
- Mixbook
- Shutterfly
journi is a good option if you want something quick. You upload photos and it will automatically generate a book for you, it can also add maps with pins on the places you went. However, I don’t like the large dead space this company adds around the photos, you can’t add borders on the individual photos and the page sizes are too small.
Things to check when choosing a photobook company:
- Page sizes offered (plus portrait or landscape orientation)
- Number of pages
- Hardcover or softcover
- Glossy versus matte printing (I prefer matte finish)
- Do you want software that automatically orders the photos, or do you want full control over the page layouts
- Some companies are web based rather than a downloadable software
- What country the company is based
- Shipping cost and times
- Discount if you order more than one book
- How to contact them (I wanted a company that had an Australian branch so I could easily contact them if something was wrong)
I hope you found this post helpful!
Travel posts
- Day trip to Versailles from Paris (by train)
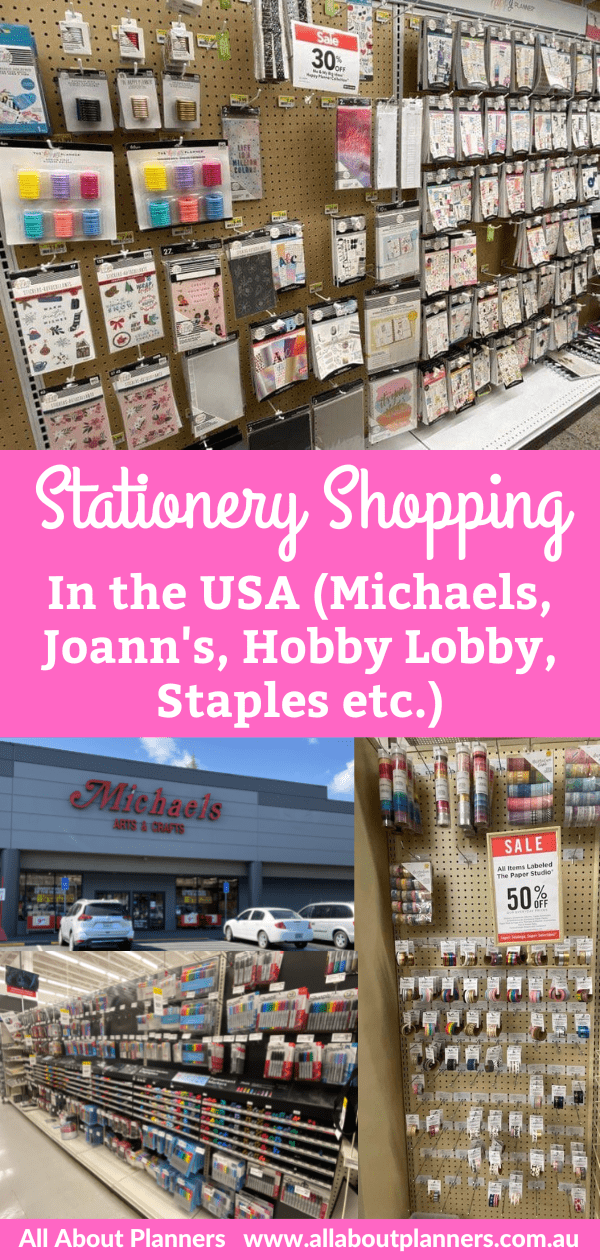
- Favorite Stationery Shops in Belgium (Brussels, Antwerp & Bruges)
- Copenhagen Weekend (2 Day) Itinerary (What to see & do and best photo spots)
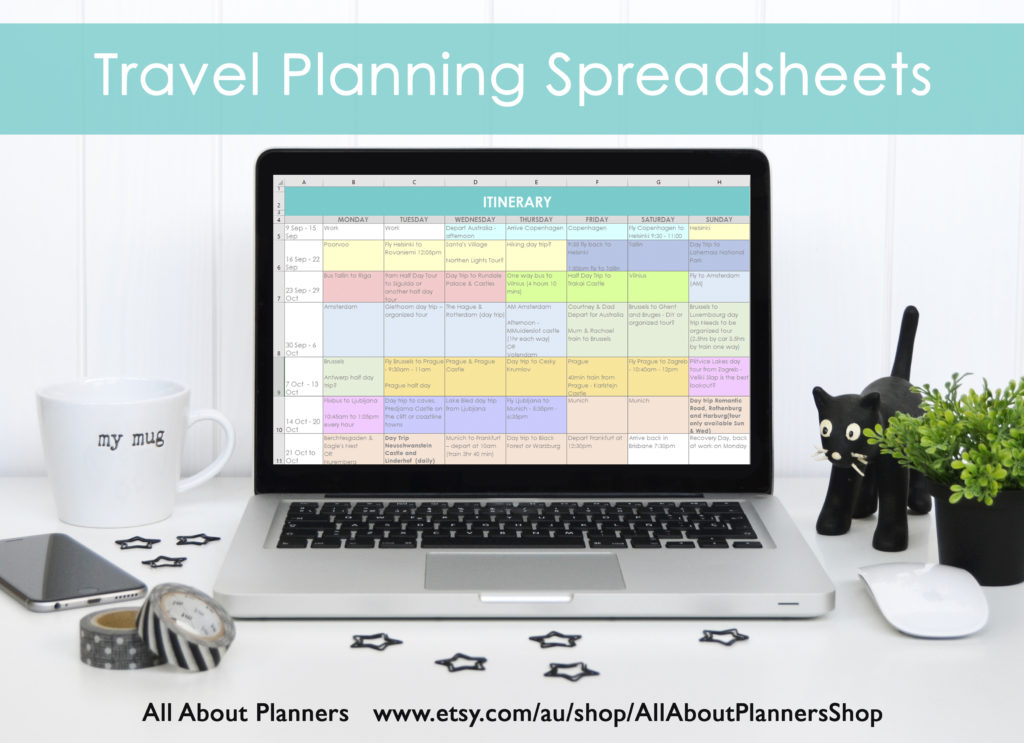
Download a copy of my travel planning spreadsheets
Found this post helpful? Pin it!


Thank you such a detailed explanation of your process. I’ve done a couple of these for past trips and love them as otherwise pics live in the cloud or on my phone and never really get looked at. I’ve used Chatbooks, which offers an app or web interface to make their books and I found it really helpful to be able to create my books while I was commuting on the train to work. They also offer an interesting option to regularly dump your Instagram feed to a book. I think for people with kids this could be a really nice and easy way to keep track of them as they grow.