
Monthly blog post planning using sticky notes (my 6 step process)
Sticky notes are one of my favorite planning tools – especially for blogging where I tend to change my mind a dozen times on the order in which blog posts are published! I’ve previously used sticky notes for weekly blog post planning but decided to try monthly blog post planning using sticky notes instead as I tend to under utilise the monthly calendar of a planner as I find the boxes have very limited space to write in.
How to plan blog posts using sticky notes
What you’ll need:
- Small sticky notes (I prefer the Post it Note 3M – they come in plenty of colors and are a good size without needing to trim them. You can use bigger sticky notes e.g. 1.5″ x 1″ and cut into smaller strips but it’s more time consuming, that size sticky notes don’t come in as wider range of colors and you usually have to buy in bulk)
- Black pen (easier to see against the colors of the sticky notes)
- A monthly calendar. I opted to use one of my (many!) Plum Paper planners but you could do this with any planner or printable
Related: Plum Paper Planners Haul & Review (better than the Erin Condren?)
How to set up your month
You could use this method for weekly blog post planning – especially if you’re short on space on your planner. I prefer to do this monthly as I can see the entire month’s work of blog posts without flipping through multiple pages.
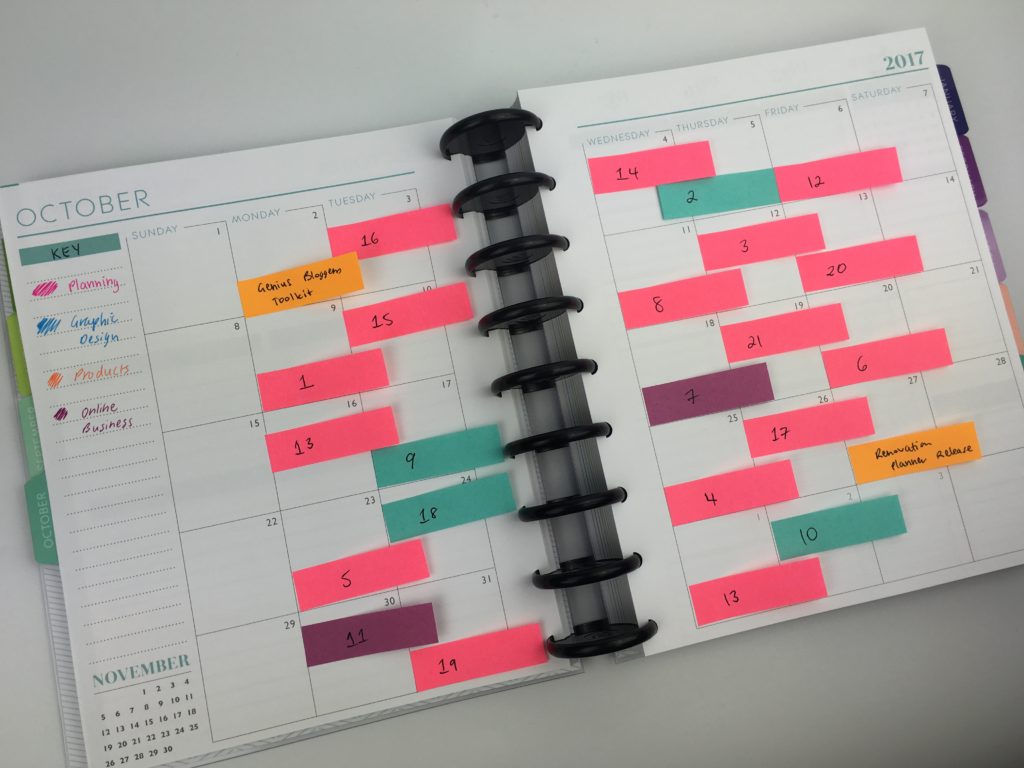
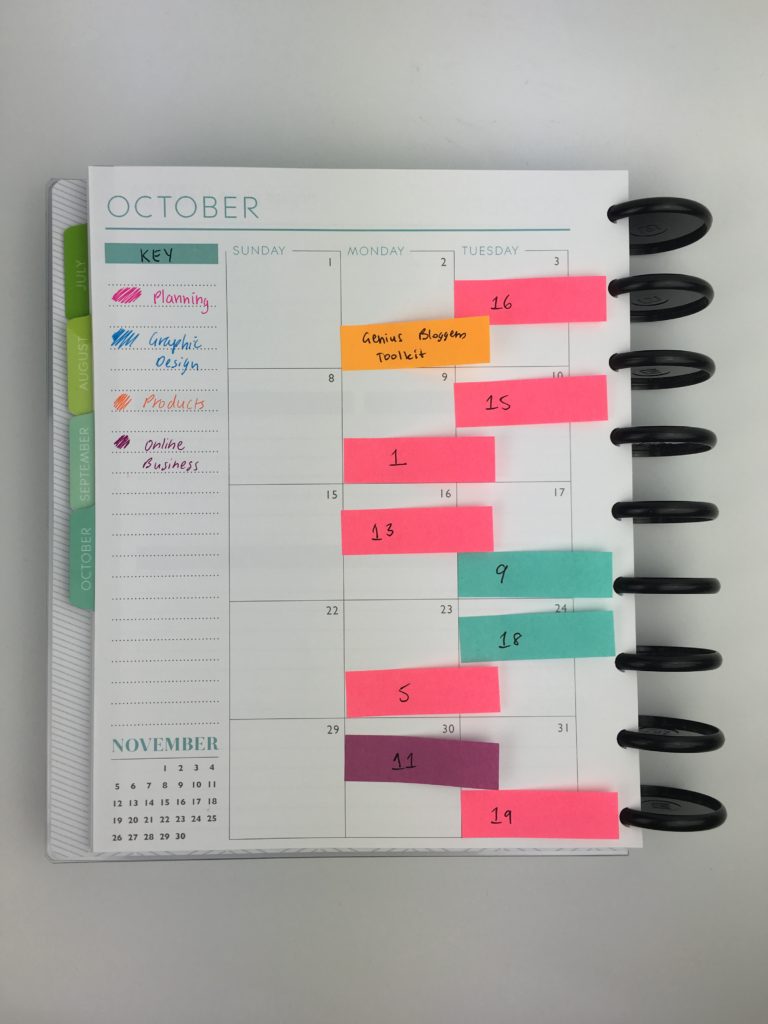
Step 1: Color code
I’m an avid fan of color coding. It makes it so much easier to keep track of multiple things plus it creates a colorful planner spread!
Sticky notes tend to come in 5 colors: yellow, blue, green, orange and pink. I recommend using these colors for color coding. The reason being is that your brain dumped blog post ideas can be color coded to match and keep everything coordinated. It’s easier to find highlighters and pens in these 5 colors.
More posts on color coding:
- Planner Organization: How to color-code your planner (so you’ll actually use it effectively)
- Favorite color coding planner supplies for less than $5
- Ultimate list of the best planner pen brands and how to choose colors for color coding
- 50 Category Ideas for Color Coding Your Planner
- How to organize and color code your notes for school, college or university
- Color coded monthly meal planning using sticky notes
- 6 Ways to color code your planner to increase productivity
- Color coding your planner: how to choose which colors to use
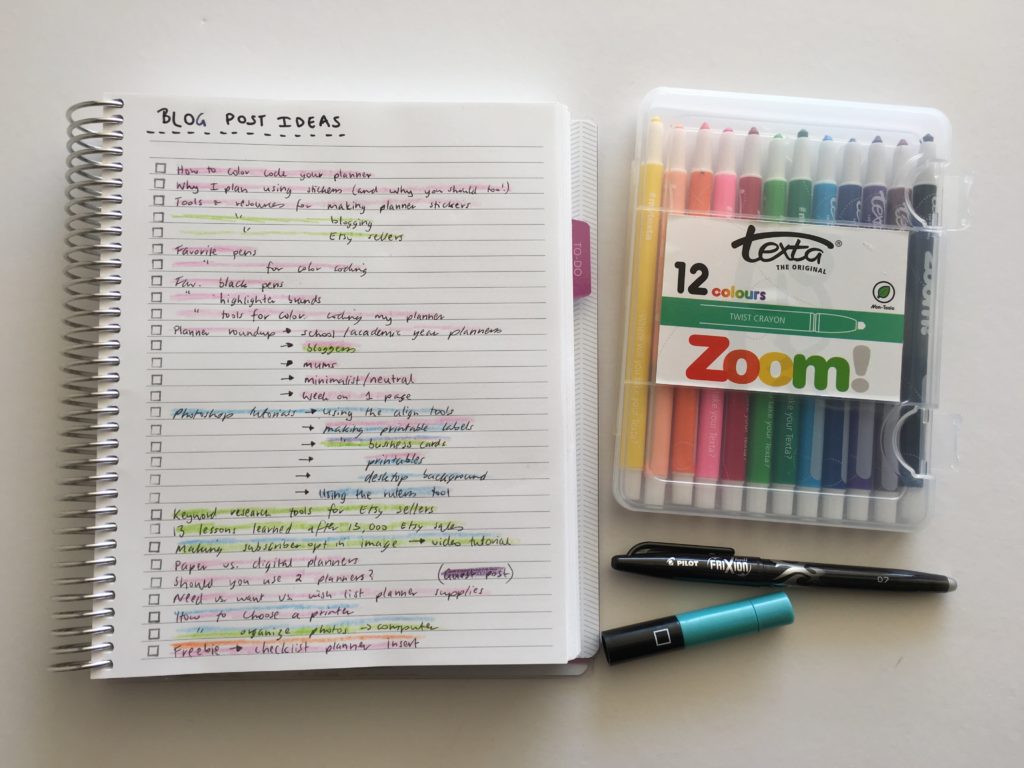
Step 2: Brain dump blog post ideas
I prefer to do this using the same colors as the sticky notes. I alternate between using the Frixion erasable pens and writing blog post ideas in black pen then highlighting or use zooms (twistable crayons) to color code.
If you need some blog post ideas I compiled a number of brain dumps into an ebook: 1200 Blog Post Ideas! That reference list means I never run out blog post ideas and is how I always post 3 – 5 times per week!
Related: Simple method for organized brain dumping of blog post ideas using a notebook and zooms
Step 3: Choose how many blog posts to publish
Choose how many blog posts you’re going to publish that month. I try and post 3 to 5 times per week. Anything less than that and it’s not enough to maintain traffic. Even with pinning you need to be posting frequently as this pushes your blog higher up in Google’s search results.
I like to have a minimum of 3 backup blog posts in the works – just in case.
Step 4: Number the blog post ideas
Place a number beside each blog post – it doesn’t matter what order you number them and they don’t need to be grouped by category. I just go down the page from top to bottom and number each blog post idea.

Step 5: Add the numbers to sticky notes
I coordinate the colors used to write (or highlight) the blog posts with sticky notes – makes it very easy to see if you’re blogging too much about one thing. I keep a separate color (orange) for product launches.
Note: If you write the exact same number of posts for each category, each month, you can coordinate the numbers written on sticky notes with the colors of your blog topics. I personally find this too restricting as I’m prone to frequently changing my mind about which posts to publish!
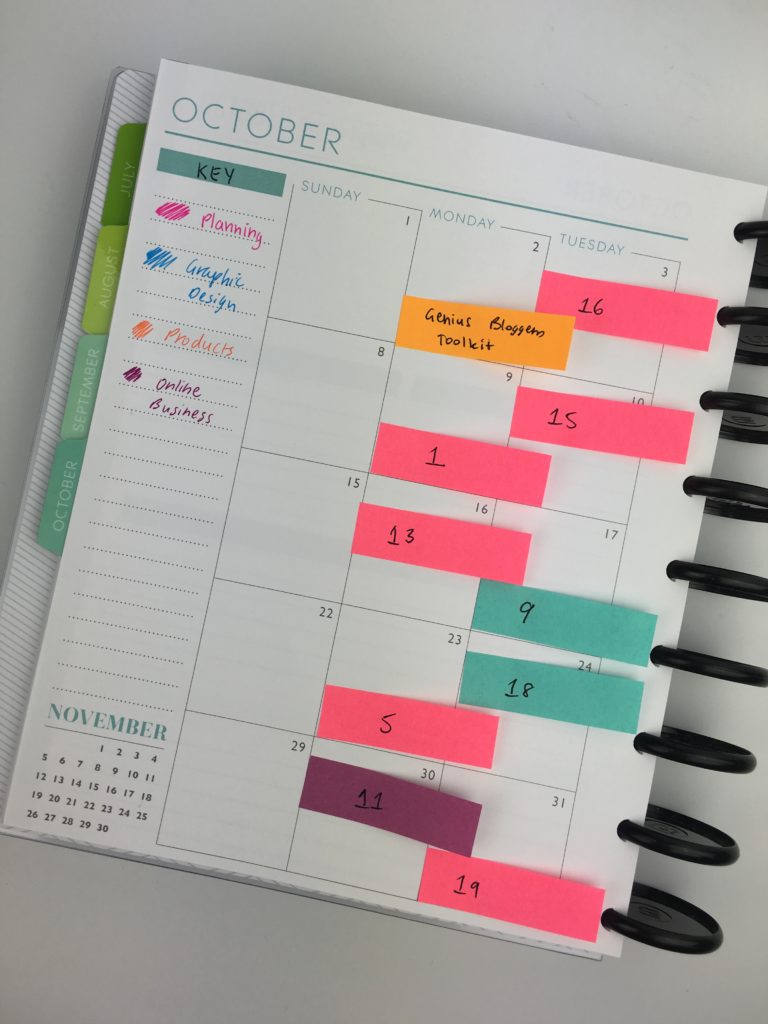
Step 6: Schedule the posts
You can add and rearrange them as many times as you like. When that post has been publised just pull the sticky note off.
Found this post helpful? Pin it!
Related Posts:
- How to start a blog (step by step tutorial)
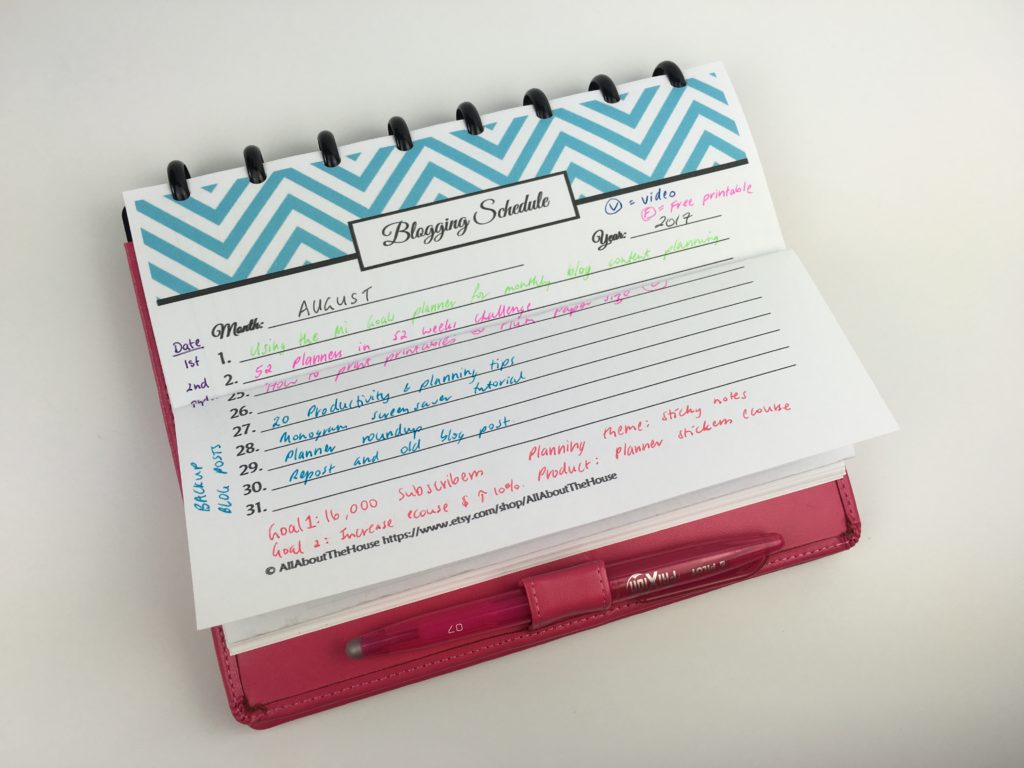
- Using the Mi Goals planner for monthly blog post content planning
- My weekly blog planning process (how I organize and plan for the week ahead every Sunday)
- 10 strategies for efficient blogging (that I use to post 5 times per week while working full time)
- How to write and publish a blog post in 1 hour (plus a free printable blog post workflow checklist)


OMG! I though I was the only crazy blogger who used Post It Notes to plan my blogs (and my life) Love the color coded blog ideas in your notebook. I’m going to have to use your tips for scheduling, as I am still listing and scheduling online all at once! Great post 🙂
Glad you found the post helpful! 🙂