Quick Canva Tutorial: How to remove backgrounds from photos
In this post I’m going to show you how to quickly and easily edit either your own photos, or stock photos from Canva.
Canva has a handy ‘BG remover tool’ that automatically removes the background of an image.
Canva’s BG Remover tool is helpful for:
- Making your image look cohesive
- Can be used to make Pinterest pin images to market your blog
- Make gift guide roundup posts for your blog (and include links to the products on Amazon so you can make affiliate income)
- Create cohesive photos for a product catalog for your Etsy shop, other online store or wholesale catalog (I have a Canva catalog template here).
- If you don’t want people to know you’ve used stock images
- If you’re using your own photos but they don’t look as professional as you would like
You will need the paid version of Canva (Canva Pro), to access the BG Remover tool.
How to get a white background behind your images quickly
To enlarge the screen of the video, click the square icon in the bottom right hand corner of the video (it will say ‘full screen’ when you hover your mouse over the icon).

Subscribe to my YouTube channel for more graphic design tutorials & planner reviews
1. Upload your photo and add it to whatever you’re working on in Canva. Or, find a stock photo you like and add it to whatever you’re working on in Canva
2. Click on the image and click on BG remover from the pop up menu that will appear

Removing the background from one of my own images

Let’s try it again with a stock photo from within Canva.
Before…

Removing the background from a stock image
And after:

3. Crop the image.
If you used an image that had a much larger background than the part of the image you’re keeping, you can crop it by clicking on the icon circled in the image above

4. If a white background is too plain, press R on your keyboard to get a rectangle element. Change the color and position it behind the image.
If you want to move or resize both the rectangle background that you’ve added, add the image you’ve removed the background from, group them together.
You can copy and paste the edited image to another file in Canva, or save as a JPG pr PNG file to download a copy and use the image outside of Canva.
After you remove the background, you can either leave the background white, or you could add a colored background to make it look cohesive. I’d add the colored background if you’re making a gift guide roundup post for your blog, Instagram etc., when there are some images that aren’t working when you try and remove the background (Canva’s background remover tool is good, but it’s not perfect).

Here is the link to the Pinterest pin template I mentioned in the video (and where the above gift guide template is from).
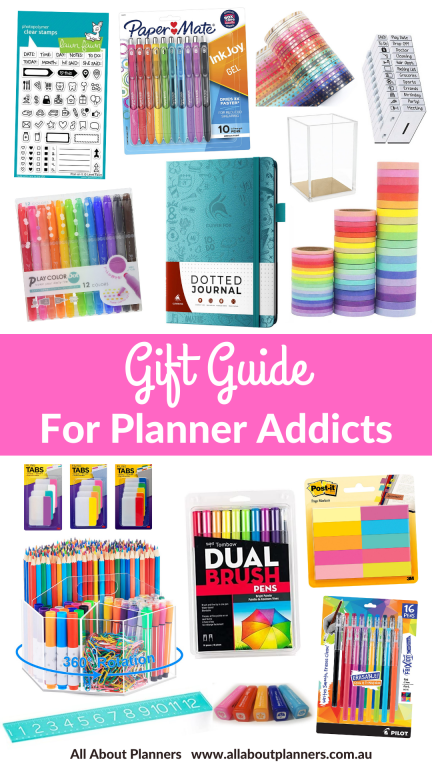
Here’s another example: I made a gift guide for planning addicts. Some of the product photos already had white backgrounds, and then I used the BG remover tool to fix up any photos that didn’t so that it all looked cohesive.
More canva tutorials here.
More blogging and online business tips here.
Found this post helpful? Pin it!