Using Microsoft Word to plan your week (52 planners in 52 weeks – week 21)
For week 21 of the 52 planners in 52 weeks challenge, I decided to try another digital planning system. Since Trello didn’t work that well, I opted to keep it simple and try planning the week using Microsoft Word.
Using Microsoft Word to plan your week
To enlarge the screen of the video, click the square icon in the bottom right hand corner of the video (it will say ‘full screen’ when you hover your mouse over the icon).

Subscribe to my YouTube channel for more planner related videos & graphic design tutorials!
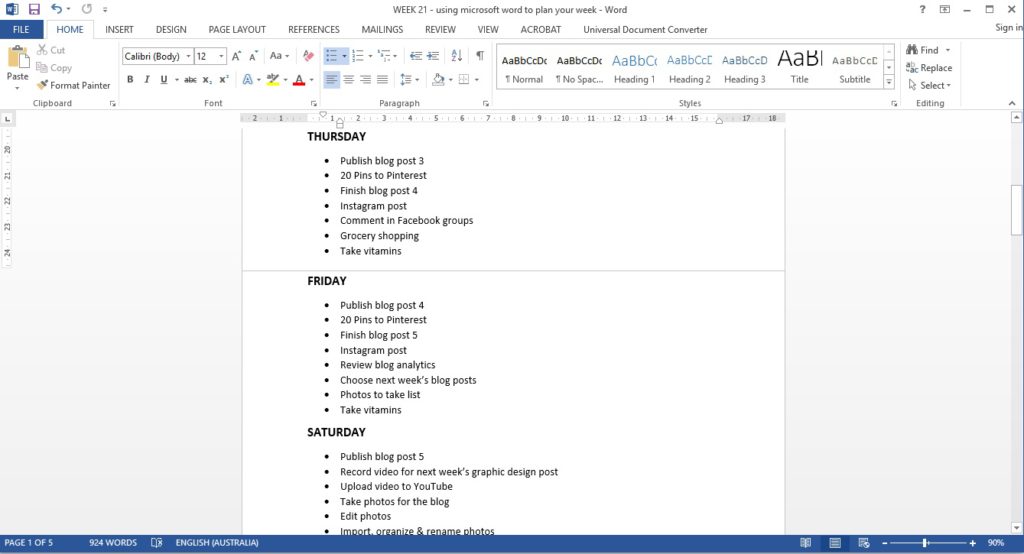
Setting up the Week
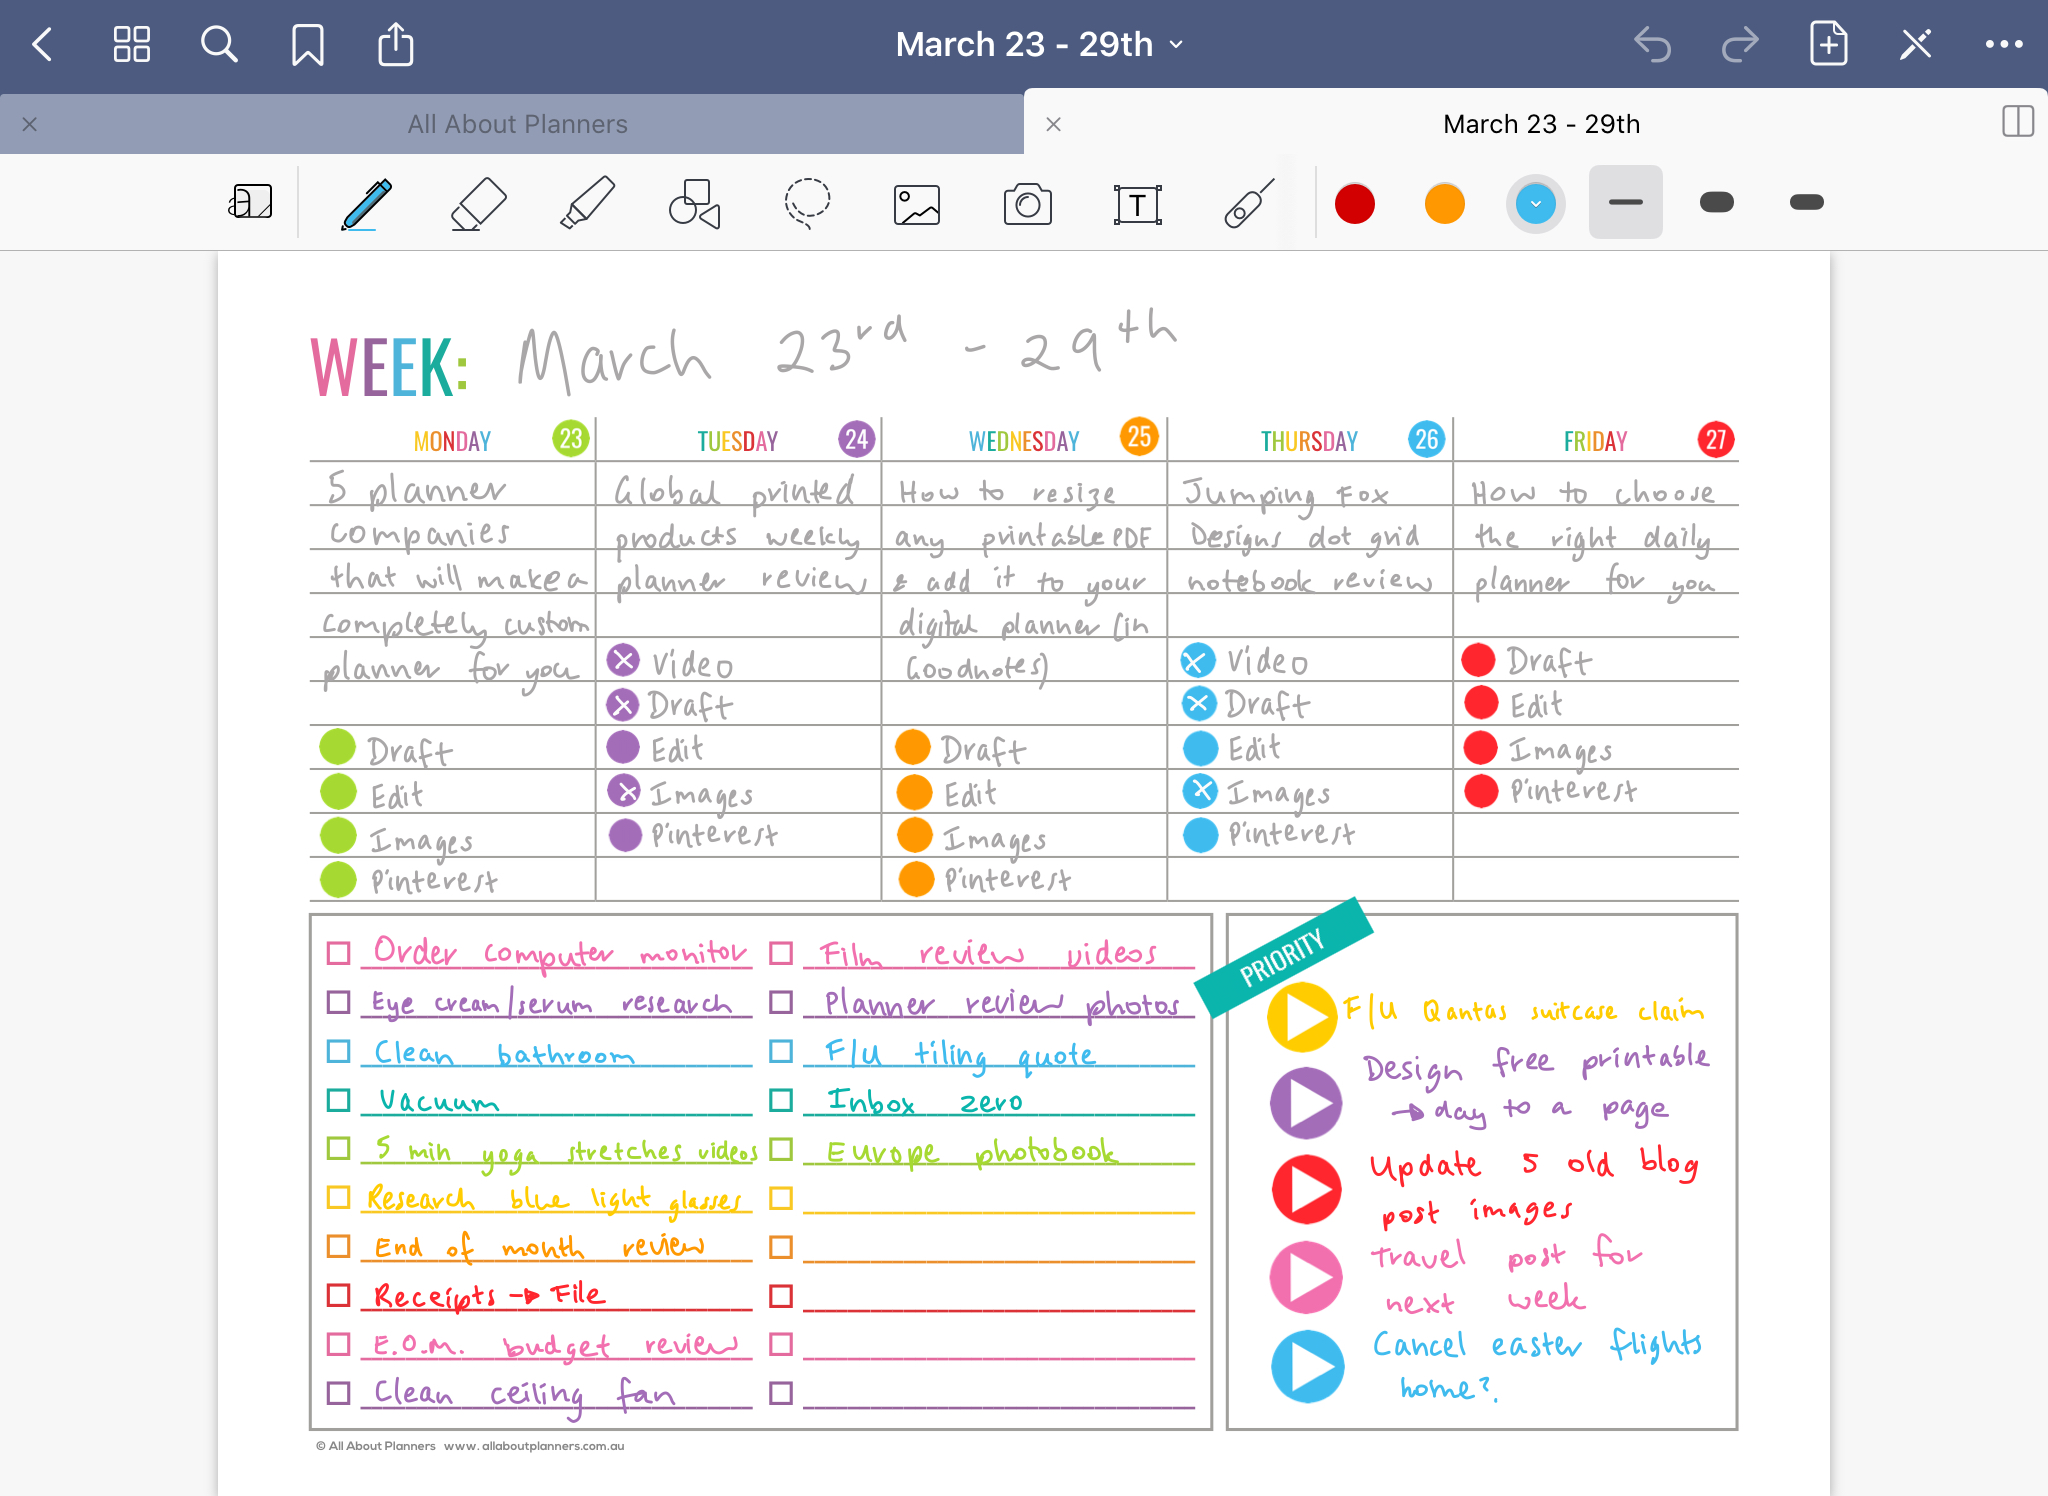
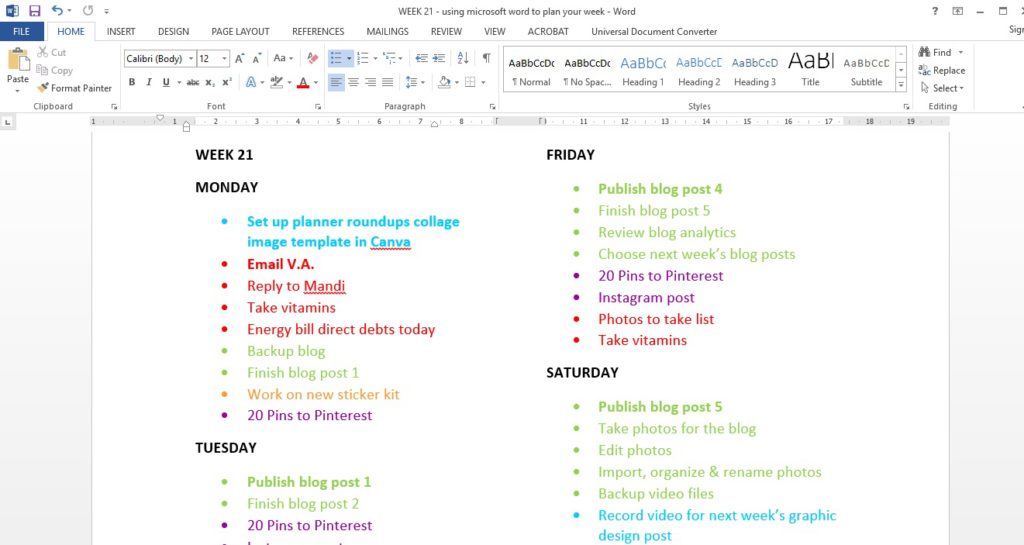
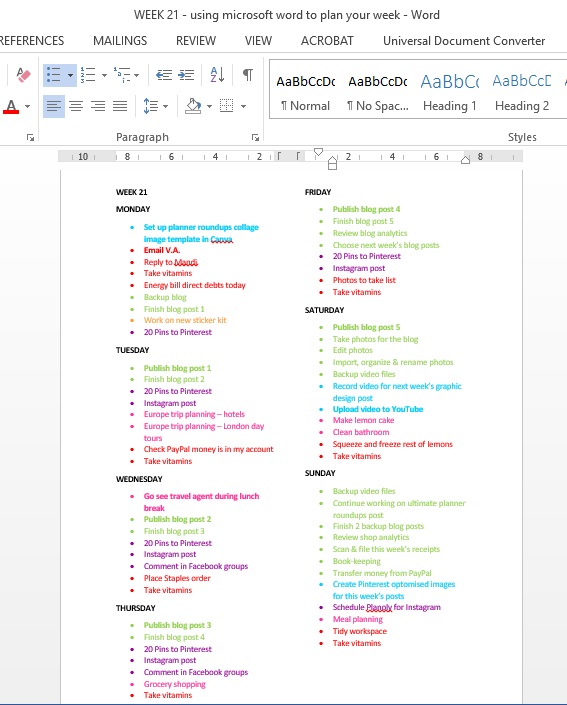
I set up the week with dots points for each day and the task beside it. Since I was going to keep it on my computer and not print it out, I didn’t turn the bullet points into a checklist (which you can do by typing the letter o to create a circle you can tick beside each task)
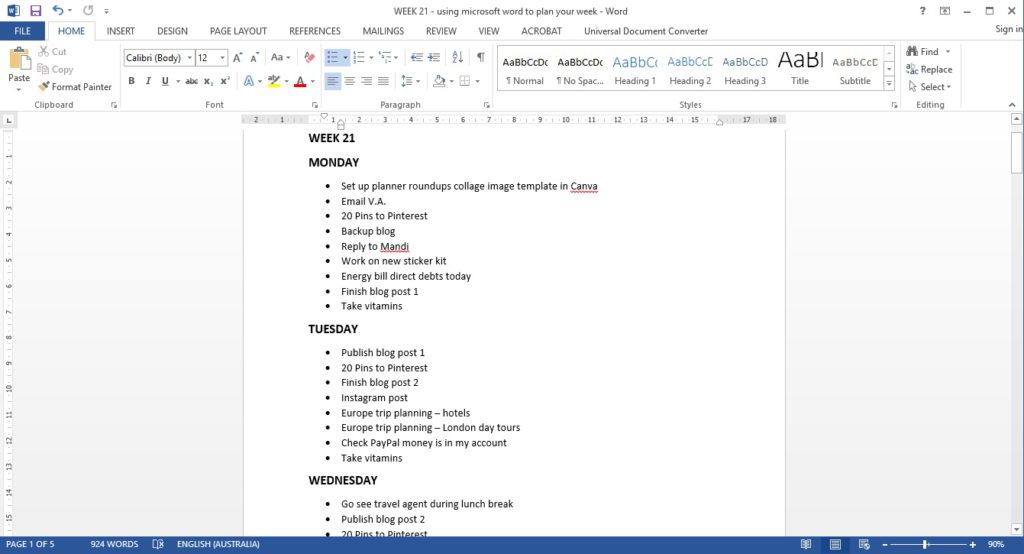
Because it’s digital I was able to copy and paste daily tasks for each day since I didn’t use a habit tracker this week.
I made the days of the week in uppercase letters and used bold formatting to make them stand out more (same formatting style as I tend to do when planning on paper).
Related: Favorite pens for writing headings in my planner
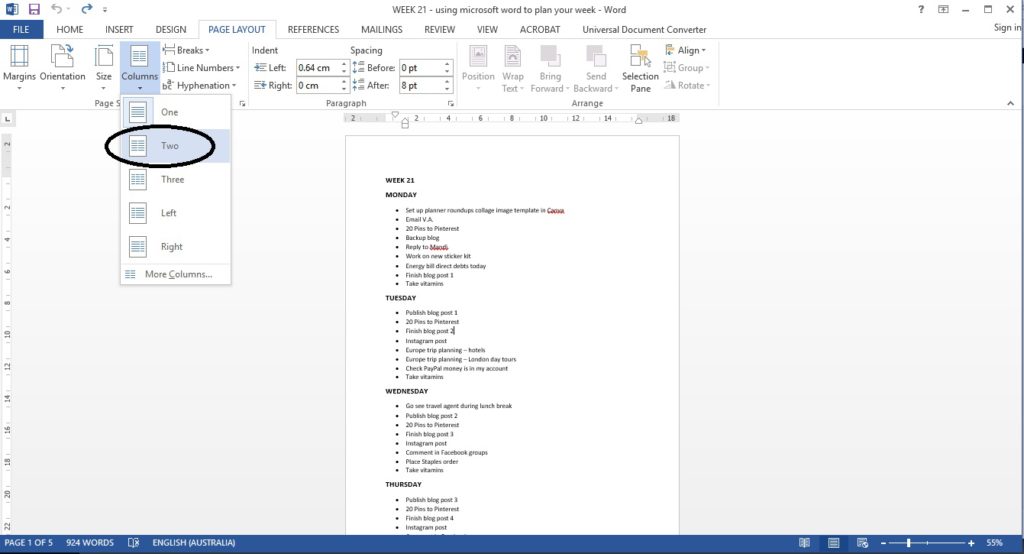
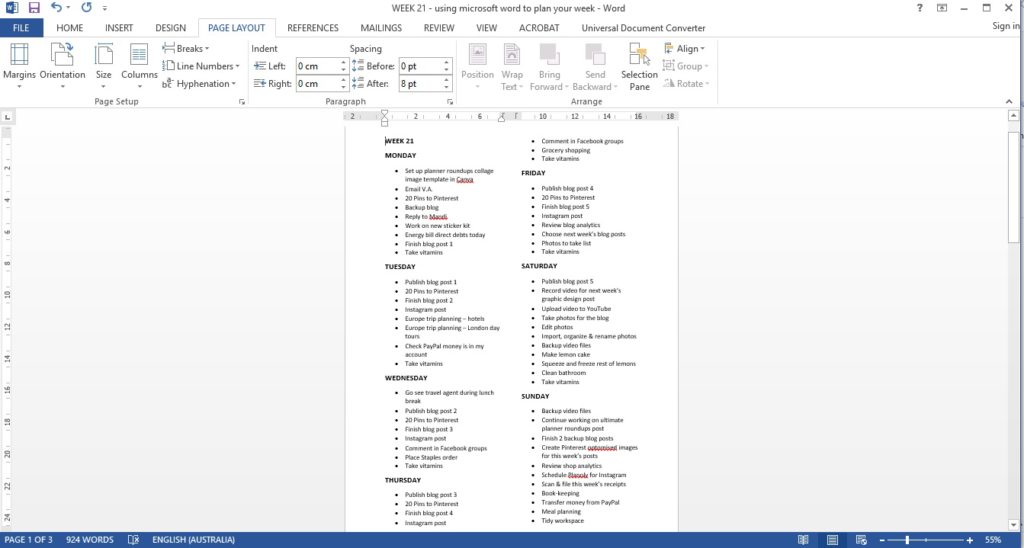
My plans for the week ended up spreading over multiple pages so I switched the page format to 2 columns so I could see everything on the 1 page.
Go to Page Layout > Columns > Two
If I was going to continue using Microsoft Word I’d use a prettier font! I just used Microsoft Word’s default Calibri font – a bit plain but easy to read.
As I experiment with more planner layouts throughout this challenge, I’m finding I definitely prefer having everything right there in front of me rather than flicking back and forth between multiple paces.
Color Coding
I almost always color code my planner – I may try different planning methods but this is one thing I keep constant each week.
I switched up the colors I used this week:
- Personal = pink
- Graphic design = blue
- Blog & business = green
- Purple = social media
- Orange = products
- Little things (15 minute or less tasks) = red (I chose red as I associate this color with reminders / don’t forget)
I prefer color coding by week as it helps me see if I’m scheduling too much of one thing. It also make it more obvious if I’m forgetting something e.g. if I don’t see purple then it alerts me to the fact that I’ve forgotten to schedule a social media post.
Related: 50 Category Ideas for Color Coding Your Planner
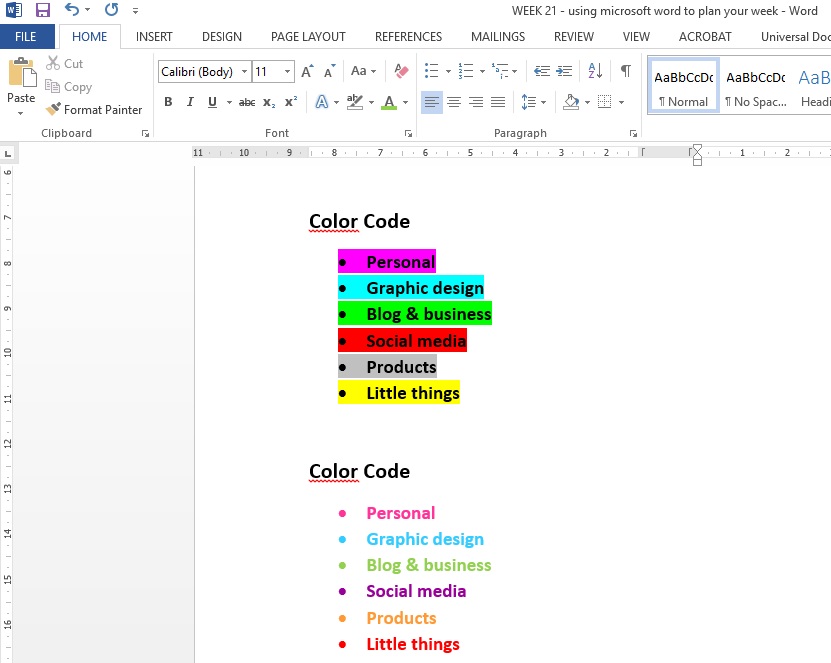
I experimented with color coding using the highlighter tool
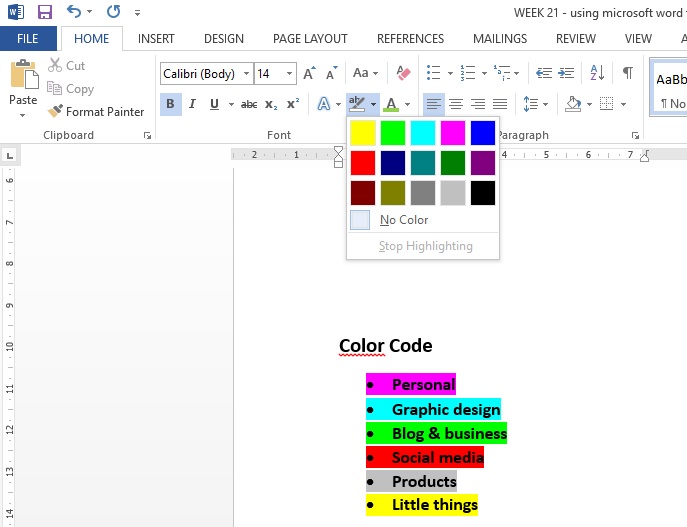
Highlighting takes longer and there are very limited colors to choose from. The darker colors make the text hard to read unless you change the text color from the default black to white.
And also by changing the color of the text…

You can choose any color you like for the text instead of just the 15 pre-selected highlighter colors (which don’t look distinctly different e.g. there’s no orange). For this reason I opted to color code the text.

Using the planner
I changed the formatting of the text to make the most important task in bold to make it stand out. You could also use italics, underline, or a different color to code the most important / top 3 tasks so you know what to focus on first.
The photo doesn’t show it that clearly but that small formatting change really did make those tasks much more obvious. I also re-ordered the tasks so those were first on the lists for each day.
I liked that I could easily move tasks around – I ended up clustering them by color. Being able to move them was handy as red and orange can blend when placed beside each other (one of the reasons I tend not to use red pens when color coding in a traditional planner – plus it’s a color that isn’t readily available in all office supplies).
Related: Color coding your planner: how to choose which colors to use
I liked that as I added tasks I could just reduce the font size and line spacing to keep everything on the one page.
And when a task was completed, I could just delete it. So that at the end of the week I could see which tasks weren’t completed – and they’d already be typed out ready to be scheduled for next week!
How to make planner printables using Microsoft Word: An Introduction
Pros of using Microsoft Word for planning
- Could jot everything down then easily re-order and group like tasks together that relate to one another e.g. scan & file receipts should be done before book-keeping. I didn’t need to worry about numbering tasks or whiting tasks out and re-ordering them – I could just highlight the task then drag my mouse to where I wanted to put it – much quicker than using pen and paper
- Fast to set up – I can type much faster than I can write
- Easily copy and paste recurring tasks – no need to re-type them out
- Could be more detailed e.g. ‘finish draft for post 1’ for the task description rather than just ‘post 1’
- If plans change you can easily move them around
- The in-built spell checker in Word and ability to erase mistakes kept the spread very neat
- Easy to add random things that pop up throughout the week into your to do list for each day, rather than using a sticky note when you run out of room (as I tend to do)
- Can use as little or as much space as you need – kind of like a digital version of bullet journaling
- You can deleting tasks so at the end of the week you can see what’s left – I’d recommend saving an original with all of your habit tasks so you don’t have to re-type them out each week

Cons of using Microsoft Word for planning
- Not as pretty as using stickers, washi tape etc.
- Need to be at your computer to add new stuff and cross them off – given I’m always at my computer since I mainly use a planner for blog / business when I look at my planner this wasn’t a big deal for me, but if you’re someone that prefers pen and paper this could take some getting used to
- No tasks progress indicator. To track progress I usually put a line through the checkbox when the task has started, shade half the box when it’s in progress and color the box completely when the task is completed. I could have used the line through function through half of the task but that takes longer than just putting a line or quickly shading half a box. Another option would be to use the italics, bold or underline text formatting options, or using a different color, or increasing the font size of that task to make it stand out more
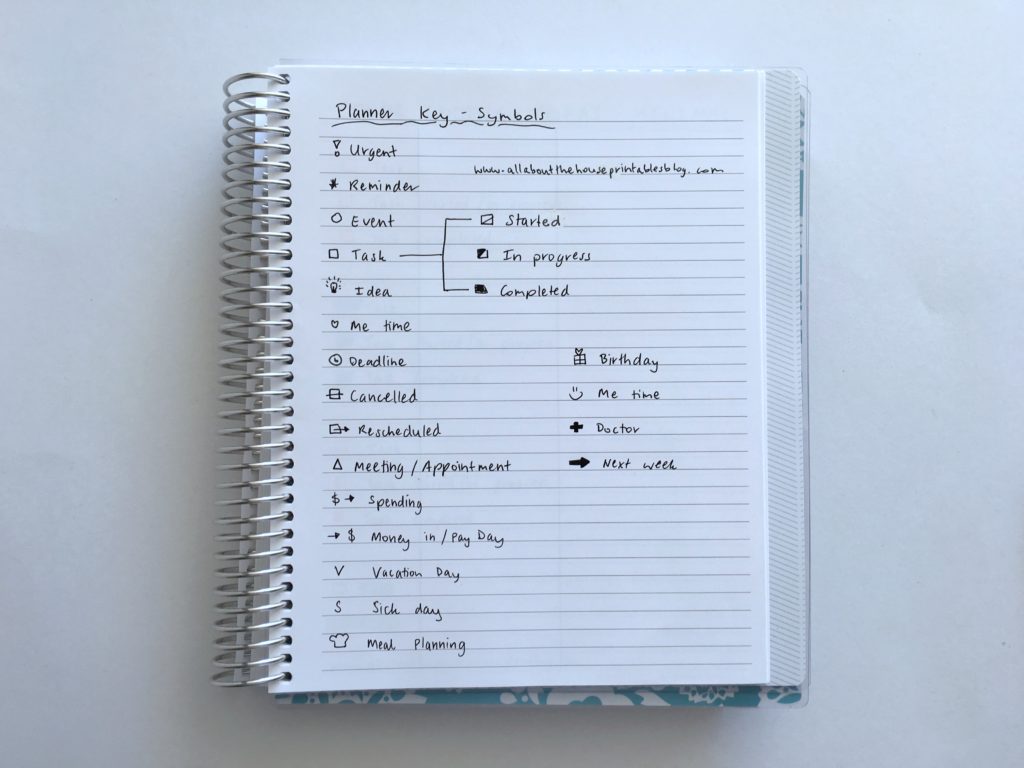
Related: Using a planner key and symbols to code your planner (efficient planning methods)
- There are very limited colors if you color code using the highlighting tool in Word – they’re also dark colors that make it hard to see the text. Whereas when you highlight tasks on paper it makes them stand out more and looks way nicer (and better colors)
- Using a habit tracker provides a clearer visual representation of those quick daily habits, much clearer than another dot point on a to do list
![]()
Would I use this layout again?
I was surprised how much I really liked this layout. My task descriptions were longer than when I use paper planners as I had more room to plan and didn’t have to use abbreviations to shorten tasks.
I liked that I could set up the week really fast and not worry about messing it up as can always use the backspace key!
I took a photo of the plans for the week on my iPhone so I could take then with me – the only problem was that I couldn’t add extra things as they came to mind (I ended up using the notes app on my phone, then adding to the Word document when I got home). This wasn’t ideal as it meant I was duplicating things – I’m considering trying a digital calendar that has an app to go along with it.
While it was easy to copy and paste recurring tasks, I prefer the visual of using a habit tracker and shading or crossing off boxes, it helps keep them separate from other things on my to do list.
Because I tend to do a lot of the the same tasks each week e.g. backup blog, publish blog posts, book-keeping etc. I’ve been thinking about turning these tasks into a weekly list I can just slip into the planner rather than re-writing them out – but this depends on me choosing the right planner layout to go with this and I just haven’t found that perfect planner yet!
Related: FREE Printable To Do Checklist Planner Insert (For Erin Condren or Any Planner)
Catch up on past weeks of the challenge:
- Week 7: Pros and cons of using a 1 Page Weekly Planner
- Week 11: How to plan your week using Trello
- Week 15: Trying a freehand weekly planner inspired by bullet journalling
Related Posts:
- Buying a planner versus DIYing and making your own (pros and cons)
- Favorite pens for writing headings in my planner
- Honest review of the Happy Planner by Me and my Big Ideas (MAMBI)
Found this post helpful? Pin it!