Today’s post is a quick planner printing tip! A reader recently emailed me this question: Can I print A4 pages on US 8.5 x 11″ paper without anything getting cut off the page?
My answer: yes – here’s how:
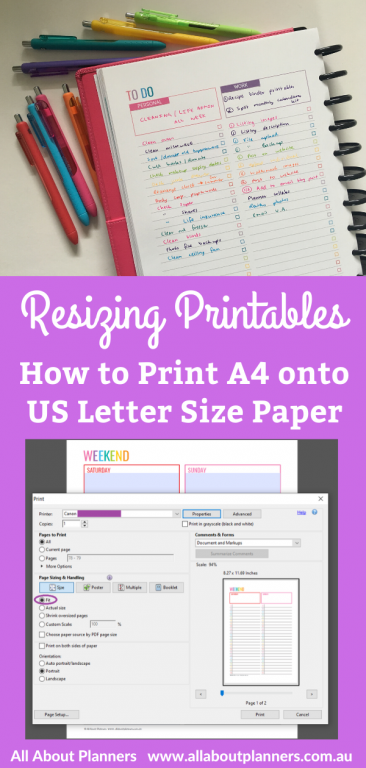
How to print an A4 printable onto US letter size paper (and vise versa)
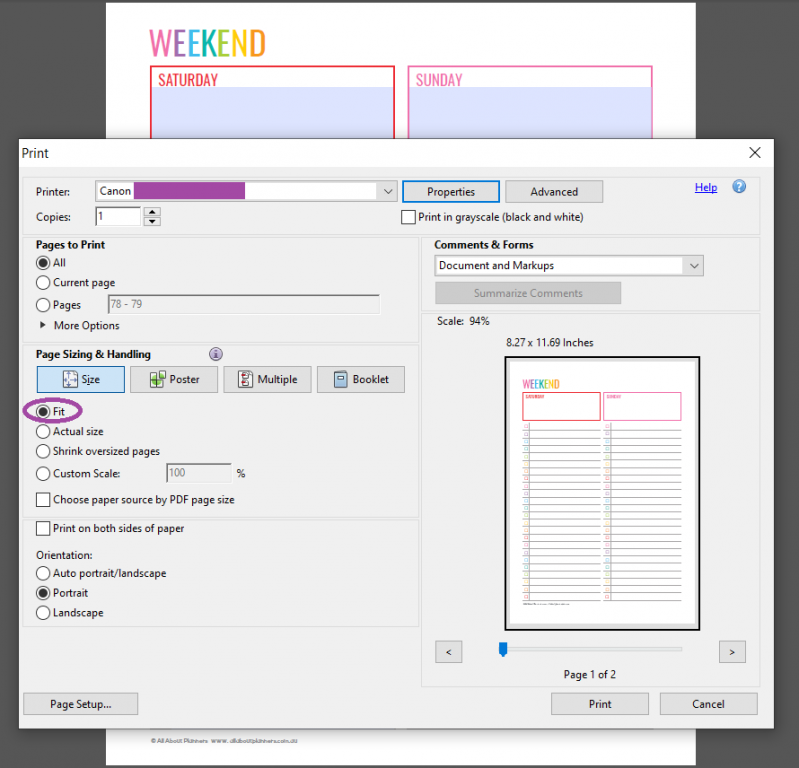
You can check how a printable is going to show when printed by opening the file and going to file > print and then checking the print preview.
By print preview I mean the mini size image of the printable that you’re printing that will show somewhere in your printer’s menu before you hit the print button. For my printer it’s in the first menu that appears (refer to the image below on the right), for your printer you may need to click a button along the lines of ‘details’ or ‘more’ or ‘properties’.
Most printers seem to default to ‘no scaling’ i.e. true to size printing which is normally what you want… but not in this instance. ‘Fit’ or ‘fit to page’ is the button you’ll want to select in your printer menu. If you don’t select the fit button then you might accidentally cut off part of the design and it won’t print correctly.
When printing a letter size design onto A4 you also need to choose the fit button in your printer menu. A4 paper is not as wide as US letter but it’s longer so a bit of extra white space is added to the top and bottom (refer to the preview in the image below).
If you want to experiment there’s a few different types of printables (in A4 and US letter size) in the free printables library that you can find here.

Depending on which page size you’re printing onto, there may be extra white space.
- Printing US letter size 8.5 x 11″ onto A4 = wider margin / white space at the top and bottom of the page
- Printing A4 size onto letter size 8.5 x 11″ = wider margin / white space on the left and right sides of the page
This is because US size paper is shorter and wider than A4 page size.
Or thinking in reverse, A4 paper is skinnier but longer than US size paper.
Related: Ultimate planner page size guide (with printable reference cheat sheet)
So what to do with the extra space? Cover with washi, enjoy the wider margin to give a bit more room to write (especially if you’re hole punching printables), or just leave as is. It might bother some but I don’t find it that noticeable.
Here’s an example of US page size printed onto A4. See how there’s a bit of extra white space at the top? It also appears at the bottom of the page (this printable is from the checklists kit in my shop)
Keeping work and personal in the same planner plus pie chart blog planning
Any excuse to use washi tape 🙂
Week 23: Using Limelife Planners Weekly Layout C
I would show an example of printing A4 onto letter size paper but I’m in Australia and US letter size paper isn’t available for purchase here.
More printing tips
- 7 Ways to make colors POP when printing using an Inkjet printer
- Don’t own a printer? Here are 5 companies that will print and ship printables to your door
- How to get rid of a white border when printing printable (borderless, no bleed, no scaling step by step video tutorial)
- How to Choose a Printer (Including the best printer for printing printables and planner stickers)
- Best Paper for Printing Printables
- How to clean your printer (prevent smudging, streaks and make the colors POP!)
- How to print any printable in black and white (greyscale) using your home printer
Printing at a particular page size
- How to print printables at Erin Condren planner size from your home printer (step by step tutorial)
- How to easily print printables double sided (duplex printing tutorial)
- How to resize a printable to fit A5 or US half letter (5.5 x 8.5) page size
Found this post helpful? Pin it!
[…] How to print an A4 printable onto US letter size paper (and vise versa) […]