How to quickly rename and organize your digital files (in seconds) using free software
I take a lot of photos for this blog, when travelling and have a lot of files for my online shop. I used to type out the file name I wanted to use, then copy and paste that to the next photo and add a 1 at the end (as the file names can’t be the same). Then I’d click the next photo, paste and add a 2 and the end. And repeat.
Well that was taking a long time so I went in search of something that could do that for me but much faster. That program was actually in front of me all along. I’ve been using Adobe Photoshop since 2012 but only discovered Adobe Bridge a few years ago and what a timesaver it’s been!
This post contains affiliate links. If you make a purchase after clicking one of these links I’ll receive a small commission in exchange for referring you (at no extra cost to you).
Here is the link to download Adobe Bridge
If you’ve been thinking about investing in other Adobe products I also use and recommend Adobe Photoshop (affiliate link).
Adobe Bridge
With Adobe Bridge you can quickly rename your documents and photos.
Adobe Bridge is available on desktop only, not an iPad.
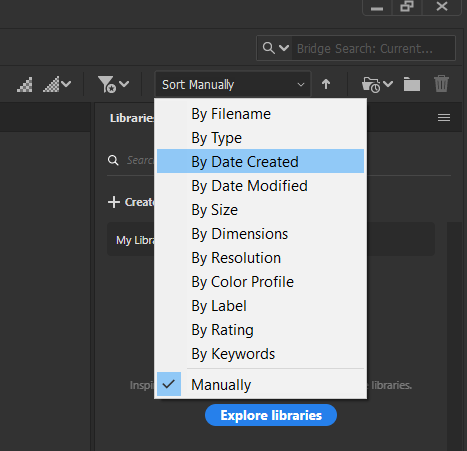
I mainly use it to quickly rename a lot of similar files for my shop and also my travel photos. You can drop all of your photos into one folder on your computer then use Adobe Bridge to sort the files by type and date modified.
How to quickly rename and organize your files using Adobe Bridge
To enlarge the screen of the video, click the square icon in the bottom right hand corner of the video (it will say ‘full screen’ when you hover your mouse over the icon).

Subscribe to my YouTube channel for more planner related videos & graphic design tutorials!
The digital paper set I used in the video is from my design resources shop, PaperCravings.
You can select all of the files in the folder at once by pressing CTRL and A on your keyboard. Or if you only want to select a few files to rename, press CTRL and then select the files you want to rename.
Once you have the files you want to rename selected, right click on one of them and select ‘batch rename’

You can type any file name you like. I like to include a description of the file, then an underscore _ and then a sequence number. Adobe Bridge automatically shows you a preview of the new filename so you can see if the name is going to be too long, or if you prefer a space instead of an _ etc.
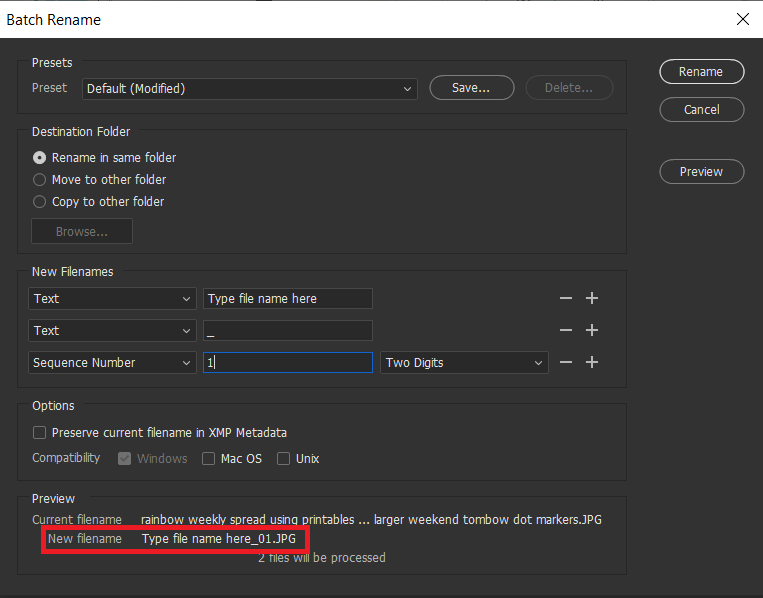
So if I was organizing travel photos for one of my travel photobooks, I might sort the files into date order and then rename the file ‘Brussels – Belgium – 1’. With the sequence number set to start at 1, Adobe Bridge would automatically rename the next file ‘Brussels – Belgium – 2’.
For my blog, I rename the images with keywords. So if want my image of this week’s spread to appear in the search results when people type ‘rainbow weekly spread’ then I would include those words in the file name.
In the menu in the screenshot above you can choose to copy or move the photos to a different folder as well – huge timesaver when sorting and organizing photos!
I hope you found this quick tutorial helpful.

Related posts:
- The 3 things I plan digitally instead of using pen and paper
- How I plan and make travel photobooks (plus download my workflow printable)
- How I use Microsoft Word to plan my travel itinerary (my template & planning process)
- Pen and paper versus digital: which is better for keeping track of your money?
Found this post helpful? Pin it!