
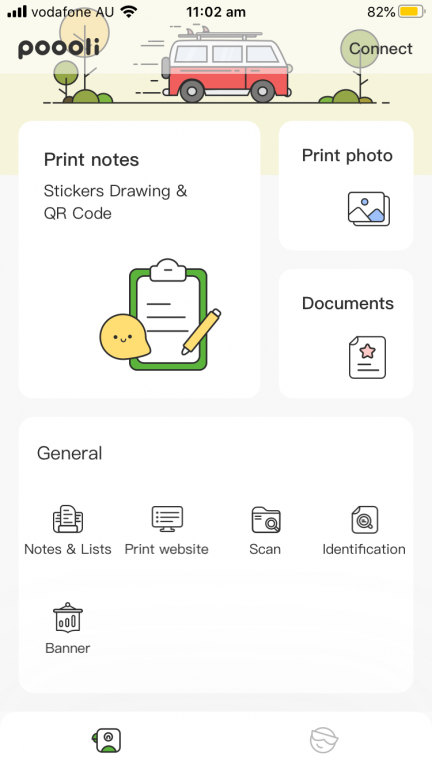
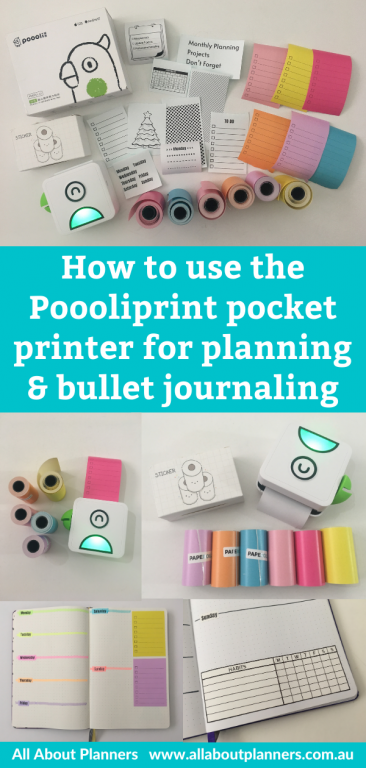
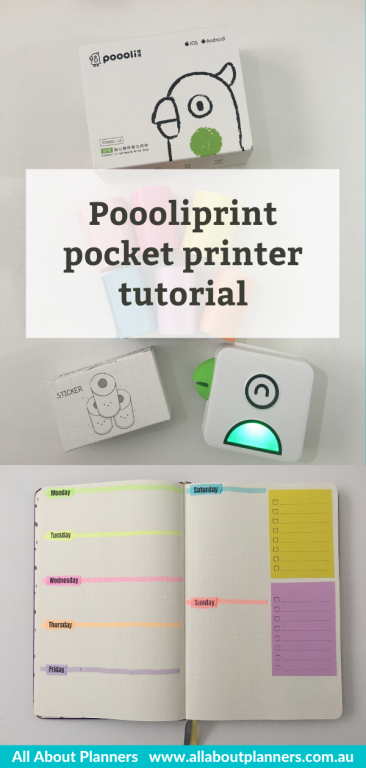
How to use the Poooliprint Inkless Pocket Printer for Planning and Bullet Journaling
You might have seen those mini polaroid cameras making a comeback in recent years. Well the Poooliprint machine is kind of like that… but better! You can do more than just print photos, you can print clipart, designs you’ve made in other programs (e.g. Photoshop), make your own stickers and labels using their templates.
In this post I’ll show you how it works (including a video walkthrough), some of the things I’ve been using it for (from a planning & bullet journaling perspective) as well as my pros and cons list.
Disclaimer: This post contains affiliate links. If you click one of these links and make a purchase I’ll receive a small commission (at no extra cost to you) in exchange for referring you. I was sent a copy of this machine for free in exchange for this review. As always, all opinions are my own.
If you’d like your own Poooliprint you can get 15% off using my referral link and the coupon code RACHAEL15 (click here to purchase your own Poooliprint machine).
What is this machine?
This pocket printer is a thermal printer so no need to worry about messy ink or replacing ink cartridges. It works using heat and black ink.
You can choose between 4 machine colors – green, pink, yellow and blue. Since things aren’t usually available in green, I opted for the green version (really the only difference is the color of the ‘beak’ and the on / off button).
There are 2 versions – the L1 and L2. I was sent the L2 version for this review.
Update: There’s now another version called the XL which prints on paper rolls up to 4.3″ / 110mm wide.
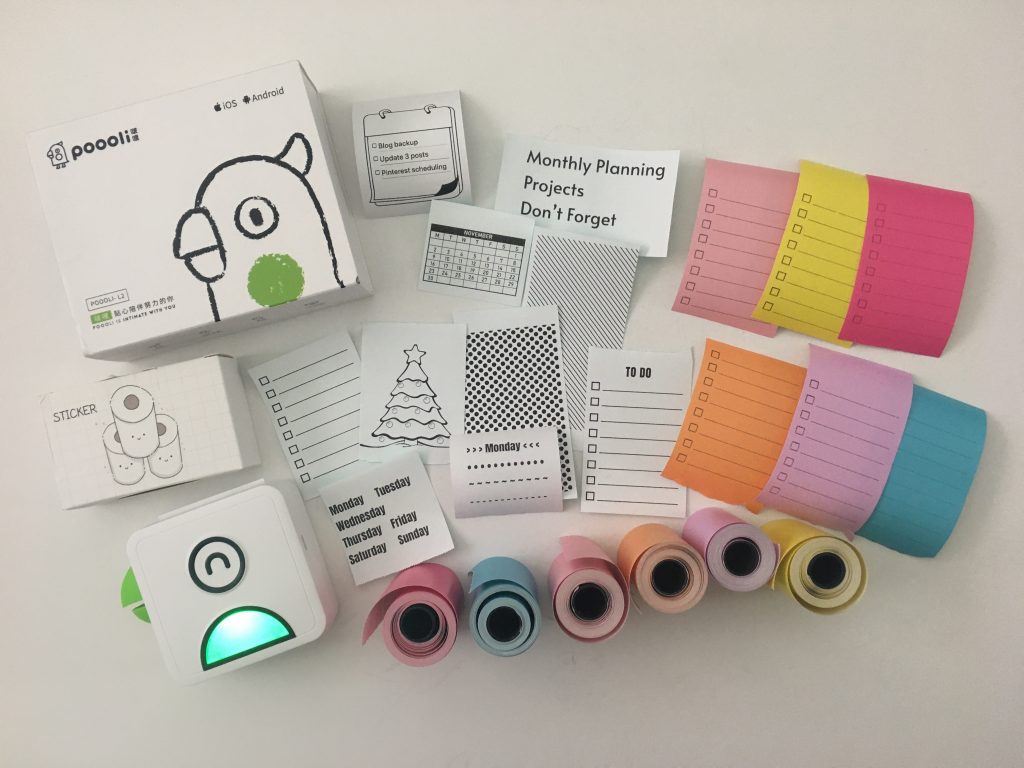
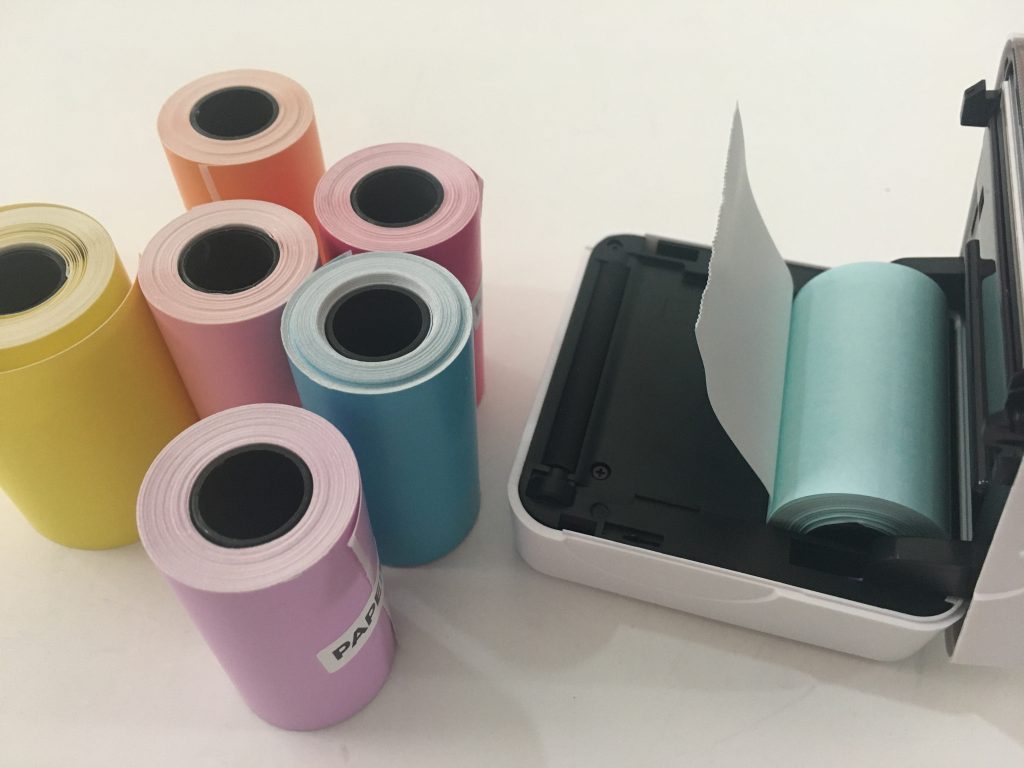
There are multiple label rolls to choose from including white, colored, clear and patterns.
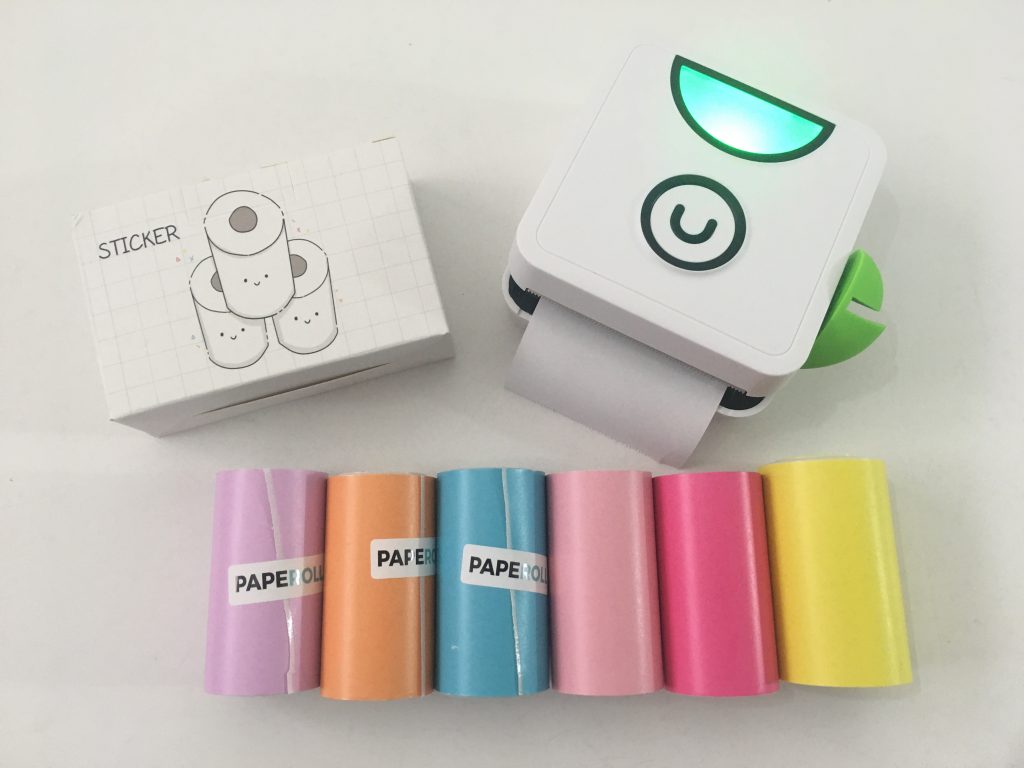
This is a compact machine that takes up hardly any space:
- The machine is only approx. 3″ x 3″ x 1.75″ (8cm long x 8cm wide x 3.5cm high)
- The box it comes in (and which it can be stored in when not in use) is only approx. 5.5″ long x 4.5″ wide x 1.5″ deep (13.8cm long x 11.3cm wide x 4.3cm deep)
The machine takes approximately 90 minutes to fully charge when you first take it out of the box. I have playing with it on and off for a few weeks now for probably about an hour an a half total and haven’t needed to charge it yet.
To use the Poooliprint you’ll need to download their app. It’s free and works with iOs and Android.
I didn’t get any clear label paper but think that would work better, especially for text headings.
What you can do with this machine
- Make stickers for your planner
- Checklists
- Print photos directly from your phone
- Print decorative tape for wrapping presents
- Make labels to organize your planning supplies, office, pantry etc.
- There are multiple colored label paper so you can do color coded labels too
Functional Planning
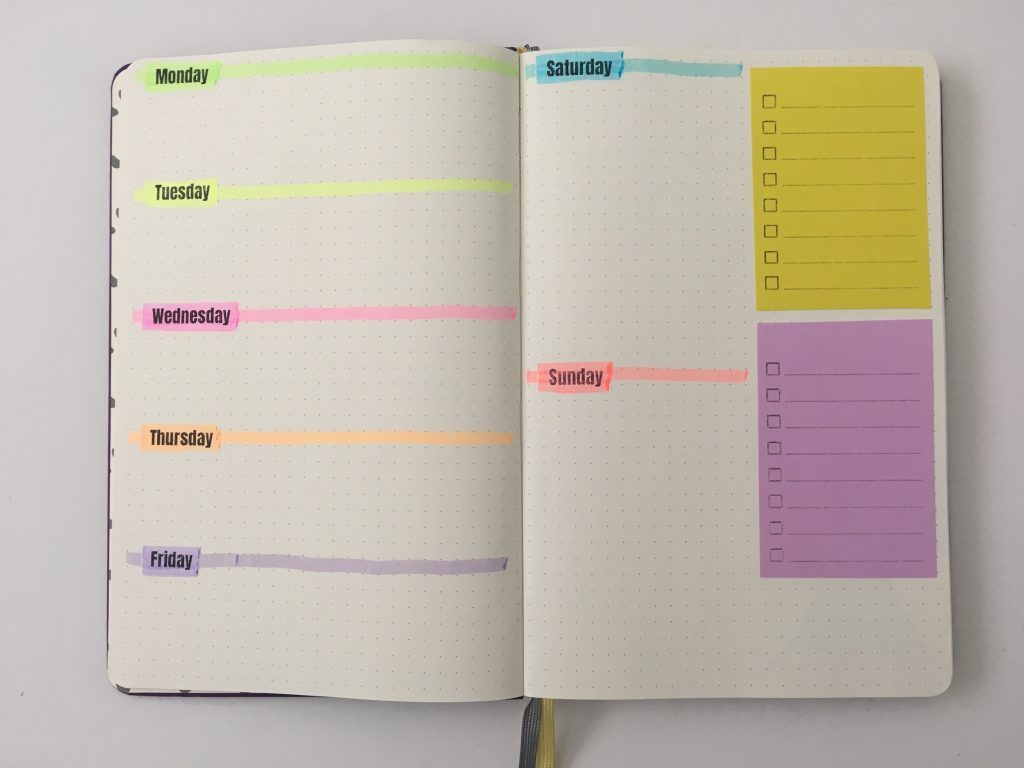
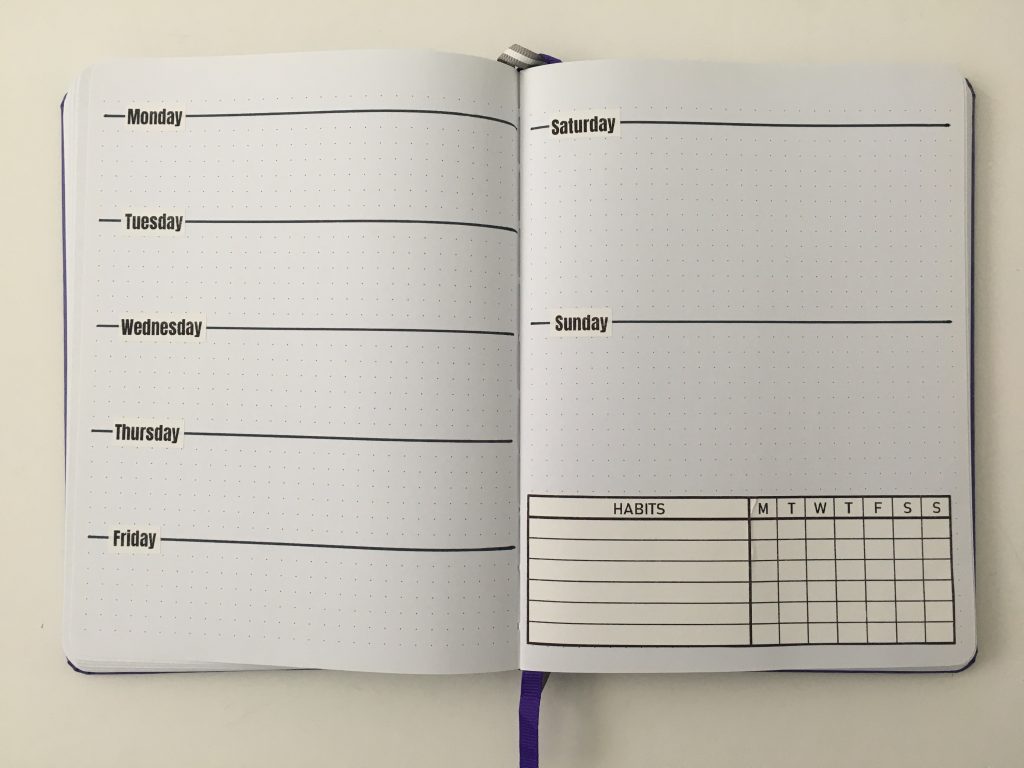
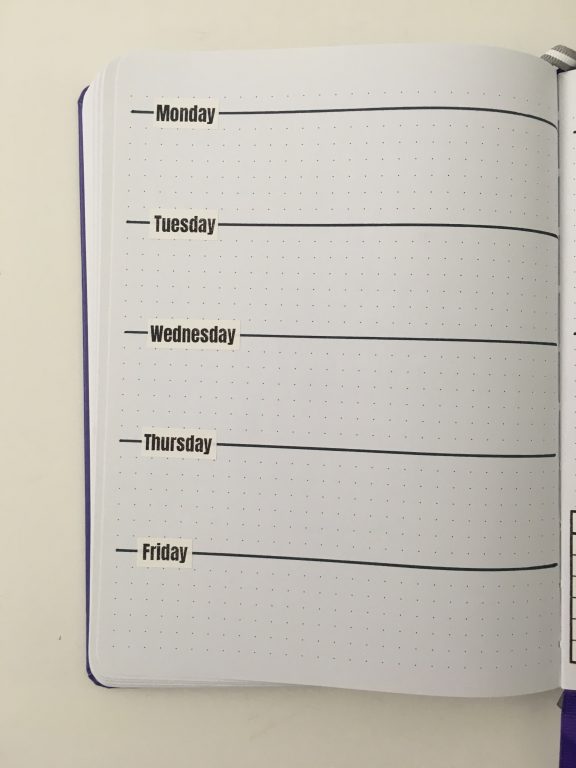
- Days of the week stickers
- Labels for anything you like
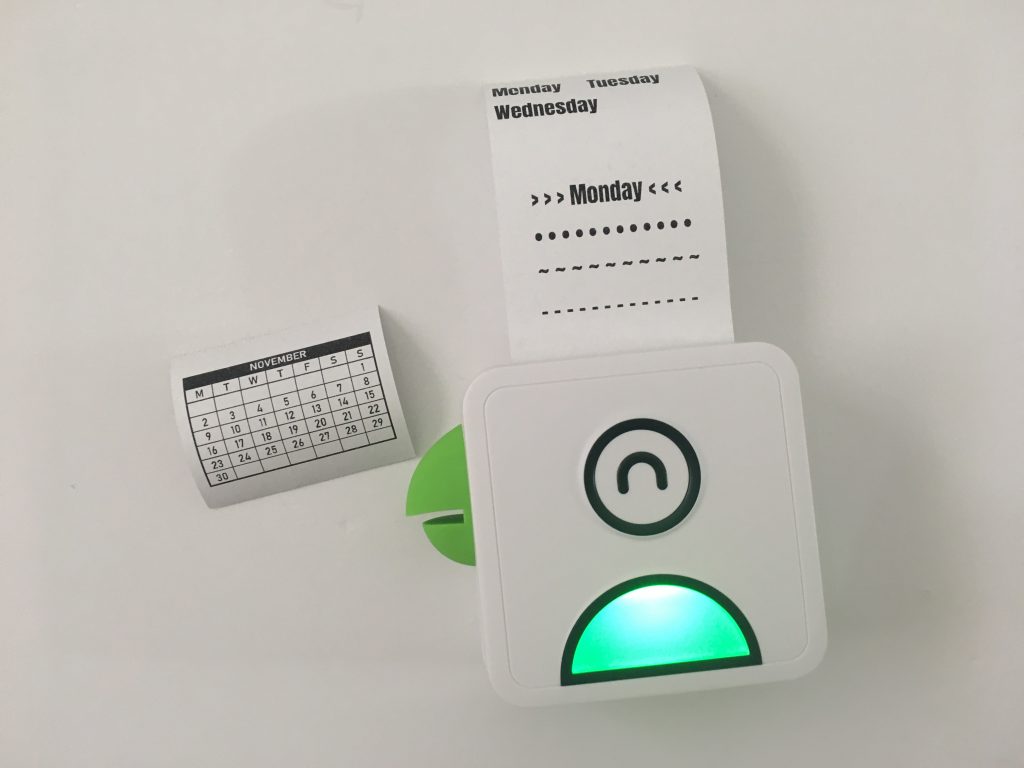
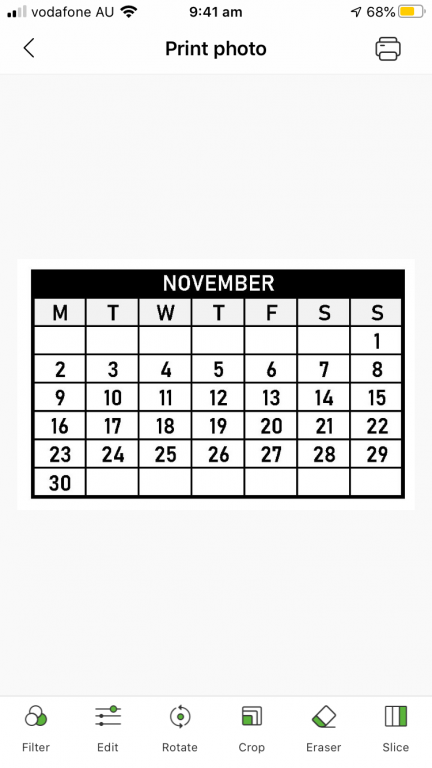
- Print mini monthly calendars instead of stamping or hand-writing out all of the dates
- Habit trackers

Decorative planning
- Pattern digital paper to make ‘washi tape’
- Print clipart to create page borders
- Print digital planner stickers – anything that is individual PNG file. You can find plenty of cute clipart on Etsy
Let’s try it out!
To enlarge the screen of the video, click the square icon in the bottom right hand corner of the video (it will say ‘full screen’ when you hover your mouse over the icon).

Subscribe to my YouTube channel for more planner videos!
Mentioned in the video
- The Christmas tree image I used is from Fav PNG
- I made the checklist template in Photoshop
- I made the mini dates at a glance calendar and the habit tracker in Microsoft Excel
- You can find the green Poooliprint machine (I have version L2), colored sticky paper and the white sticker paper refill on the Poooliprint website (affiliate link)

The top of the machine lifts off to change the paper rolls. It can be a bit fiddly to slide and then pull the top up.
Some of the ways I’ve been using the Poooliprint
Since filming the review video and spending more time experimenting in the app I’ve noticed the ‘Dark’ graphics filter option reduces the amount of speckles in the black.
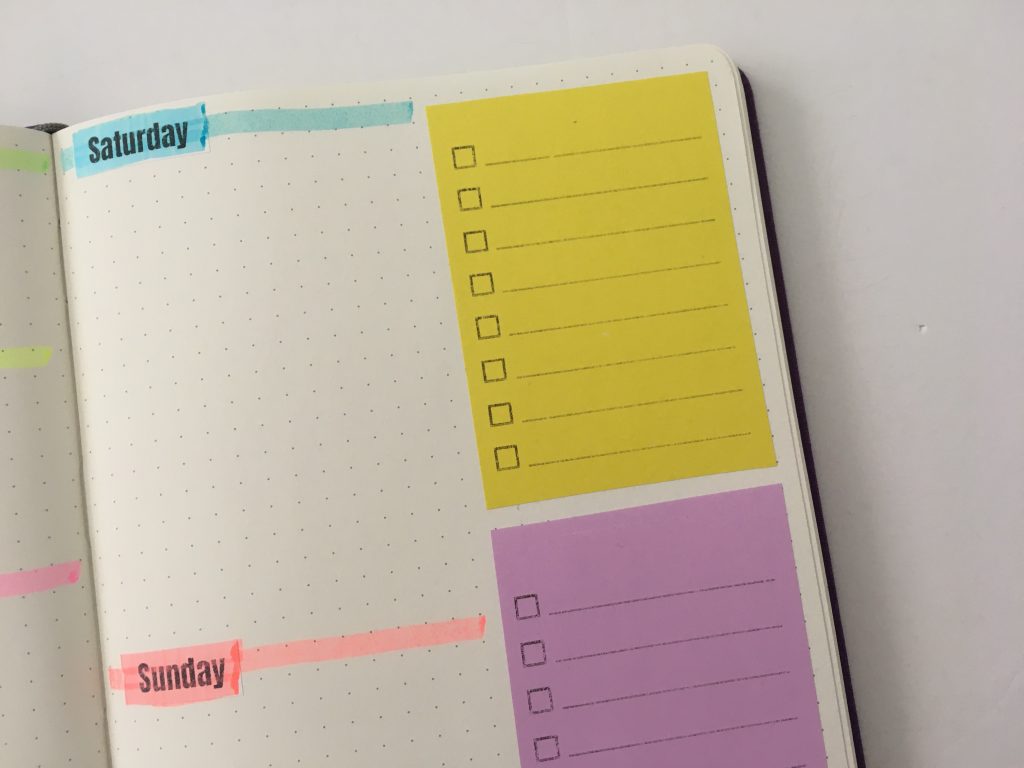
I definitely prefer a full spread using the Poooliprint instead of half the spread printed and half the spread handwritten like I did below

I made this habit tracker using Excel (tutorials are in my ecourse), saved it as an image, emailed it to myself, opened it on my iPhone and printed it with the app. You can save the image to your camera roll for quick printing if you need another copy.
Trying out the Poooliprint app
To use the printer you can either:
- Make a label using the templates in the app
- Type text or symbols such as — within the app
- Save an image you’ve found on the internet
- Print a planner sticker image (JPG or PNG)
- Make an image in Photoshop
- Make a template in Microsoft Excel (e.g. I made a habit tracker and mini dates at a glance tracker using Excel)
- Print digital paper to make ‘washi’ strips
When you download the app, this is what the home screen looks like:
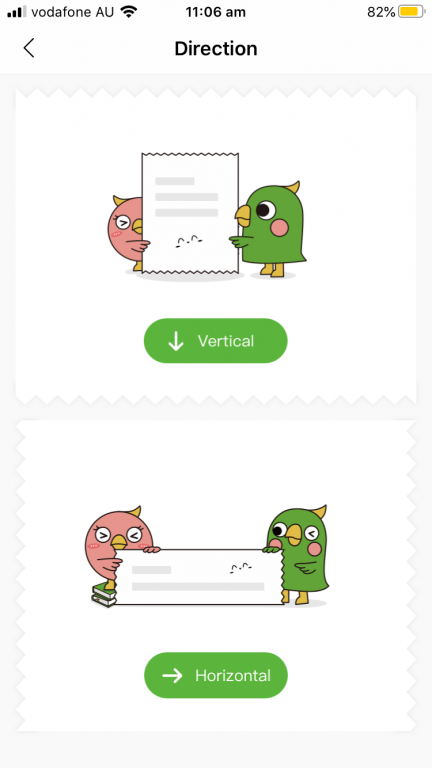
When you want to make a label you can choose between vertical and horizontal (so you can choose the option that uses the least amount of label paper)
To use the machine you’ll need to download the app and connect the machine to your phone via bluetooth.
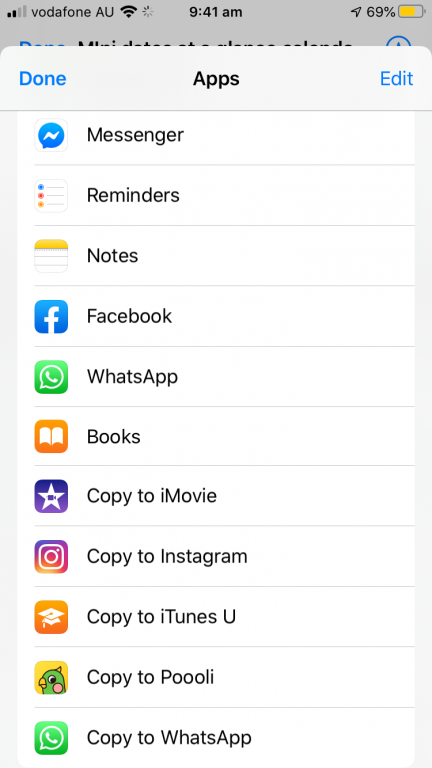
First I made a mini month at a glance calendar in Microsoft Excel, saved it as an image and emailed it to myself. I then opened the email attachment on my iPhone and chose ‘copy to Poooli’
The image will open in the app. You can print exactly as is or add some effects. I found that ‘Dark’ printed better (less white flecks in the black once printed).
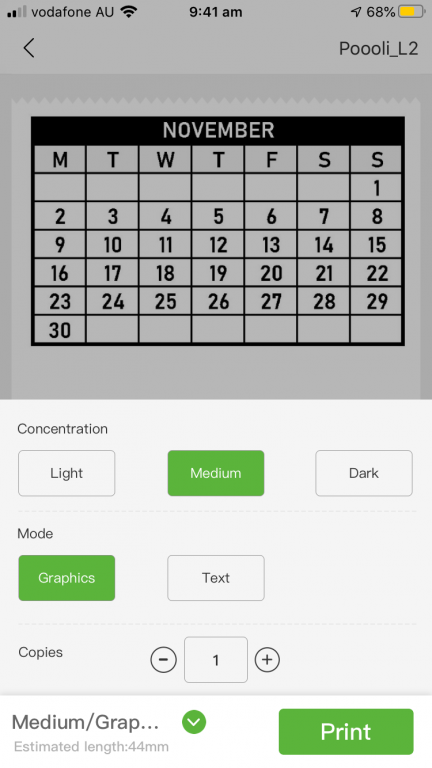
It will show you a preview and tell you how much label paper it will use. You can also rotate, crop and make other adjustments.
Then all you need to do is hit print!
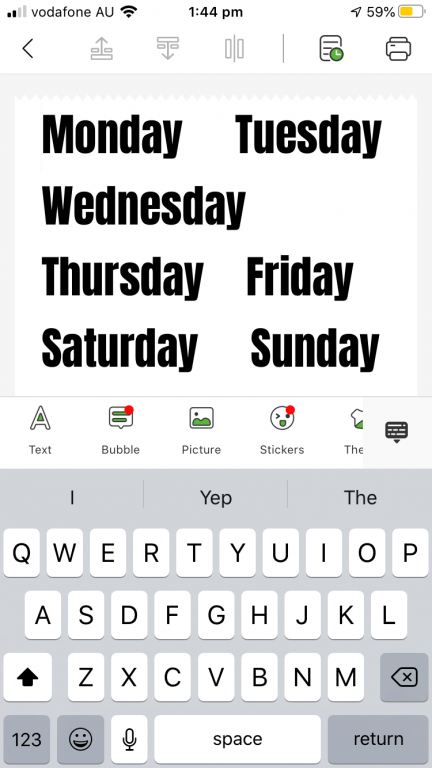
For text labels, I made these directly in the app. To save space I entered multiple days of the week on the same line, and then just trimmed the excess around each day using scissors after printing.

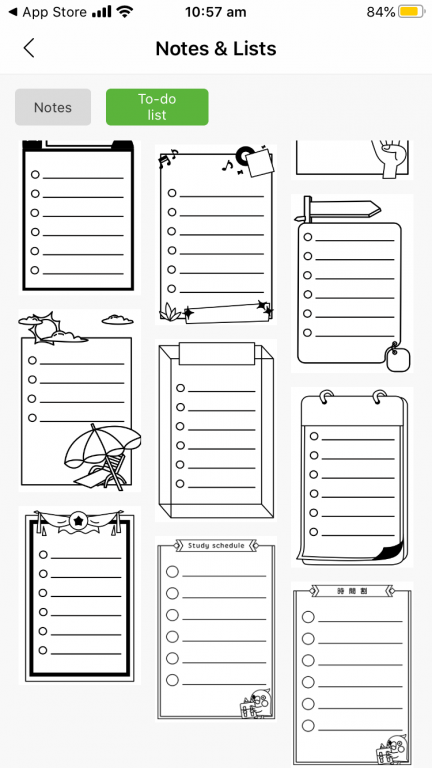
You can also use some of their pre-made templates like these:
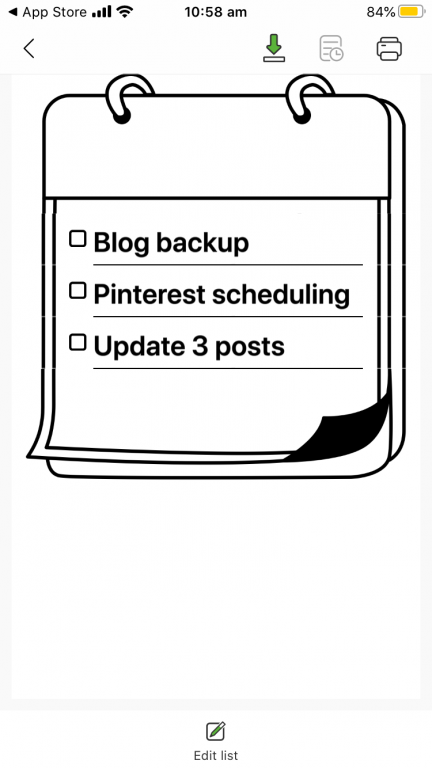
My issue with these is that they don’t work for long tasks, it maintains the text size and creates a double line which doesn’t look good. Most of the templates in the app are decorative. Since I do functional planning, I haven’t used any of the pre-made templates.
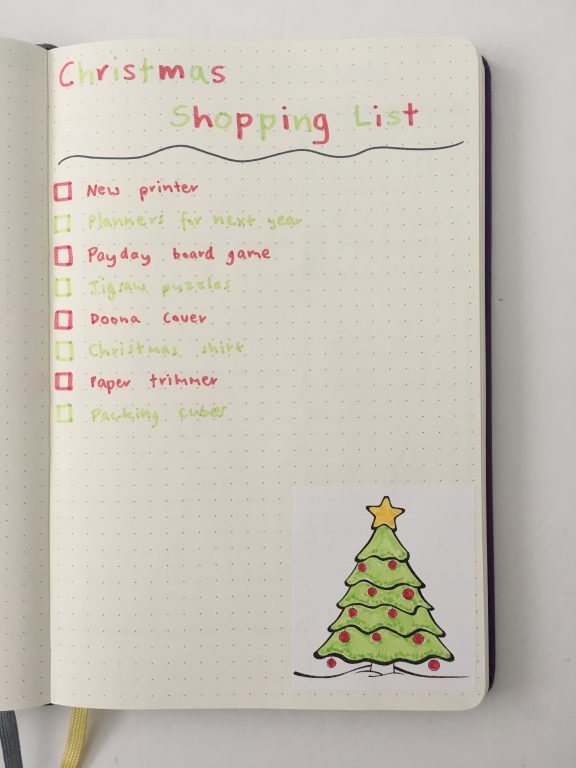
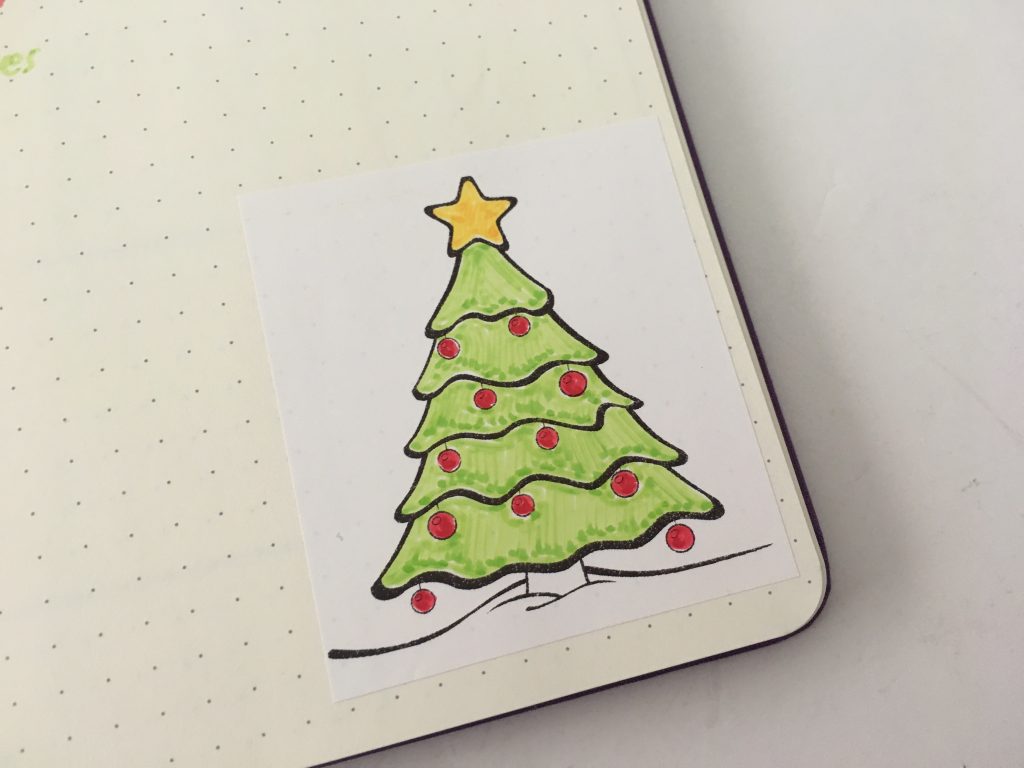
Another option is to print an image. You could do this with your own images made in Photoshop or other software, or with images you’ve purchased (e.g. planner stickers) or found on the internet. I found a Christmas tree clipart, printed it and then colored it in with some marker pens:

Pros of the Poooliprint
- Can print your own images. I opted to print my own digital paper to create some ‘washi tape’
- Label sizes are large (width of the rolls are about 5cm) but can trim the excess
- Quiet when printing
- Quick to print
- The App appears in the save image menu after you email files yourself so it’s quick to print directly in the app – you don’t need to save to your camera roll first
- Compact and lightweight machine
- Multiple sticker label paper colors to choose from (there’s some pattern papers too)
- Recommend to use no more than about an hour before the machine auto turns off to prevent over-heating (note: I didn’t have the machine on for this long at one time to see if this is actually the case)
Cons of the Poooliprint
- Can’t do it on the computer it all works off a free app on your phone (iOs and Android)
- Can only fit short tasks / a few words in their pre-made list templates
- Choose from their fonts only (there are 14 fonts to choose from but they are all similar and mostly sans serif, you cannot use custom fonts)
- Make sure you take note of what font size etc. you chose as once you close out of a menu it disappears. I took a screenshot on my phone for quick reference for later
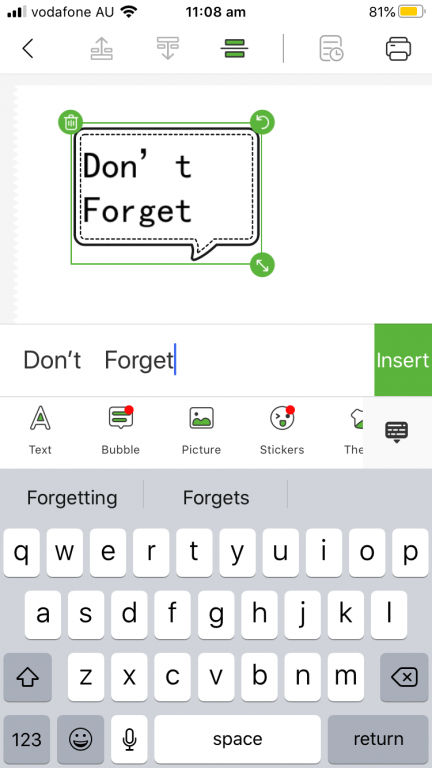
- If you like decorative planning you might like the templates that come with the app however they were not to my liking. Some of the menus when I tried to add text, formatted weirdly like the ‘don’t forget’ speech bubble (refer screenshot below – it added a large gap between the ‘ and the t)
- Can only do rectangle stickers, some round labels would be great
- Can only do black and white ink
- Printing onto white paper the ink is not vibrant, I had to play with the settings and find a ‘dark’ option to remove the graininess of some of the images I wanted to print
- If you enter text into the app and then print, it disappears afterwards – annoying if you wanted to print the same thing multiple times. I couldn’t find a way to save it for quick reference to refer back to later
- Had to keep connecting via bluetooth each time I turned the machine on
- Removing the top of the case to change the paper refills can be fiddly
- The machine is expensive but you only need to purchase refill label paper (which are big rolls that will probably print 100 or more stickers depending on the size), there’s no ink cartridges to replace. The machine comes with 1 roll of paper and you can purchase more if needed.
How does this compare with other label makers?
I have a DYMO label maker that I’ve used for years. It’s a lot cheaper and you can easily find it in Big W, Target, Amazon etc. however it’s quite limited. You cannot do decorative labels or stickers, you can’t print photos from your phone or the internet, it does text labels only. There are more fonts to choose from in the DYMO compared to the Poooliprint but that is the only advantage.
If you don’t want to pay for a Silhouette or Cricut machine, or don’t have the space to store one, or aren’t sure if planning with stickers is something you want to do, then the Poooliprint is a good entry level alternative.
Where can I get one?
If you’d like your own Poooliprint you can get 15% off using my referral link and the coupon code RACHAEL15 (click here to purchase your own Poooliprint machine).
More Planning Tool Reviews
- Weekly spread with the Helix Circle Maker in the Dingbats* Notebook
- The best time saving tool for bullet journaling (Ink by Jeng Row & Column Stencil)
- How to Choose a Printer (Including the best printer for printing printables and planner stickers)
Found this post helpful? Pin it!

I read reviews of similar small thermal printers, and they said that the prints fade over time. Is that the case with this one as well? My planners are memory books as well as planners, so I prefer less ephemeral prints,. (I use clear sticker paper & photoshop & my home printer.)
Hi Laura,
I asked my contact at Poooliprint and this was the response:
The retention period may be affected by the exposure of the thermal paper to the sun. For normal use conditions, the retention time varies from a minimum of 10 years and up to 22 years depending the type of paper you use. Refer to the paper rolls product page for more info about retention time.
For reference, reply to most frequently asked questions can be found on our website’s FAQ here: https://www.poooliprint.com/apps/help-center#hc-how-long-will-the-printed-materials-last
Hope this helps,
Rachael
Can you use other brands of thermal paper in this printer?