
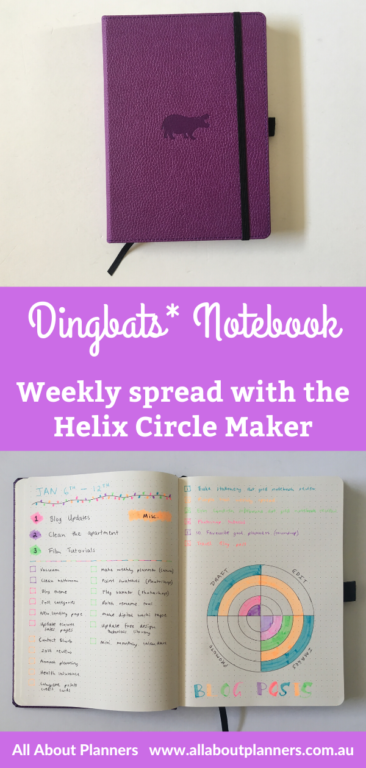
Weekly spread with the Helix Circle Maker in the Dingbats* Notebook
After touching the Dingbats* notebook‘s paper and realising it is so smooth, I was keen to do a weekly spread to try out the notebook. In the same online order as that notebook was my Helix Circle Maker that had been on my wish list for months. This tool is so handy – can easily draw circles at various sizes. See this post for a tutorial on how the Helix Circle Maker Works.
Before the Pen
The circle maker works by staying in place while you place your pen in the holes and move the pen / turn the wheel. I was sceptical that it might slip but it actually stayed in place and was quick and easy to use. I did use erasable pens just in case.
Review of the Dingbats* Notebook
![]()
After the Pen
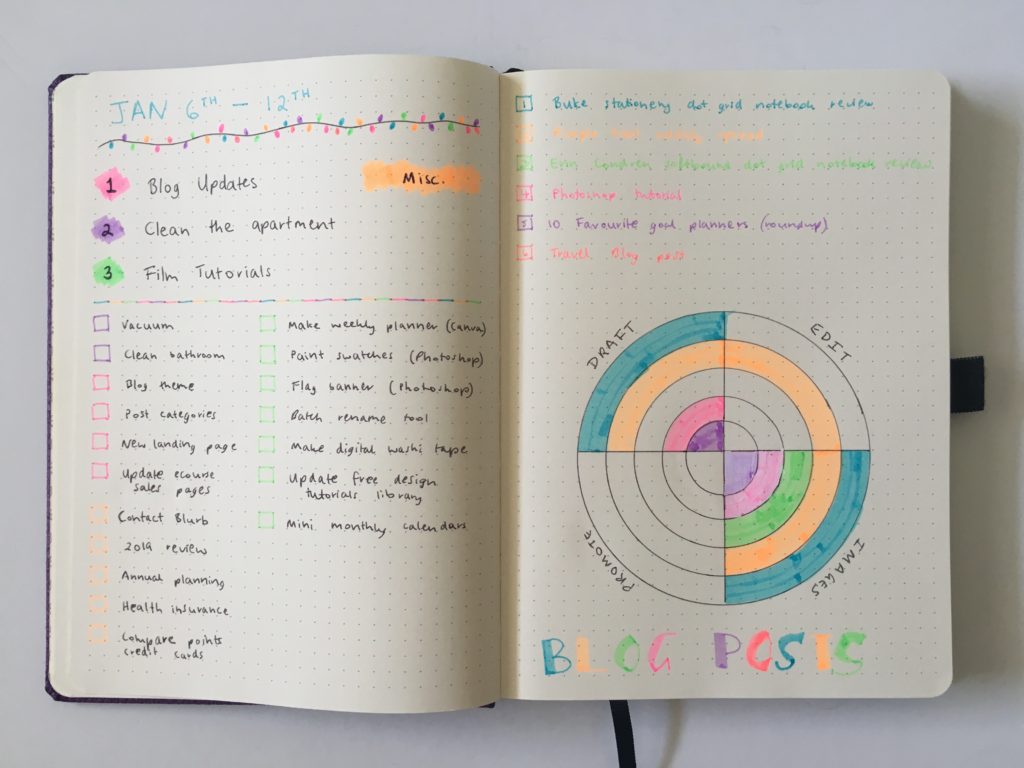
I thought about writing within the actual circle but when I drafted this on scrap paper I didn’t like how it looked. Plus I had space so opted to divide the circle into 4 workflow tasks and list out the blog posts on the rest of the page.
![]()
I think I should’ve used highlighter pencils or zooms to shade in the circle, highlighters ended up looking a bit messy. I thought by using the Tombow Kei Coat (which have a plastic thing around the entire chisel end to keep it sharp) would work but it looks a bit messy with ink overlap.
I also used the wrong color for the rings so had to use whiteout. It didn’t look that bad in the end but I did think about just restarting the whole spread.
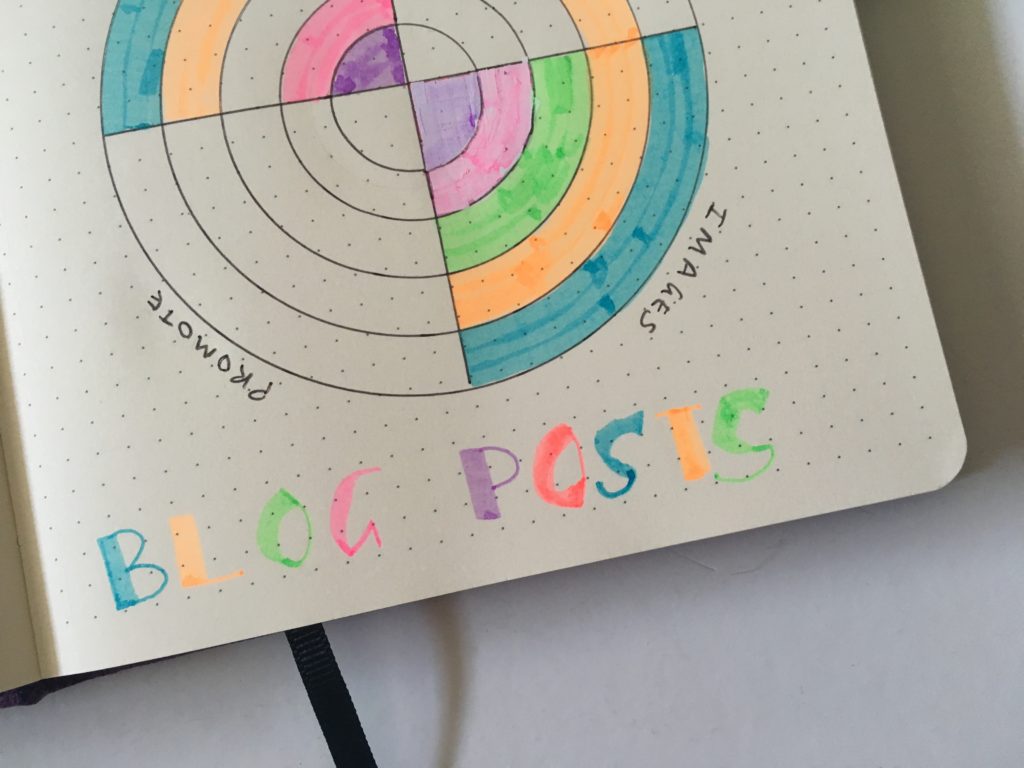
Totally botched the text – the chisel tip of a highlighter is no match for a brush pen!
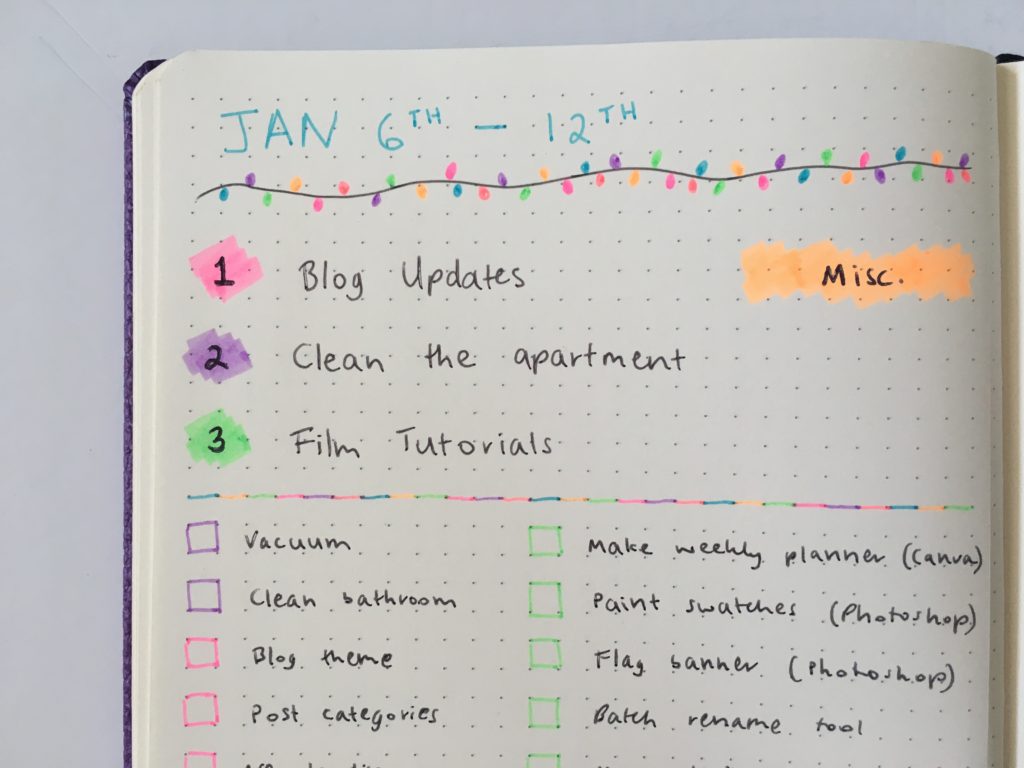
Since I liked how the fairy lights looked in this Christmas spread I decided to do it this week as well. Simple, easy to do and doesn’t take up much space.

I used the thin end of the Tombow Kei Coat highlighters to create a simple & quick divider (in rainbow colors of course!) between my code / top 3 priorities for the week and tasks below.
Related: 7 Ways to quickly and easily cover up mistakes in your planner or bullet journal
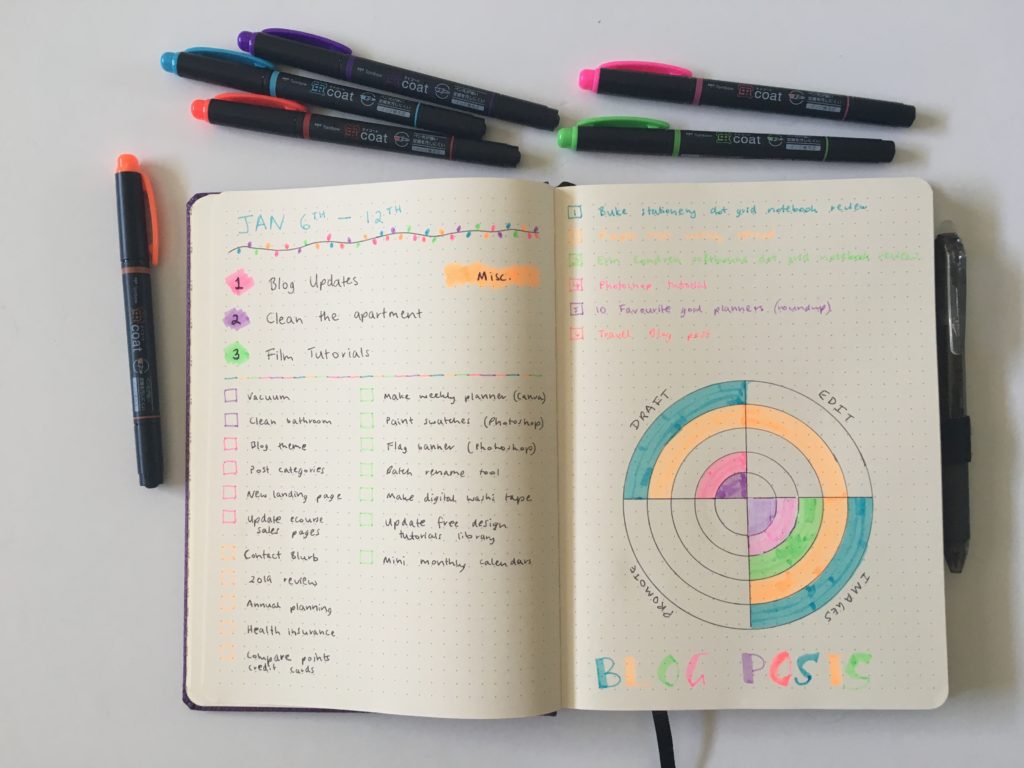
Supplies Used
This list contains affiliate links – if you purchase after clicking one of the link I’ll receive a small commission of the sale (at no extra cost to you).
- Tombow Kei Coat Dual tip markers
- Helix circle maker
- Dingbats dot grid notebook (purple hippo cover version)
- PARKOO erasable pen
Would I use this spread again?
I like the circle maker and it was a nice change to my normal blog post to do list… however it does take up a lot of space. I think it would be better for monthly habit tracking or another purpose. I definitely want to try using it again.
Past weekly spreads
- Bullet journaling in the Rhodia Goalbook
- Landscape page orientation bullet journaling in the Northbooks dot grid notebook
- 10 Minute Rainbow Weekly Spread Using Highlighters
Planning tips & ideas
- Best pastel highlighters for planning and bullet journaling
- 15 habit tracker tips & ideas to try
- 7 Ways to quickly and easily cover up mistakes in your planner or bullet journal
Liked this post? Pin it!


are the discs interchangable with the letter size and junior size? I put large disc on my junior size but the pages do not want to turn. Thanks.
Hi Melissa,
Do you mean discbound planners? If so, then yes you can use larger size discs on both junior and letter page sizes. If you put too many pages on the discs then they’ll be difficult to fold the notebook / planner back on itself. I’d split your notebook into 2 notebooks.
Guide to discbound planners and FAQ’s: https://allaboutplanners.com.au/guide-to-discbound-planners-frequently-asked-questions/