How to make digital planners or notebooks in Microsoft PowerPoint
My new ecourse teaching how to make your own own digital notebooks & planners using Microsoft PowerPoint is open for enrollment (click here!)

By the end of this course you’ll be able to:
- Create a complete digital planner from start to finish including daily planner, weekly planner, monthly calendars, to do checklist, important dates pages etc.
- You can create a planner that is exactly to your liking – you get to choose if the week starts on a Sunday or Monday!
- How to use templates (which I teach how to make in the ecourse) to create more page layouts, faster
- Create your own digital notebooks – including dot grid pages for bullet journaling
You’ll have a skill you can use to make your own digital planners and notebooks for years to come.
COURSE TUTORIALS
Introduction to Microsoft Powerpoint
- Why I use Microsoft PowerPoint
- Workflow / steps to make a digital planner (download my checklist)
- Planning the design of your digital planner or notebook
- Handy keyboard shortcuts
- Setting up a landscape page orientation planner or notebook
- How to add a home button (and different options)
- How to add a background to your planner
- Time saving tips for making digital planners
Fonts & Colors
- How to download and install fonts
- How to choose fonts (plus my favorite resources for free & paid fonts)
- My favorite font pairings resources (and some of my favorite fonts for pairing)
- How to use / change colors + how to color match anything
- My favorite resources for color inspiration
The Cover
- How to make covers for your planner – multiple ways
- How to add rings to your planner
Tabs
- How to add tabs
- How to decorate and customise your tabs
- How to make dividers within your planner
Adding the Base Inside Pages
- Quality control checklist – must read before adding the inside pages!
- How to make an index / contents page
- How to make an index for a notebook with page numbers
- Example index / contents pages
Notebook Page Layouts
- Dot grid pages
- Graph / grid pages
- Lined pages (3 methods)
- Checklist (3 methods)
Future log / annual planner
- Important dates / annual overview page
- Monthly planning / overview page
Habit Trackers
- Monthly and weekly habit trackers
- Example monthly and weekly habit trackers
Calendars
- 1 page monthly calendar – landscape page orientation
- 2 page monthly calendar
- List style monthly calendar (method 1)
- List style monthly calendar (method 2)
- Design examples and tips for making calendars
Weekly Planners
- Things to consider before making a weekly planner
- How to make a vertical weekly planner (method 1)
- How to make a vertical weekly planner (method 2)
- Horizontal weekly planner (method 1)
- Horizontal weekly planner (method 2)
- Vertical hourly weekly planner
- Dashboard weekly planner
Daily Planner
- Daily planner – portrait and landscape page orientation
- Example daily planner layouts
Adding hyperlinks
- How to hyperlink your entire notebook / planner (and download my checklists)
Finishing touches
- Saving your files
- Workflow / Quality Control Checklist (Downloadable PDF)
- How to import your planner into Goodnotes
Learn how to make landscape page orientation pages…

And portrait page orientation pages…

Who this course is for:
- If you need a digital planner to organize a specific area of your life: college, direct sales, kids, money management, health, medical, cleaning, blog, business, family documents etc.
- Anyone that is frustrated with not being able to find that exact planner they want
- Anyone that wants to learn how to make their own digital planner
This course includes 35 video tutorials covering everything from planning the design of your planner or notebook, creating the cover, divider pages, tabs, all of the inside pages, page numbers and adding navigation links.
There are also downloadable checklists with my workflow process and all of the things to check when making your planner or notebook.
What you need to start digital planning
All you need is an app that can annotate (add text) to a PDF file. I prefer to use Goodnotes but some other options are Xodo, Noteshelf and Noteability. You can do digital planning on your phone but I use an Apple iPad and the Apple Pencil. You could also use a Microsoft Surface Pro with stylus pen, or a Samsung tablet and stylus pen.
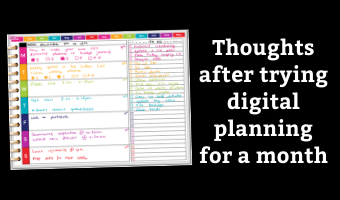
Why should you use a digital planner?
- Easy to rearrange plans. You can use the lasso tool in Goodnotes to copy your tasks from one day, week or month to the next
- Can use any color (you’re not limited to pen colors and you don’t have to pay to use more / other colors). You can also change the color of your text after writing
- No need for a printer, printer ink or paper
- Can reuse the same spreads over and over. You can either erase what you’ve written or if you have a lot of routine tasks, just copy the spread, delete the things that are no longer applicable and convert it to whatever week you’re using
- Don’t need to keep buying planner stickers, or printing & cutting your own, once you buy digital stickers you can use them as many times as you like
- Can access your plans on your phone which you’ll be carrying with you anyway so you can leave your iPad or tablet at home
- You only need to purchase a digital planning app (I use and recommend Goodnotes) once and you’re good to go. Digital planning apps are usually $10 or less (sometimes free!) to purchase which is far less than a paper planner (or bullet journal notebook that’s likely only going to last 1 year)
- Instant access to the planner app after you purchase / download – there’s no need to wait for it to be delivered or go out to a store to purchase it
- Less likely to lose it – if you’re planning on an iPad you’re going to take more care to know where your iPad is since it’s expensive
- Buy the iPad once and keep planning for years (plus you can use it for things other than digital planning)
- Can duplicate any hyperlinked page and all of the links (e.g. between tabs) will still work
- Never run out of paper – just copy a page and keep planning. You can do a 3 page, 4 page or more weekly spread (which most paper planners don’t have)
- Good for planning secret projects – no one will see what you’re planning unless you show them
- If you don’t like your handwriting you can type text and use different fonts instead
- Can resize design elements. Sometimes I won’t use a planner sticker because the size is too big or too small for the space I want to use it e.g. Erin Condren full box stickers can be used in other planners, but it won’t be a perfect fit. In Goodnotes, you can quickly resize
If you still want to plan on paper, you can use your paper planner with your digital planner, or alternate between paper and digital planning (which is what I do).

Frequently Asked Questions
When does the course start and finish?
This is a self-paced online course – you will receive immediate access to the entire ecourse after your enroll. You can access the course as many times as you want. You can pause, rewind and re-watch the tutorials as many times as you need.
How long do I have access to the course?
Lifetime access!
Software Requirements
The tutorials in this ecourse were made in Microsoft PowerPoint version 2016. You will need Microsoft PowerPoint. Earlier & later versions can be used – the menus may appear slightly different. Microsoft PowerPoint can be purchased outright, or as part of a Microsoft 365 subscription.
I have Macbook not a PC, Can I still take this course?
If you have a Mac you can use the online version of PowerPoint. See this tutorial for instructions.
What if I want a refund after enrolling?
Due to the digital nature of the ecourse, no refunds will be given under any circumstances – serious buyers only please. If you have any questions please contact me via [email protected] before purchasing and I will get back to you A.S.A.P (I usually reply to emails within 24hrs – note that I am located in Australia – when it is 10am in L.A. it is 3am here)
What app do you recommend for digital planning?
I use and recommend Goodnotes ($8 USD – purchase once and you get lifetime access) Similar digital planning apps are Xodo, Noteshelf and Noteability
If you have any questions about the course, please send me an email via [email protected]