Colorful time blocked weekly spread using Happy Planner Stickers
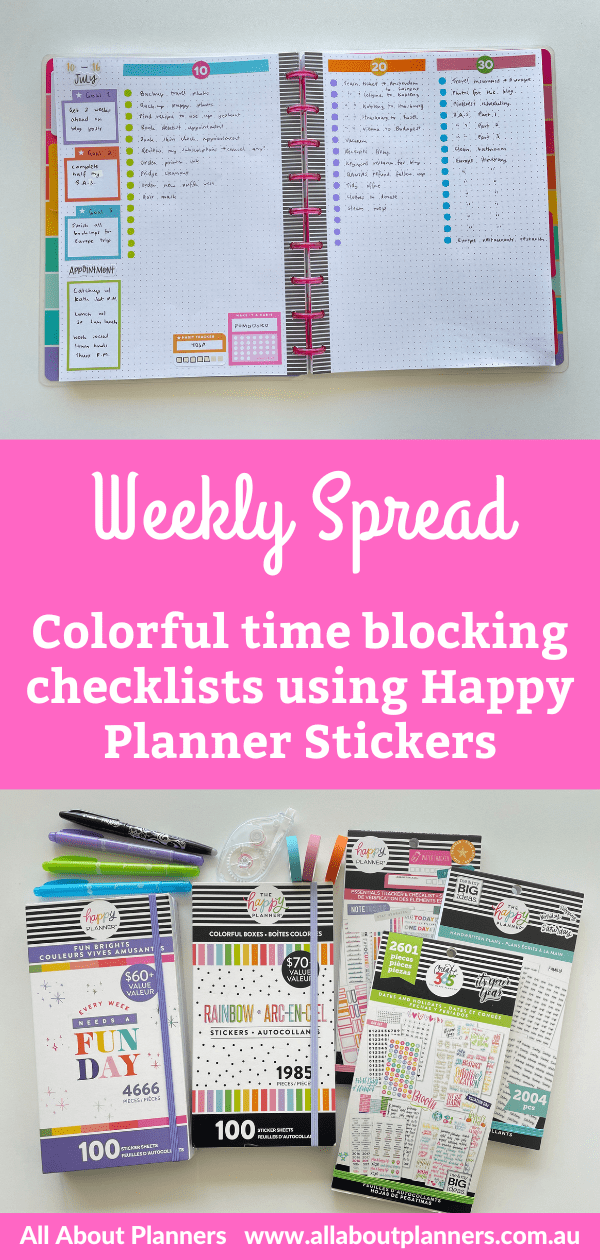
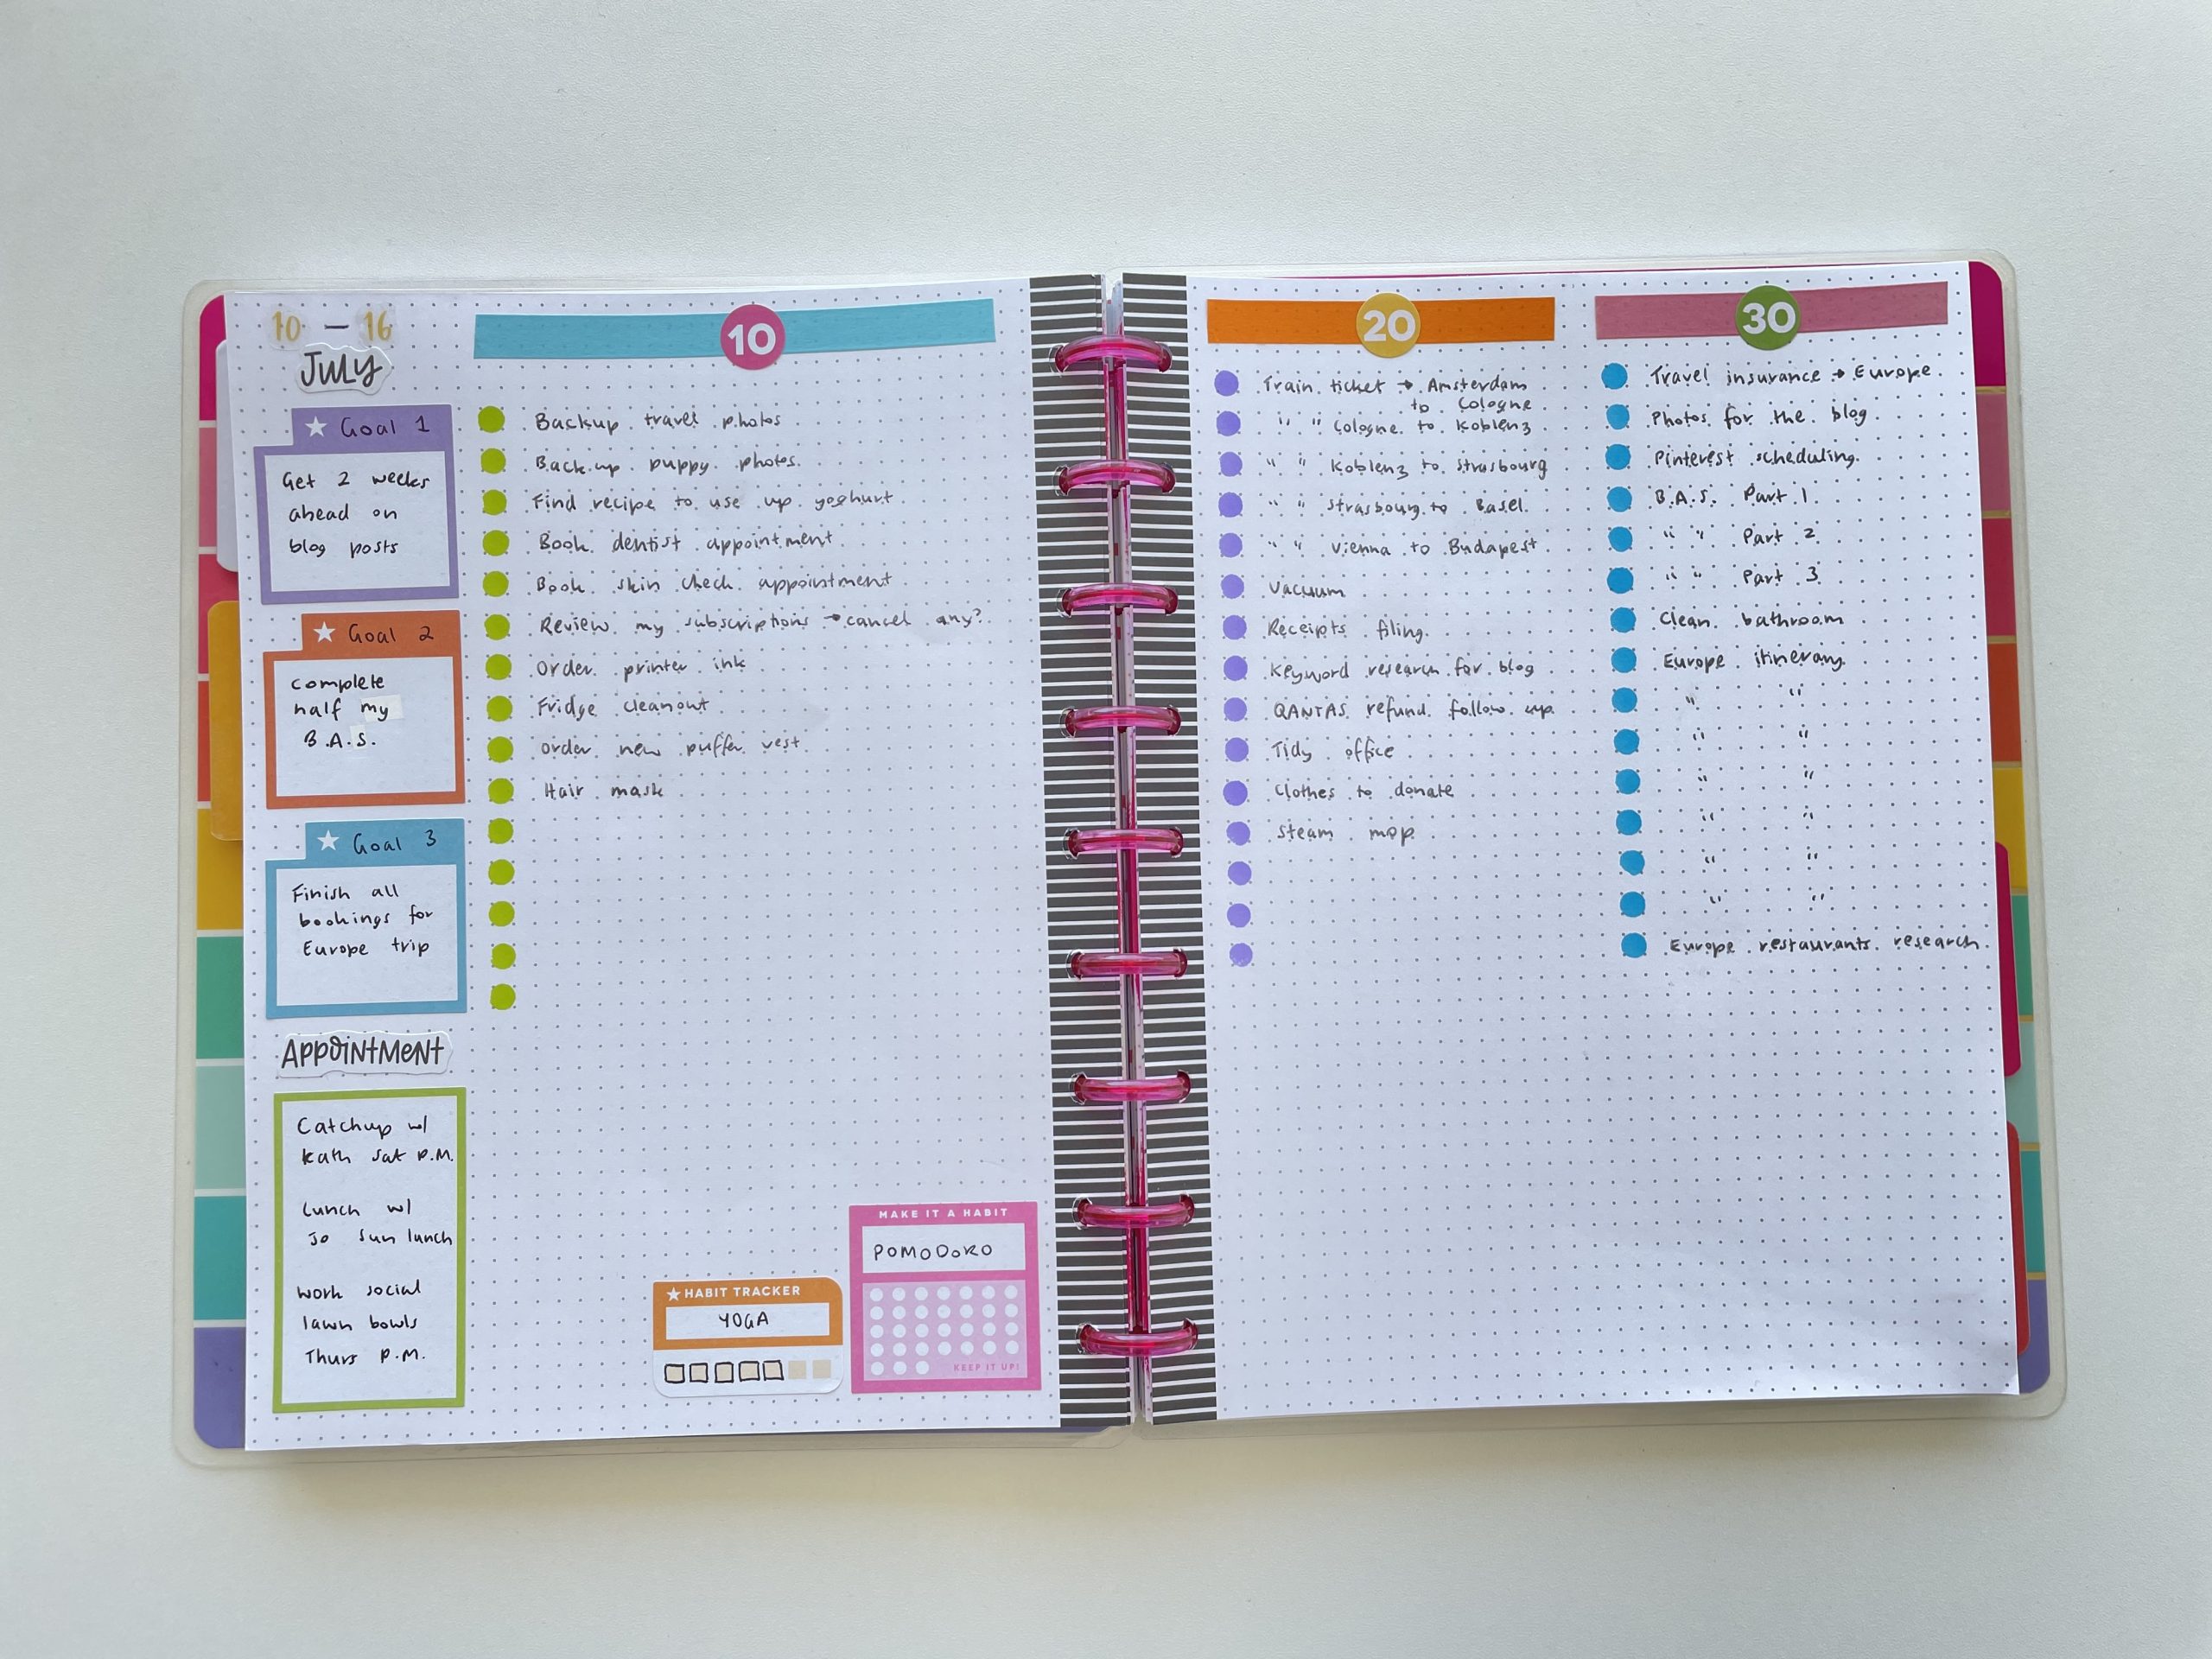
This week I need to get stuff done and didn’t have a lot of time to do it, so decided to try time-blocking. But I didn’t want to do an ordinary time-blocking weekly spread (e.g. vertical hourly layout then color code / assign task to every single timeslot). Instead, I took the usable hours I have to do things (excluding work, commuting, catching up with friends, life admin etc.) and divided that time into 10, 20 and 30 minute task lists.
- 10 minute x 15 tasks = 150 minutes / 60 = 2.5 hours
- 20 minute x 15 tasks = 300 minutes / 60 = 5 hours
- 30 minute x 15 tasks = 450 minutes / 60 = 7.5 hours
- Total useable time = 15 hours
I didn’t bother doing a list with anything less than 10 minutes because I try to just do those tasks when they pop up. I figure by the time I write it down I could’ve practically done the task already.
Before the Pen
My inspiration for this layout started with the number date stickers from the Dates and Holidays Happy Planner Sticker book. They’re a bit too big for a weekly spread on a small page size (half US letter, A5 etc.) so I was thinking of other ways to use them.
Then I thought of layering them over solid colored washi tape.
Then thought about the other sections I needed and how I could mix and match different colors.
And here’s what I came up with:
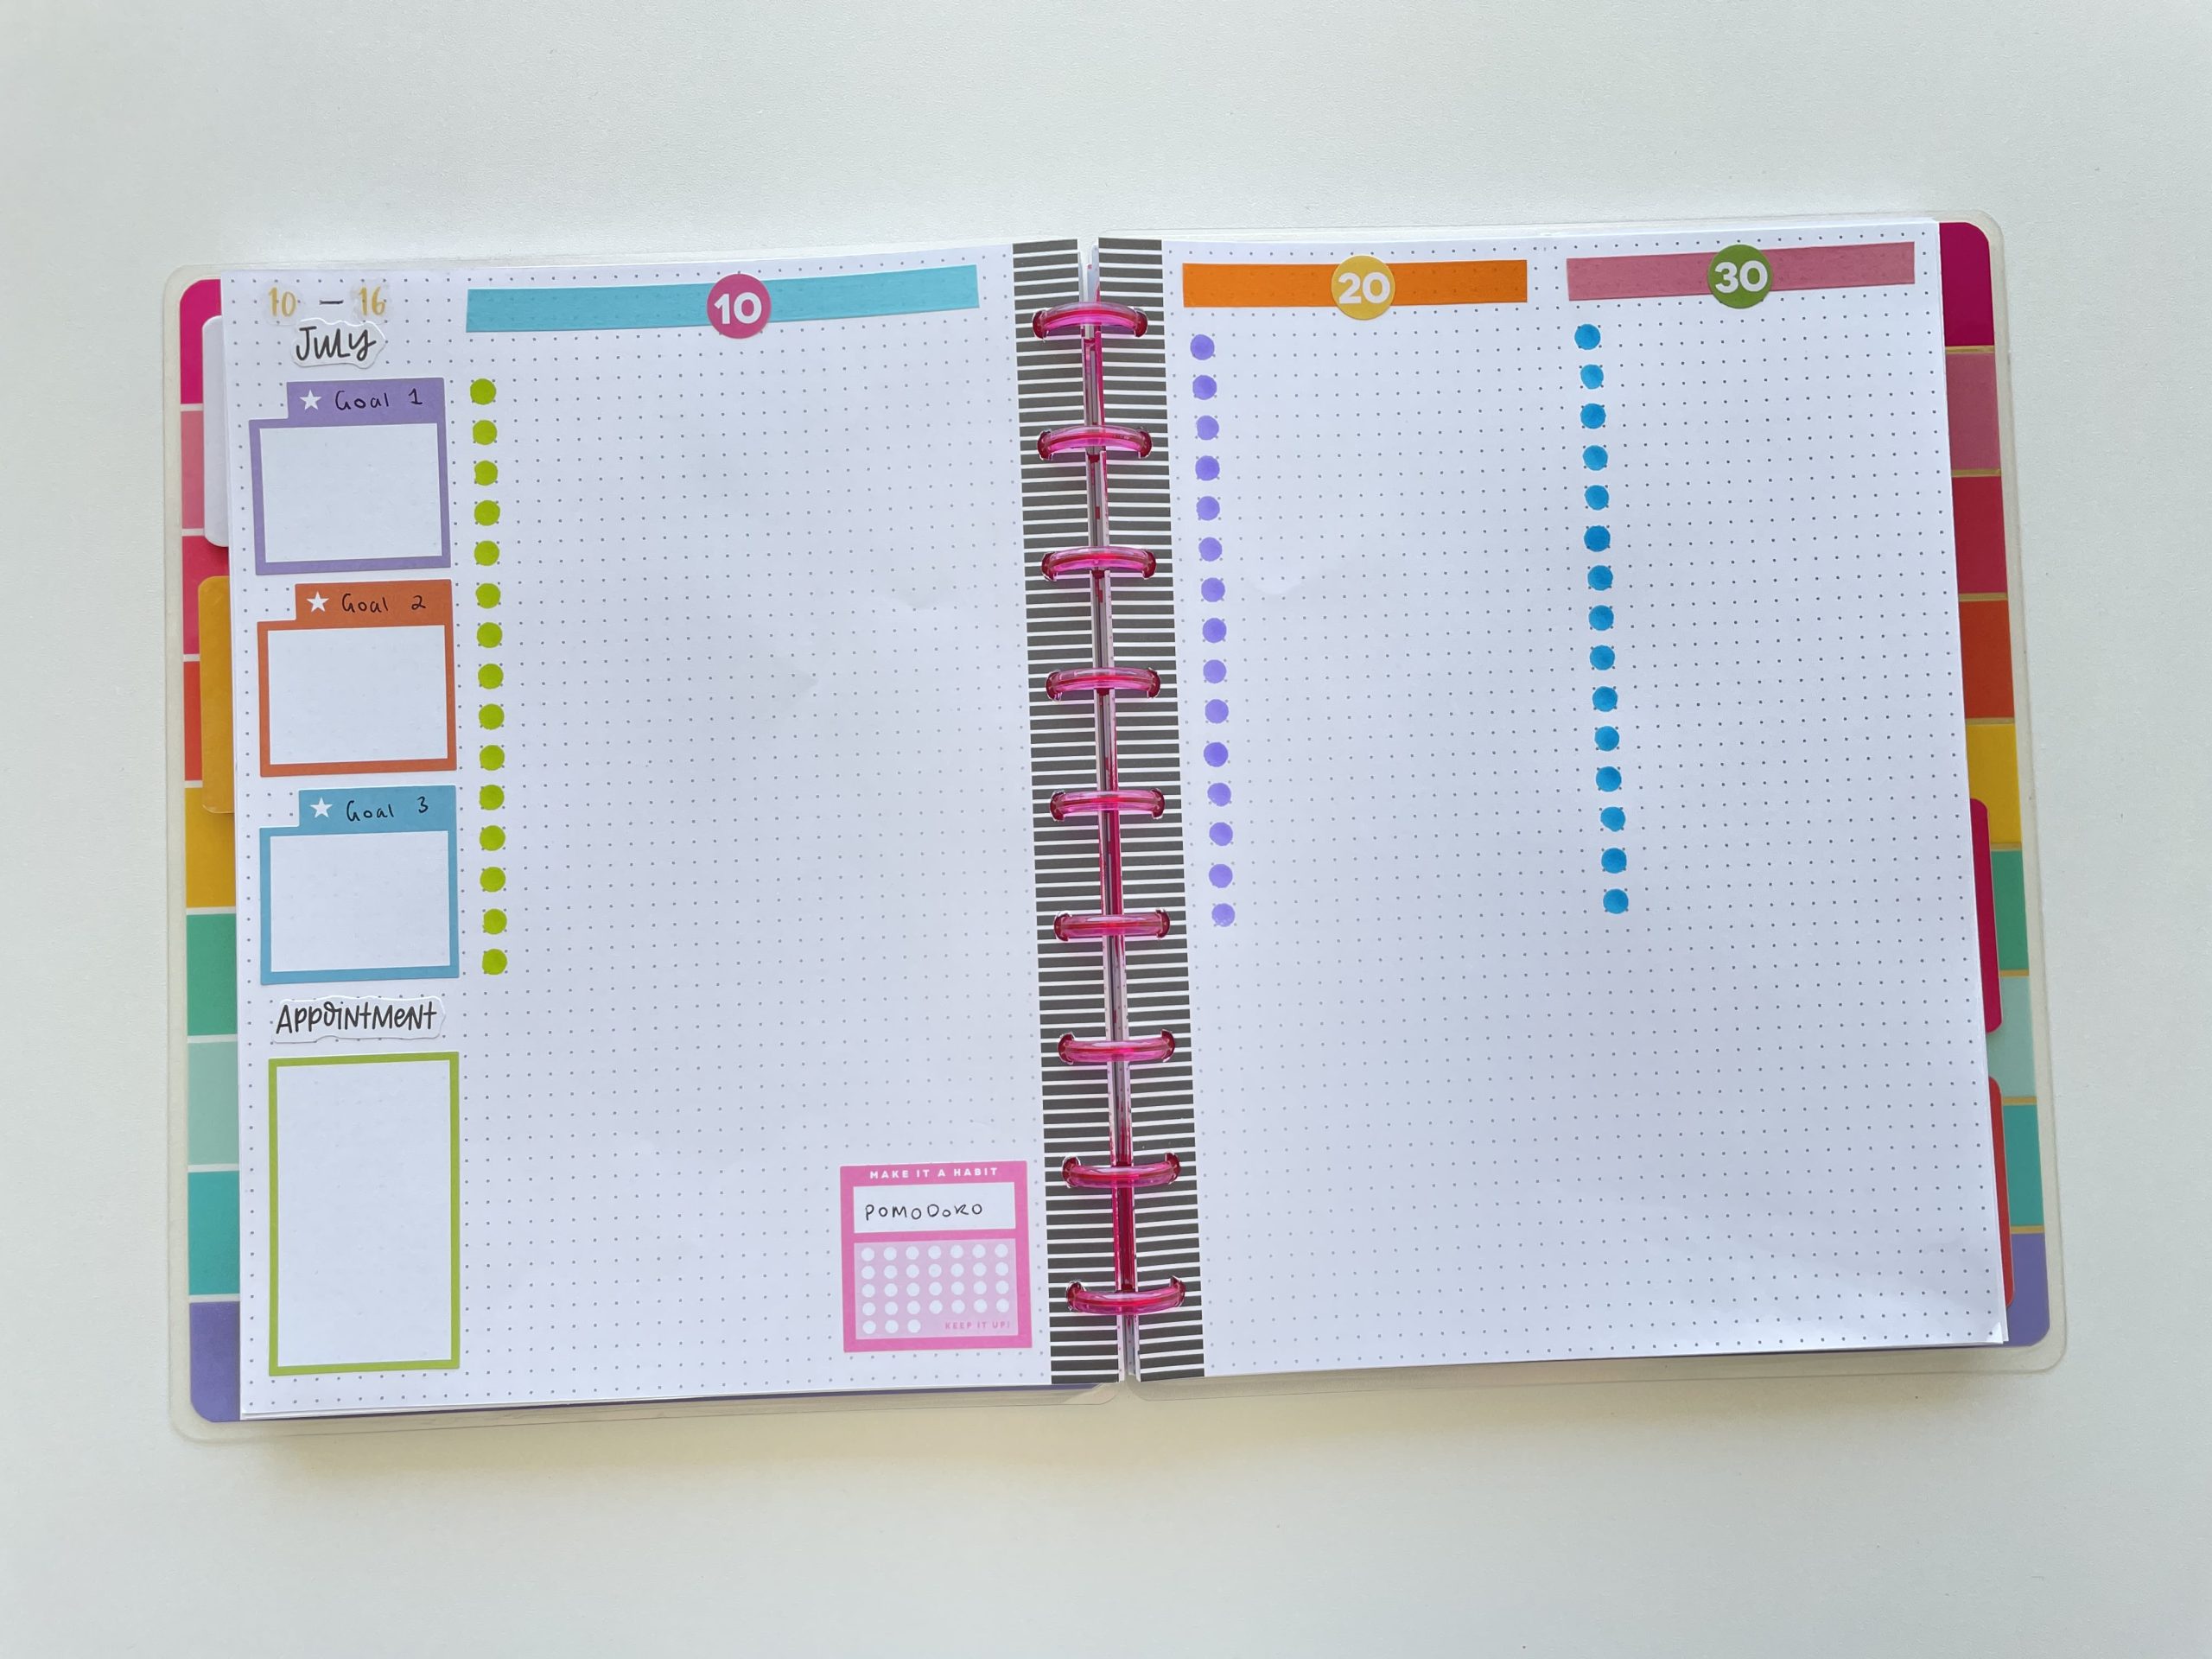
I mostly used stickers from various Happy Planner sticker books (I’ve listed which ones I used later in this post).
The stickers I used for the goal 1, goal 2 and goal 3 are actually monthly calendar stickers. Since I don’t use a traditional boxes monthly calendar layout (I prefer a list format), these stickers were always left unused in my sticker books so I’m glad I finally found a way to use them!
I’ve been using a pomodoro tracker for the past few months and it’s been working really well at keeping me on task. I use a printable monthly habit tracker so monthly habit tracker stickers usually go unused in my sticker books. So instead I re-purposed it for the pomodoro tracker.
Related post: 30 Things to track in the monthly spread of your planner
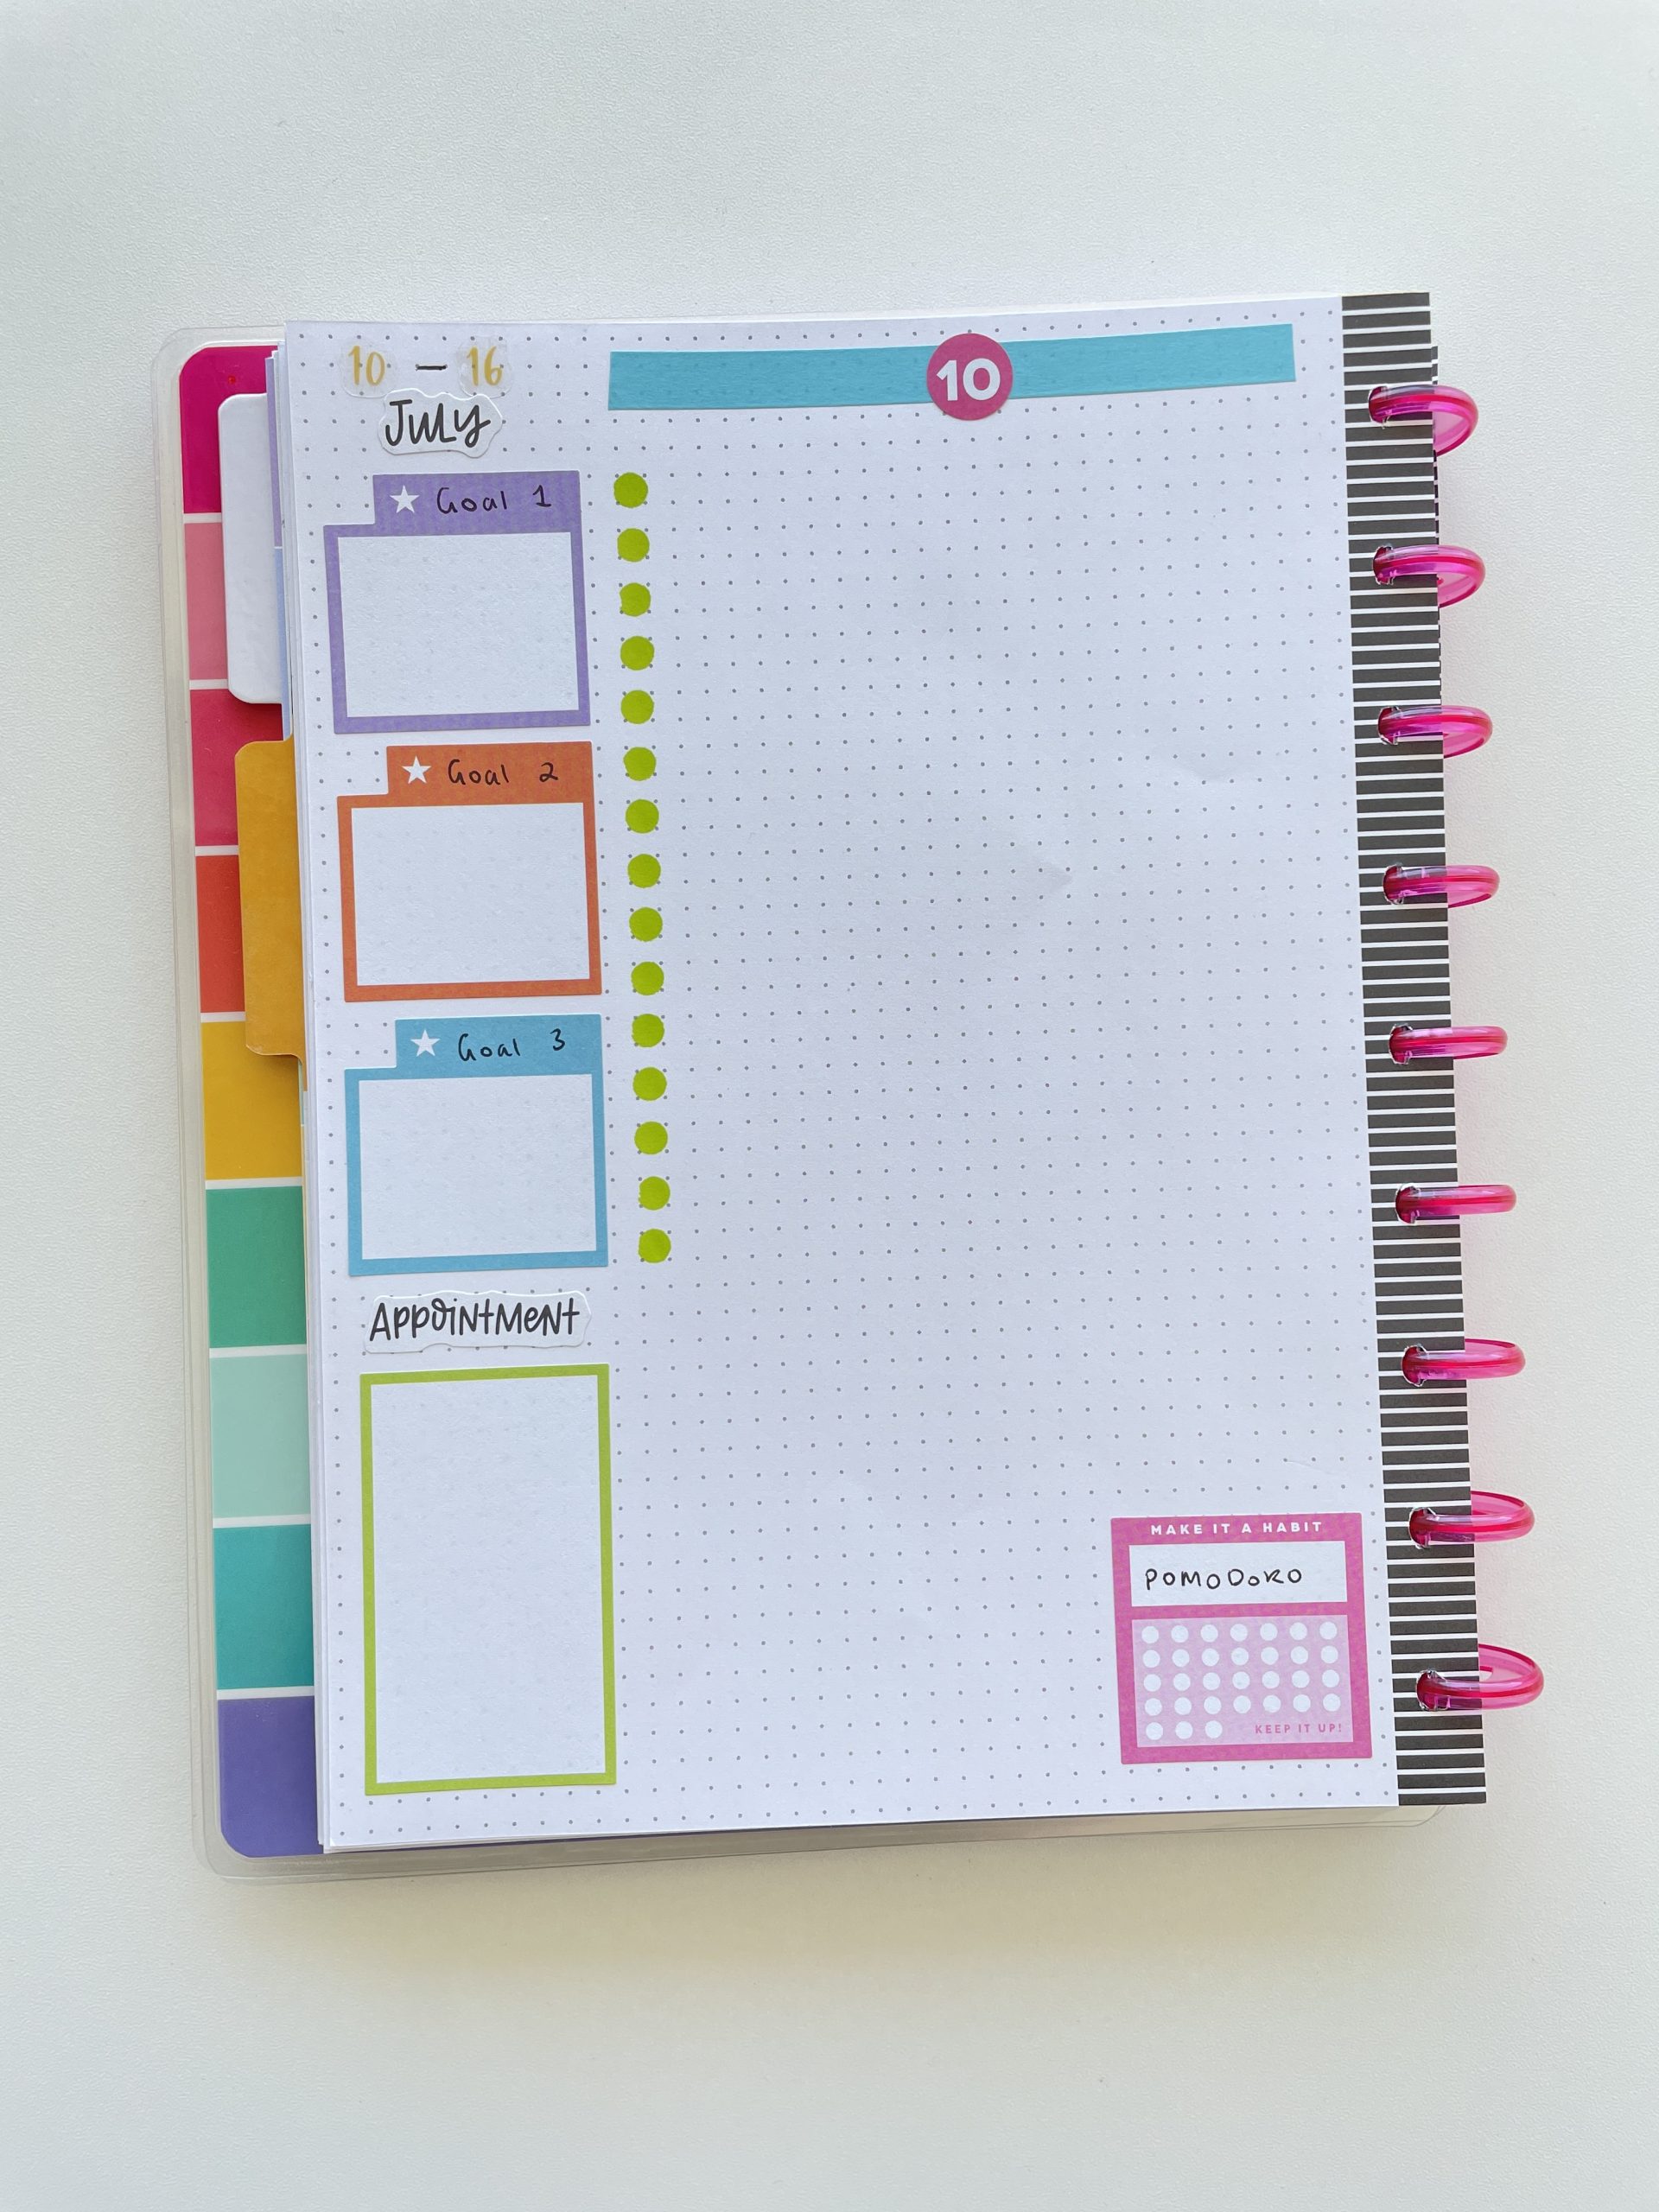
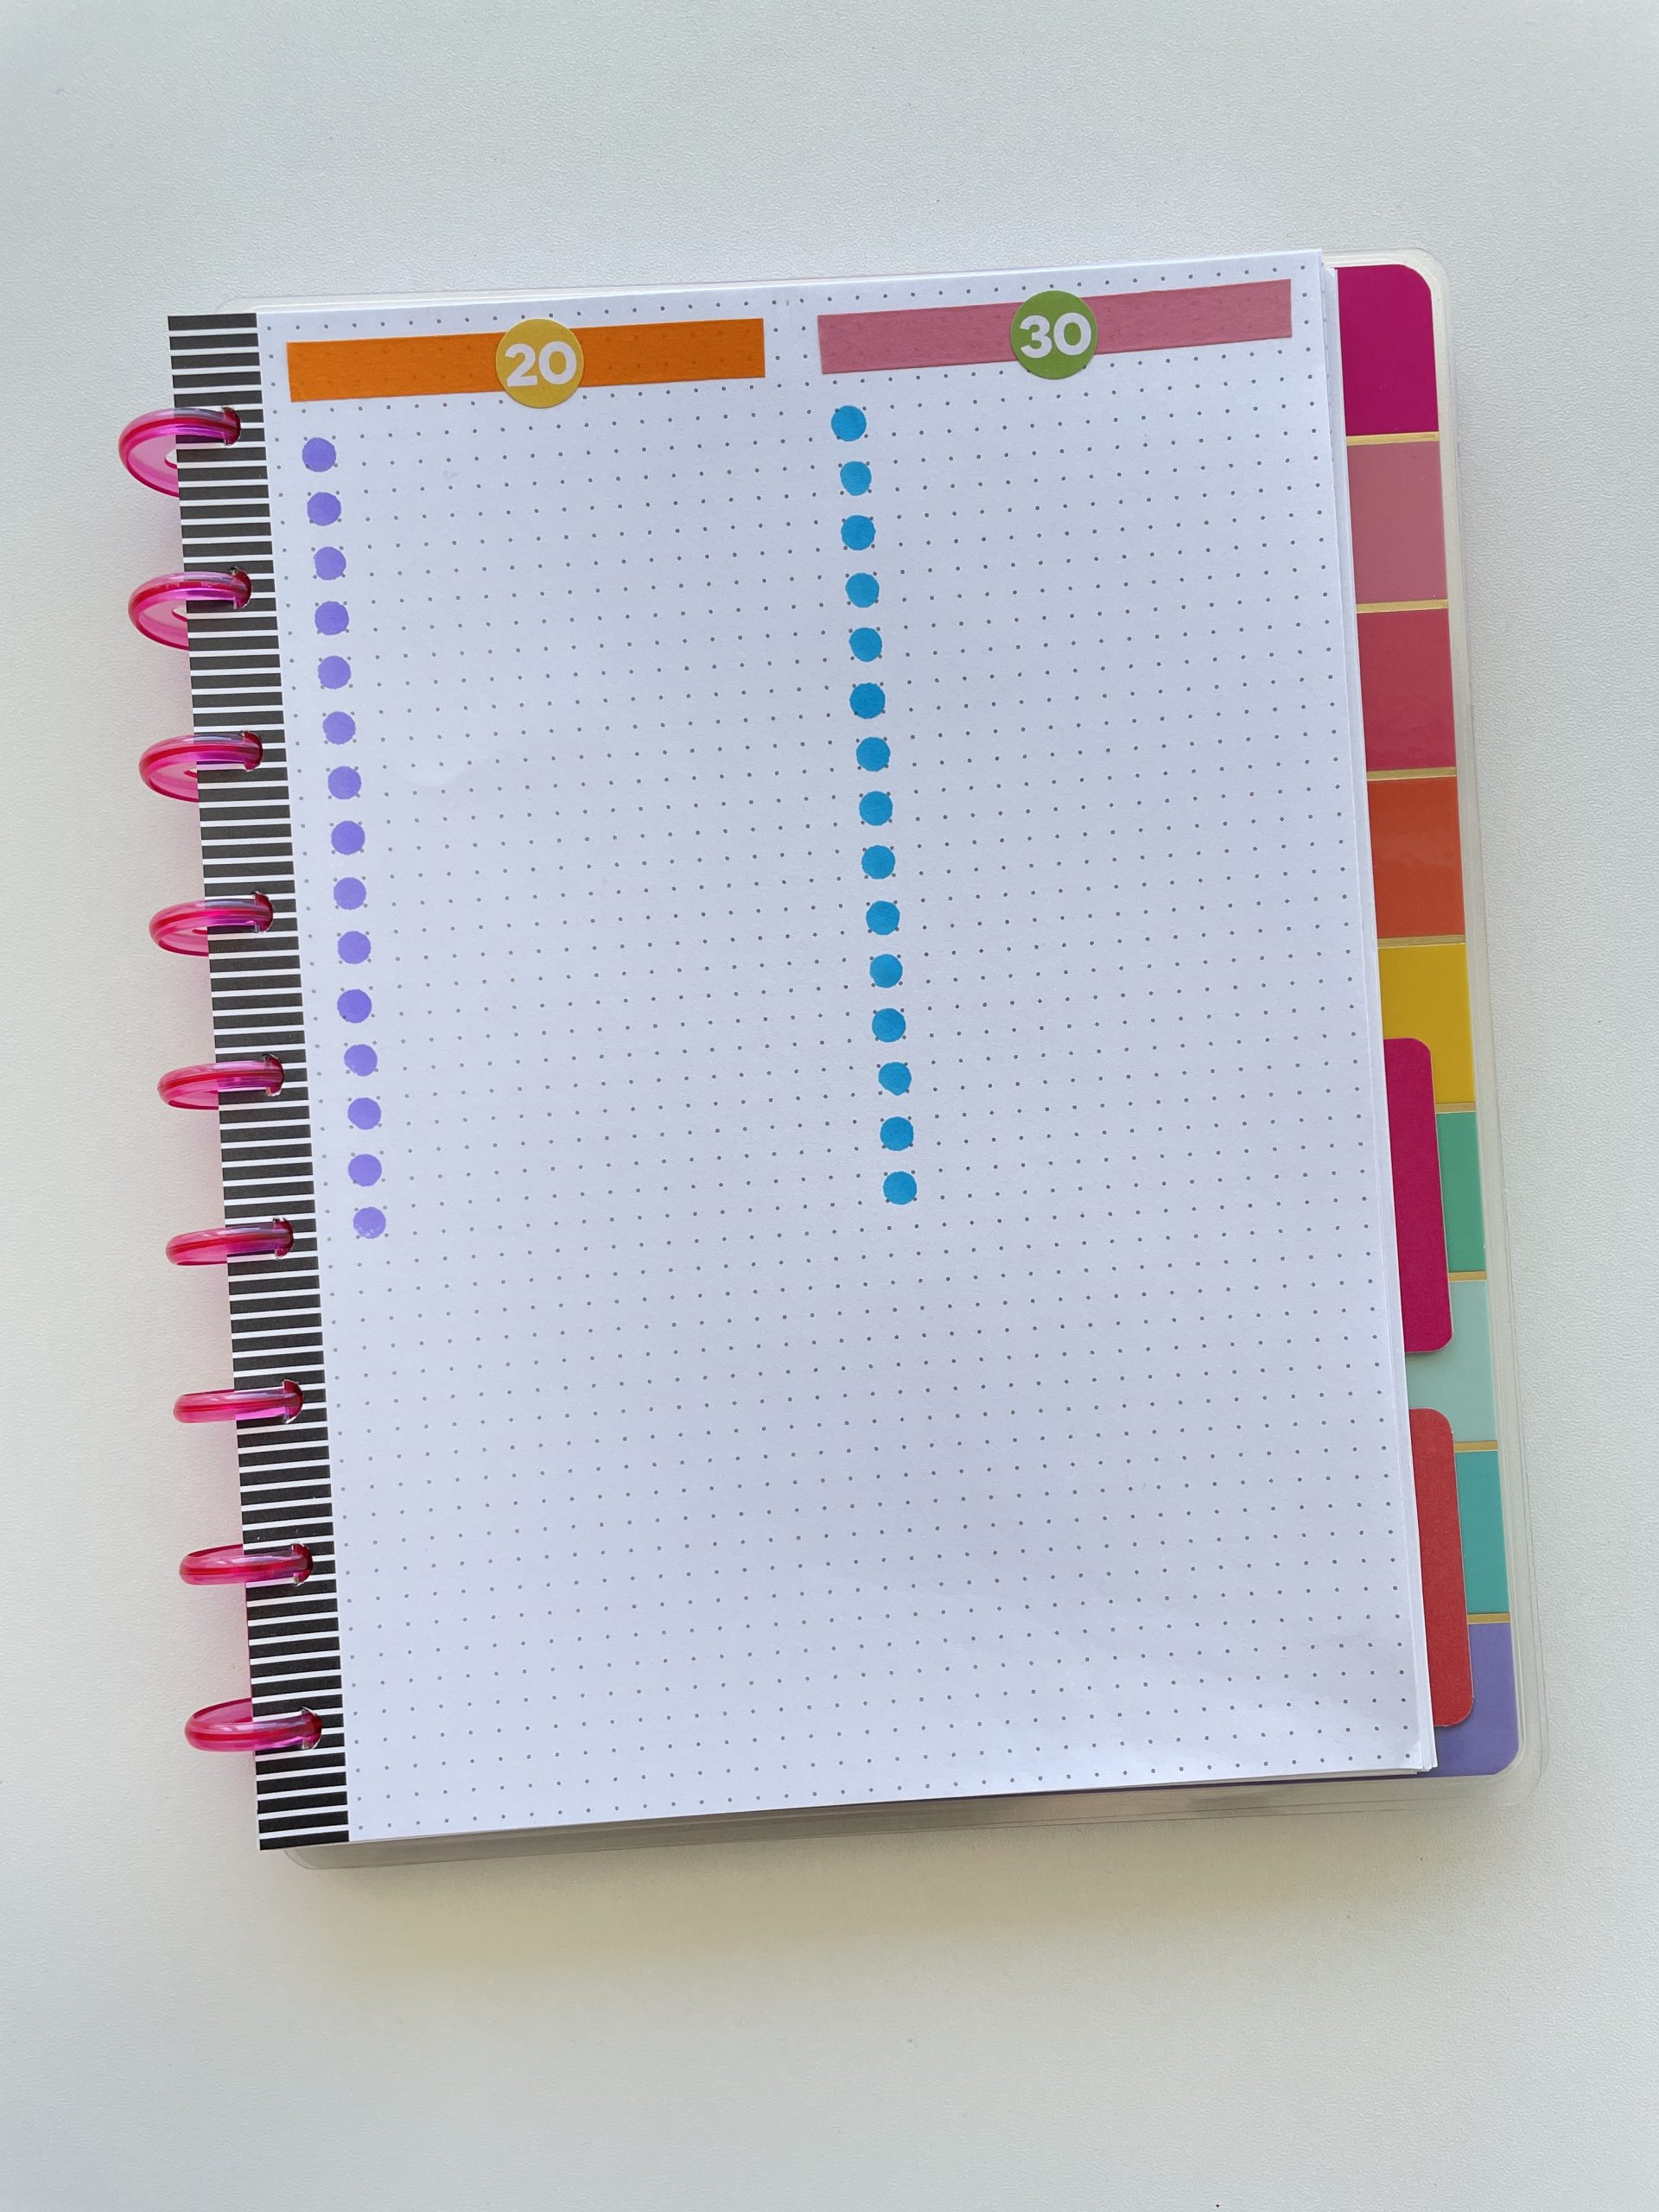
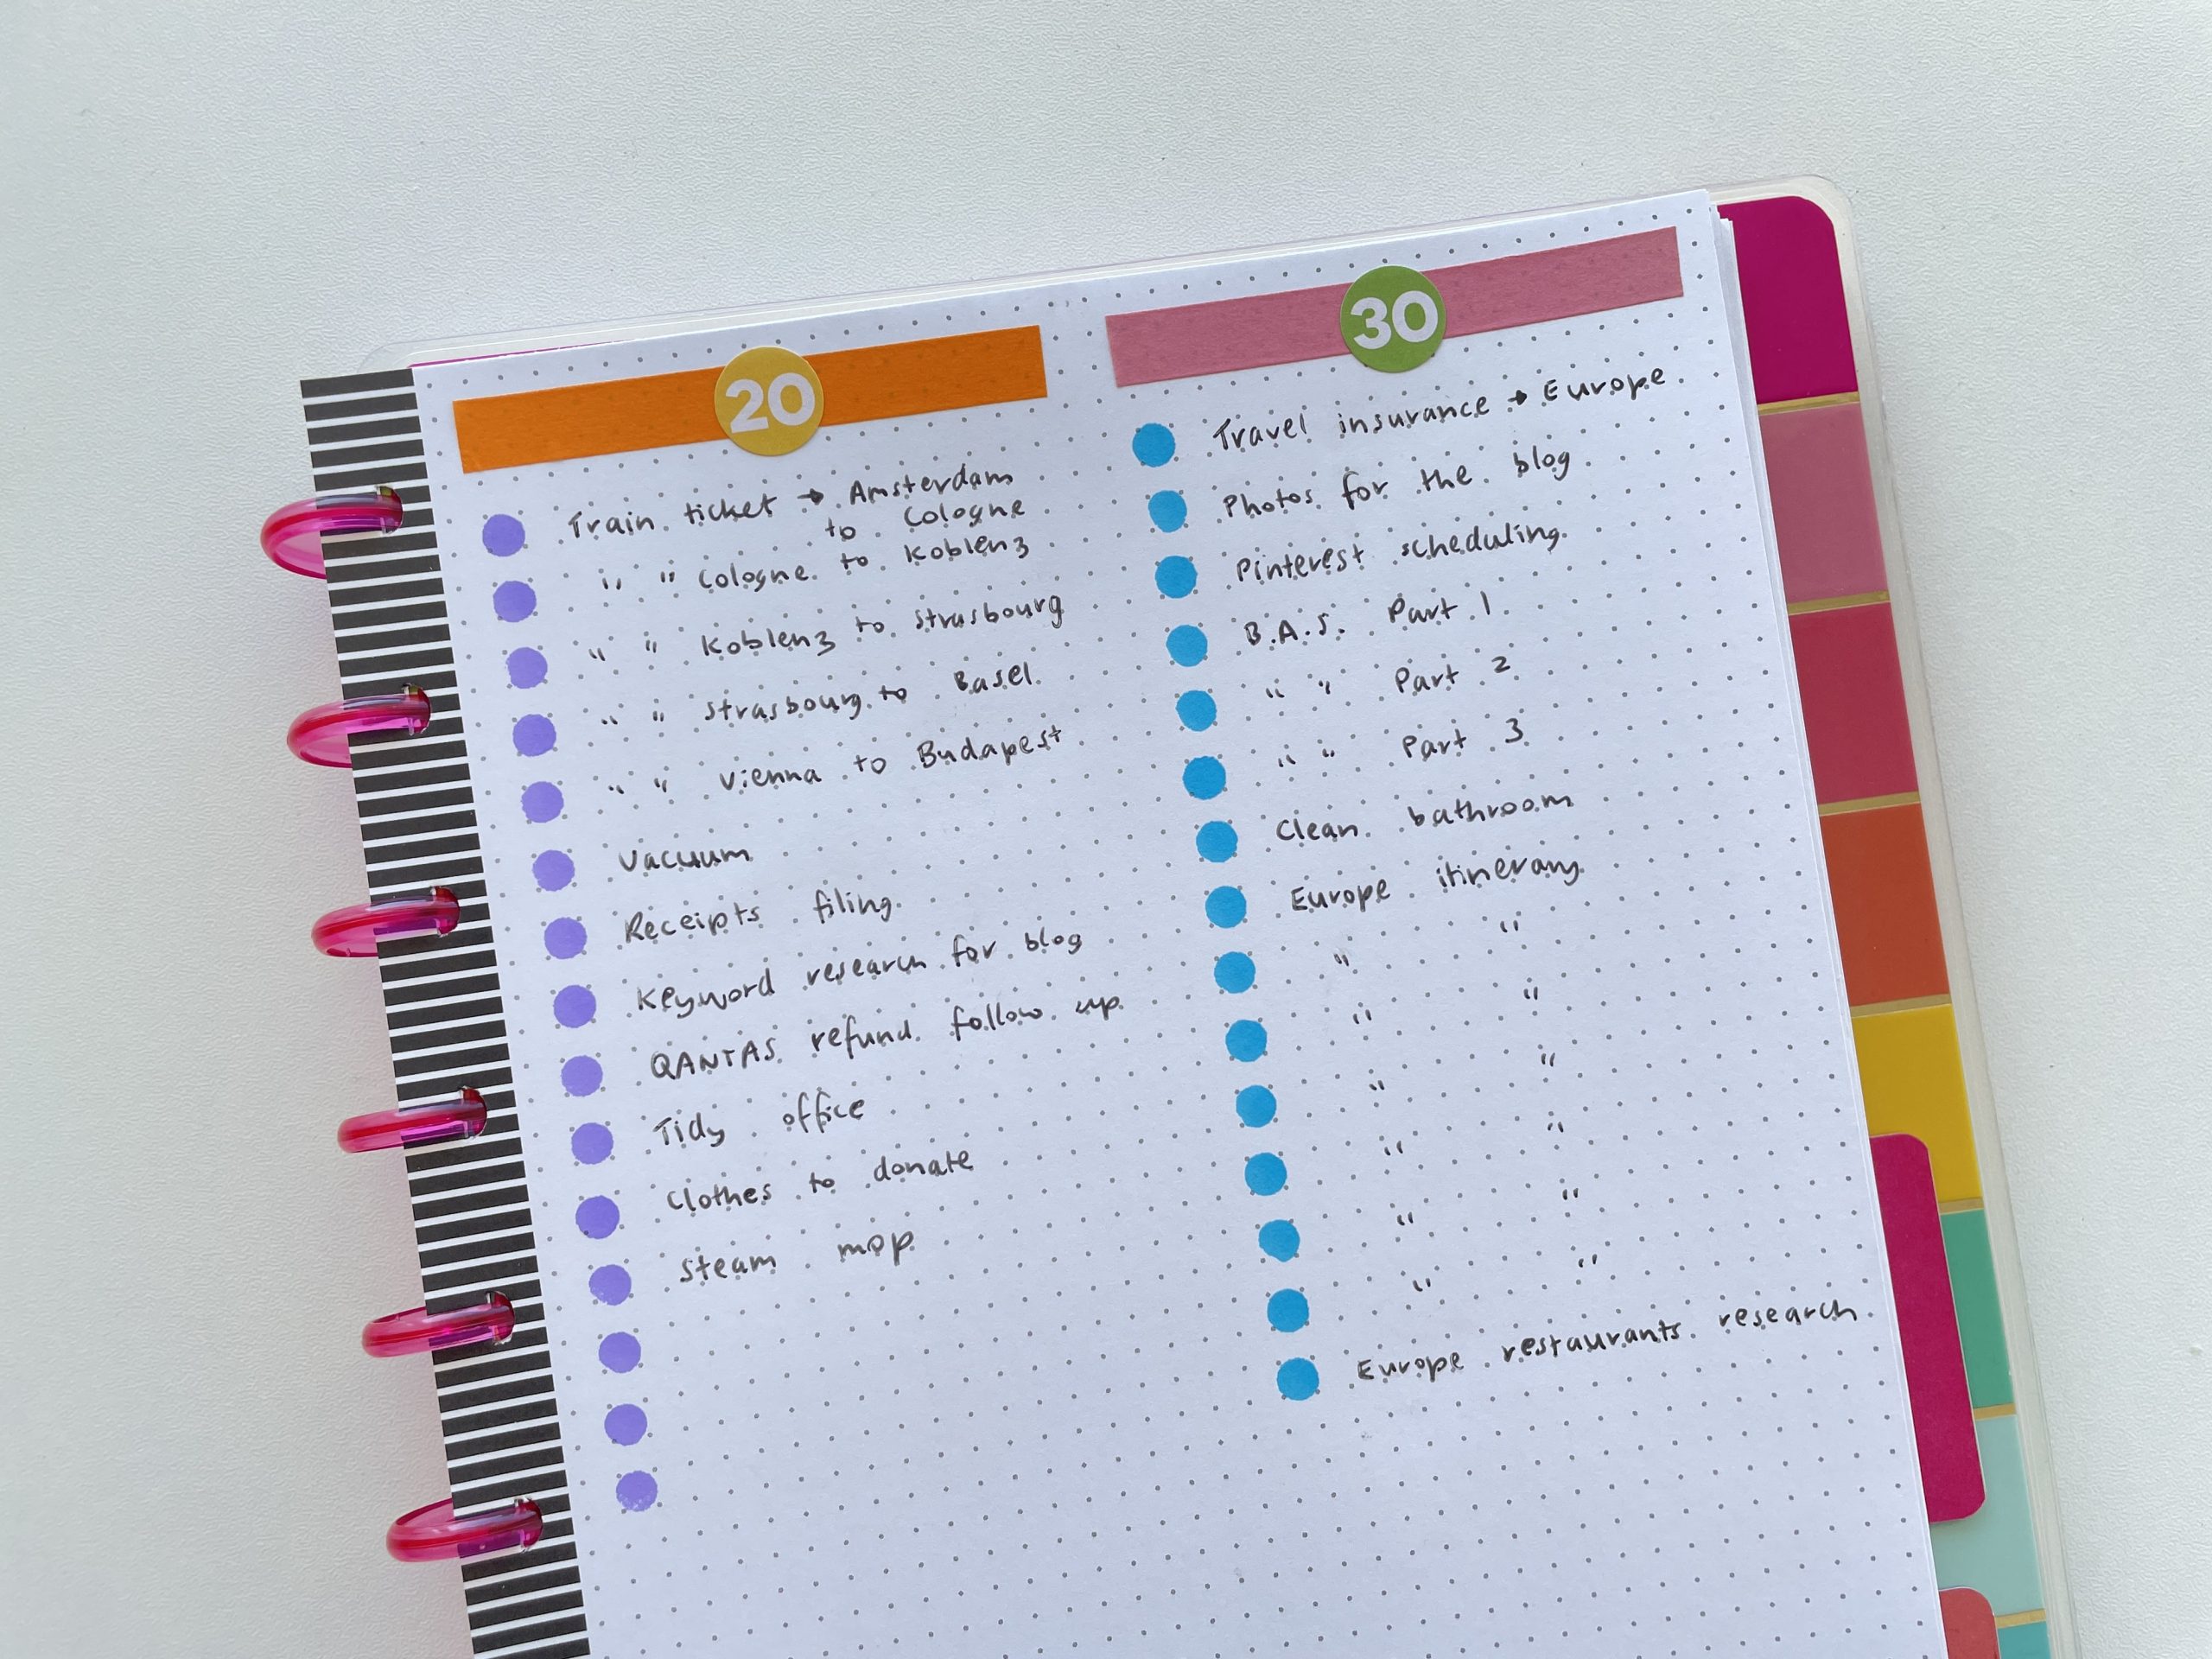
Here are my 20 minutes and 30 minute task lists. The Tombow dot markers make it really easy to quickly set up a checklist.
After the Pen
Here’s what my pomodoro tracker looked like at the end of the week.
![]()
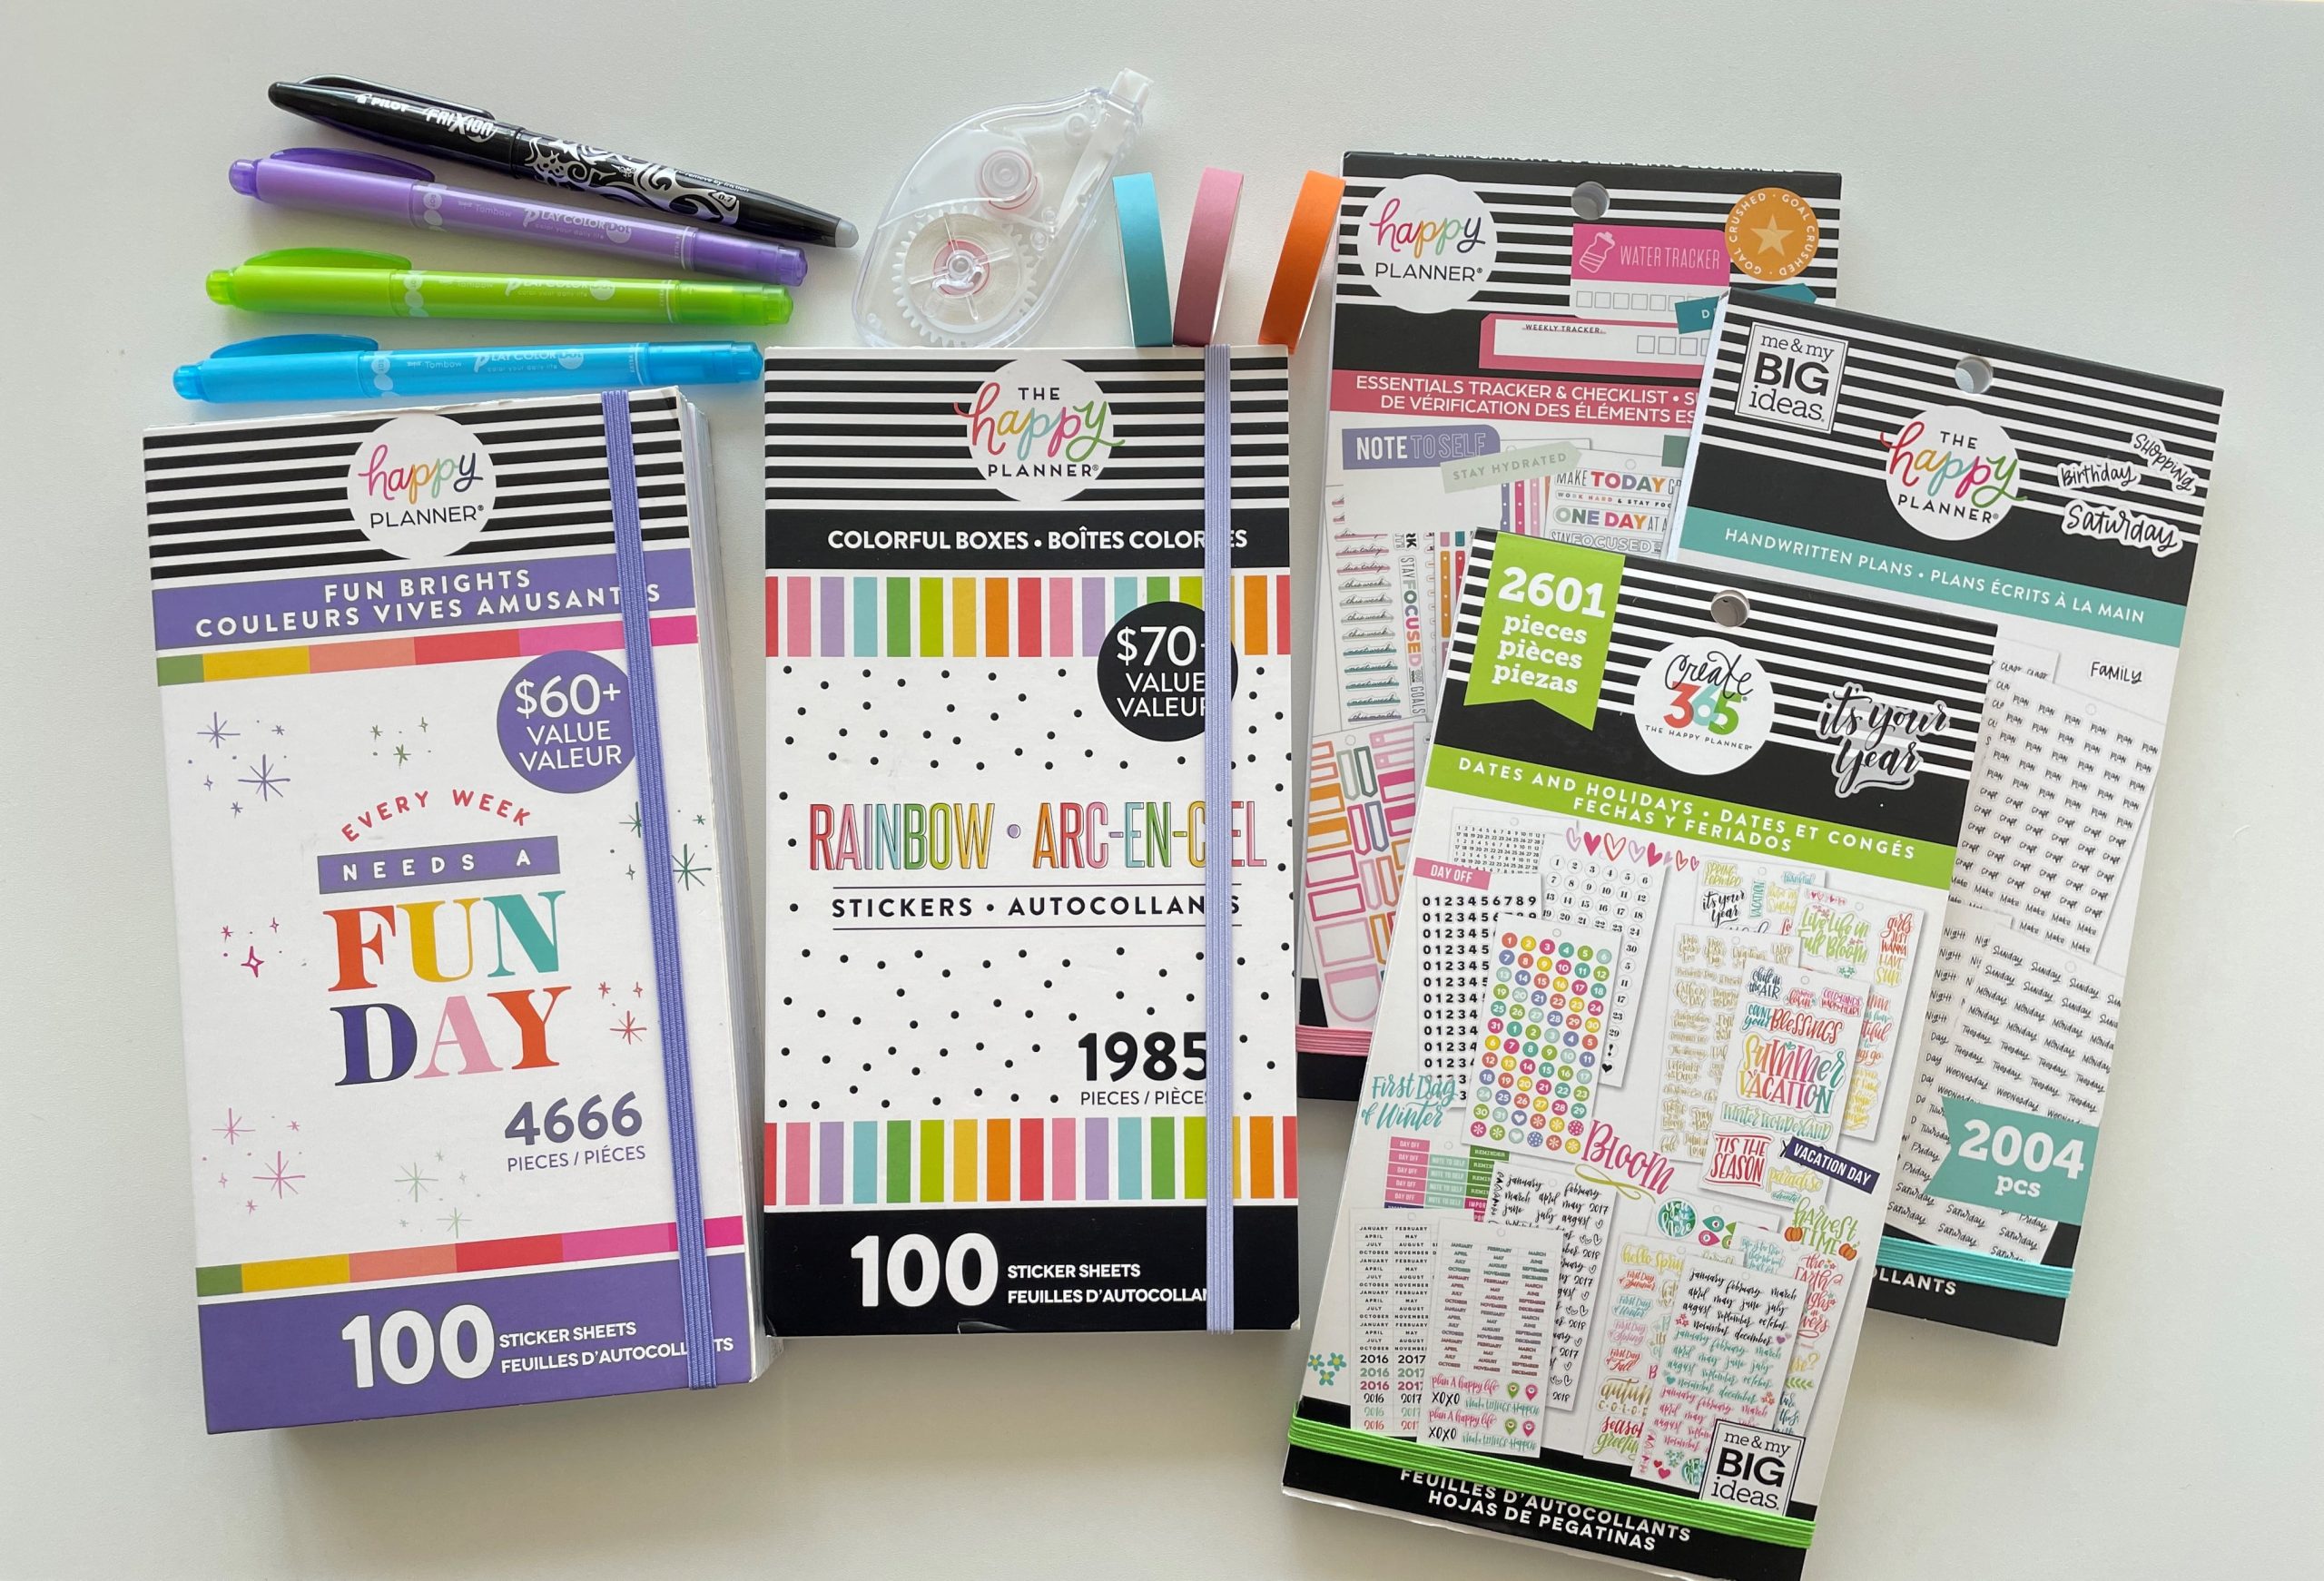
Supplies used
- Happy Notes Notebook
- Happy Planner dot grid refill paper (no longer available but here are some more styles)
- Happy Planner ‘Dates & Holidays’ sticker book (no longer available)
- Happy Planner ‘handwritten plans’ sticker book
- Happy Planner ‘Essentials Trackers & Checklists’ sticker book
- Happy Planner ‘Fun Brights’ Mega Sticker Book
- Happy Planner ‘rainbow colorful boxes’ mega sticker book
- Recollections 9mm wide solid washi tape
- Tombow dot markers
- Frixion erasable pen
- Papermate Inkjoy Gel 0.7 (black) – to write on the Happy Planner Stickers
- Officeworks correction tape
Would I use this layout again?
Yes, I prefer to work off a to do list and these days I typically just do categorized lists, so organizing by time was a new approach to me. I think it helped me be realistic about how many things I add to my to do list.
If I did this spread again with all of these colors, I’d use a Happy Planner refill paper with a rainbow colored spine, or use my printable dot grid Happy Planner paper with the rainbow stripe pattern I like to use. I thought it would make the spread too overdone with all the colors, but I think the black on the dot grid paper ended up looking a bit out of place.
Past weekly spreads
- Weekly spread with small weekday section and larger space for projects
- Erin Condren Petite Dot Journal & Stencils
- Weekly spread in my custom Agendio vertical planner (with spans)
Planning tips
- 6 Ways to color code your planner to increase productivity
- 5 Things I Plan (but not in my weekly planner)
- What to do if your planner isn’t working
Tired of drawing up weekly spreads? This printable bundle of 52 different 1 page weekly planners (you can mix and match to create 2 page spreads if you prefer), is available in my Etsy shop and online store. It comes in US letter size and Happy Planner classic page size.

Liked this post? Pin it!