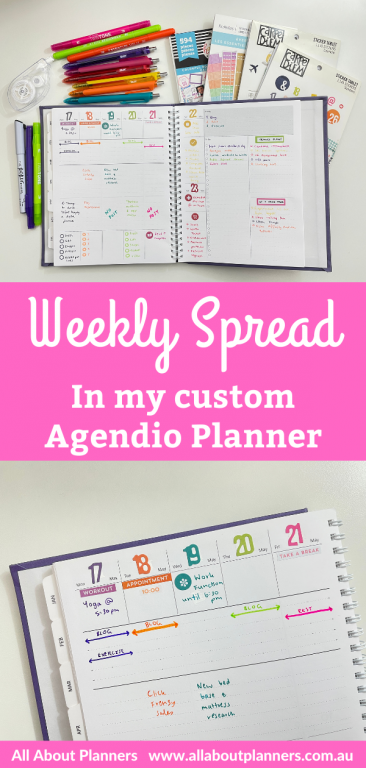
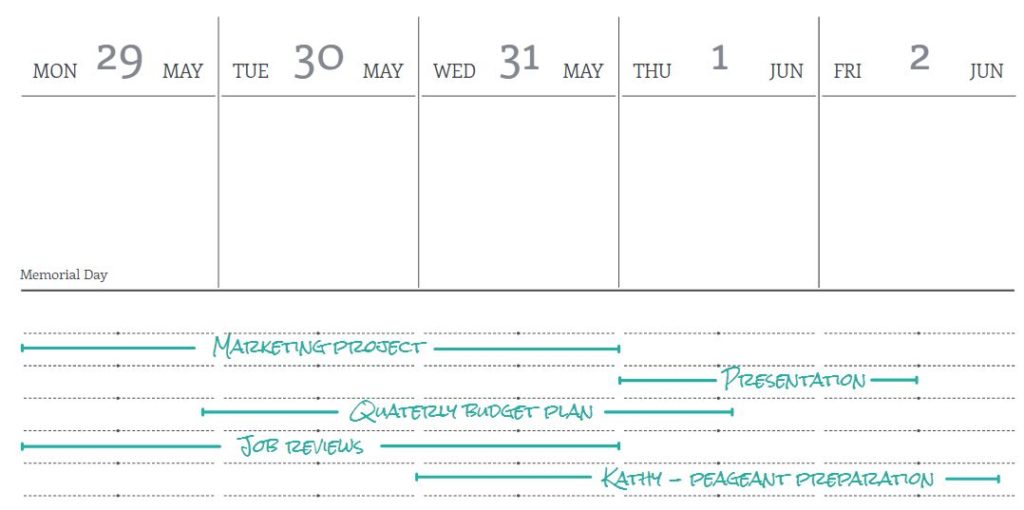
Weekly spread in my custom vertical Agendio planner (with spans)
The last of my Agendio planners to try – the vertical weekly. To be honest, I had been experimenting in the Agendio software when I created this layout and purchased the planner mainly to see how the binding style compared to the coil bound versions I’d chosen. The main reason I chose this layout was because I liked the idea of what they call ‘spans’ (refer to the arrows in the image below). I thought it would be a good way to break up projects if you’re multi-tasking.
I purchased this planner as part of my Agendio Haul.
This post contains affiliate links. If you make a purchase after clicking one of these links I’ll receive a small commission in exchange for referring you (at no extra cost to you).
Before the Pen
See my review of this planner in this post. Ordering tutorial for all the different customisation options and how Agendio planners work is in this post.
After the Pen
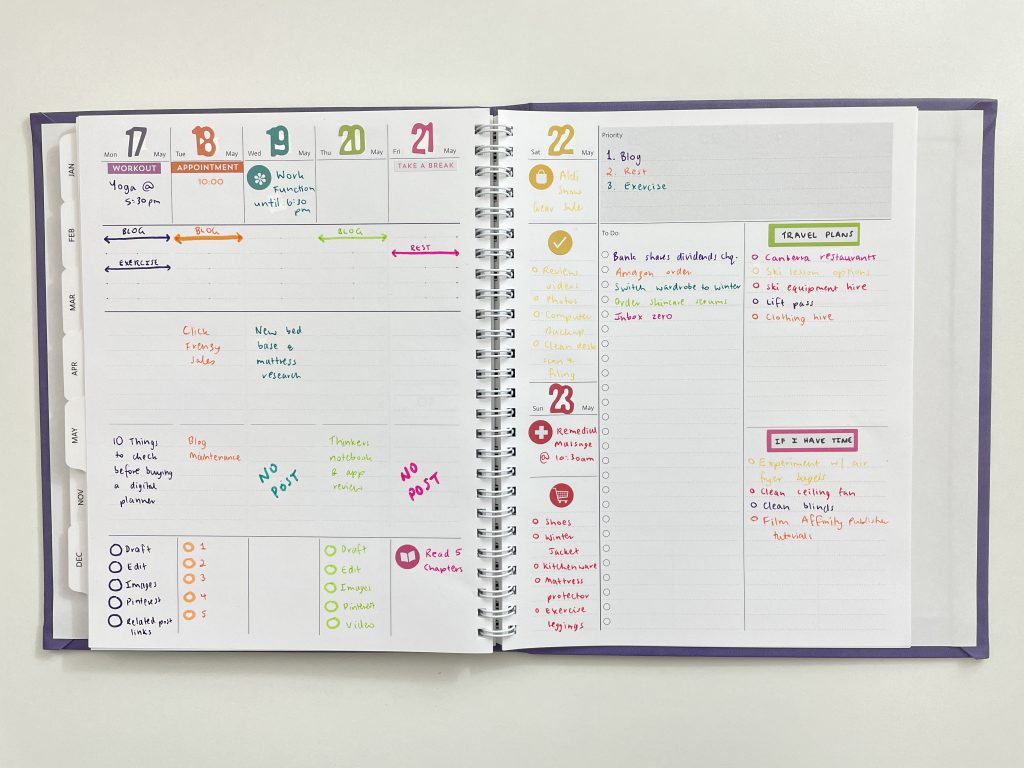
I don’t like rainbow colors unless they are in a specific order – it really does make a big difference. I usually follow the order of the saying ROYGBIV: red, orange, yellow, green, blue, indigo and violet. This time, I decided to deviate.
I wanted to try some stickers from the new (to me) Recollections Everyday Basics sticker book. I paired the colors of those stickers with my favorite Carpe Diem number stickers for the dates. I added some Happy Planner box stickers to make the headings stand out for the checklists. Then I found pens that matched as close as possible to the colors I’d chosen for the stickers.
This is my usual process for choosing color combinations for my spreads each week – start with the supplies I want to use – and then choose pen colors that coordinate with them.
I restocked my cheap Keji white out tape and this one was bad (or maybe it was bad all along and I just happened to get good ones in the past). The tape didn’t cleanly come out and I kept losing part of the tape to the runner. Might be time to buy some more expensive whiteout tape…
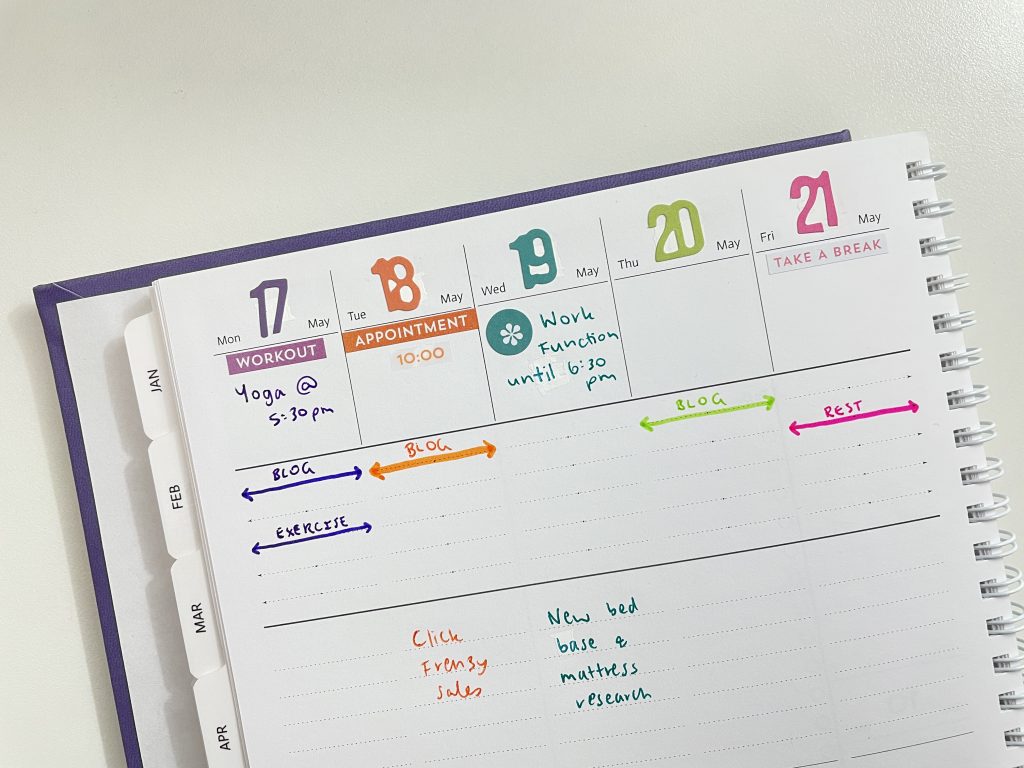
This spread would work best if you’re managing multiple projects, a day job plus your own business, or if you’re studying. I used it to try and balance work with exercise / rest. With Covid not going anywhere anytime soon and not being able to take a break via going on a holiday (like I normally would) due to border closures, I’m finding I need to find other ways to take a break instead of travel, otherwise I just spend most of my time working. So I made sure to actually schedule some downtime this week using the spans.
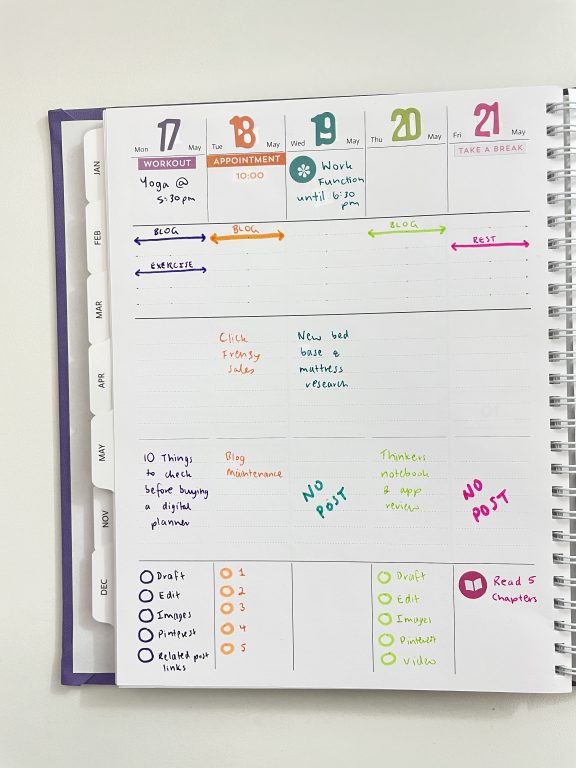
This spread reminded me of why I never use yellow. Even though BLOT is one of the few gel pen brands where you can actually see the yellow, it’s still hard to read. I think I used too many colors for the lists and wish I’d just used black pen and added color with highlighters instead.
Related post: Yellow pen swatches (and my recommended pens that have yellow ink you can actually see)
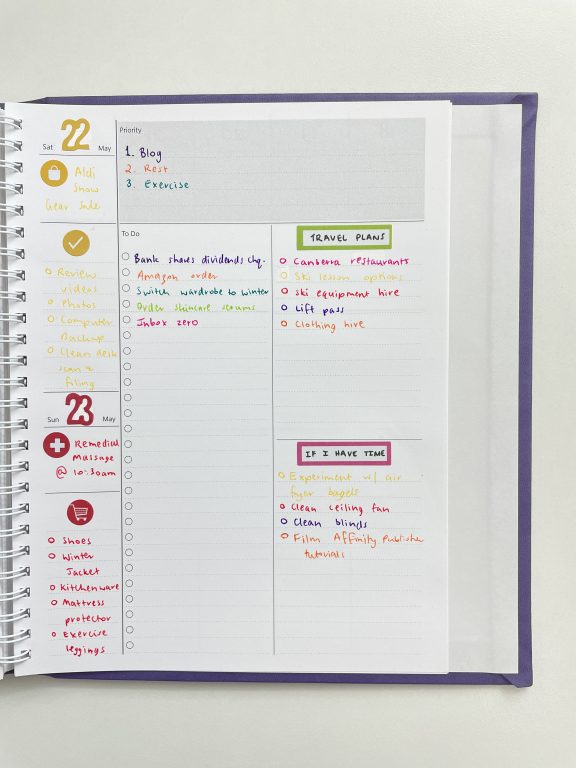
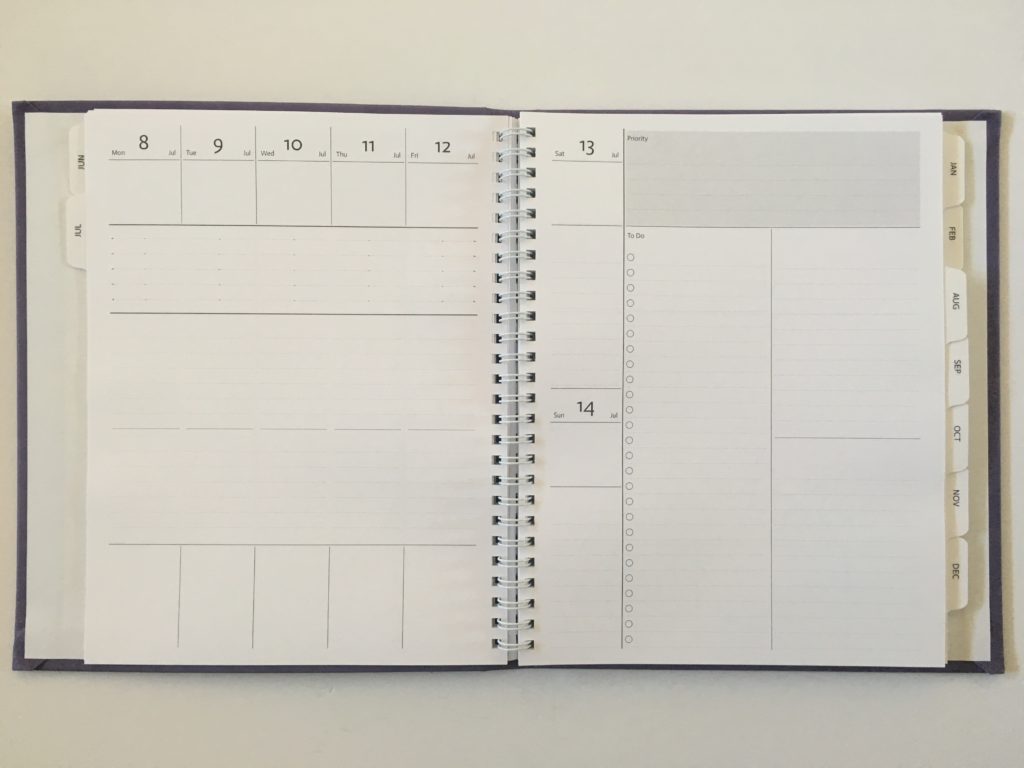
The page size for this planner is my favorite 7″ wide by 9″ high so I had plenty of room to spread out my plans. I had checklist space leftover at the end of the week too, which rarely happens. The cover style adds an extra 1″ on the left and right pages which did make the planner a big bulky to have open on my desk.
I don’t like this style of hardcover binding – it doesn’t allow the pages to fold back on themselves. I’ll be reverting back to the pattern cover with the coil binding version for any future Agendio planners.
Supplies Used
- My customer Agendio vertical planner (see my review here). I used their base model 32035 (here’s my affiliate link if you’d like to make your own custom planner)
- Happy Planner colorful boxes sticker book (classic planner size)
- BLOT gel pens (I found them on Amazon but they appear to no longer sell them)
- Carpe Diem numbers sticker tablet
- Carpe Diem calendar sticker tablet
- The Paper Studio 0.7mm black pen
- Tombow twin tone dual tip pens – purple, teal and pink
- Staedtler dual tip pens – green and orange
- Recollections text label stickers (if you want to learn how to make your own text label stickers, see this post for a tutorial)
- Keji white out tape

Pros of this planner
- The binding lays completely flat when both pages are open
- Pre-drawn checklist circles (or you can choose checkboxes in Agendio)
- Easily keep things separate due to all the different sections
- Spans are a good idea, although I need them for the weekends and weekdays
Cons of this planner
- No vertical lines between the daily columns – I can understand no dividing lines on the spans section, but it would be good if the columns were the entire height of the rest of the page
- I don’t like the hardcover binding – it doesn’t allow the pages to fold back on themselves
- The larger page size (7″ wide x 9″ high) meant the vertical columns for the weekdays were narrow (1.25″ / 3cm) but still useable
- Weekend column is small, but there is extra checklist space if you wanted to dedicate one of those to a weekend to do list
Would I use this planner again?
I would (the page size was great), but I need a few tweaks to the layout:
- I need the spans to continue across to Saturday and Sunday
- I need wider columns for Saturday and Sunday (as I work full time, this is when I have more time to do things so need more space)
- Just 1 wider sidebar to do list column instead of the 2 columns would be better
I am a bit nit picky about this planner purely because Agendio lets you make these sort of customisations so there is extra pressure to get the layout perfect!
I don’t think I fully utilised the spans and will probably try this layout again another time.
I think this type of weekly layout would work well for someone managing multiple projects, a day job plus your own business, or if you’re studying.
If you’d like to order your own Agendio planner, here is my referral link.
Past weekly Spreads
- 52 Lessons learned after trying 52 different planners in 52 weeks
- After trying 52 planners, these were my top 7 favorite weekly planners
- Trying out the Uncalendar Planner
Planning tips
- DIY Bullet journal alphabet stencil that costs practically nothing
- DIY Tutorial: How to Print and Assemble Your Own Planner
- How to use a digital notebook (5 functional uses)
Tired of drawing up weekly spreads? This printable bundle of 52 different 1 page weekly planners (you can mix and match to create 2 page spreads if you prefer), is available in my Etsy shop and online store. It comes in US letter size and Happy Planner classic page size.

Liked this post? Pin it!