DIY Planner Tutorial: How to make your own planner stickers without a Silhouette machine
If you want to make your own planner stickers but don’t want to buy a Silhouette machine and also don’t want to hand cut sticker sheets then there is another alternative. You would’ve heard of Avery label paper before – well why not use them to make your own planner stickers?
This is not a sponsored post, I just put together this tutorial to show you another way to make stickers.
Now before I go through the tutorial I’d like to point out one thing: do not expect these DIY stickers to be as good as stickers made in Silhouette Studio software or Photoshop. Avery label maker tools are not graphic design software. They don’t have things like align tools to keep things perfectly centred. The unsophisticated software can be cumbersome and time consuming to use. Plus, if you use the online tools you’ll generally have to print 1 design on an entire sheet of labels. But they are a good option if you’re not sure if planner stickers are the right fit for you, or if you have recurring stickers you use every week and buying stickers off Etsy is getting expensive.
To make your own stickers without a silhouette machine, there are 2 options:
1. Use Avery’s online tool where you create a design in the software (or upload a design you’ve made elsewhere to their online tool) and they print and ship it to you (this tutorial)
2. Download a Word document template of the labels, buy a box of the label paper that fits that template you chose and print at home. I shared the tutorial for this method here: how to make planner stickers in Microsoft Word
If I were you I’d go with option 2 as:
- It’s much more economical – an entire packet with multiple sheets of label paper usually works out the same price as 1 or 2 sheets Avery print and ships to you
- Quicker – don’t have to wait for shipping
- You have the ability to choose multiple designs for the one label sheet
- You can do a test print with different colors, fonts, text etc.
- You can print as many or as little sheets as you like
- You can make different designs on the one sheet of paper
Below is the tutorial for using the Avery design tool, but my preferred method (Word templates) is in this post: how to make planner stickers in Microsoft Word
How to make planner stickers with We Print
If you prefer written instructions, keep scrolling.
To enlarge the screen of the video, click the square icon in the bottom right hand corner of the video (it will say ‘full screen’ when you hover your mouse over the icon).

For more planner related videos, subscribe to my YouTube channel
Mentioned in the video:
- Avery We Print
- Online Labels
- Tutorial: How to make header planner stickers using Silhouette Studio (free software)
- (samples of the lessons from the full ecourse): How to Make Planner Stickers Ecourse
- How to download the Silhouette Studio free software
- My sister’s planner supplies shop, Carefully Crafted (where the stickers I design and she prints & cuts are sold)
- My printables shop (which has more than 400 different types of planner stickers)
How to make your own planner stickers without a Silhouette machine
First things first, what size stickers do you need? I much prefer rectangle labels for stickers with text, otherwise round icon stickers.
Avery templates to choose from can be found here: https://weprint.averyproducts.com.au/
Step 1: Go to Avery We Print
At this URL: https://weprint.averyproducts.com.au/category/labels.html/
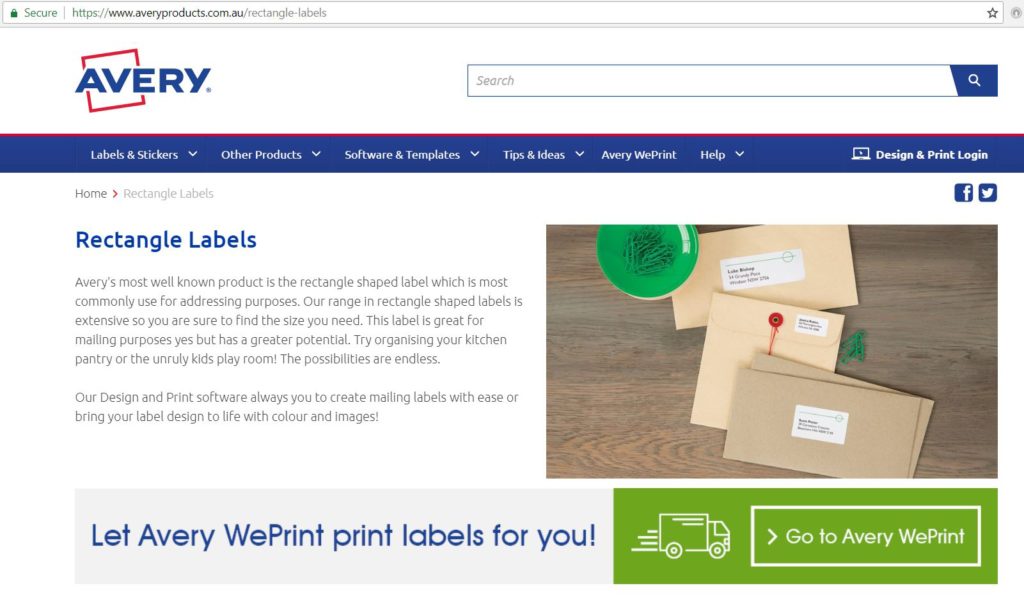
Step 2: Choose your label shape
![]()
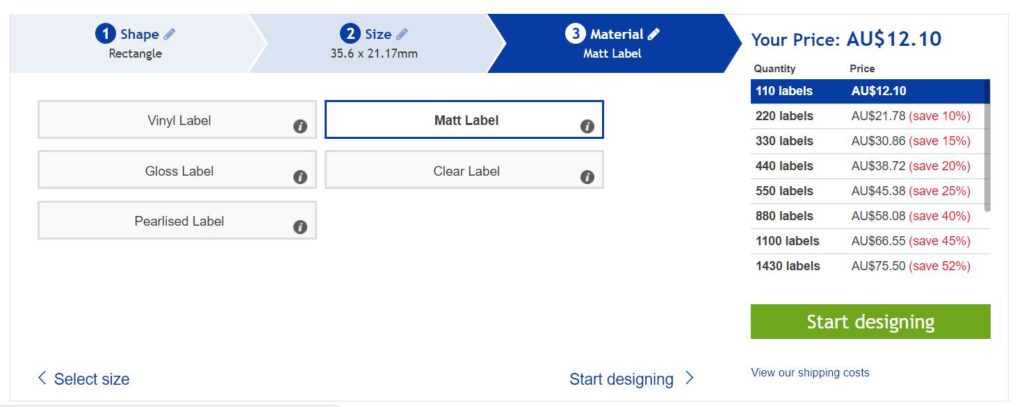
Step 4: Choose your label size
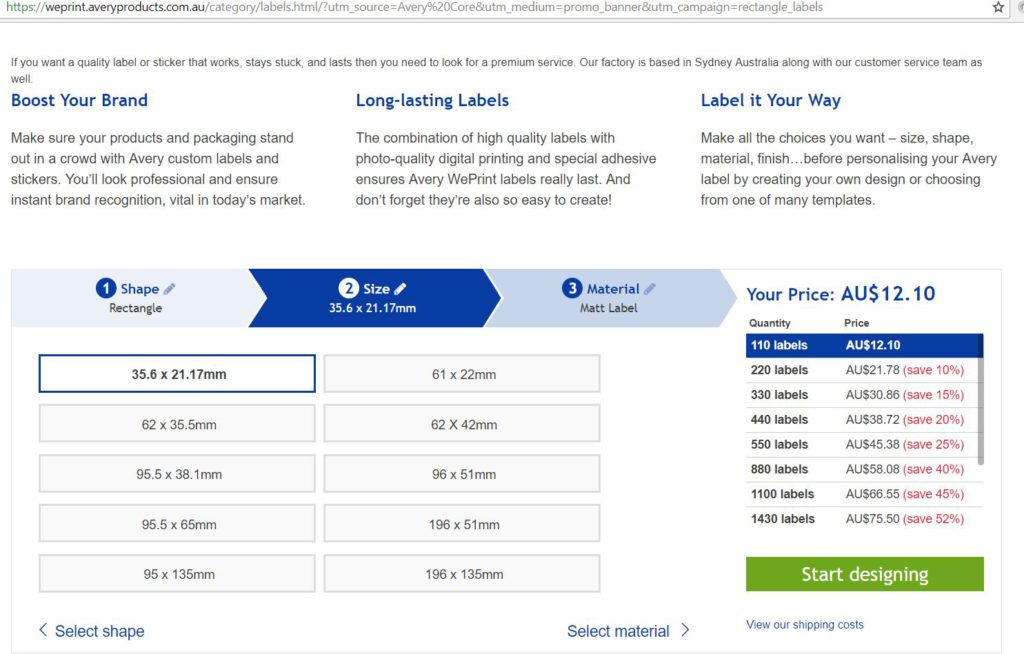
Step 5: Choose your material
I recommend matte label paper. The reason being is that most pens will write on matte label paper but few work on glossy (the ink just wipes off unless you use a ballpoint pen)
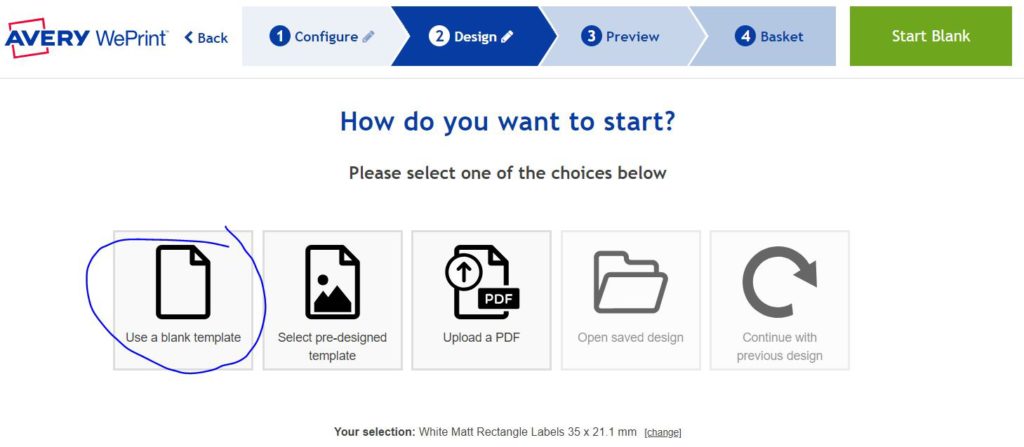
Then click ‘start designing’ and ‘use a blank template’
Step 6: Decide what type of sticker to make
A few ideas for stickers:
- Bill due
- School assignment, exam, group meeting, final exam, homework due etc.
- Birthday’s
- One off tasks like cleaning A/C filters
- Cleaning – deep clean kitchen, cooktop, stoves, check expiry dates in the pantry
- Countdown to vacation
- Appointments
- Etc!
More than 100 sticker ideas in my ecourse: How to Make Planner Stickers
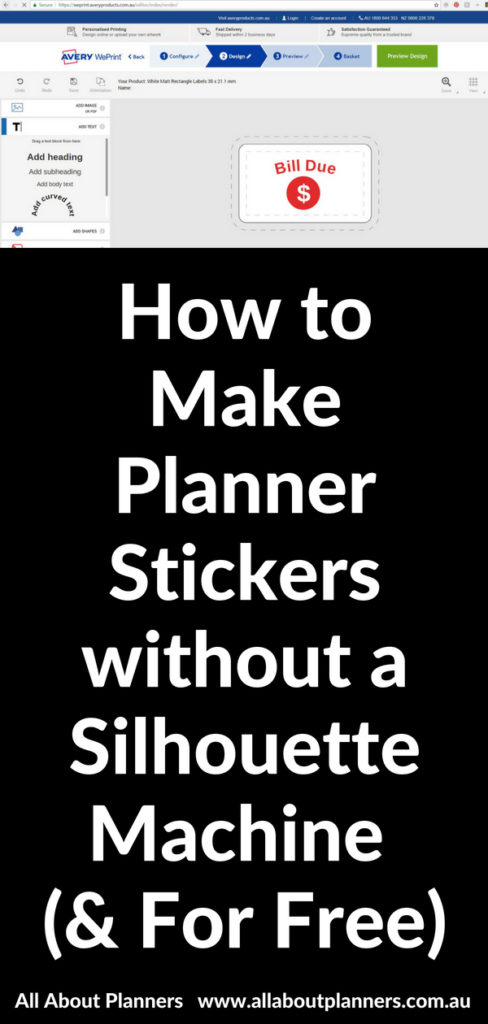
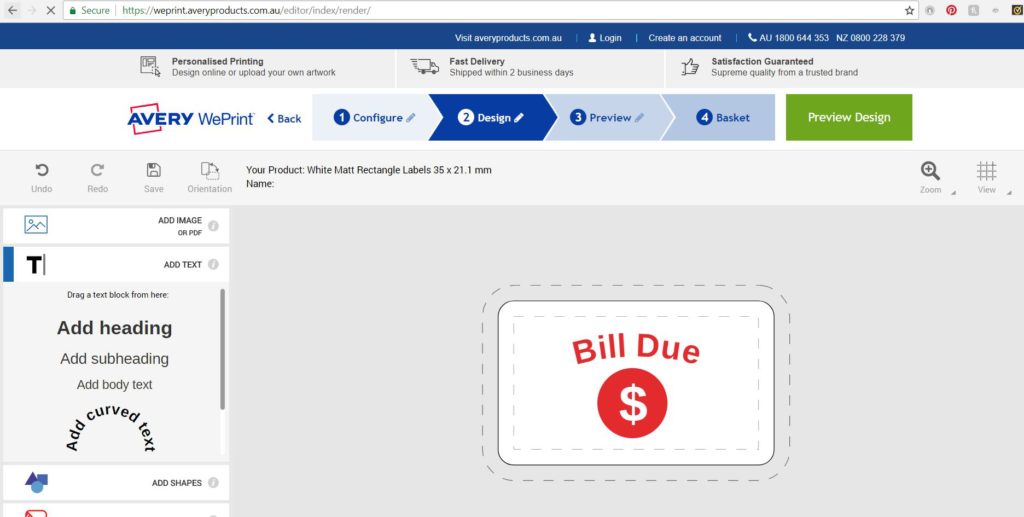
Step 7: Design!
Add shapes, text, change the font and text colors, images etc.
Note: if you have some Photoshop skills you can upload a pattern background to jazz up your sticker a bit. If you want to learn how to make a stripe pattern see this post for a tutorial!
Step 8: Check your design for things like:
- Is everything aligned where you want it to be?
- Is the text spelt correctly?
- Are all design elements within the print boundaries?
- If you’re making a sticker like the one I did, is the dollar sign in the centre of the circle?
- Are the colors correct? I.e. are you happy with the color tone, do you want the text in one color and the border in another color?
Step 9: Add the stickers to your ‘basket’
Choose how many you want and which delivery option.
You can see from the screenshot below that if you order 1 sheet (110 labels) it’s going to be quite expensive: $12.10 plus $8 delivery = approx $20 for one sheet of labels. To me, this is far to expensive. I’d only recommend buying labels like this if you had a recurring task i.e. you need a lot of the same sticker for things like meetings, your kid’s extracurricular, bills etc.
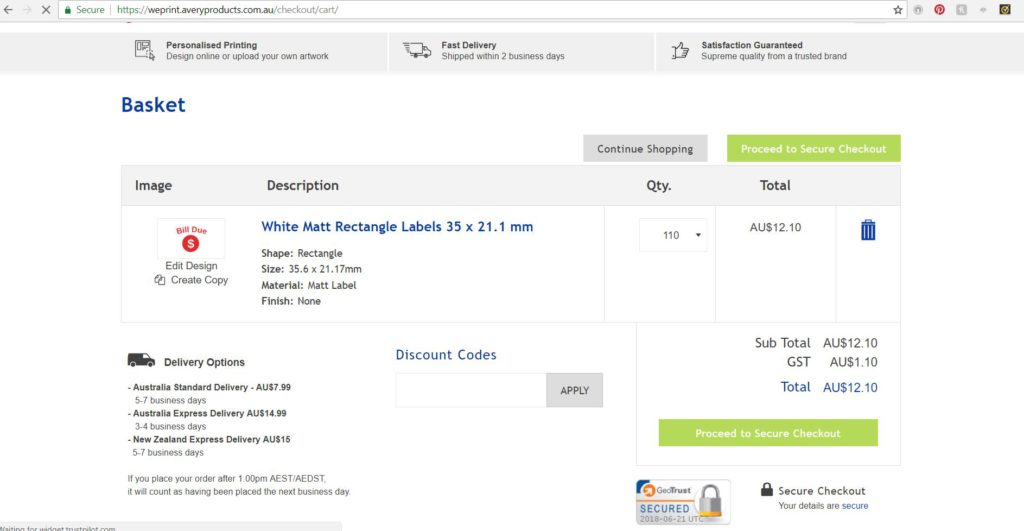
If you’re making a lot of similar labels you can click ‘create copy’ from the shopping cart screen (see screenshot above) and make a bunch of different colored versions e.g. blue for water bill, pink for phone bill, red for rent etc.
That’s it! Place the order and wait for your labels to arrive.
While you’re waiting, try the tutorial from last week! How to make planner stickers in Microsoft Word
You can use this same tutorial to make all kinds of stickers – birthday stickers, thank you labels, address labels, name labels for notebooks etc.!
Want to make more sophisticated labels?
While yes you can make planner stickers using the Avery online design tool and that may be sufficient, but if you want to make custom planner stickers that are exactly sized for the planner you’re using, make them faster and have more control over the design (plus save a ton of money by only needing full sheet label paper), then you need my ecourse: How to Make Planner Stickers!
A silhouette machine costs about $270 AUD. You’d only get 27 label sheets for the same price. Plus shipping on top of that. So hence why I recommend making your own and cutting them with a Silhouette machine.
How to Make Planner Stickers
If you want to learn how, then in this course I teach how to make all kinds of planner stickers: header stickers, icon, habit tracker, list making etc.! Using the free Silhouette Studio software. This is the ecourse you need if you want to make planner stickers that the Silhouette machine will cut for you. The Silhouette machine & software is what my sister and I use for our planner stickers, and what everyone selling planner stickers on Etsy uses.
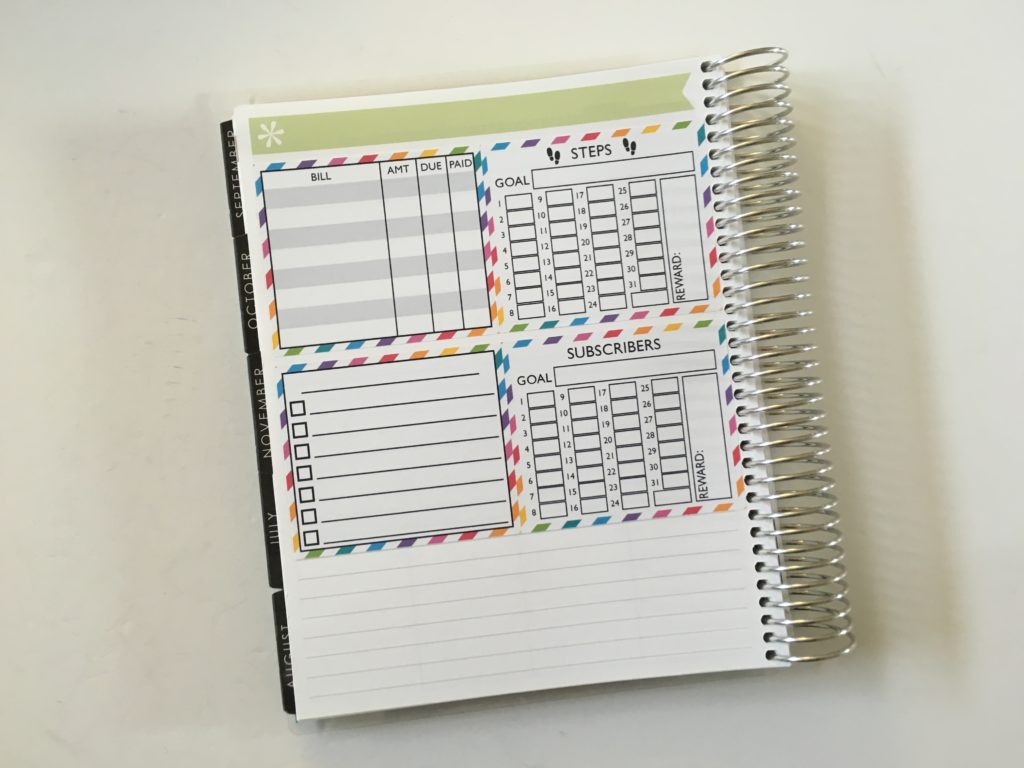
The problem with using pre-sized label templates is that you can’t make them at the exact size you need. So you couldn’t make stickers like these unless you have a Silhouette machine:
If you want to try out a sample tutorial from the ecourse, click here for a tutorial on how to make header planner stickers.
Found this post helpful? Pin it!