How to quickly edit & enhance photos for free and without using Photoshop
In today’s post I’m sharing a quick and easy way to crop and enhance your images quickly and without using Photoshop.
This post contains affiliate links. If you make a purchase after clicking one of these links I’ll receive a small commission (at no extra cost to you) in exchange for referring you.
How to edit images without using Photoshop
If you don’t have Photoshop, you can purchase and download it here (my affiliate link).
In the video below (or scroll down if you’d prefer written instructions), I show how to make a few quick and easy tweaks to improve your pictures. These techniques work with a photo that’s ok, but could be better.
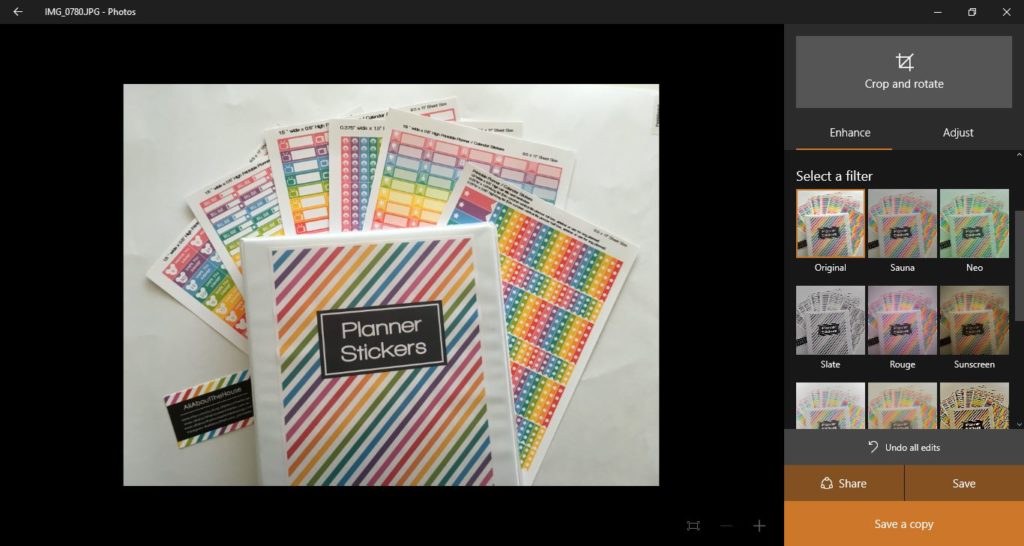
This photo is ok, but it could be better:
- In the top right corner you can see the barcode. I took this photo on cardstock but have recently upgraded to foam board ($5 for a poster size board at Target). More on how to take better photos in this post
- The colors could be enhanced to pop a bit more
- The amount of white space around the edges are ok, but I’m going to crop it a bit so if someone sees this scrolling on Pinterest I want them to go Ooooo and click on the image to come to this post
I am using Windows 10 on a Toshiba laptop. If you have a Macbook the default image editing program for MAC may be similar.
For more video tutorials, subscribe to my YouTube channel
How to edit images without using Photoshop
Step 1
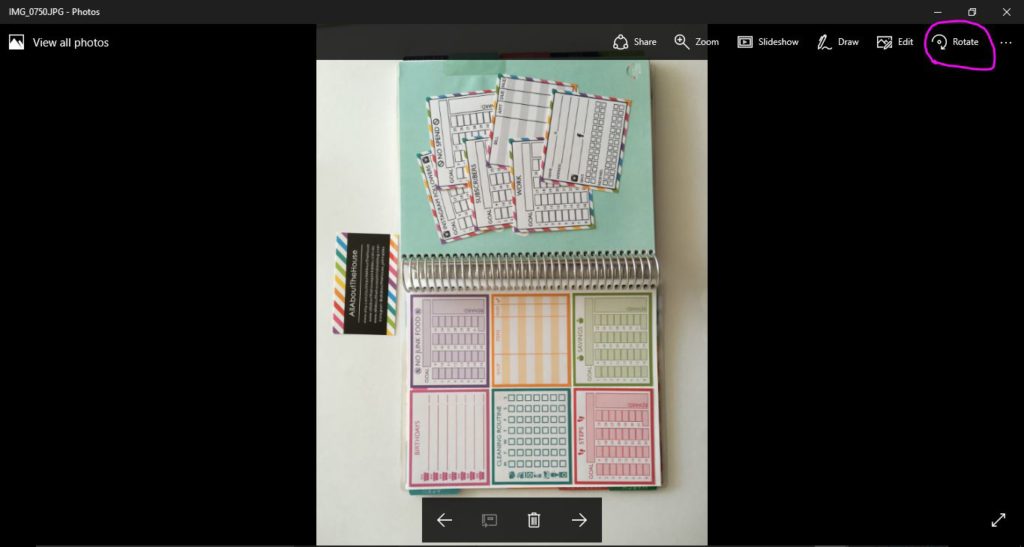
Double left click on the image and it will automatically open in Windows media viewer. From there I do 2 things to my photos:
- Rotate (if necessary)
- Crop (if necessary)
- Enhance the colors
Click the ‘rotate’ button to turn the photo around (I always do this before uploading any pictures to my blog)
To crop your photo
Click on the edit button
Then click on crop and rotate 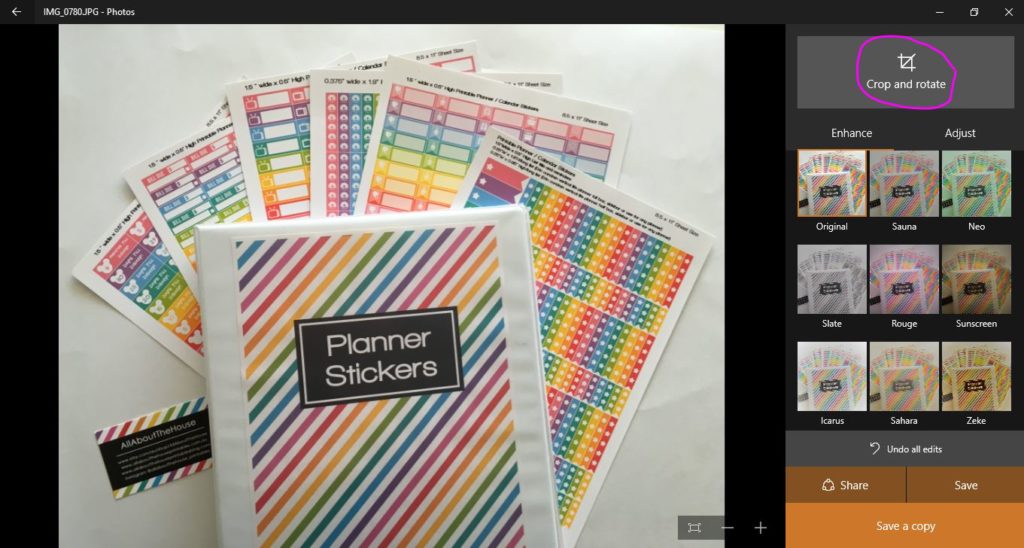
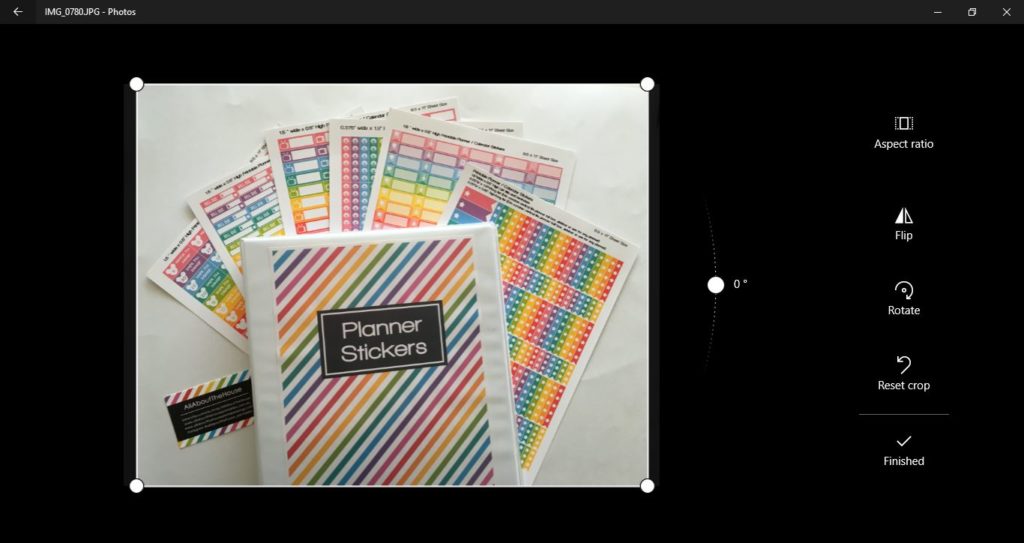
Choose an edge of the photo and drag your mouse inwards to crop it
Related post: How to improve your product photos (Photoshop not required)
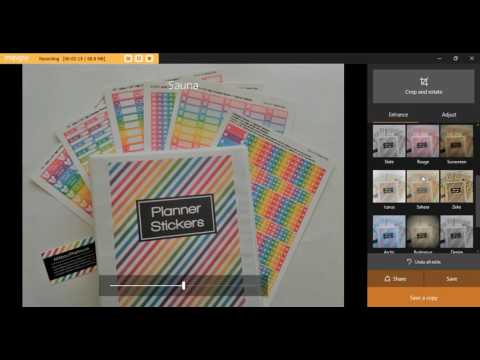
To enhance your photos
Choose one of the filters from the menu. If you’re using an iPhone the filters are usually similar but have different names to Windows Media Viewer depending on what app you’re using. There are soooo many free photo editing apps – play around with a few until you’re happy with the results, you can also use the ones that allow you to edit the photo just before uploading to instagram.
For this photo, I chose ‘Icarus’
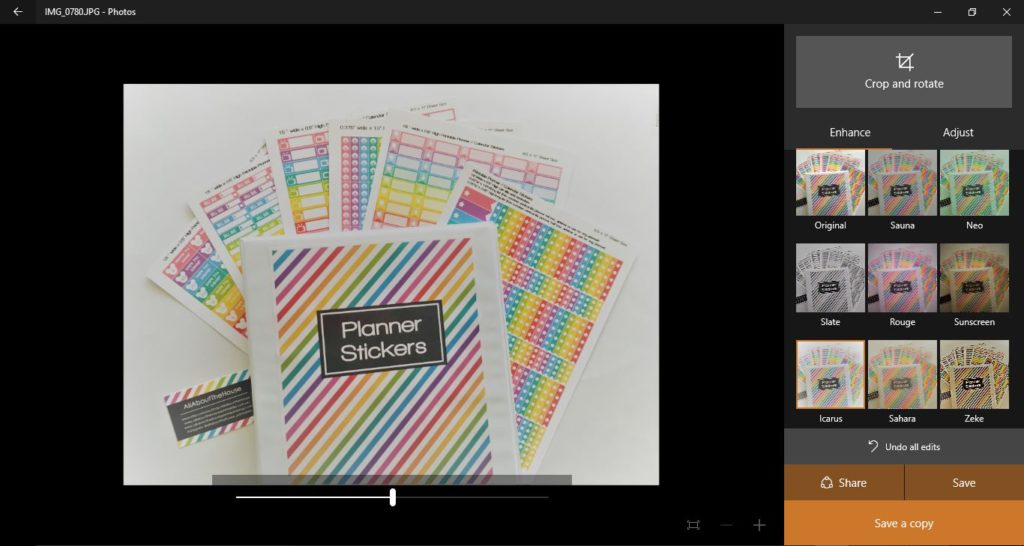
Then drag the bar below the image to the left to reduce the amount of filter. For this image, I chose 6. I wanted the filter to enhance the rainbow colors and make them POP while still making sure the colors showed true. Remember you want to enhance the photo.
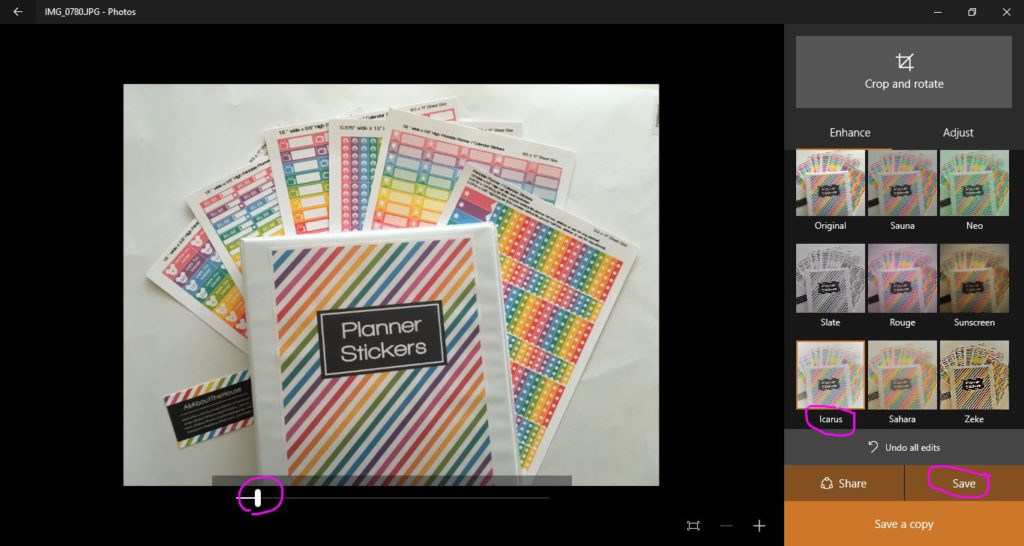
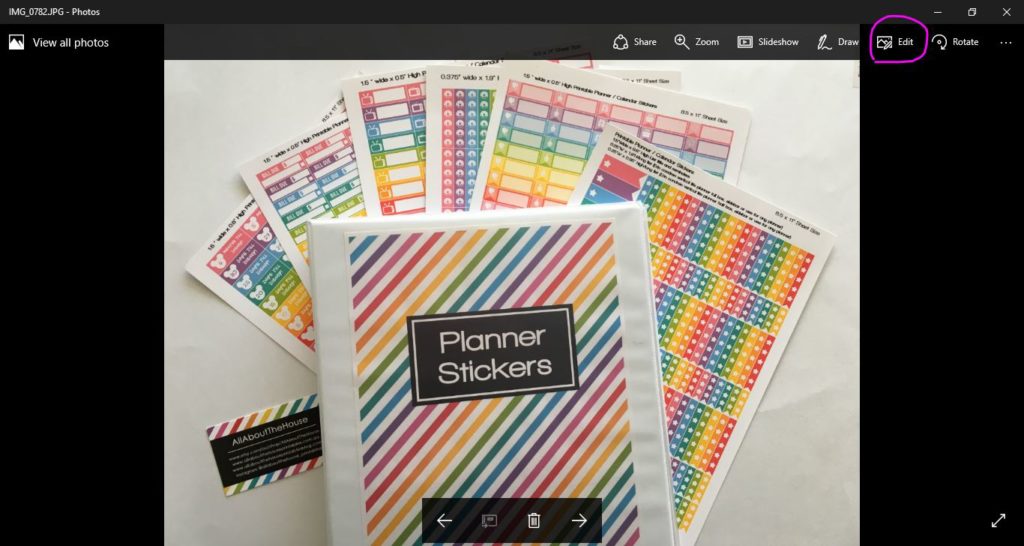
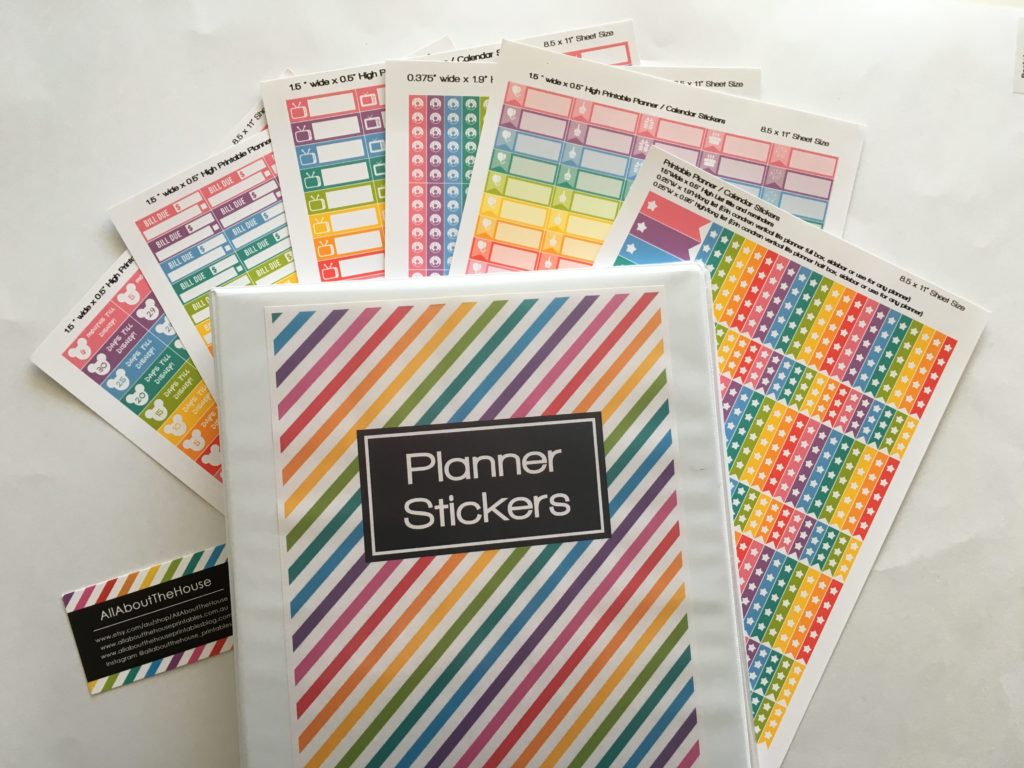
And the finished product!
But wait, 2 more steps!
-
Don’t forget to rename your pictures
I always try and use the maximum number of allowable characters for the file names of my images. Google uses the names of your pictures to provide search results so make sure you take the time to choose appropriate keywords. I did an entire tutorial on how I use the Google Adwords Keywords Planner tool to choose keywords, as well as Marmalead (which is specifically for Etsy if you’re a fellow Etsy shop owner/business blogger).
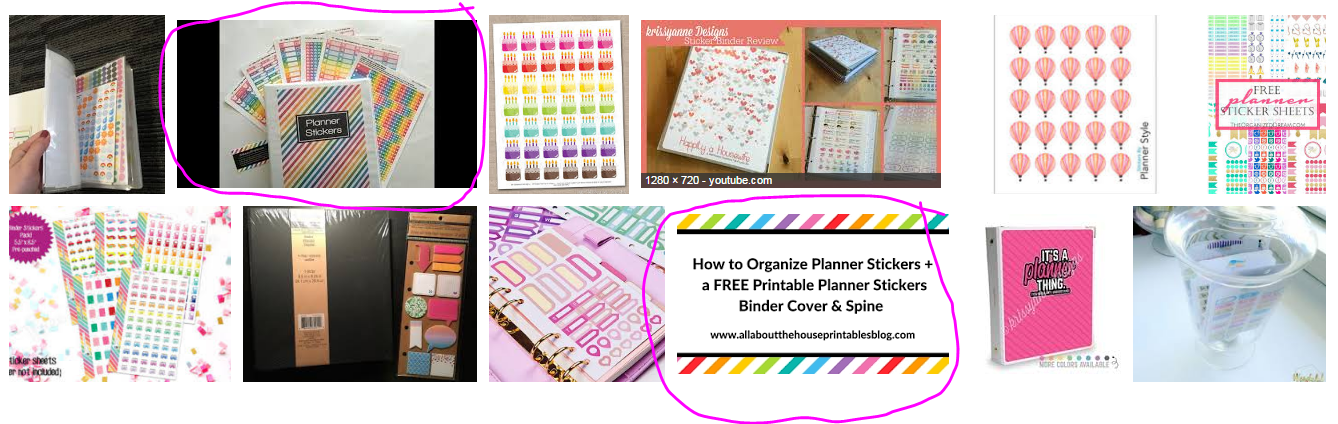
I try and use different keywords for YouTube videos, picture names and the title of blog posts as that way there are more opportunities to show up in Google’s search results. If I do a search for ‘planner sticker organization’, my YouTube video on the topic (the image circled in the first row below) shows up, as well as my blog post about the topic (the circled image in the second row).
I make sure both my featured image (the small image you see when scrolling through the archives or the home page of my blog) and the large vertical image I pin to Pinterest (which I typically place at the start of each blog post), are also SEO optomised, as well as every picture I upload within the body of a blog post.
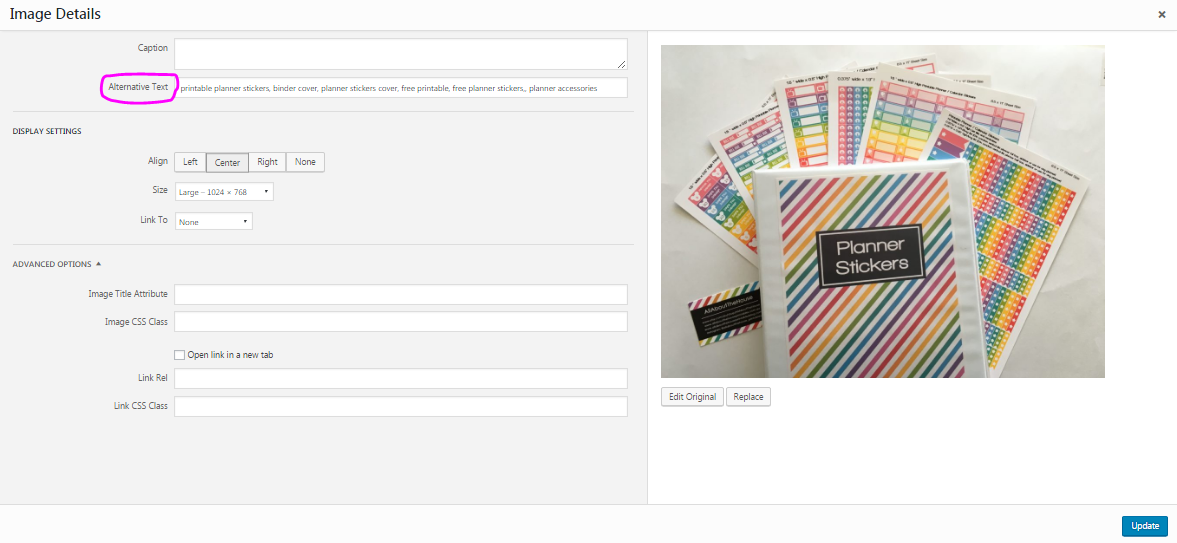
2. And add the alt tag for Pinterest SEO optomisation
The ‘alternative text’ title is the title Pinterest automatically places as the title of an image when you pin it to Pinterest. So if people reading your blog want to pin one of your images to Pinterest, they probably aren’t going to bother writing an SEO optomised caption. You need to do the work for them (and yourself!) by filling out the Alternative Text section with a keyword optomised name. I copy and paste the image name to the Alternative Text section.
To add the ‘Alternative Text’ title, just click ‘edit’ on your image and the option will appear in the ‘Image Detail’s below (see below).
If you’d like to download the planner stickers binder cover shown in the above photos, it’s available for download in the free printables library 🙂 If you’re interested in purchasing planner stickers, printables are available via my Etsy store, AllAboutTheHouse. Printed & cut for you planner stickers are available from my sister’s shop, CarefullyCraftedByJo.
Tips for taking photos:
- Take a photo, check the photo then either keep the photo and move onto photographing the next thing, or delete the photo and retake. Do NOT take a zillion photos of the same thing and think, ‘I’ll choose a good one later’ you’ll spend more time after you’ve taken the photo trying to decide which one is best, than if you retake until you’re happy with it. Plus, you don’t want to have to come back and re-set up your photo taking area
- Only take photos in natural light – no matter how urgently you need to take a photo, you’ve got to wait for a day with good natural light. There’s no point wasting your time setting up the photo taking area, taking a bunch of photos only to have them dark. You won’t be motivated to take them again. Remember that the first impression leaves a lasting impression so you want your photos to stand out. I shared an entire post with product photography tips and how to make a DIY lightbox.
- If you’re lazy and don’t want to add a watermark (I previously shared a video tutorial & blog post on how to add a watermark) then placing your business card in the photo like I did above is a good way to ensure people can’t steal your photo and try and claim it as their own, especially if your photo is of a item that is not handmade by you (e.g. if you’re taking product photos to market your online shop which you’ve purchased from a wholesaler)
- If taking photos just isn’t your thing, try styled stock photos or product mockups
Found this post helpful? Pin it!