
Using my custom Agendio Planner (would I order from this company again?)
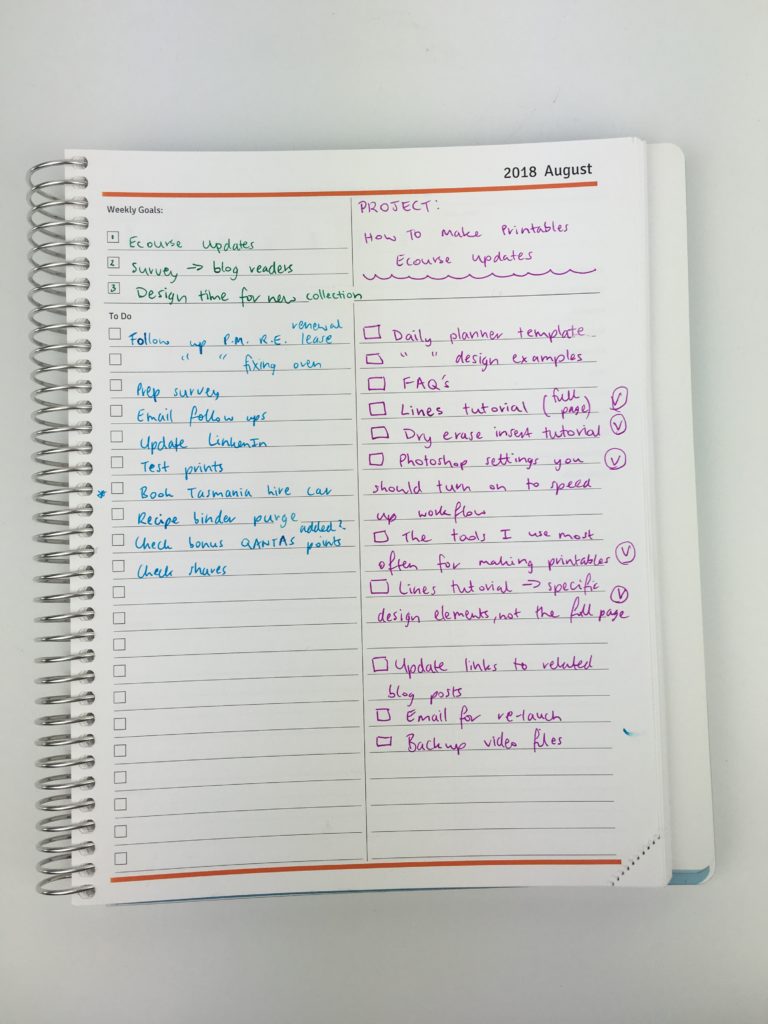
I’d been wanting to use my Agendio planner for a while now and the perfectly opportunity arose when I was doing updates to my How to Make Printables ecourse! I deliberately designed a layout that could be used multiple ways, with one of them being project planning.
Before the Pen
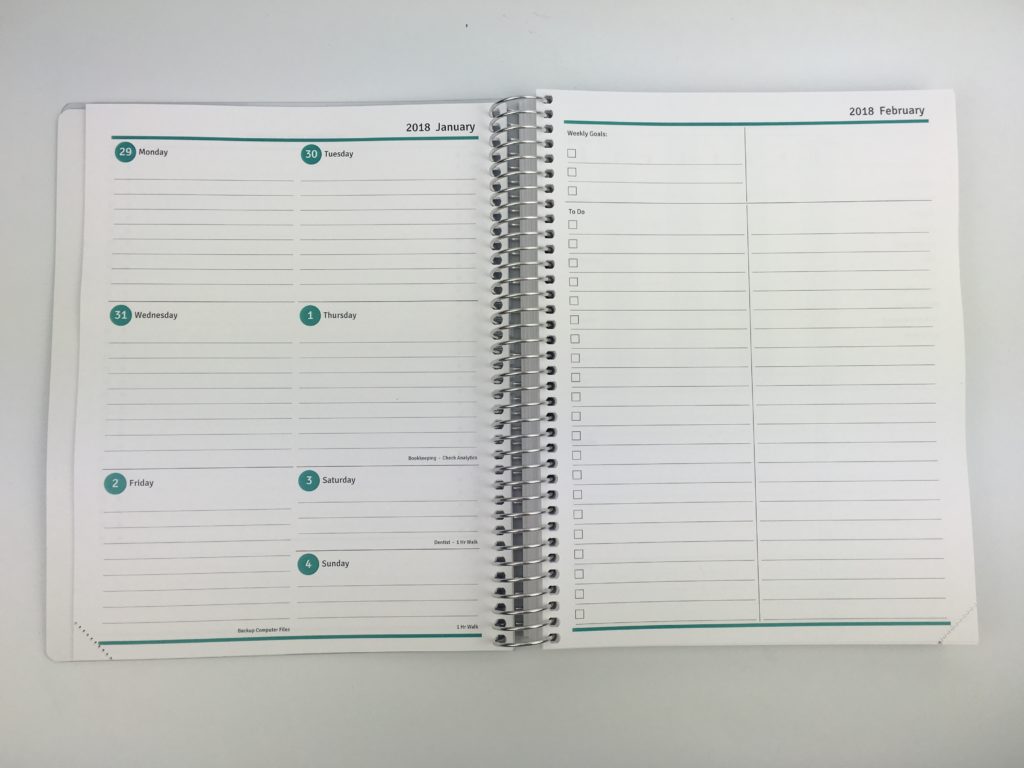
See my full review of the entire planner with all of the inside layouts I chose in this post. If you’d like to make your own Agendio Planner, here is my referral link!
After the Pen
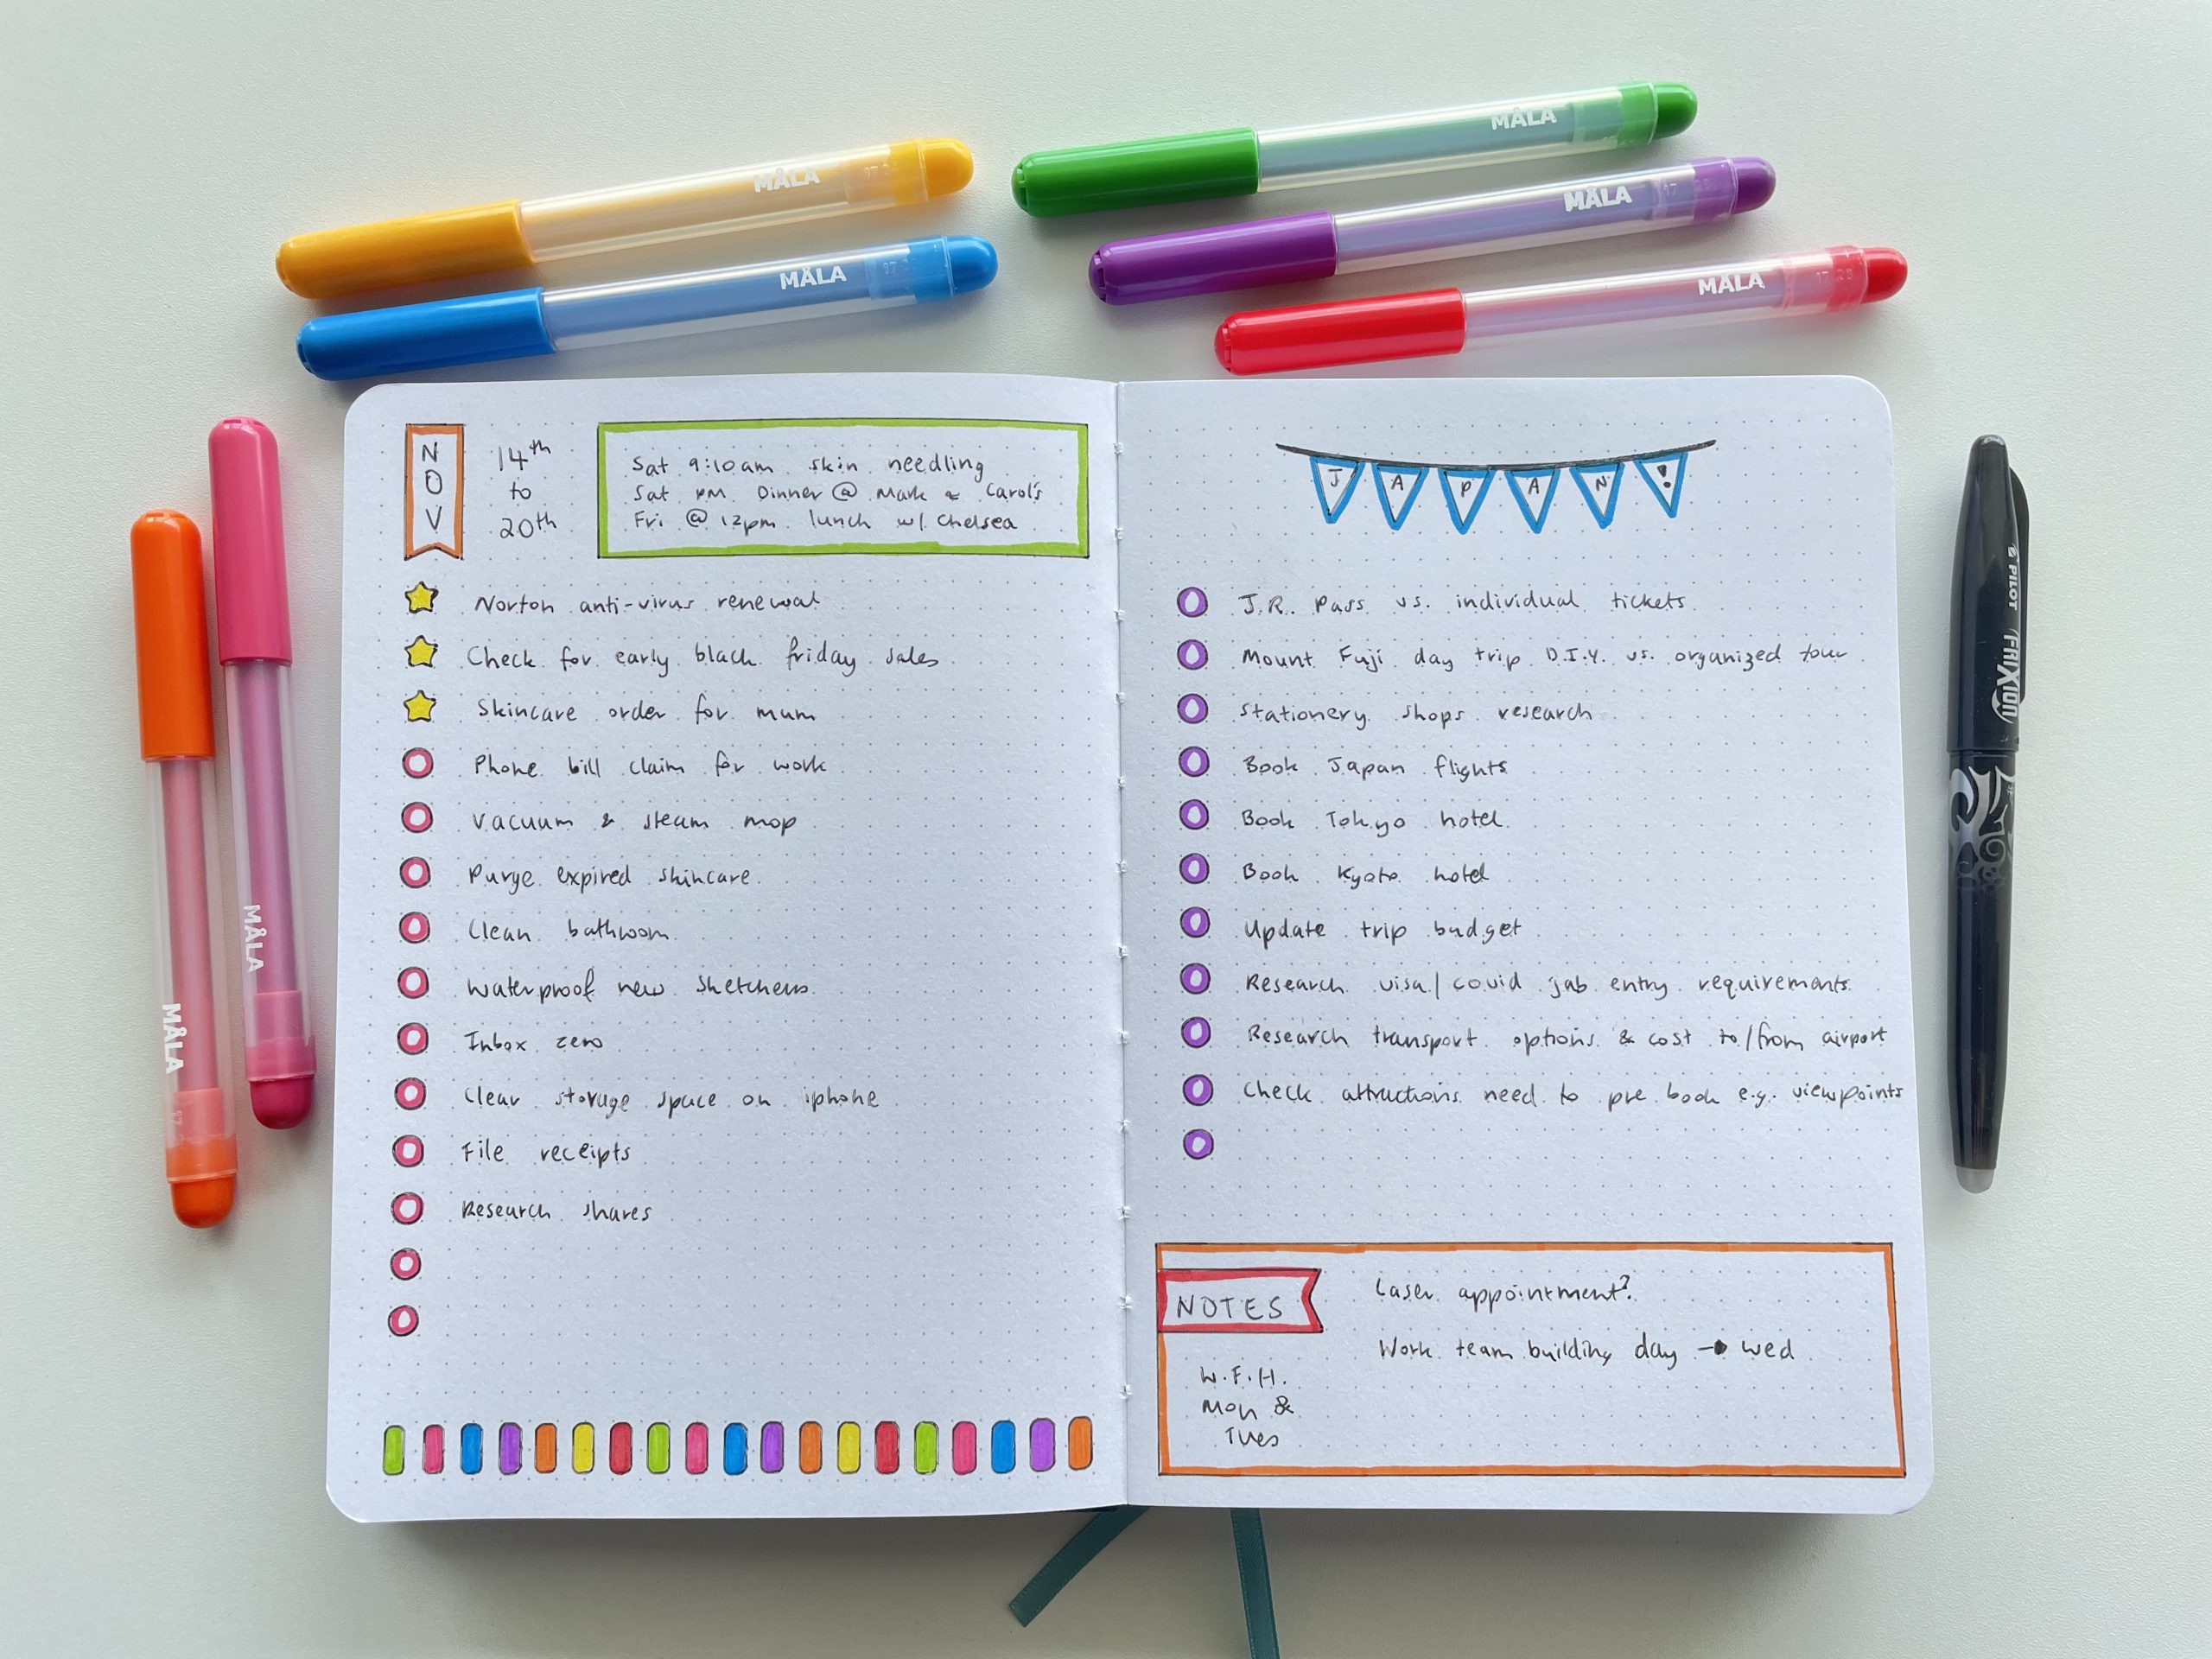
Normally I use a separate project planner printable I’ve designed, but since I was making notes for what I was going to add for each tutorial directly into Teachable (the tool I use to host my ecourses), I only needed a checklist.
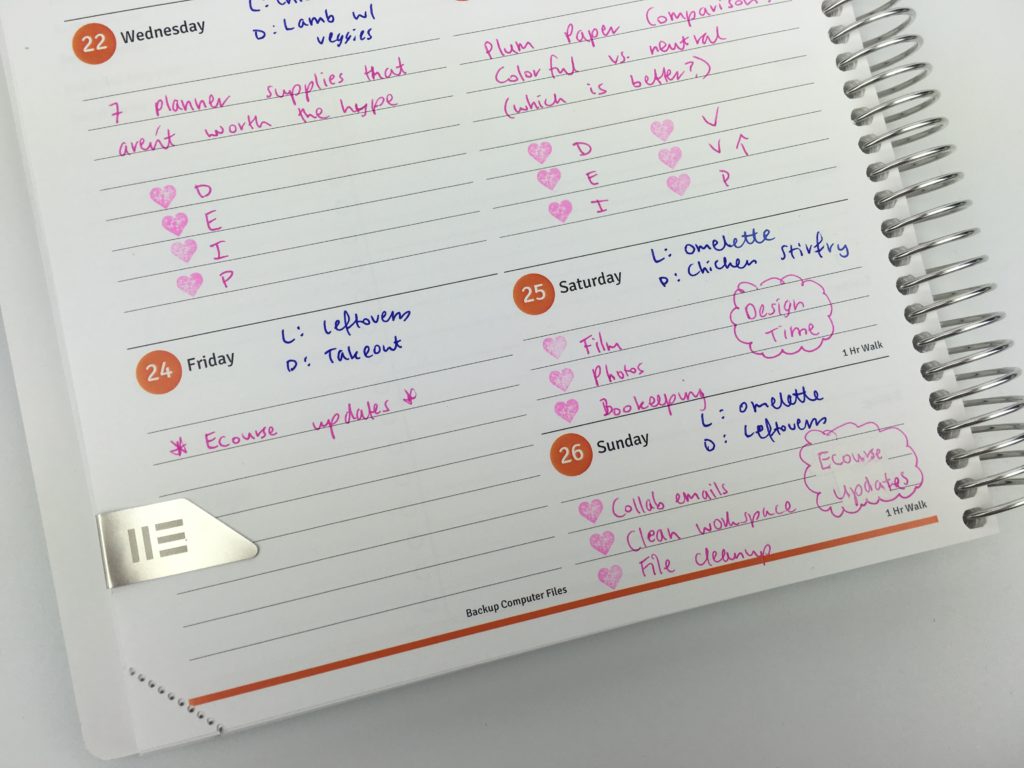
I opted to use different colors for each section of the planner with the sole purpose being that I get bored with 1 color only spreads!
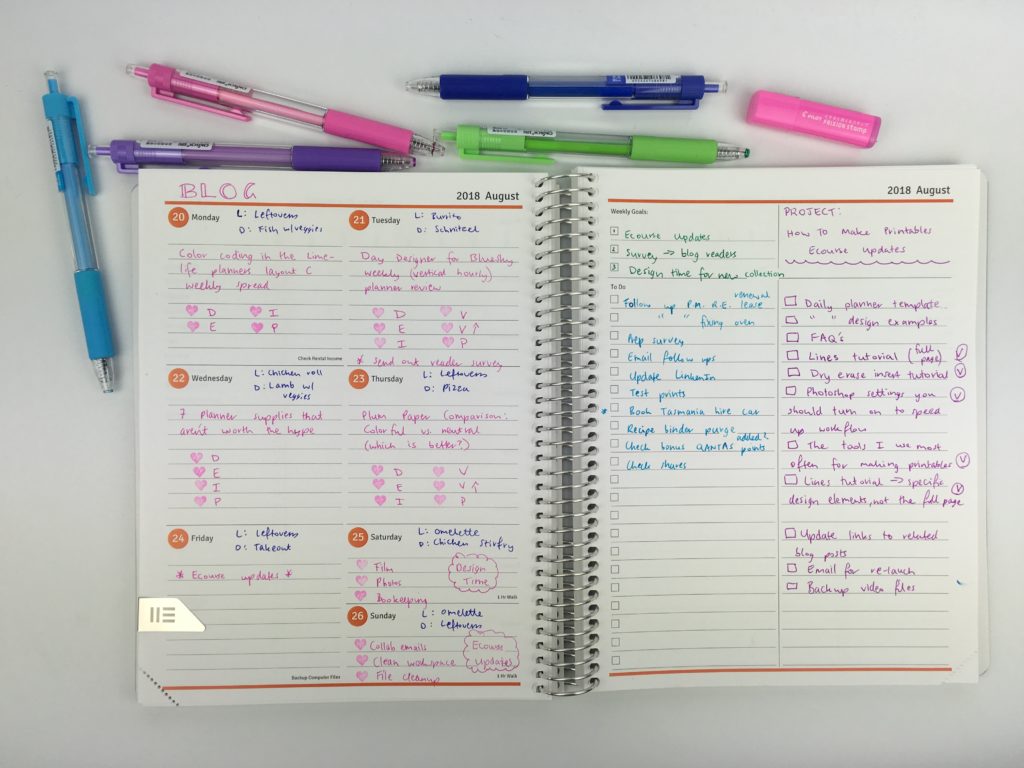
The Agendio paper is so smooth and nice to write on, combined with the Chosch pens which also write smooth – it was a dream combination <3
The line spacing I chose was perfect for my size of handwriting
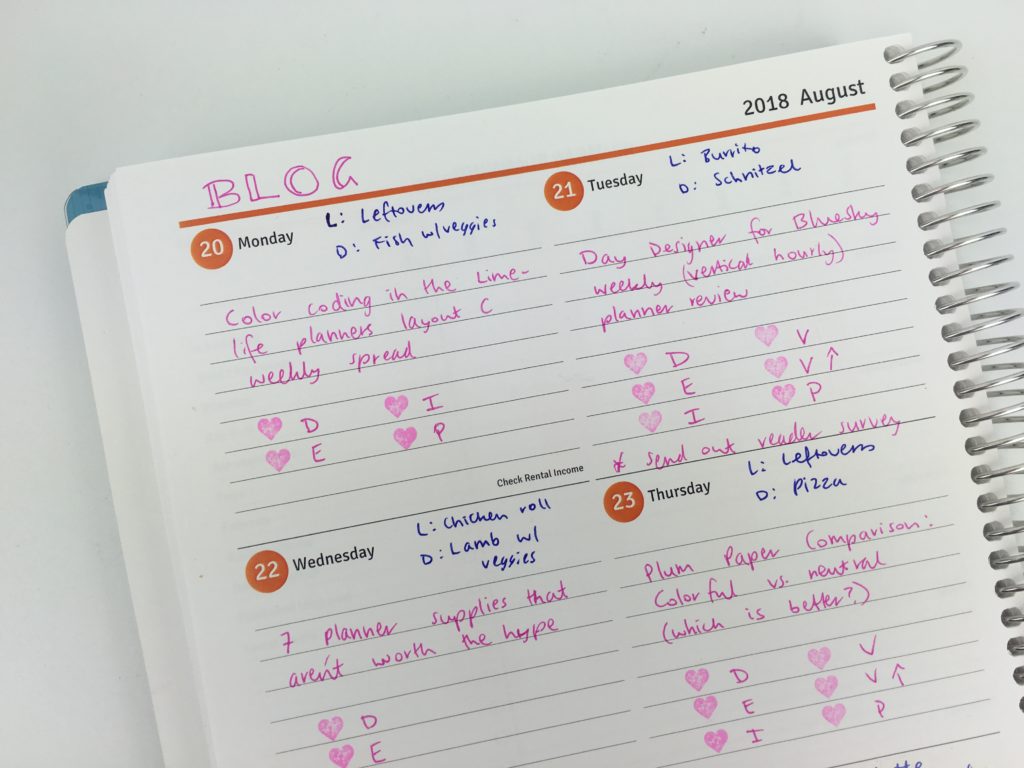
If you follow my blog you’ve probably already seen my blog post workflow before. I’ve added a new task to my blog post workflow: V and an arrow pointing upwards. I have a lot of planners on the list to review and only a limited time each week when I get the apartment to myself to film. So some of the reviews have videos but I haven’t uploaded to YouTube yet (since it takes forever to upload 🙁 ). I liked this and am thinking about keeping it permanent!
More time saving ideas you can apply to your own planning system in this post: Using a planner key and symbols to code your planner (efficient planning methods)
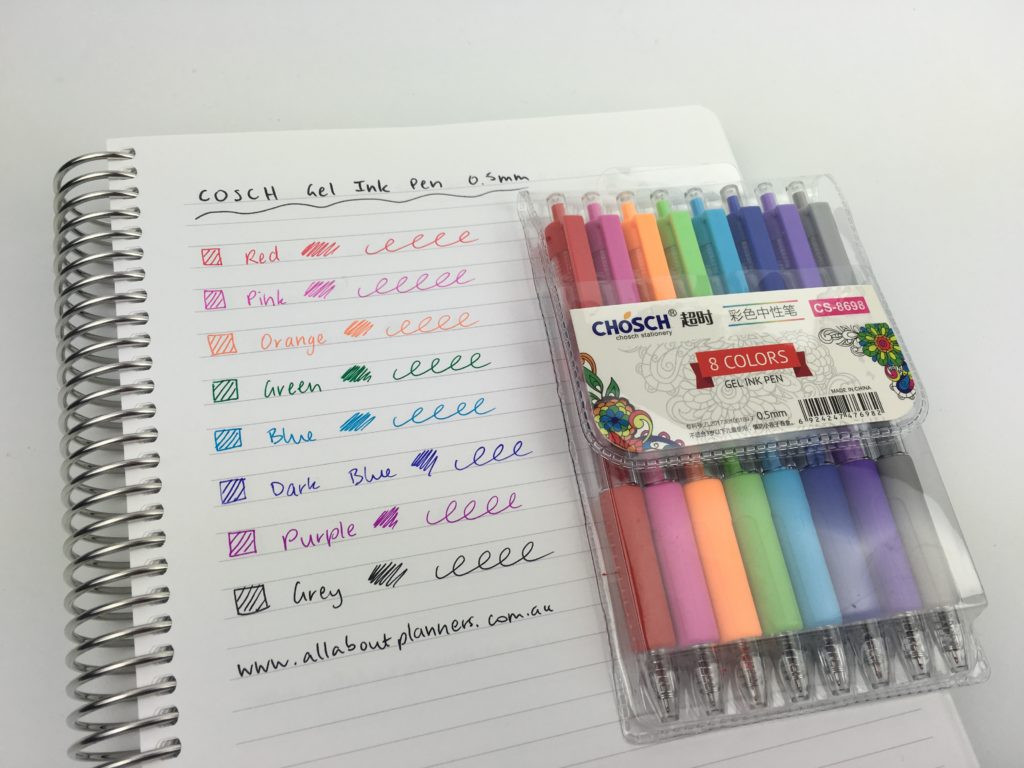
Supplies Used
- My custom Agendio planner
- Chosch gel ink pens
- Frixion erasable stamps heart (number 51)
Update: I used to like the Cosch pens – the first couple of times I wrote with them they were really smooth. However a few months later (and after I did this spread), the pens have become scratchy, the ink is prone to collecting in globs. I no longer recommend these pens.
Lots of list making space in this page layout! <3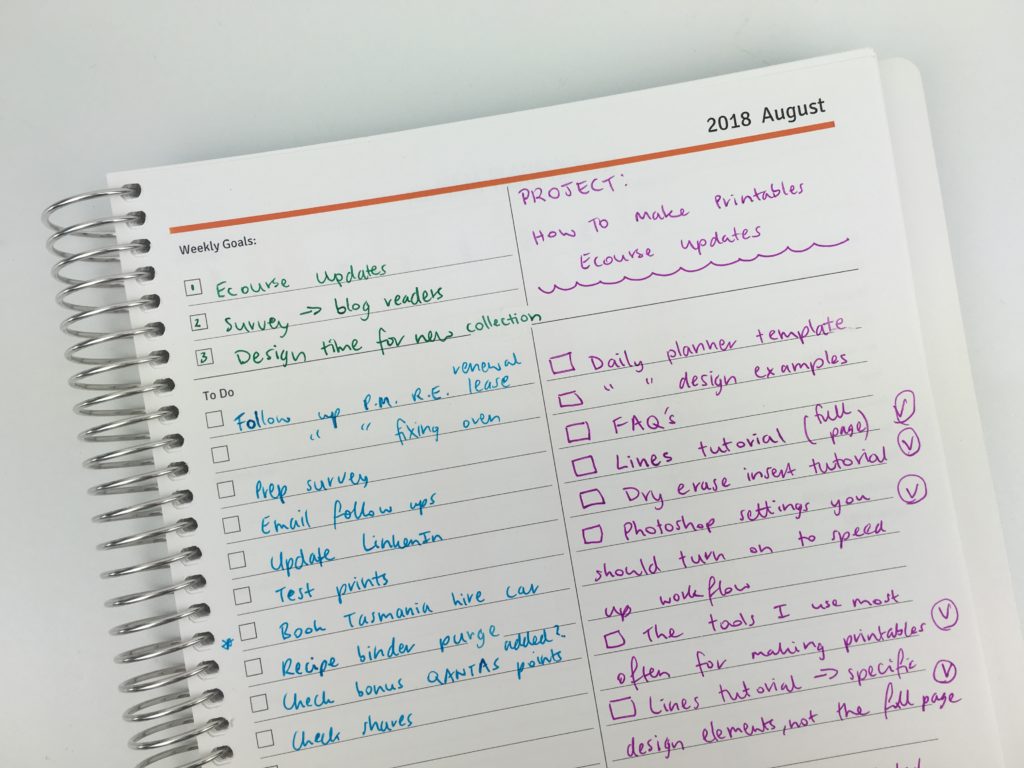
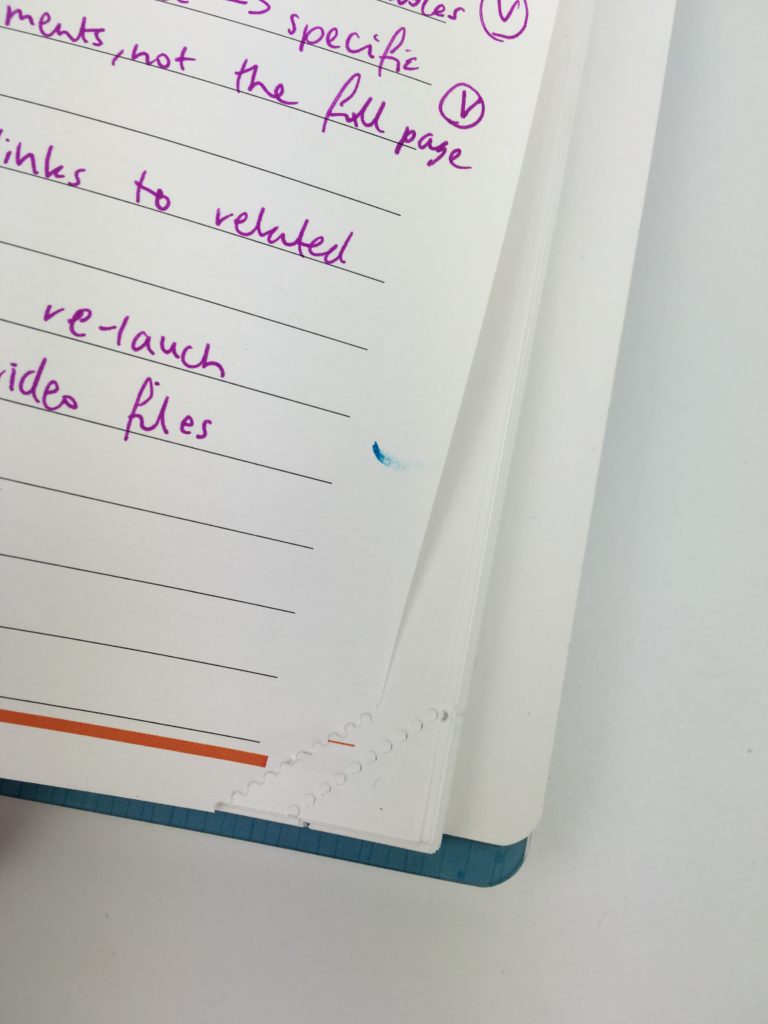
One of my favorite things about the Agendio planner is that they have the option to perforate the corners so you can tear off where you’re up to.
Is there anything I’d change about the layout I chose?
No, I really like this layout.
I actually ordered a 4 page weekly spread. There’s another 2 pages (1 for a habit tracker + lined notes and another for meal plan + grocery list). After ordering I switched to mainly using monthly habit trackers. Hence why I can never use the same planner for an entire year – I change my mind / weekly spread layout too often!
So when I use the other page layouts I chose, I’m going to white out the meal plan heading and convert this into just a weekly planner (mostly for blog post planning). I might just place sticky notes over the top of the weekly habit tracker to create extra lined space.
![]()
Past weekly spreads
- 6 Useful ways to efficiently plan your week using highlighters
- 10 Things people often forget to check before buying a planner
- 50 Category Ideas for Color Coding Your Planner


I love your reviews. They are the perfect compliment of information and narrative that make them really fun to read. I completely agree with you about TNs, but I can’t commit to printables or customizing an Agendio, yet.
Maybe in 2019-2020.
Hi Karen, thanks for taking the time to leave a comment! Glad you find my reviews helpful 🙂 You could always use a combination of a planner and then printables or a custom Agendio Planner for pages you use frequently e.g. password logs, checklists, extra notes pages etc.