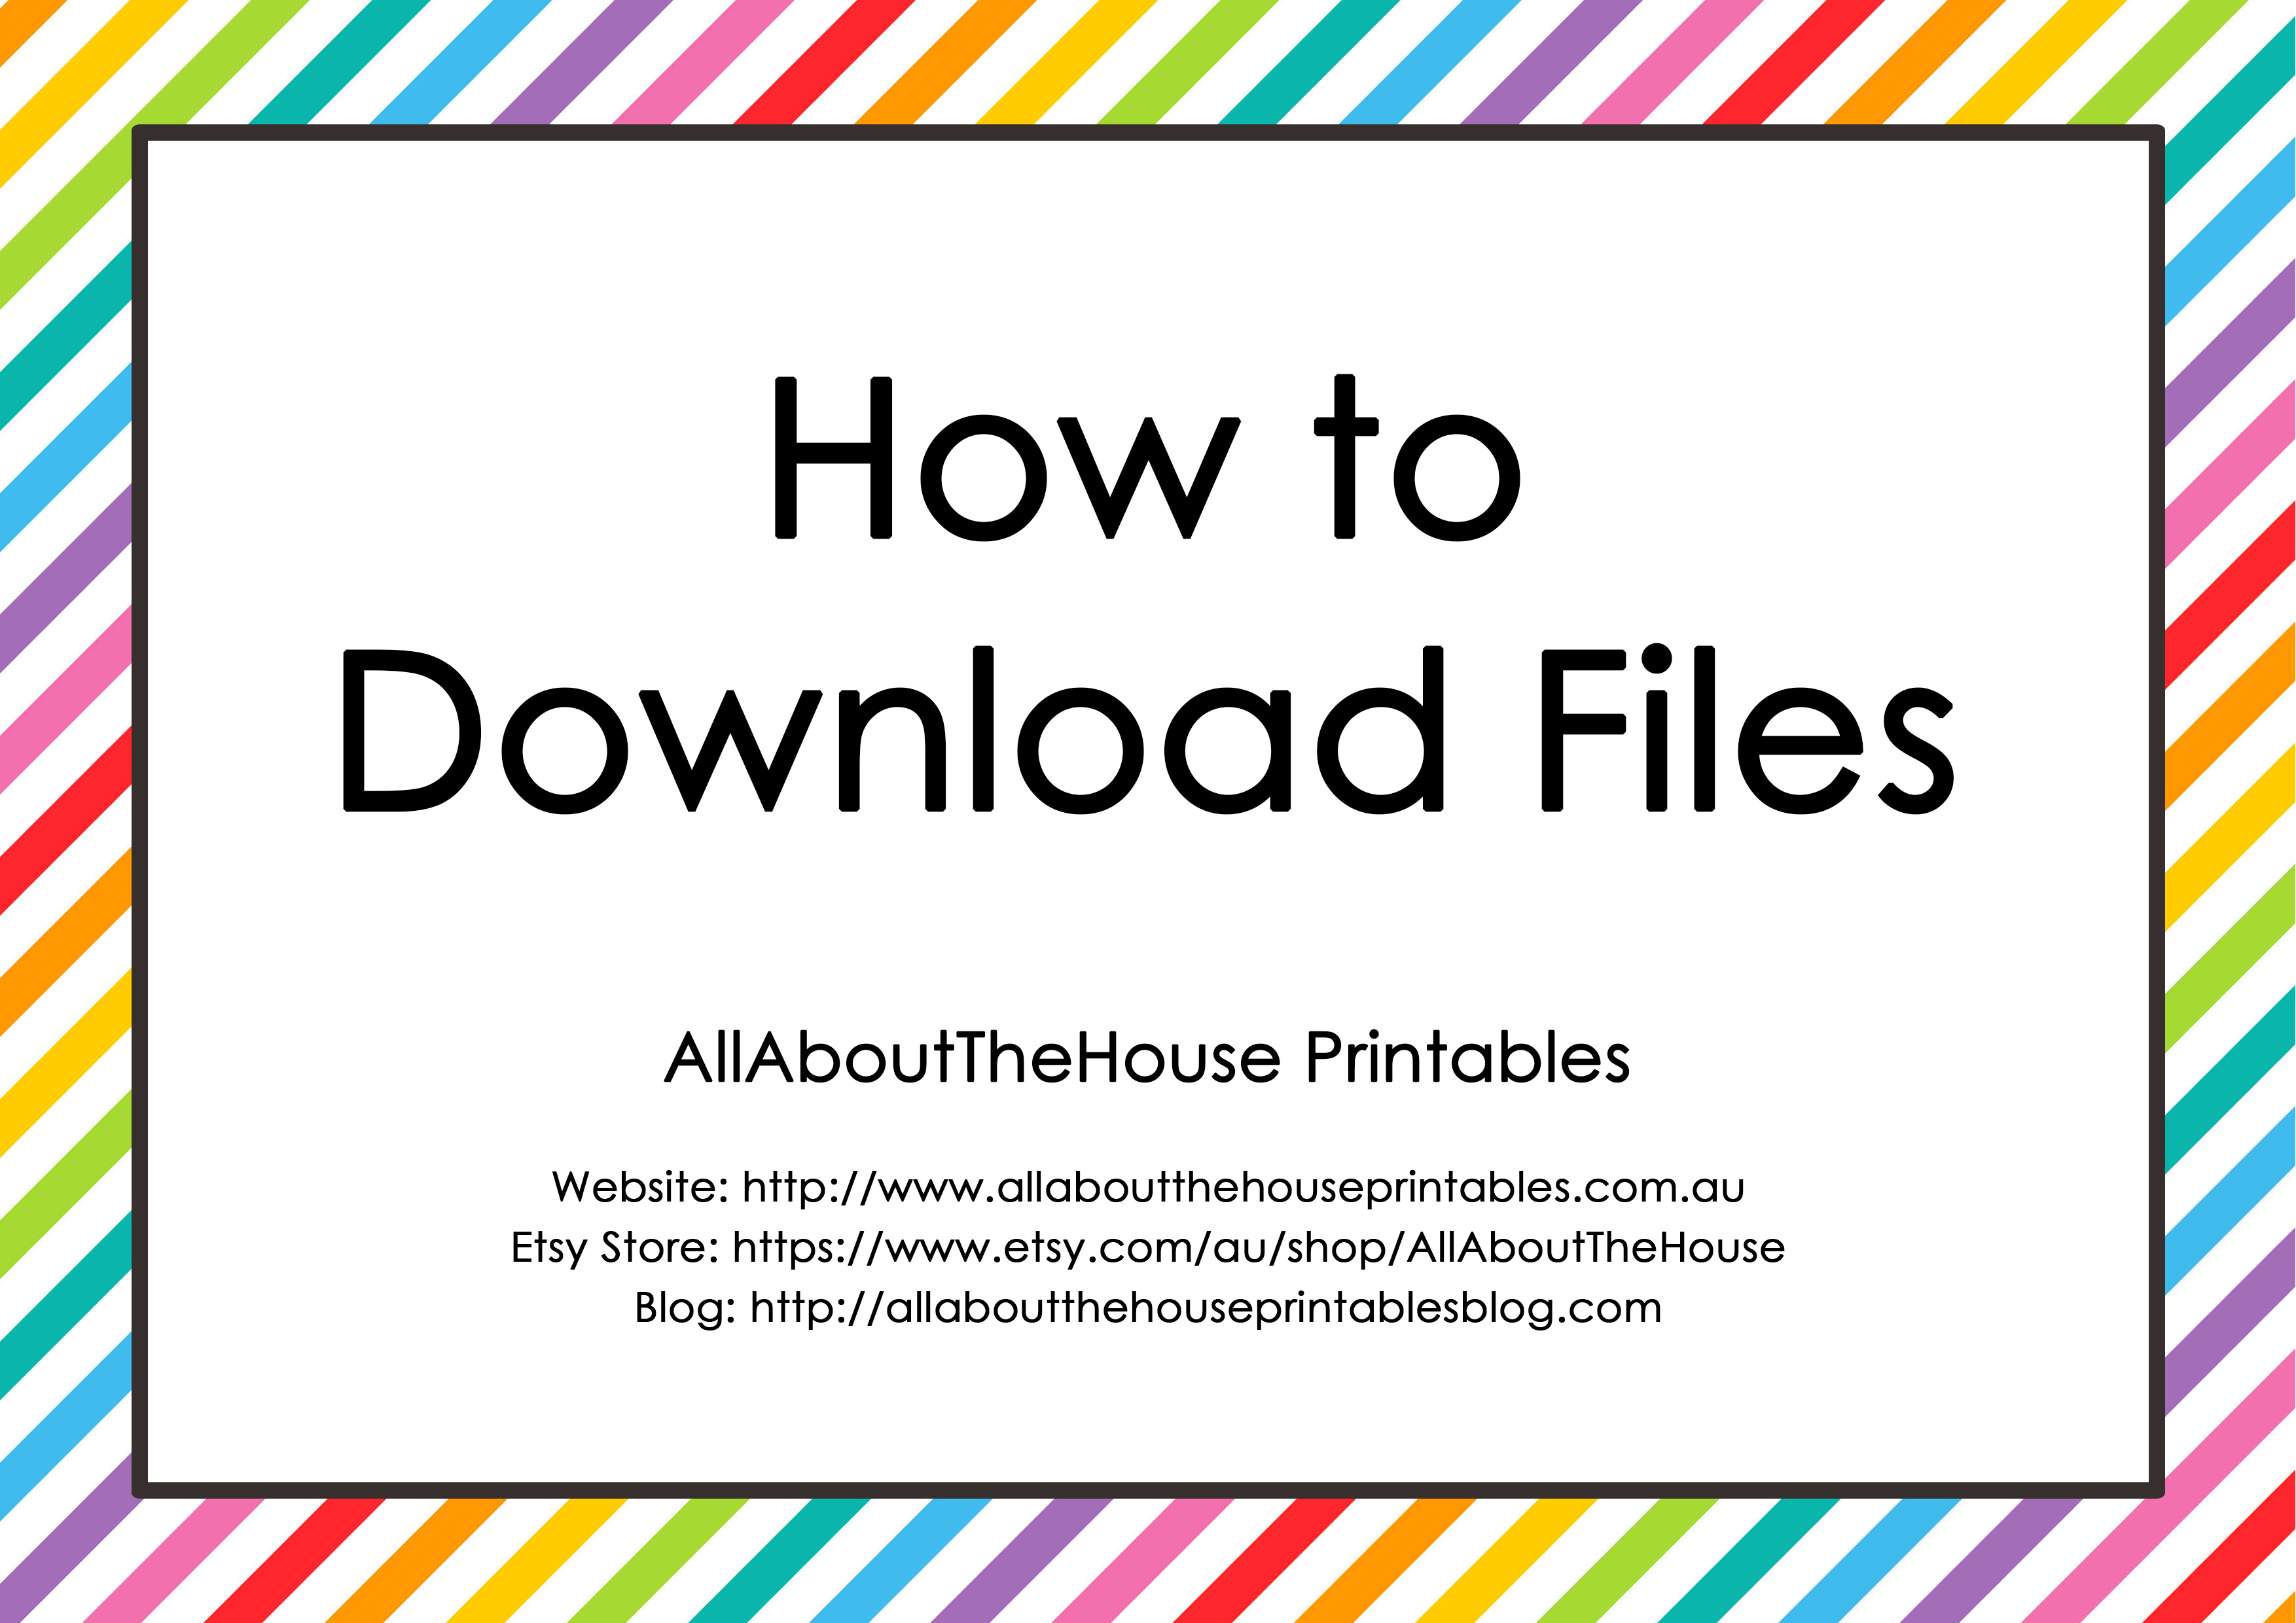
How to download and share a template made in Canva
So you’ve finished creating a design or customising a template in Canva and you’re ready to list it for sale. But how do you give people access to the file?
In today’s post I’m going to show you how you can easily send someone a link to your Canva template. I’m also going to explain how to send a link to a customer if you’re selling a digital template.
I’m going to use my cookbook template and itinerary template for the examples in this tutorial.
What if you’re selling Canva templates and want to share the design?
I’ll start with this first, as I figure most people are reading this post because they either have an Etsy shop or are thinking about starting an Etsy shop selling Canva templates.
To enlarge the screen of the video, click the square icon in the bottom right hand corner of the video (it will say ‘full screen’ when you hover your mouse over the icon).

Subscribe to my YouTube channel for more Canva tutorials
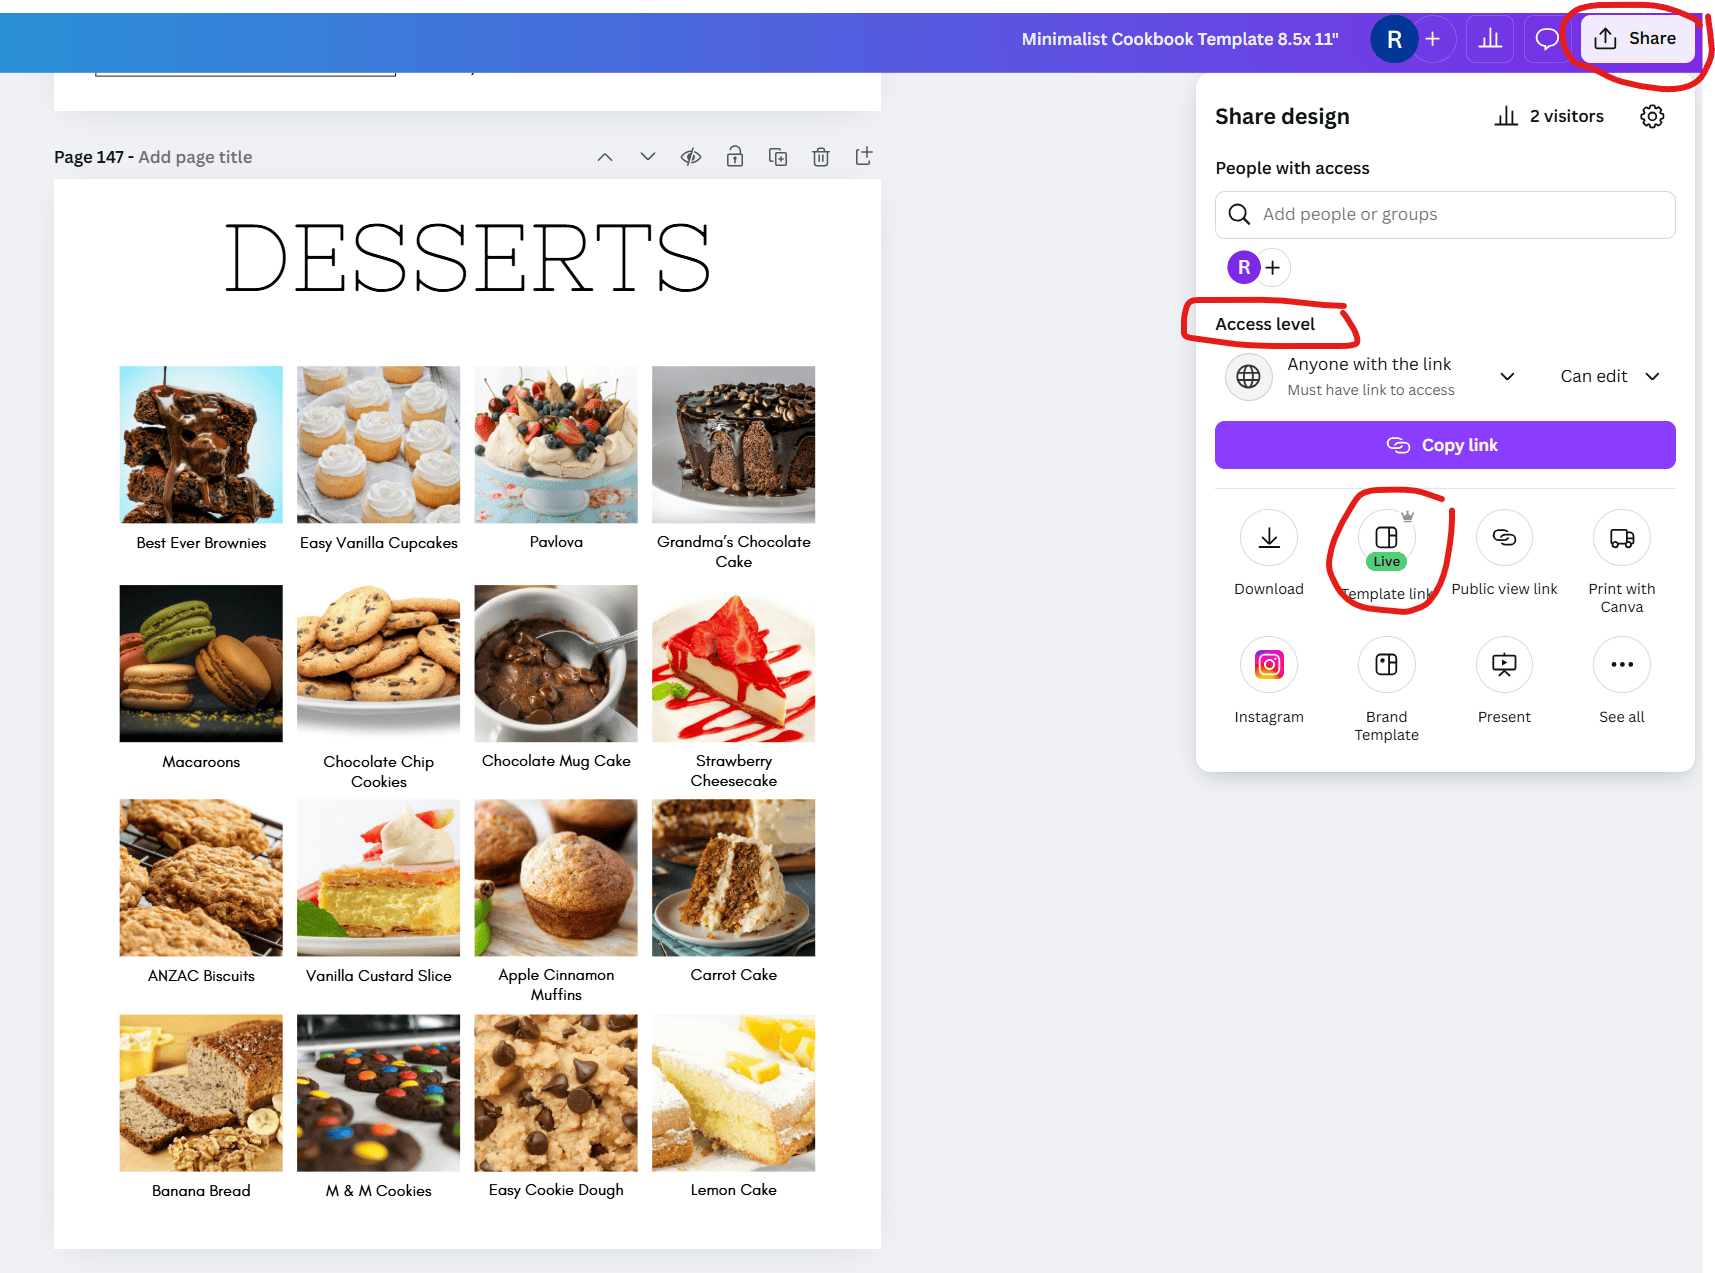
For the design process, you don’t need to do anything different. Go ahead and make the template per normal. Once you have finished the design and are ready to list it for sale, go to the top right corner of Canva > Share > Template Link.
You need Canva Pro to be able to share a template link
You can choose the access permissions you would like to set, then copy the long URL that will appear and paste that into another blank document in Canva.
Why do you need a second document? Because you can’t upload a link into Etsy or other ecommerce platforms such as Bigcommerce and Shopify. You need to upload a file, and in that file you can add the link to the Canva template.
I create one document which I can reuse again and again with minor tweaks depending on the document. You could make this pretty, but I don’t think it’s worth spending a lot of time on the design. People don’t really care, they just want the link.
If the template I’ve made is likely to have people asking questions, then I include some tips and instructions for customizing the template within the document. You could also include a link to YouTube if you have a tutorial video showing how to use your product.
Some people aren’t trustworthy of a long URL with random letters and numbers. You can either use an element like a rectangle to create a ‘click here to download’ button, or just hyperlink text. I like to include a screenshot of what page will appear when they click on the link, so they know they’re in the right place.

Always test and double check the link works.
I then upload this second document as a PDF file to my Etsy shop and my online store. This is what people receive immediately after they place their order so I don’t have to send a manual link each time.
If you’re selling digital downloads these days, people expect instant access to the template.
In summary, on that separate ‘how to download’ document I add this info:
- A hyperlink to access the template in Canva
- A screenshot of what the page to access the template in Canva looks like
- Instructions of the exact buttons to click
I also add a link to the free printables library on my blog, so customers don’t just access my template and disappear, but instead stick around and see what other templates I have.
I like to name the file something obvious like ‘how to download and use the catalog template’. It might seem silly but even calling the file name something as obvious as that, I still get customers on occasion that message asking how to access the file. I’ve never checked out as a guest on Etsy but the interface must be different because it’s usually people that have checked out as a guest, not logged into their Etsy account.
If you’re creating a design for friends and family
If you are creating a design that you want to share with friends and family and aren’t looking to list for sale, you can follow the same steps above and just send them the URL for the template link, without needing the extra step of creating the PDF file with the link to the template.
Go to Share > Access level > Anyone with the link

Always make a copy of the original template so you have a backup, just in case!
Download my favorite planner supplies guide here (it’s free!)
How to download a finished design in Canva
If you are downloading a finished design because you’re selling it in compressed / un-editable format (such as PDF or JPG), or you’re printing a design that you’re going to use yourself, you don’t need to worry about creating a template link.
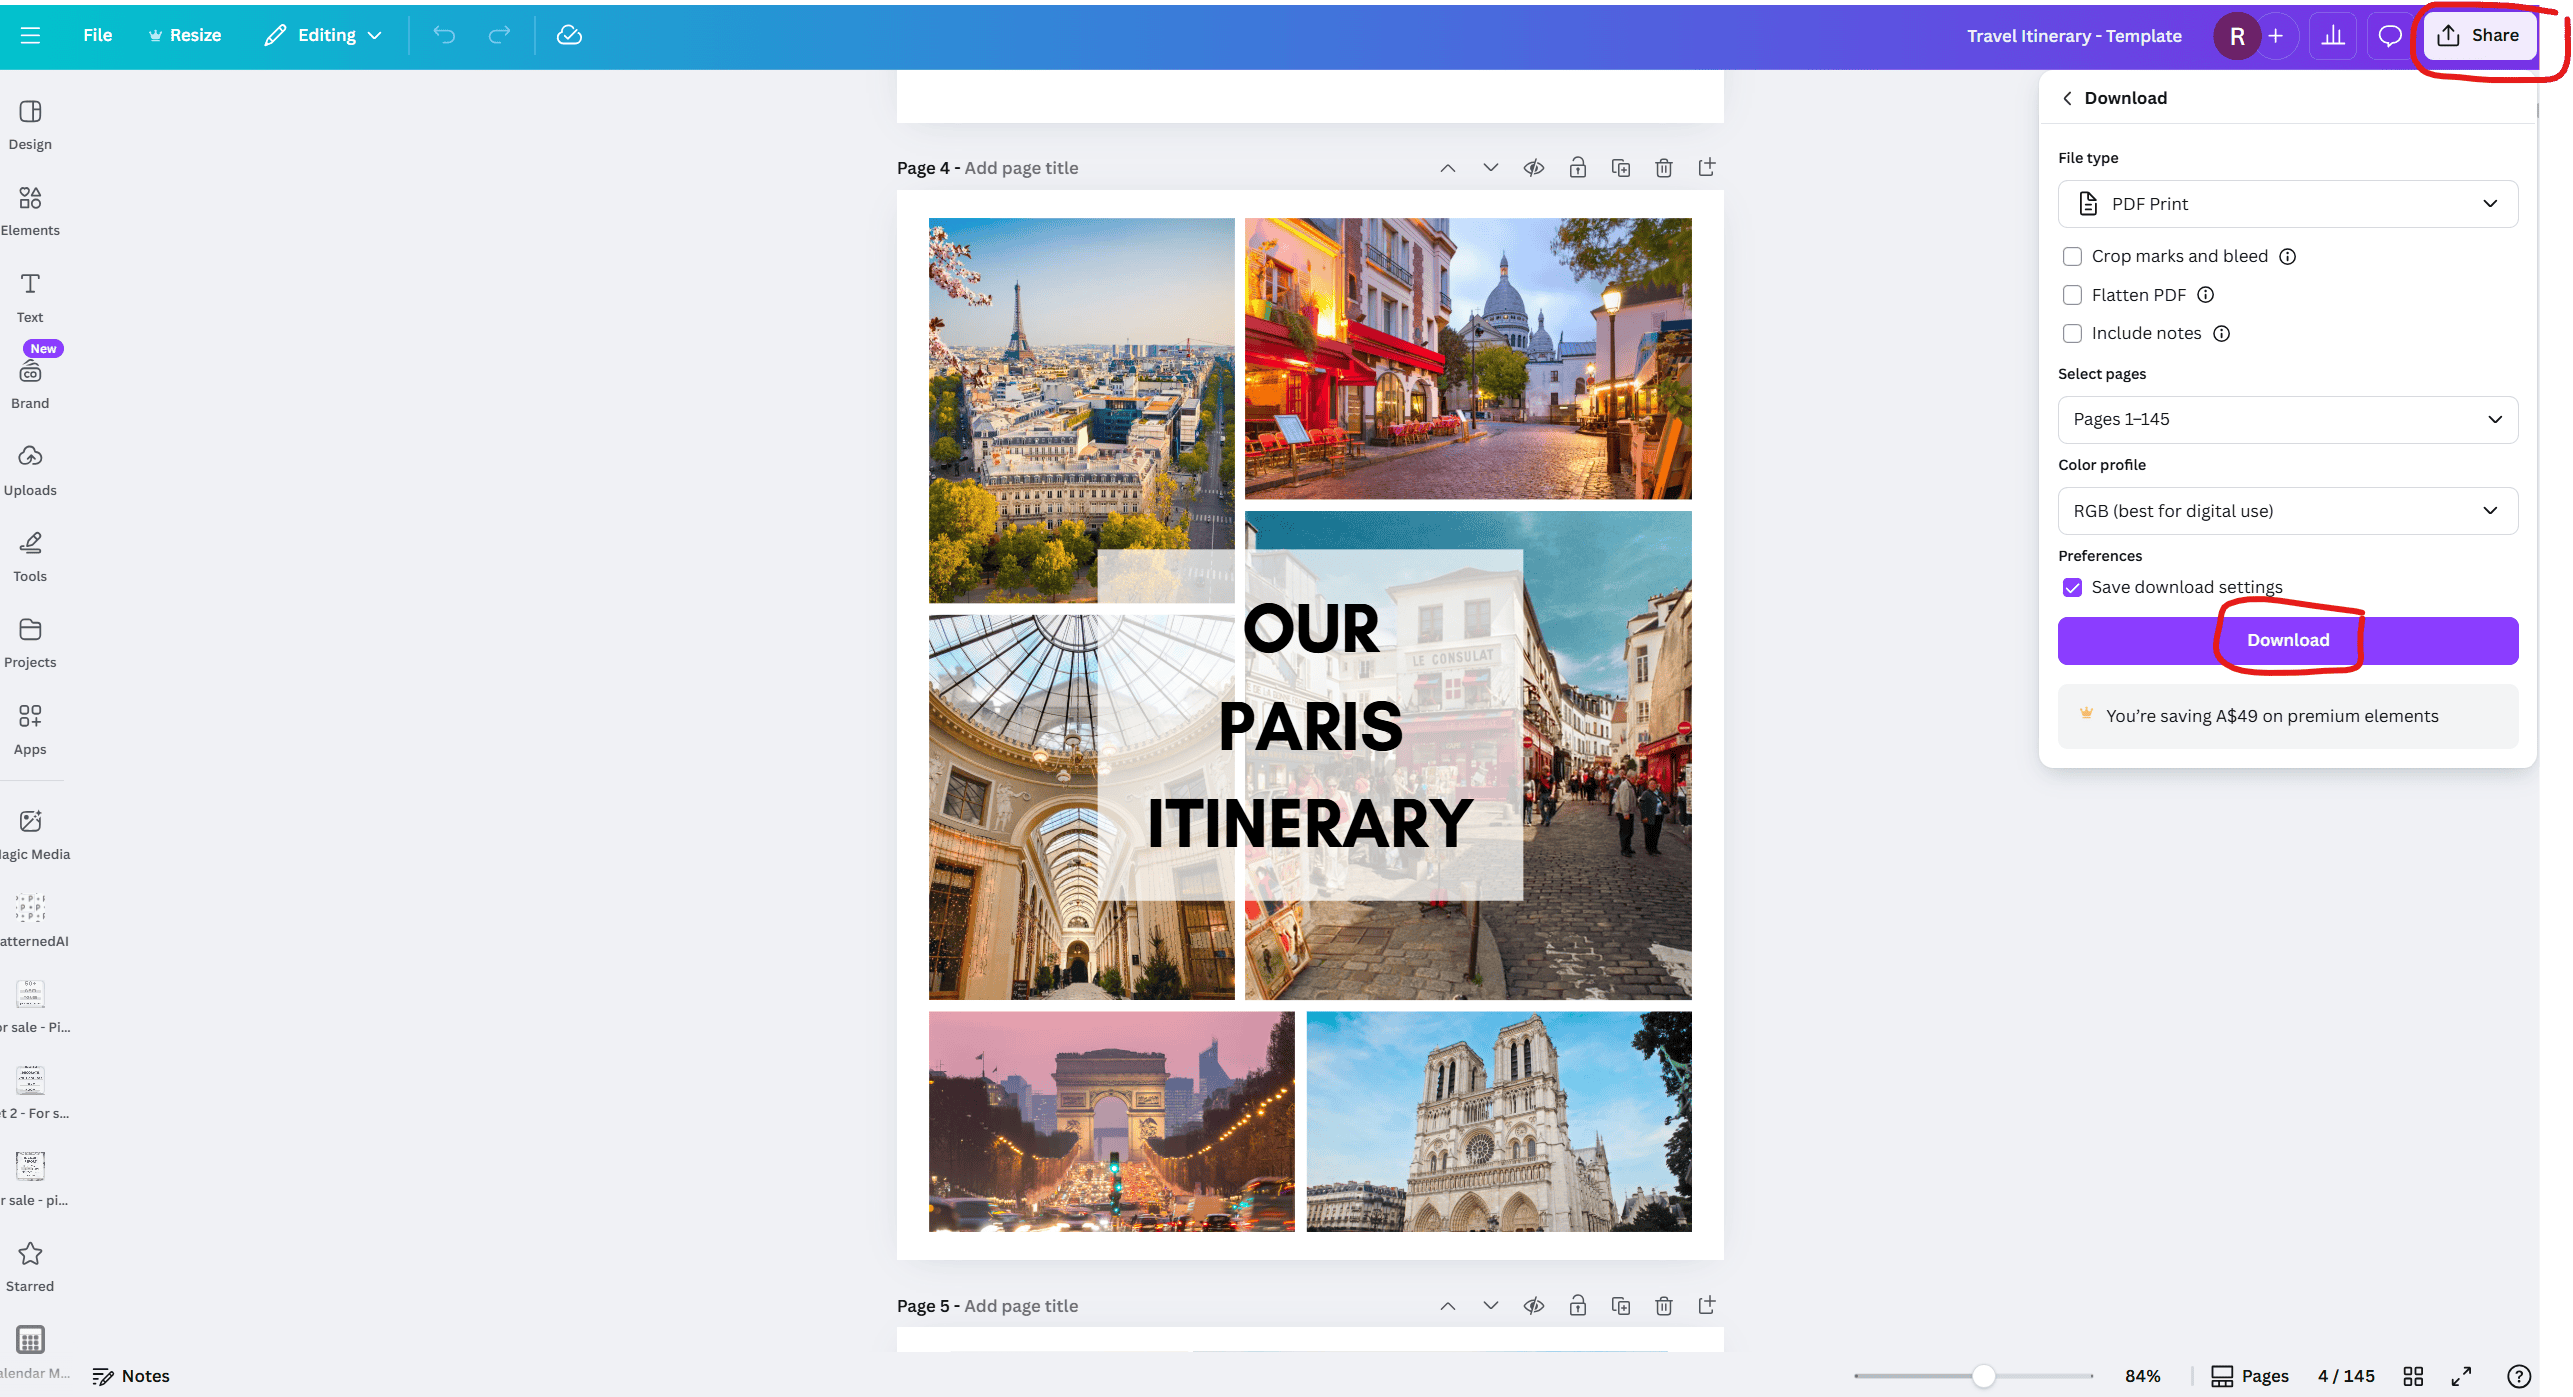
Instead, just go to share > download
To enlarge the screen of the video, click the square icon in the bottom right hand corner of the video (it will say ‘full screen’ when you hover your mouse over the icon).

Subscribe to my YouTube channel for more Canva tutorials
Before you click download, make sure you check the file type, selected pages and color profile.
If you’re printing files at home, I haven’t noticed a difference between using RGB and CMYK printing modes when downloading as a PDF and using my inkjet printer
Related post: How to clean your printer (prevent smudging, streaks and make the colors POP!)
If it’s not letting you download the template, it may be because you’ve used images that are part of a Canva pro subscription. I used images from Canva’s stock library for my travel itinerary template and was careful to only use their free stock photos, in case people buying the template did not have the Canva pro plan.
A few months after I created the template, I started getting customers complaining they suddenly couldn’t download their finished design. The reason was that some of the stock images had been removed from Canva’s image library, and some had been switched to the pro version.
If this is the case, the download button will be greyed out / not clickable and you won’t be able to download the file.
If this has happened to you, you’ll need to delete the image and choose another one. Then you’ll be able to download the design. The image will normally change from the image you originally chose, to just a grey box on your design.
Once you fix that, you can download the design by following the original steps of going to the top right corner in Canva > Share > Download > select the settings you want > then clicking the download button.
If it’s still not working, you may need to refresh your web browser.
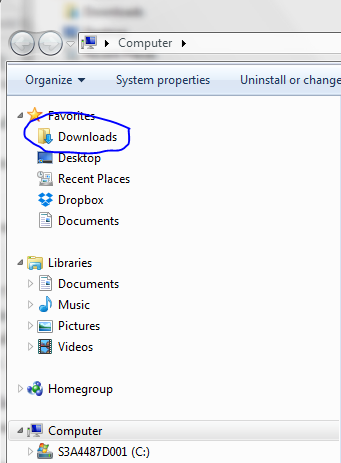
Where does the file go after downloading?
All files downloaded from the internet will automatically save in the downloads folder of your computer.
You can find that by going to the start menu and typing ‘downloads folder’. I did a more detailed tutorial in this post.
The file may automatically pop up on your screen once it’s finished downloading.
The file won’t automatically pop up if you have pop ups disabled in your internet browser, but it will still save in the downloads folder.
What to do with the finished file
Depends what you’re making.
If you want to refer to a travel itinerary while you’re on the go during your holiday, you may want to access the PDF you just downloaded onto an iPad or your phone. In that case, I’d email yourself a copy so you always have a backup to refer to, as well as saving it to that device.
If you’re concerned about storage space (I know my phone is always running out of storage as I take too many photos!), you can go back to that email with the file attached and screenshot the relevant pages of the itinerary for that day. Then the next day, delete the previous days’ pages and take screenshots of that day’s itinerary pages.
If you want to print a copy of the file you downloaded, you can print it at home or upload the file to an office supply store. If you live in Australia, I use Officeworks for this.
If you want to bind your creation, office supply stores usually offer this service. If you want to DIY bind it at home, I recommend discs.
Read more: Where to find discs to make a discbound planner or notebook (downloadable comparison)
More Canva tutorials
- How to make a product catalog, line sheets and price list in Canva
- How to quickly make a recipe book in Canva
- Picmonkey versus Canva versus Photoshop versus Adobe Illustrator: Which one is best for graphic design?
Browse all Canva tutorials here.
Found this post helpful? Pin it