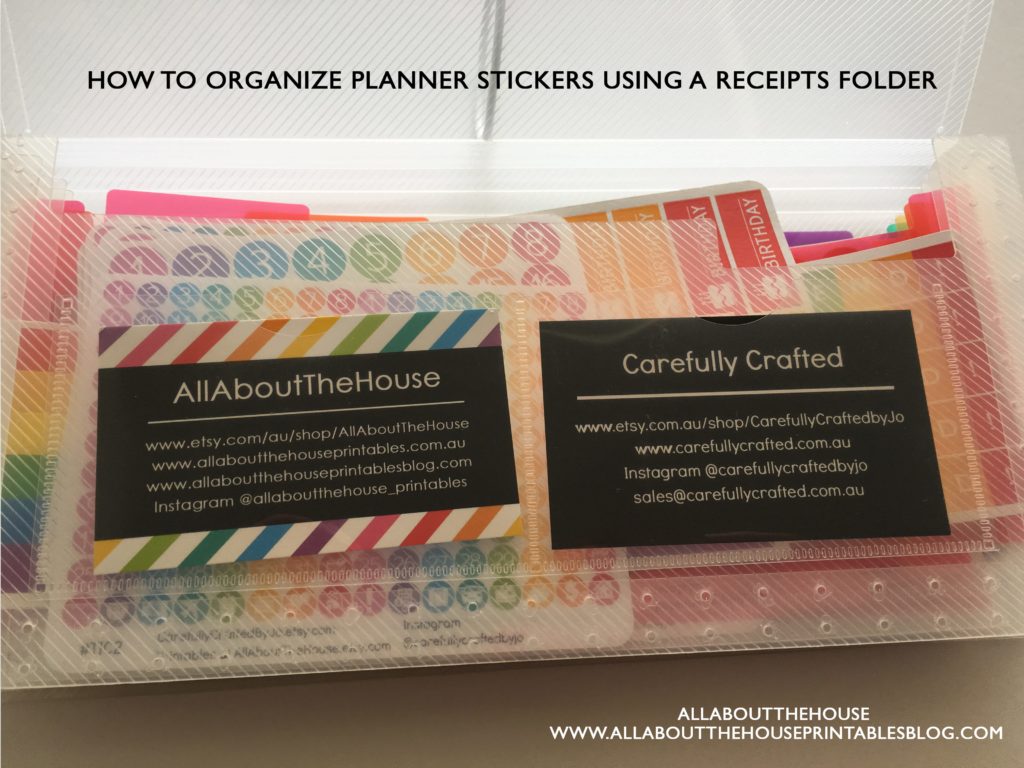
How to organize and store small planner stickers using a receipts folders
I previously shared how I organize sticker sheets using a binder. Binders are ideal for large sticker sheets such as printables. But for smaller sticker sheets I prefer to use a receipts organizer.
Related Post: Which planner stickers are right for you?
There are a few ways to organize stickers
- The order you want to use them e.g. if you use themed weekly spreads the order you want to use them
- By season e.g. Christmas, Autumn etc.
- Sticker designer
- By color (although it can be hard to find sticker sheets that have just one color sticker on them)
- Function e.g. money
- Size – Erin Condren quarter box size, rectangle, square, sidebar etc.
- Shape – round, square
Related post: My favorite places to buy planner supplies & stationery
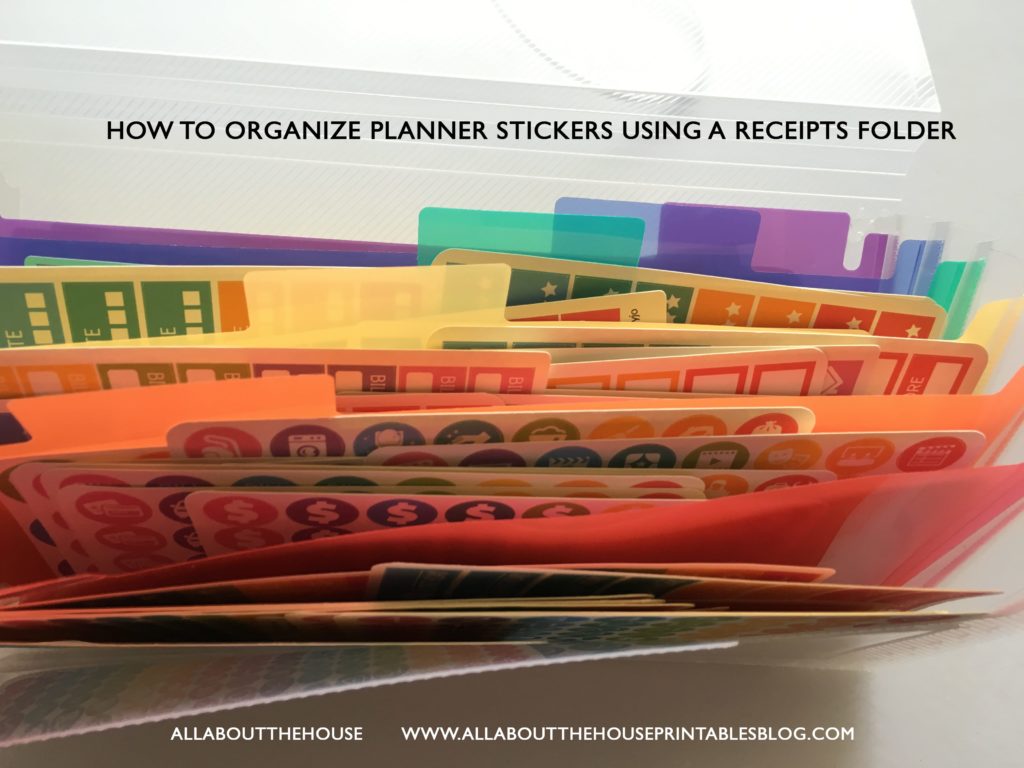
Why I use a receipts binder to organize small planner stickers
- Compact – great for on the go planning – my receipts binder is not much more thicker than a pencil case mine is only about 0.5 – 0.75″ thick
- Unlike a pencil case they have a lot of compartments
- I try and make sure I have full sticker sheets where possible – it’s very annoying when you have a half used sticker sheet (especially functional stickers which I use all the time), and need a sticker from that sheet that has already been used
- Cheap! You can find them for just a few dollars. I got mine from Kmart for $4. They also had an A4/full page size organizer which would be perfect for larger sticker sheets

Related post: Planner Organization: How to color-code your planner (so you’ll actually use it effectively)
Tips for choosing a receipt binder
- Look for a receipts organizer that has a lots of tabs. Lots of tabs = easier to find what you’re looking for
- Make sure you find one that is long enough to suit the length of your sticker sheets. Yes I took a ruler with me when I went shopping to measure the length of receipts folders #plannerdork
- Try and find a folder with different colored tabs. I am a bit obssessed with color-coded organization because it makes it so much easier to find what you’re looking for when you associate certain things with specific colors
- Keep the stickers you use most frequently at the front of the folder
- Don’t label your tabs straight away – first experiment with the order of your stickers until you have a system that works for you. I’m happy with the order of my stickers as shared in the video – I’m just waiting for a label maker to come on sale in the January back to school sales here in Australia
- Look for folders that have an elastic band enclosure – it’s more study than a button clip folder (mentioned more in the video)
- Make sure the tabs extend all the way up to the underside of the flap
- Try and avoid folders with clear tabs and pockets as it can be distracting seeing the stickers that are part of other compartments in the folder when it’s see through (that’s why I bought the black one from target – mentioned in the video below)
- If you prefer printable planner stickers and want to store them in a receipts folder – cut the sticker sheets into thirds or quarters
- If you prefer to use printable planner stickers and cut all of your stickers out individually in advance, I recommend storing them in small clip top bags, then placing in the receipts folder so you don’t have to tip the entire contents of the folder just to find a sticker
I think I could squeeze in plenty more planner stickers… :p
The stickers shown in my binder are available in my sister’s Etsy shop, Carefully Crafted by Jo. Printable planner stickers are available in my Etsy shop, AllAboutTheHouse.
Related Posts:
- How to use the monthly notes pages of your planner
- How to make use of blank pages in your planner
- The Process Behind Making a Printable Planner
- FREE Printable Happy Mail Planner Stickers – Envelope, RAK
- Which planner stickers are right for you?
- Planner Organization: How to organize planner stickers
Want to learn how to make your own planner stickers? Click here for step by step tutorials!