Using the MAMBI Happy Planner Horizontal (Week 40 of the 52 Planners in 52 Weeks Challenge)
For week 40 of the 52 planners in 52 weeks challenge I tried a planner that has been on my list of planners to try for some time now – the MAMBI Happy Planner horizontal!
MAMBI Happy Planner Horizontal
Quick Facts
- Discbound (my favorite type of binding!)
- Plenty of cover options to choose from
- Laminated front & back covers
- 2 Page monthly calendar (monthly spread starts on Sunday)
- 2 Page weekly spread – horizontal Lined (weekly spread starts on Monday)
- Laminated tabs
- Different dividers for each month (and some have gold foil)
- 12 month planner (the one I have that is called ‘Live Loud’ is an academic year, calendar year is also available)
- Covers are 7.75” wide x 9.75” high
- Planner Pages – 7” wide x 9.25” high
Setting up the week
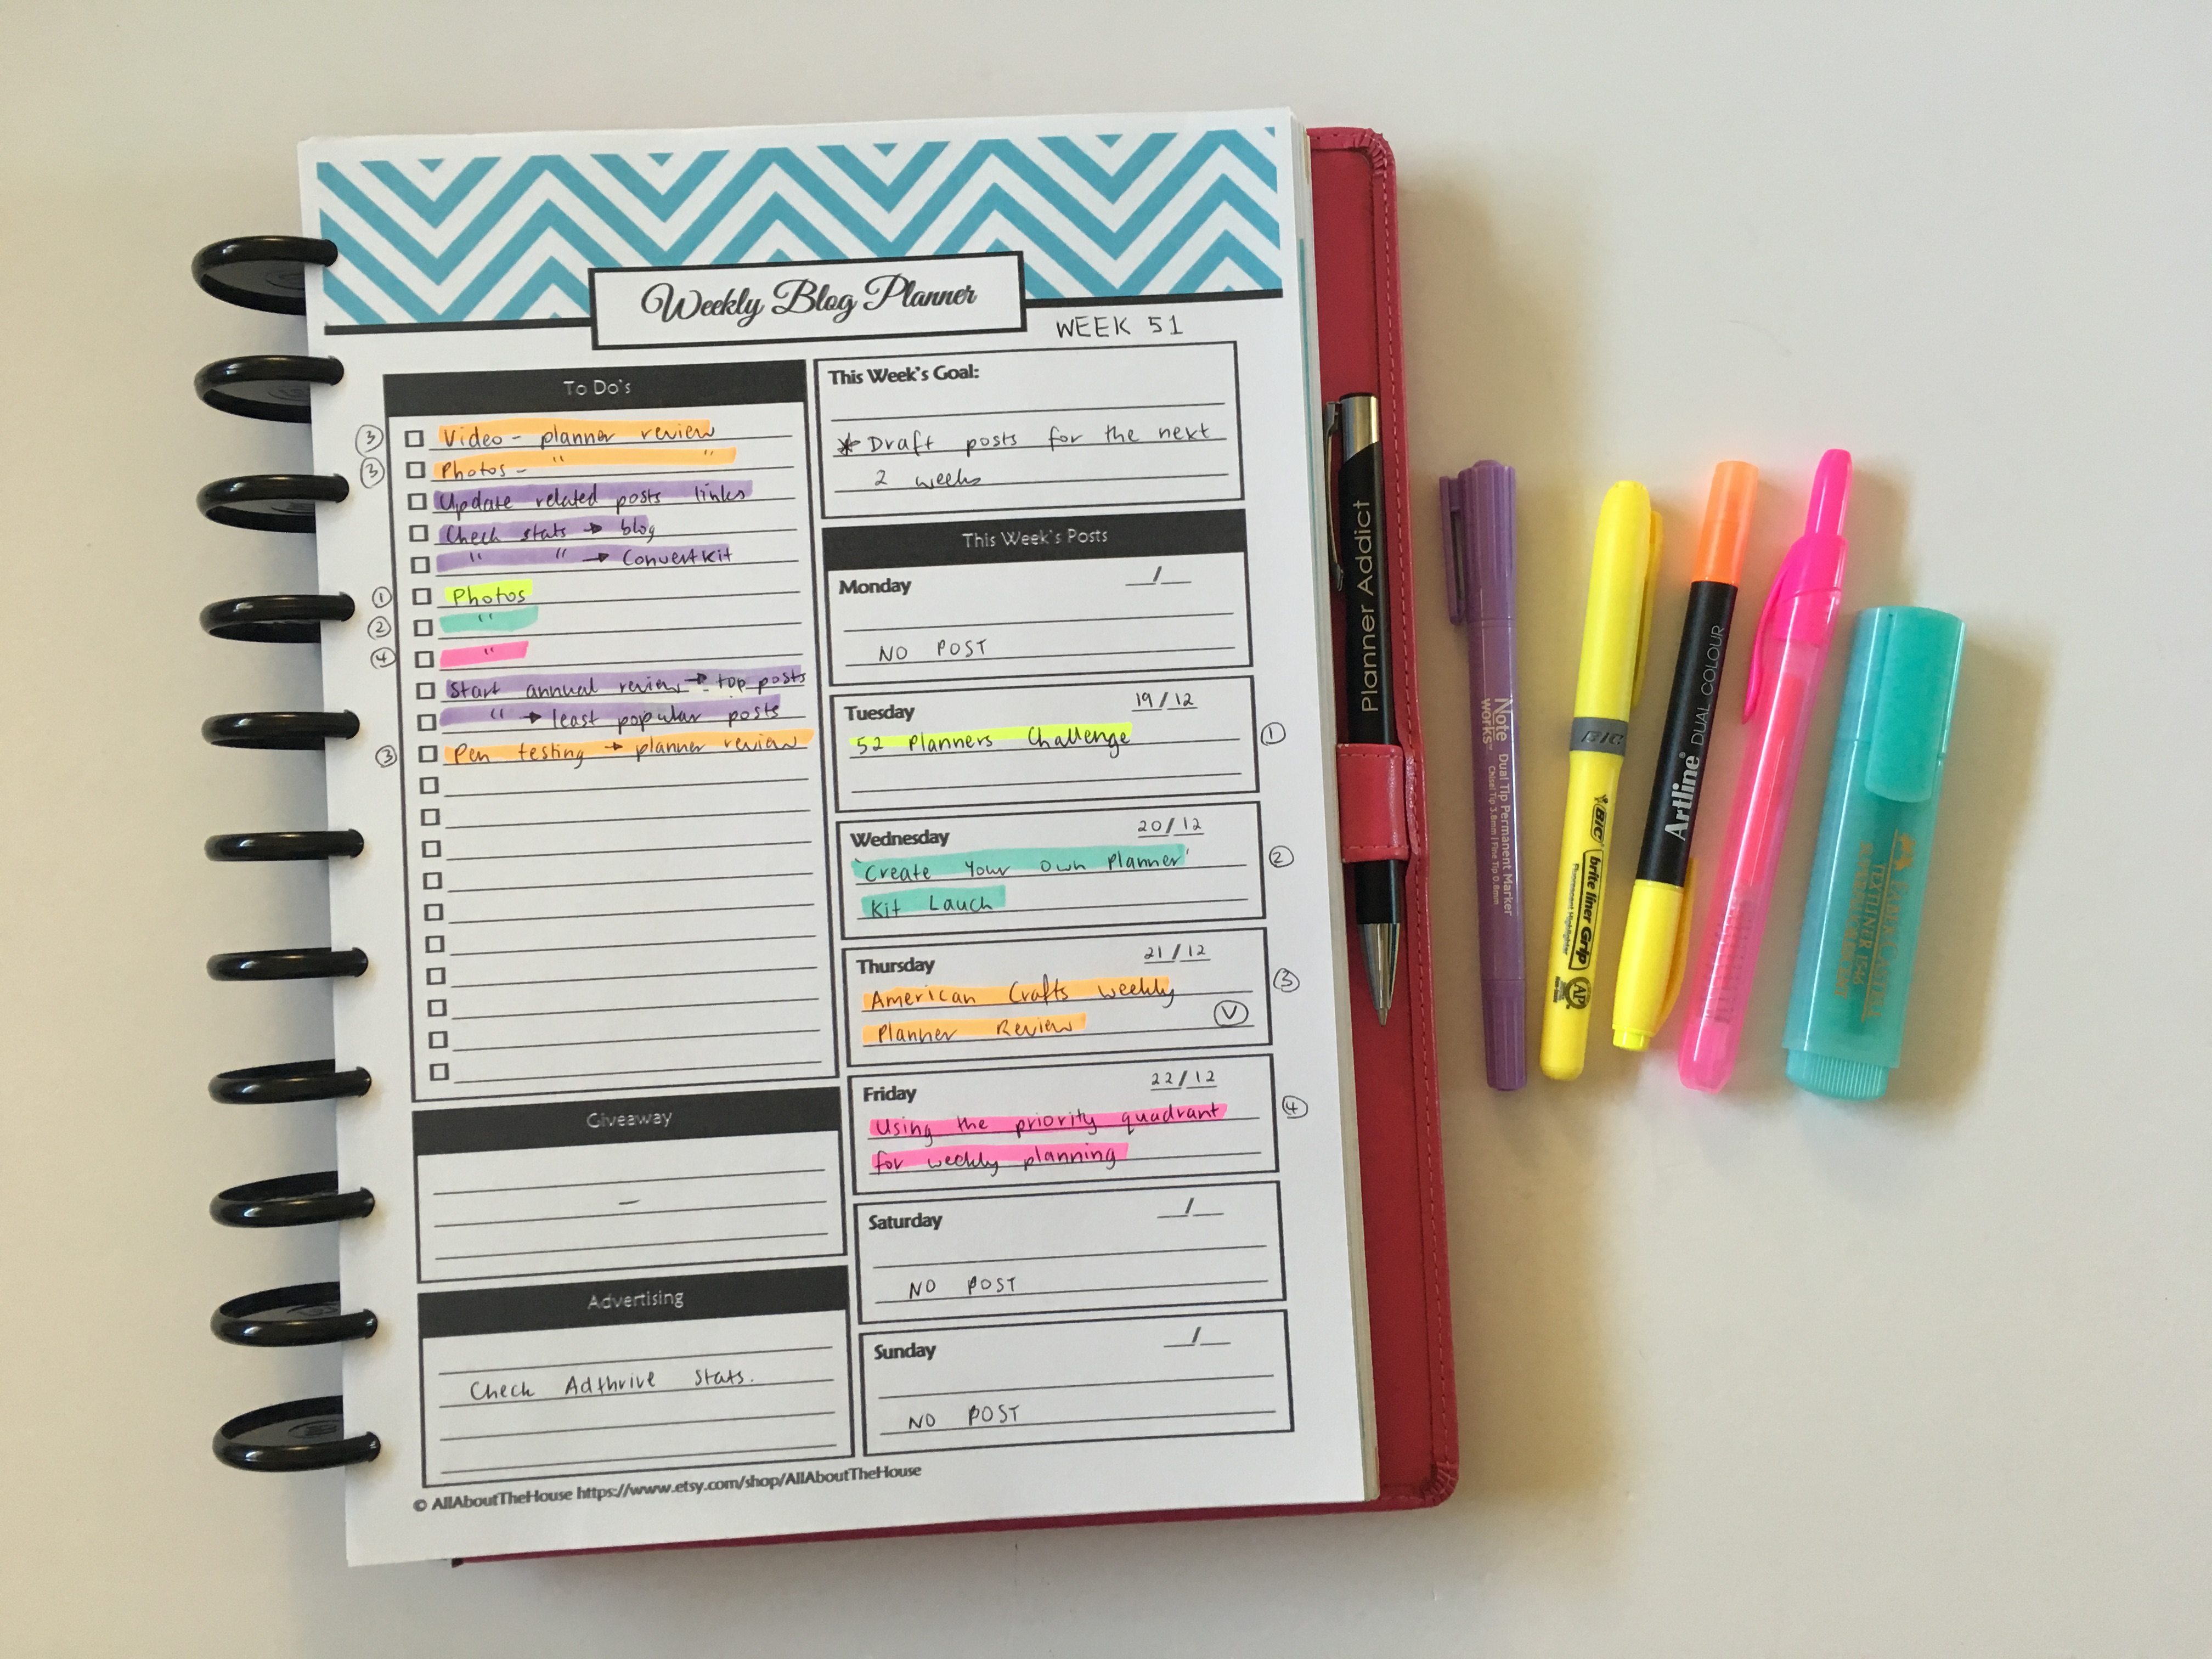
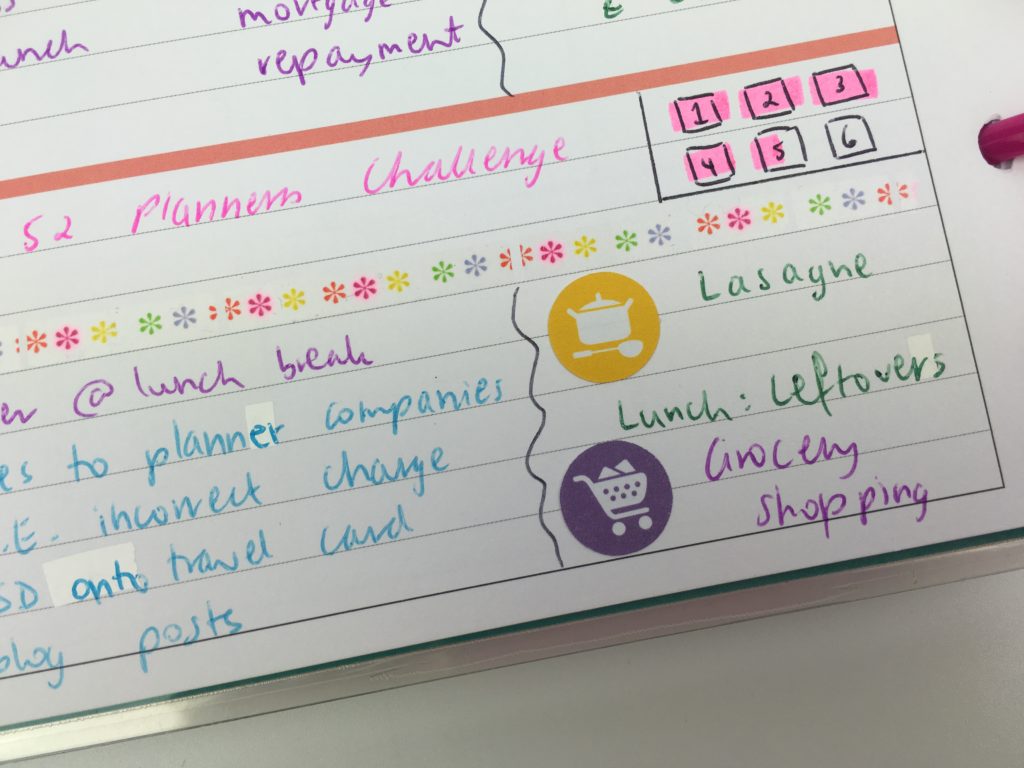
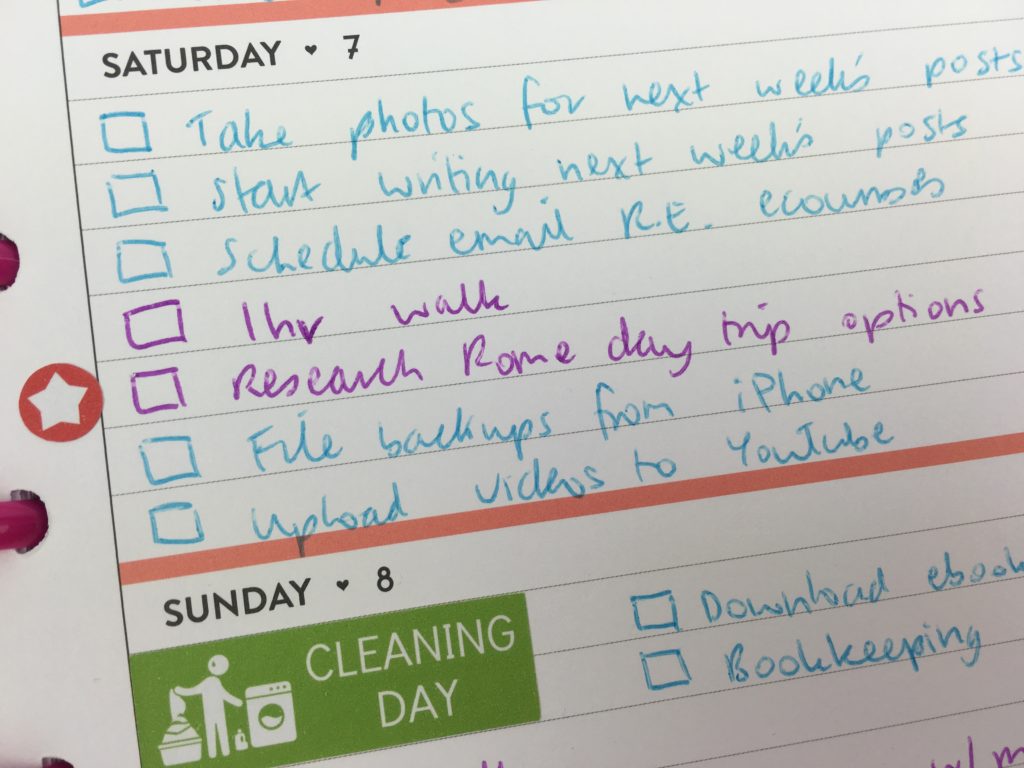
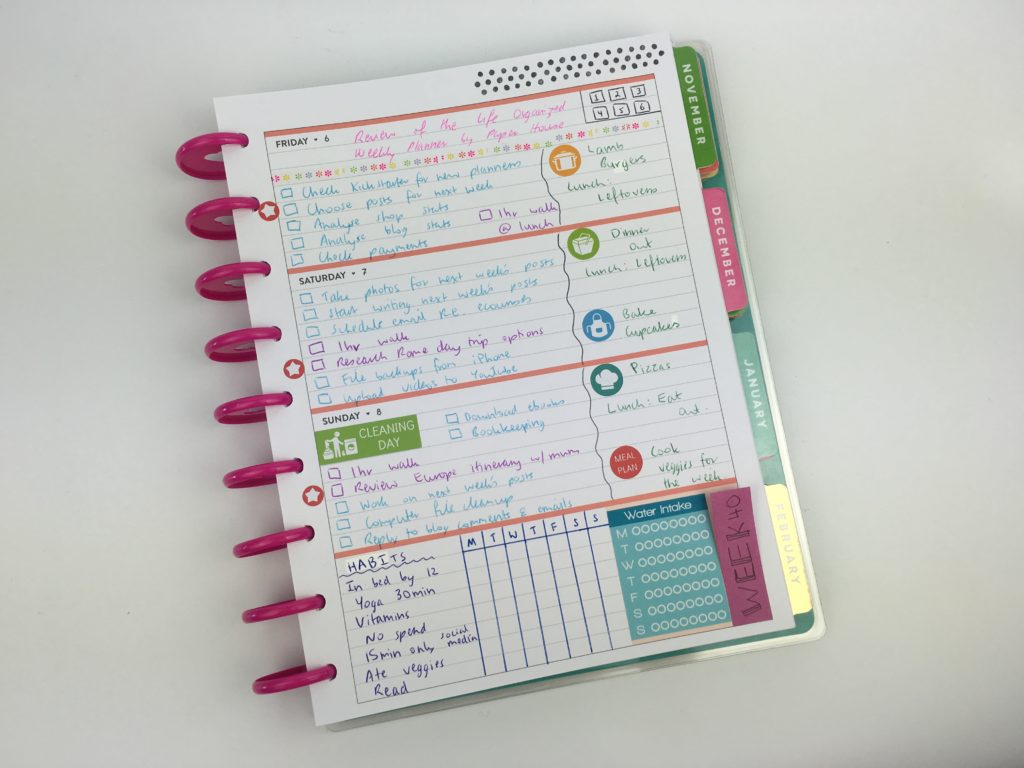
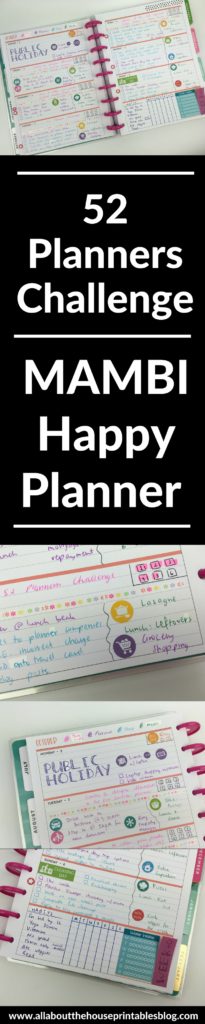
I decided to create 3 sections for each day. Rather than dividing it vertically into equal grids I used the top 2 lines for recording that days’ blog post, then the left side for tasks (color coded of course!) with meal planning on the right
![]()
This week’s color code
- Blog posts
- Personal
- Etsy shop / business
- Meals
I boxed off the top right of each day to keep track of blog post workflow. I drew a box and numbered the workflow steps (although you could use the MAMBI checklist stamp) then highlighted as the task was completed / half highlighted if the task was started / in progress but not yet completed. This saved a lot of space on the daily spread.
Related: Favorite washi tape for planning, planner decorating & color coding
I liked that there was color and stickers on the page without it feeling cluttered. I ended up drawing a wavy line to separate tasks from meal planning – I really like visual separation in a planner rather than jumbling everything together.
I like adding a pop of color using icon planner stickers to break up all the text. Last year I used to go all out using a sticker for every single thing. Now I basically just use icon stickers and header stickers. Keeps the spread functional + colorful + doesn’t take up a lot of space = 🙂
I’ve been looking at some hand lettering / decorating books so did some ‘fancy’ effect on the word to make the letters look a bit more interesting.
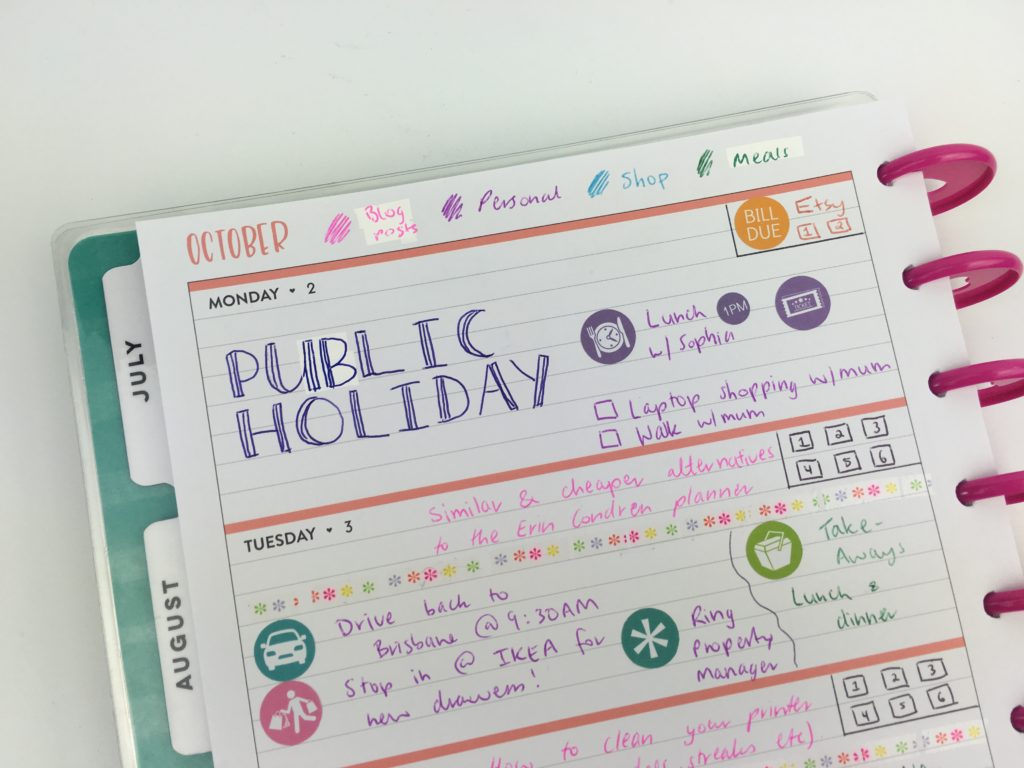
I used a mini star sticker to flag that day’s most important task.
Pros of the MAMBI Happy Planner Horizontal
- Discbound – add and remove pages as often as you need, don’t have to awkwardly try and write with the binding getting in the way
- Different colors & dividers for each month – the colors of the planner are really nice!
- The front and back covers are double sided so you can flip them over if you get tired of looking at the same cover
- Lined weekly spread (a must have if you have crooked writing like I do!)
- Large tabs so you can easily find the month you’re looking for
- The page size is just right – not too big and not too small
Related: MAMBI Happy Planner horizontal dimensions & measurements (classic size) for making planner stickers
![]()
Cons of the MAMBI Happy Planner Horizontal
- The monthly calendar splits the boxes into 2 diagonally (i.e. there is no space to plan), rather than re-starting the dates on the top line of the calendar
- The planner doesn’t have many notes pages (although you can purchase extension packs and add them)
Related: Choosing a planner: Horizontal versus Vertical versus Hourly planners (which is right for you?)
![]()
Related: How to print printables at MAMBI Happy Planner Size (step by step tutorial)
Supplies Used
- MAMBI Deco Pens (it’s like washi tape crossed with white-out tape)
- Meal planning icon stickers
- Cleaning day stickers
- Shopping stickers
- Asterisk stickers
- Movie stickers
- Bill Due stickers
- Mini star & exclamation mark reminder stickers
This week I used the Smiggle tri grip pens. They write fine for a ballpoint pen, the green is a dark green though – not the nicest color.
Related: Smiggle Stationery Haul (worth the cost?)
Would I use this planner again?
I really liked the MAMBI horizontal planner. There was just the right amount of space to create 2 columns / split each day into 2. The line spacing is also just right – not too small and not too big.
I love that the planner is discbound so I can pull pages out to write stuff on the page without having the binding getting in the way.
Interested in buying this planner? My sister stocks the Happy Planner (along with 1,000’s of other planner supplies in her shop!)
If you’re tired of drawing up weekly spreads, this printable bundle of 52 different 1 page weekly planners (you can mix and match to create 2 page spreads if you prefer), is available in my Etsy shop and online store.

Liked this post? Pin it!
Catch up on past week’s of the challenge
- Week 15: Trying a freehand weekly planner inspired by bullet journalling
- Week 23: Using Limelife Planners Weekly Layout C
- Week 24: Using Erin Condren Size Planner Stickers in MAMBI Classic Happy Planner
- Week 34: Review of the Planner Pad Weekly Planner
Related Posts:
- MAMBI Mini Happy Planner Review (pros, cons, should you buy it?)
- What type of pens write best on correction tape? (gel pens vs. ballpoint vs. marker pens)
- How to choose the right planner pens: what to look for when buying planner pens
- How to organize and color code your notes for school, college or university