
Review of the Planner Pad Weekly Planner (Week 34 of the 52 Planners in 52 Weeks Challenge)
For week 34 of the 52 Planners in 52 weeks challenge I decided to use a planner not many people seem to talk about: the Planner Pad! I’m a bit bored with the traditional vertical, horizontal, hourly layouts to be honest, and am on a quest for planners that have a bit more structure and thought behind the layout so I was keen to try the Planner Pad!
The Planner Pad
The planner pad is designed to work in 3 parts:
Step 1:
At the top of the page, jot down everything you need to do based on categories of your life . This feature was what drew me to the planner – I really liked the in-built brain dumping feature as I tend to do this anyway on a scrap piece of paper before transferring to my planner
Step 2:
Add your routine daily tasks
Step 3:
Schedule your tasks to a day and allocate a time to get them done.
They have a video tutorial with the suggested way to use the Planner Pad.
I reached out to the company and they were nice enough to send me a scanned copy of the planner to try out! 🙂 I opted to use it with my Arc notebook.
Related: Planner Organization: Why I use the Arc Planner instead of binders
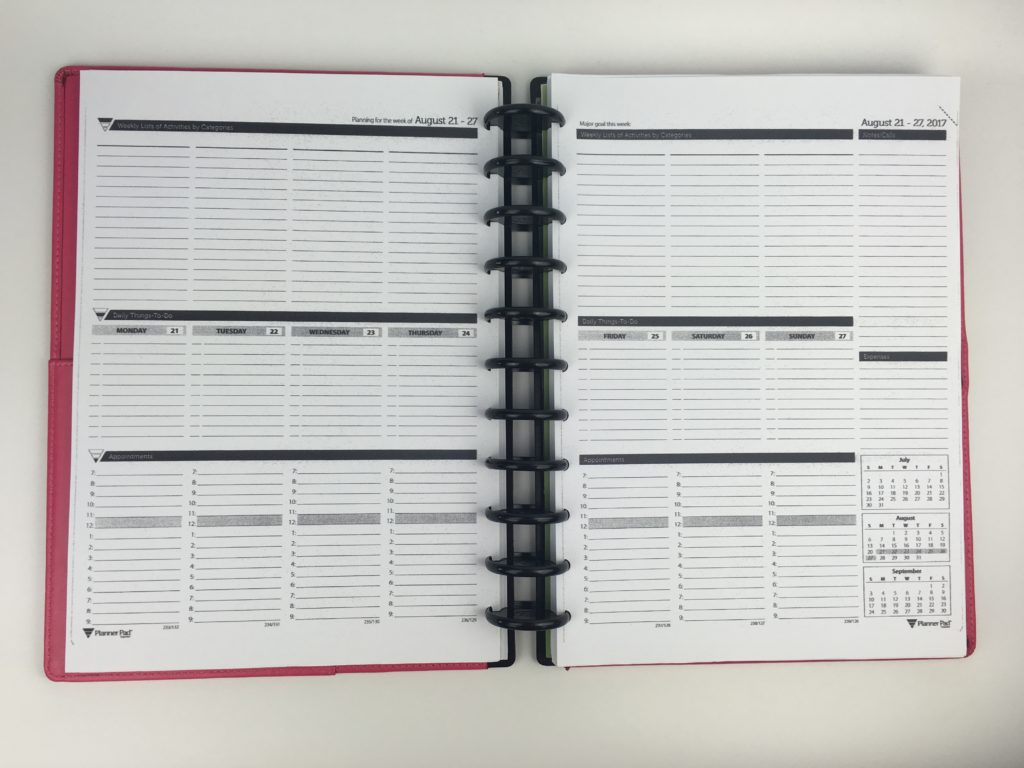
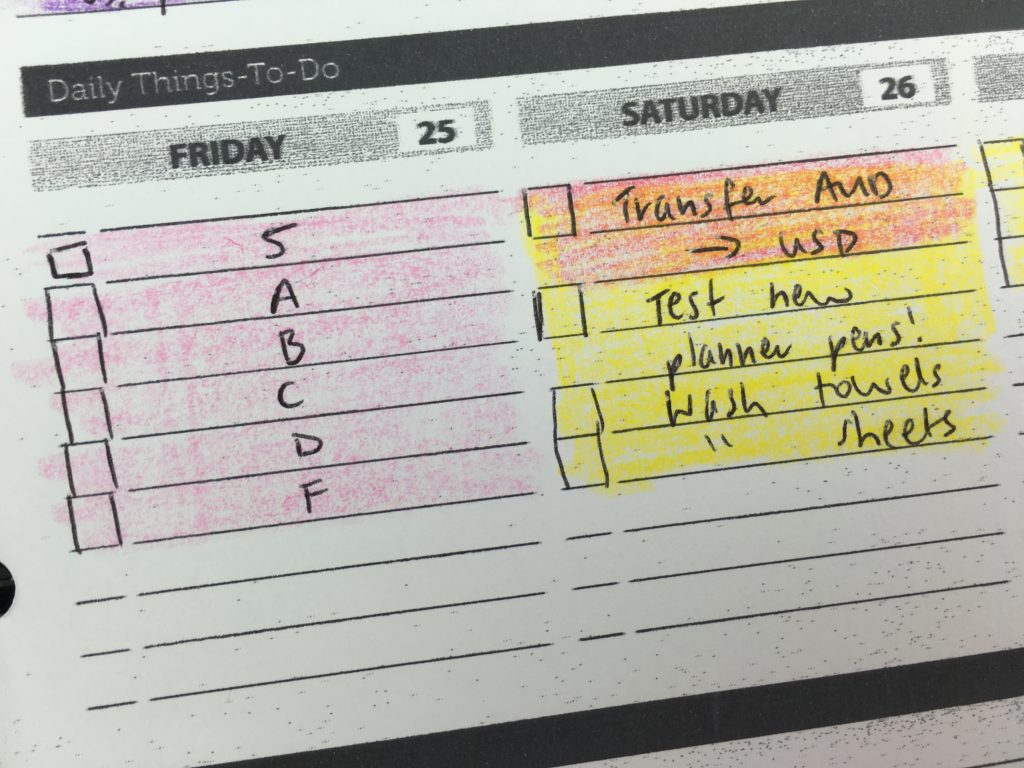
Setting up the week
Rather than re-writing tasks out again and again like they do in the tutorial video, I opted to number the tasks and color code. Planning this way saved time and add some color to the planner!
![]()
There was a good amount of space for each section.
I don’t like when calendars include dates at a glance for the months as I find this is a waste of space (can easily flick to the monthly calendar or annual dates at a glance page), I opted to cover this up with habit tracking planner stickers.
I covered up the notes / calls and expenses sections with header stickers.
I used hourly stickers to highlight the times things need to get done and make them stand out since all of the text was black.
![]()
I used a strip of washi to keep my place in the planner and also cover up the awkward gap on the side of the page where the planner stickers weren’t wide enough for the columns (I used E.C. vertical life planner size header stickers). It didn’t end up looking the greatest but it was easy to find the weekly spread when flicking through my planner. I used the A4 Arc planner – this is my blog / business notebook.
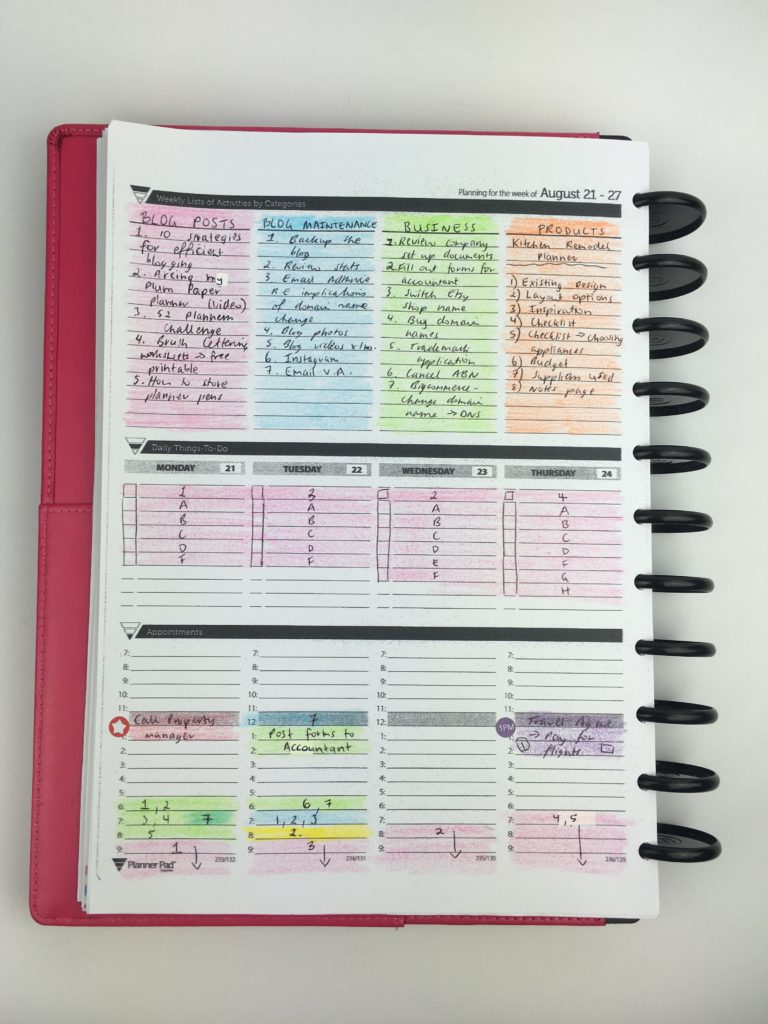
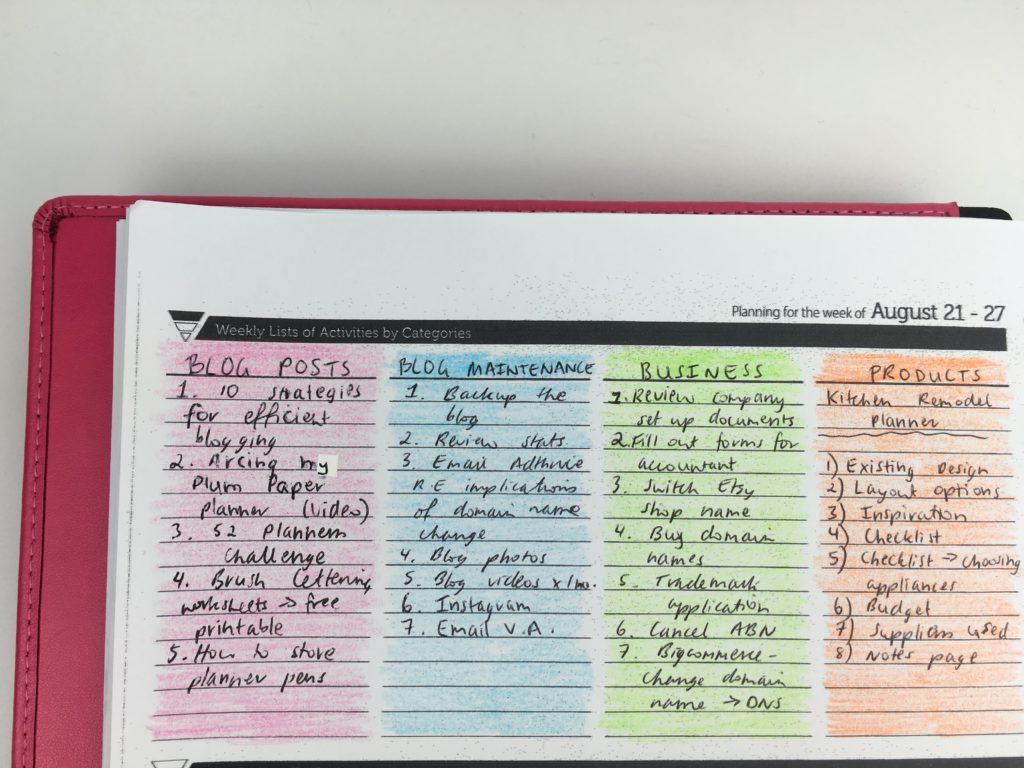
For my 7 planning categories I chose:
- Blog Posts
- Blog maintenance
- Business
- Products
- Travel Planning
- Personal
- Little Things
Related: 6 Ways to color code your planner to increase productivity
Tip: Don’t color code using zooms until after you’ve written out your tasks – pens don’t work as well over the top of the crayon.
Related: Kitchen Remodel Planner
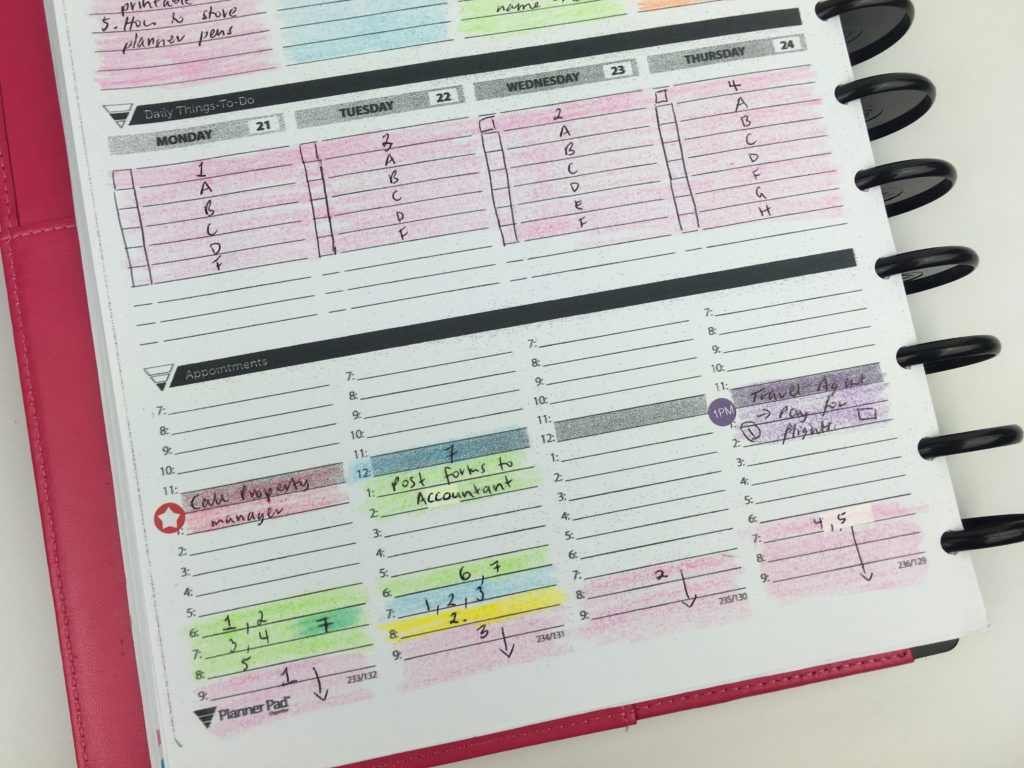
I did something a little different this week. Since I had already coded each categories tasks with a number I thought it would end up too confusing coding the blog post workflow tasks by number as well so I used the alphabet instead.

Related: Using a planner key and symbols to code your planner (efficient planning methods)
The strip of washi tape I used didn’t cover it up the gap very well, I should’ve used a darker color washi tape 🙁
![]()
Pros of the Planner Pad
- Plenty of room to plan – I had just the right amount of space!
- Ideal for anyone – columns for list making or appointments
- Black and white color scheme so you can personalise and make it your own
- Functional sidebar with notes space and expenses (I covered these sections up with meal plan and cleaning header stickers)
Cons of the Planner Pad
- The dates at a glance calendars appear on every weekly spread – they take up a lot of valuable planning space
- The monthly calendar is 1 page vertical style (i.e. the boxes are very narrow so you can’t fit much in them)
- The hourly section runs from 7am to 9pm – not ideal if you’re a night owl like me!
![]()
Stationery Used
Pens
I opted for a ballpoint pen I had custom made with the phrase ‘Planner Nerd’ my sister sells the pens in my sister’s planner supplies shop.
For color coding, I used Staedtler Zooms (twistable crayons) – they’re very affordable and unlike highlighters, the ink doesn’t dry out… because there is no ink!
Planner Stickers
- Hydrate habit tracking stickers
- Cleaning header stickers
- Meal plan stickers
- Mini icon planner stickers
- Hourly stickers
- Habit sidebar stickers
Related: Why I plan my day using planner stickers (and why you should too!)
The rainbow stripe washi tape is by Doodlebug (my favorite washi tape brand!) and is from my sister’s planer supplies store.
![]()
Would I use this planner again?
I really like the non-traditional layout of this planner. While I don’t normally go for hourly planners this week I actually liked it since I had a few appointments and things that had set deadlines. If I used this planner again I’d probably convert the bottom hourly section into more checklists as each task too up a couple of lines in the top section it’s easy to run out of space – there’s really only enough room to write 1 or 2 word tasks. If there was a horizontal version of this planner I would be keen to try it.
If you’re frustrated with basic planner layouts and need something with more structure to plan your week I encourage you to try the planner pad!
Disclaimer: I reached out to Planner Pad to see they wanted to collaborate. They were nice enough to send me a scanned copy of the planner me to trial for this review.
Catch up on Past Week’s of the challenge!
- Week 15: Trying a freehand weekly planner inspired by bullet journalling
- Week 23: Using Limelife Planners Weekly Layout C
- Week 28: Planning the entire week using only sticky notes
- Week 29: Plum Paper Me Planner
Related Posts:
- How to design planner stickers from start to finish (a sneak peak at my design process!)
- 50 Tips for writing a better to do list that will make you more productive
- Planner Organization: How to color-code your planner (so you’ll actually use it effectively)
- How to choose the right planner pens: what to look for when buying planner pens
If you’re tired of drawing up weekly spreads, this printable bundle of 52 different 1 page weekly planners (you can mix and match to create 2 page spreads if you prefer), is available in my Etsy shop and online store.

Like this post? Pin it!


I’ve been using the Planner Pad planner for several years now, and I love it. I use the project boxes for relationship/projects. This helps stay focused on what’s really importance to me
I use different colored pens for each category, but like your idea of using highlighter.
Thanks for your very informative post. I enjoyed it.
Glad you found it helpful! 🙂