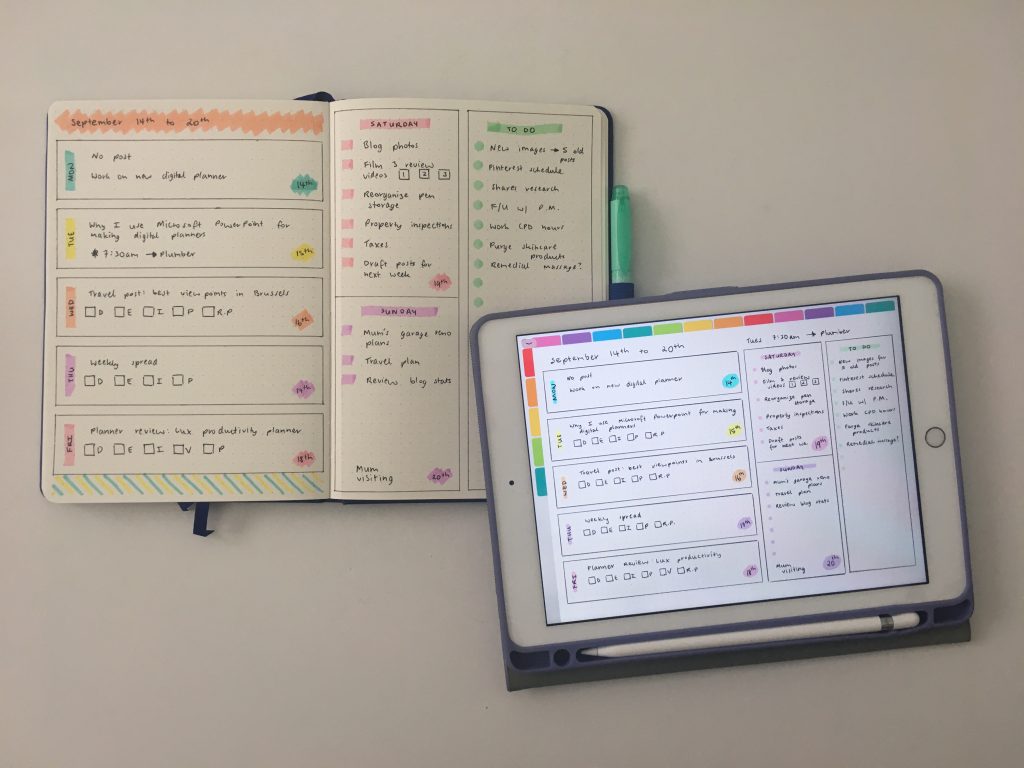
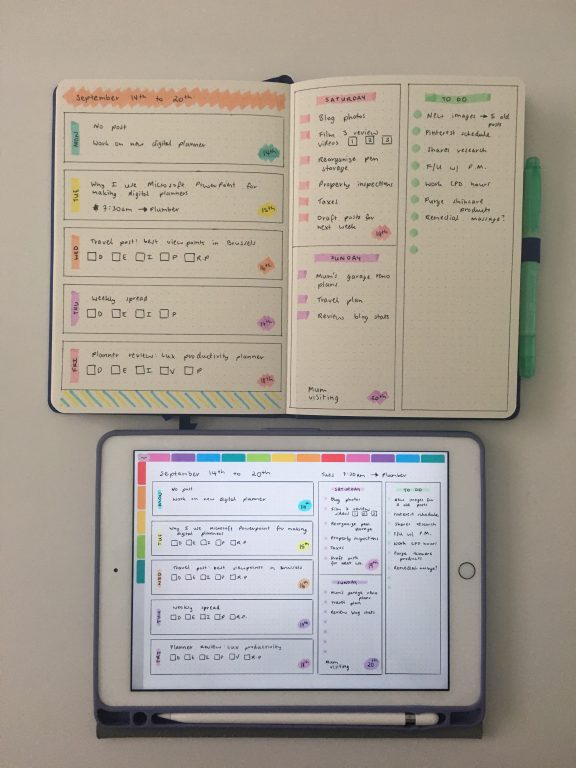
Drawing bullet journal spreads on paper versus digitally on an iPad (which is faster?)
I decided to do an experiment with this week’s spread and compare how long it took to setup the spread on paper versus digitally using the Goodnotes app on my iPad.
Related post: Digital Planner versus Paper Planner: Which is right for you? (Pros & Cons)
Drawing bullet journal spreads on paper versus digitally on an iPad
Bullet journaling on paper
- Took 7 minutes to count out the dots and rule up the spread
- Another 5 to decide on the colors and add the color
- Another 10 minutes to add in blog posts and to do’s
Total time = 22 minutes
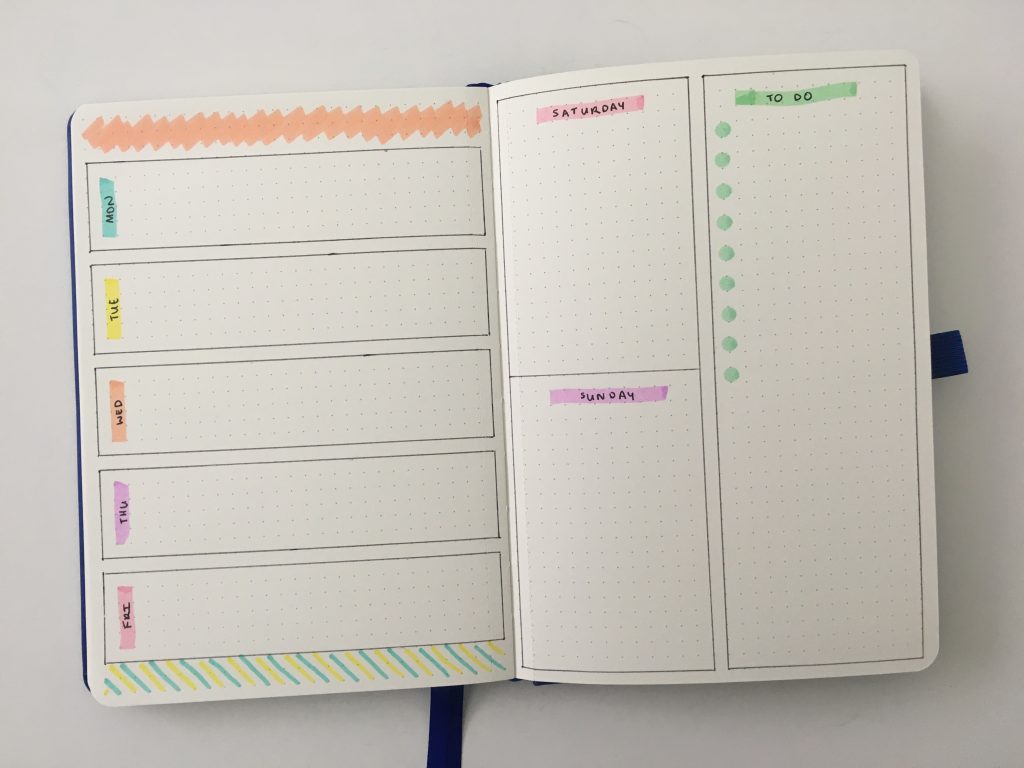
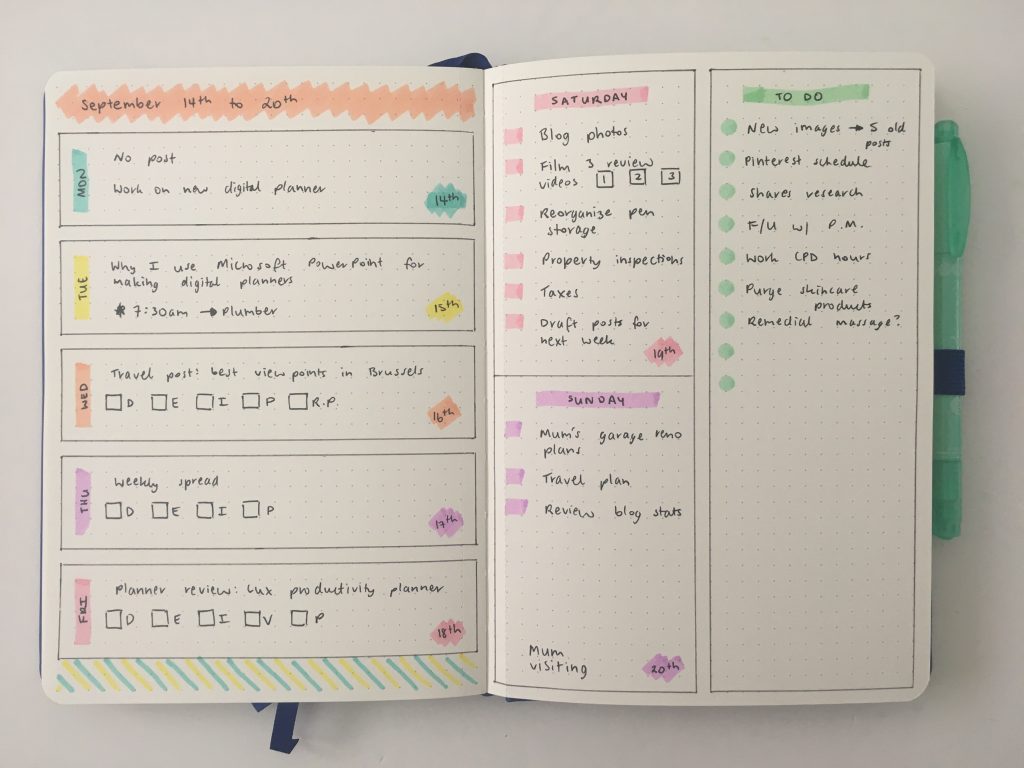
I did a mix of highlighters for the square boxes and the dot markers. I wish dot markers came in more colors!


Supplies used
This list contains affiliate links. If you click one of these links and make a purchase, I’ll receive a small commission (at no extra cost to you), in exchange for referring you.
- J Burrows pastel highlighters (the colors are very similar to the Stabilo Boss highlighters but they’re much cheaper. I got these highlighters from Officeworks)
- Uniball Signo gel pen 0.7mm
- Tombow Play Color K dot marker
- Bullet Keeper dot grid notebook
- Poppin Ruler

Pros of bullet journaling on paper
- Notebooks come in multiple page sizes to choose from, you’re not limited to the size of an iPad screen
- Don’t need to buy an iPad. Paper notebooks and stationery are much cheaper
Cons of bullet journaling on paper
- Limited to whatever colors of the stationery you have – e.g. you cannot do custom color pens
- Counting dots is time consuming
- If you don’t use an erasable pen you’ll waste a lot of money on whiteout
- Cannot duplicate the spread if you want to use again in the future, you have to re-rule it up from scratch (or make / buy a printable and resize for your notebook)
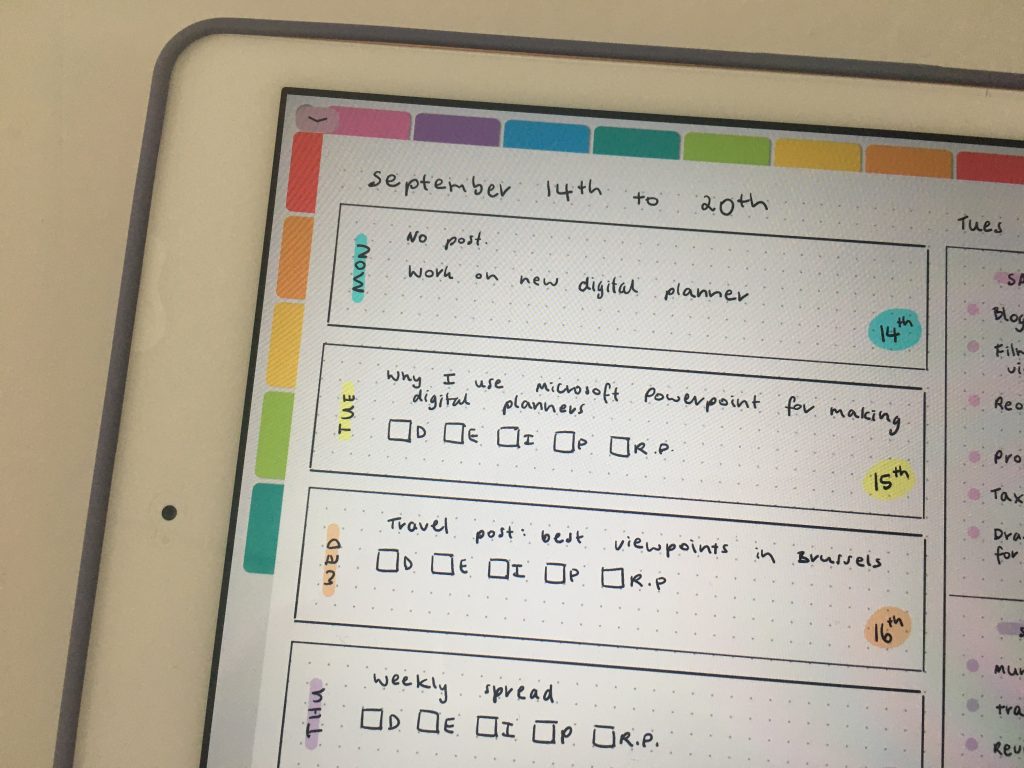
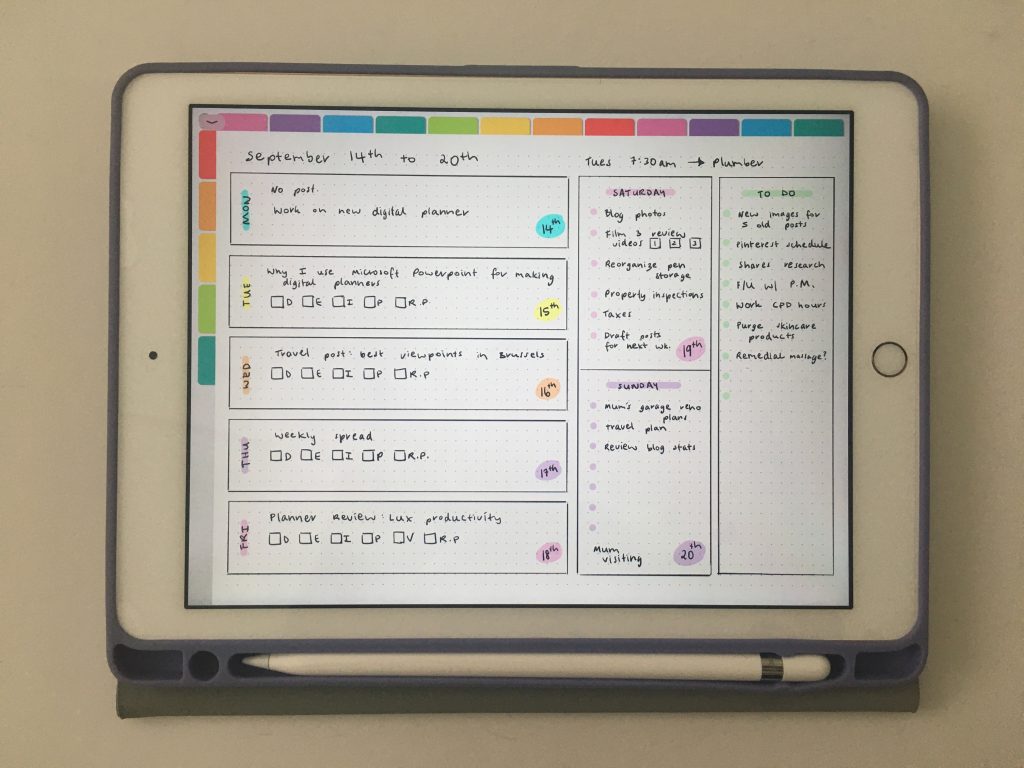
Bullet journaling digitally
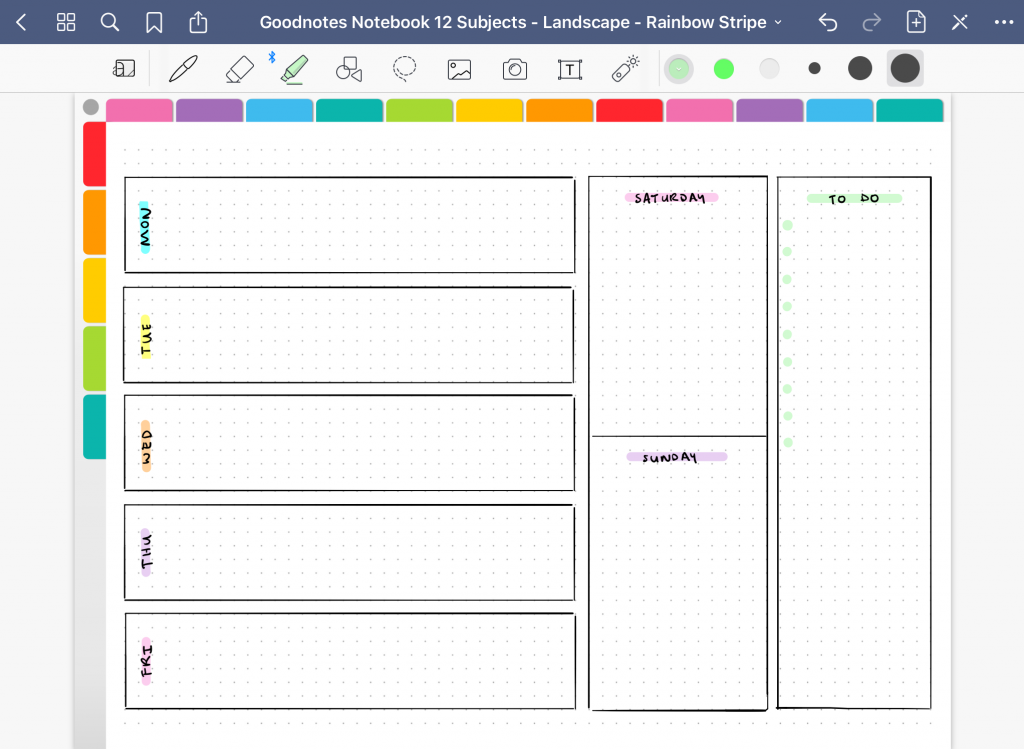
- Took 8 minutes to rule up the spread
- Another 6 to decide on the colors and add the colors into Goodnotes (note: if you were to use the same colors each time and had already saved these for quick reference this would’ve taken less time)
- Another 8 minutes to add in blog posts and to do’s
Total time = 22 minutes
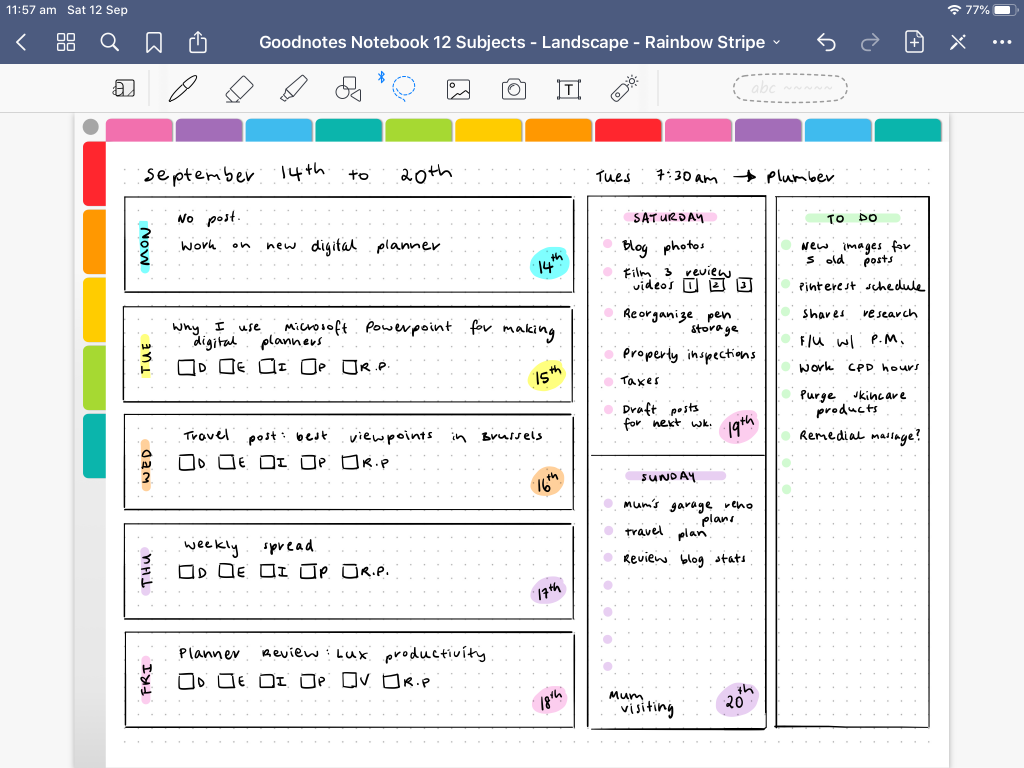
I used the fountain pen option – I think it makes it look more realistic like how a pen would look on real paper
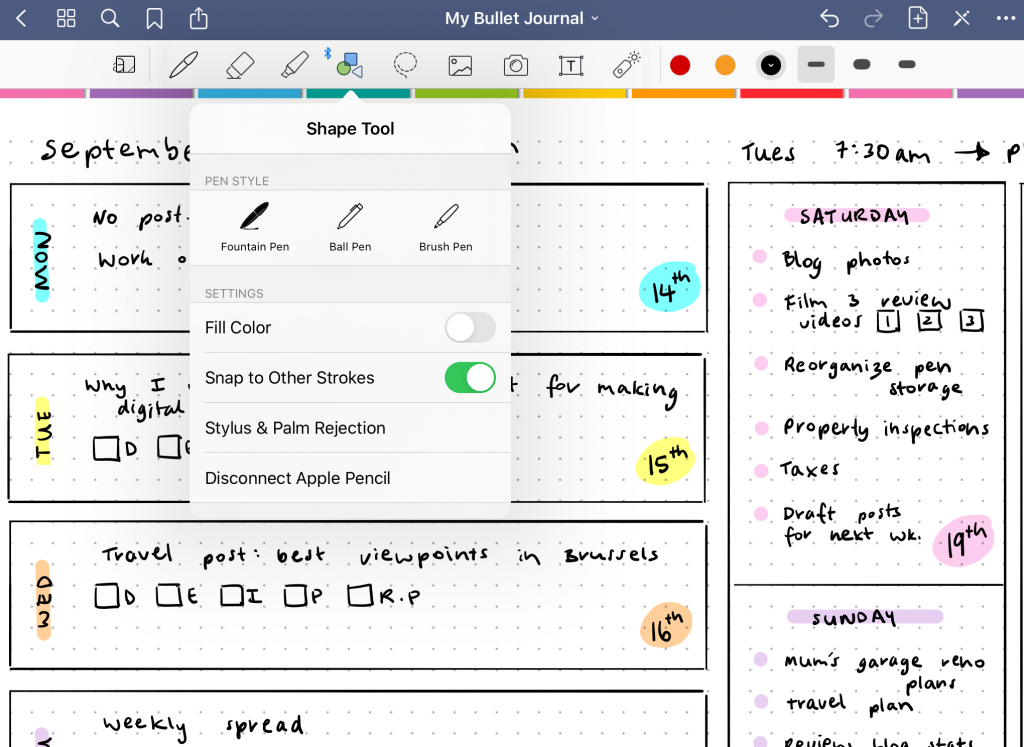
To make the boxes I used the shape tool. The problem with using the shape tool though, is that when I resized the box it keeps it’s proportions. I wasn’t able to make the boxes skinnier and fatter, both the width and length increased or decreased when I resized.
Drawing Lines
The shape tool has a ‘snap to other strokes’ feature under the shape menu – make sure you select this (green oval) – it makes it much easier to draw straight lines
Once I made one box and was happy with the size, it was quick to duplicate it as many times as needed.
It was quicker to use the iPad than paper when setting up the blog tasks as I could just copy and paste my workflow key and the checkboxes.
Adding text
You can either handwrite text using your Apple Pencil or other stylus pen, or Goodnotes has a function that lets you choose a font (like you would on a computer) and type the text instead using your iPad’s on screen keyboard. Sounds good in theory but the tool in Goodnotes is frustrating to use. When I changed the font, font size, border etc. as soon as I closed out of that menu Goodnotes got rid of whatever settings I chose and reverted back to default settings unless you select the ‘Save as Default’ button. Goodnotes appears to only let you choose 1 default font setting.
When I tried to change the font style to bold, italics or underline it wouldn’t let me change that for text I’d already typed, only if I deleted and re-typed it.
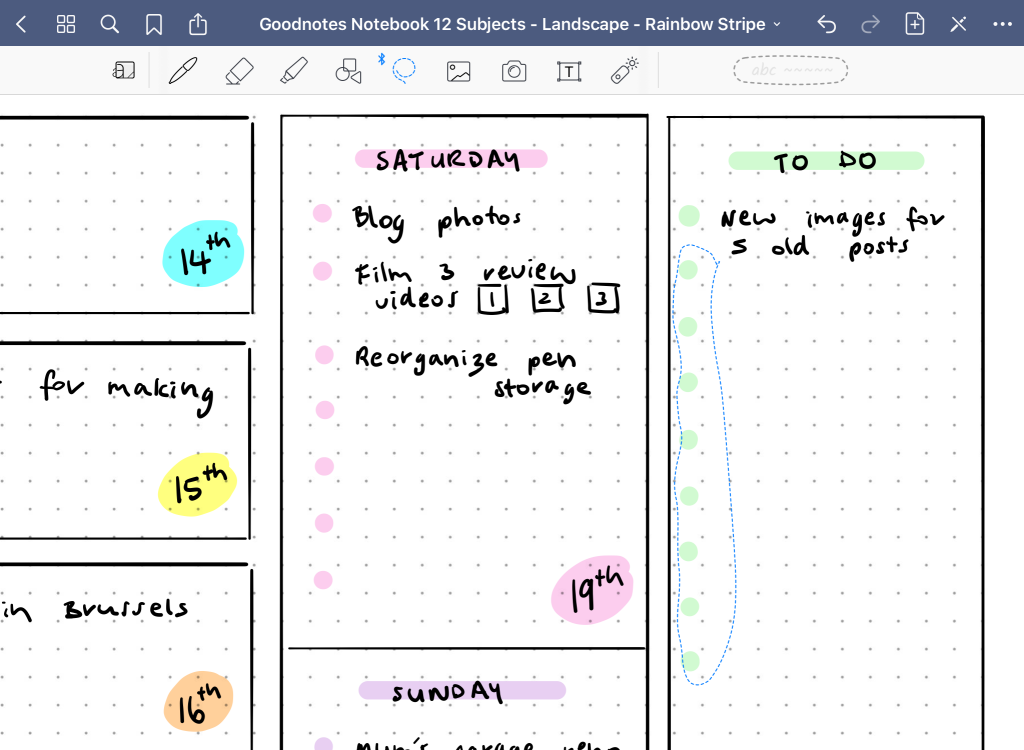
You can resize text after you’ve written it by going to the lasso tool and making sure ‘text boxes’ are enabled (green oval). Tap once on the screen and choose resize from the menu that will appear, then left click and drag the text box out to increase it’s size (or in to decrease it’s size). The font looks blurry but once you tap out of that it becomes crisp letters again.
You can change colors in that same menu that will pop up when you tap the screen. You can enter the 6 digit hex color code, or choose from their colors, or click the circle and pick a custom color.
If you’ve hand-written instead of typed text you can also resize and change colors by using the lasso tool, tapping and holding the Apple Pencil against the screen until the black pop-up menu in the screenshot below appears.

Just make sure handwriting, images and text boxes are all select in the lasso tools’ settings menu

If you don’t own dot markers it’s much easier to do dots digitally as you can just use the highlighter tool and tap once, it’s already perfectly rounded for you.
Supplies Used
- Apple iPad 6th generation
- Apple Pencil
- Rainbow Digital notebook from my shop
- Goodnotes app
Pros of bullet journaling on an iPad
- Use any color you want for design elements, fonts and your own handwriting
- Can change colors after you’ve drawn up the spread
- Can add digital planner stickers (and use the stickers multiple times)
- Make one design element, then just copy and paste it as many times as you need
- Can reuse the weekly spread as many times as you want, just duplicate the page
- If you have repeat tasks you can copy and paste them instead of re-writing out multiple times
Cons of bullet journaling on an iPad
- Drawing lines to create boxes is frustrating – the lines don’t always neatly align. If you want to do a little touch up with the eraser tool even the smallest size will erase the whole line, not just the little bit you want to fix up
- Small screen size. Even if you use an iPad Pro the screen size is smaller than a notebook when open
The verdict
Surprisingly both methods worked out the same amount of time. There was more initial setup (choosing the colors) with the iPad but once you create a template for one day’s box, it’s very quick to duplicate them. I do tend to erase and re-write things more often in Goodnotes since it’s so easy, I don’t do as much white-ing out on paper so the time saved with templates was cancelled out by my perfectionism.
There are some tools in Goodnotes that save time (like the ability to change colors of text you’ve already written), but the erase tool is not very accurate so that takes longer than erasing on paper.
I like different things about each method so I’ll continue using a combination of both digital and paper planning methods.
More digital planning
- Goodnotes: How to crop individual images from a PDF, JPG, PNG, sticker sheet, clipart etc.
- How to resize any printable PDF and add it to your digital planner (in Goodnotes)
- Digital habit tracking in Goodnotes versus habit tracking on paper
More bullet journaling
- 50 Themes for your planner or bullet journal spreads
- 12 Planner Layout Ideas for Monthly Habit Tracking in Your Bullet Journal
- 7 Ways to use dot markers in your planner or bullet journal
Tired of drawing up weekly spreads? This printable bundle of 52 different 1 page weekly planners (you can mix and match to create 2 page spreads if you prefer), is available in my Etsy shop and online store. It comes in US letter size and Happy Planner classic page size.

Found this post helpful? Pin it!