
How to start an Etsy shop selling digital products (and how much it will cost you)
A lot of you follow my blog because you’re fellow planner addicts, and some of you follow because you’re interested in starting your own Etsy shop selling planner stickers or printables. If you’re part of the second group, then read on, as today I’m sharing exactly what you need to start selling digital products on Etsy – both in terms of the time and cost investment, as well as the tools and resources you’ll need.

What types of products can you sell?
Some of the digital items you could sell on Etsy:
- Printable planners (such as those in my shop)
- Printable planner stickers (you could also offer printed, cut and shipped versions of the stickers – my ecourse How to Make Planner Stickers can show you how)
- Printable wall art
- Learning resources such as educational worksheets
- Spreadsheets – such as my spreadsheets for Etsy sellers
- Ebooks such as my ebook for Etsy Sellers and my 2 books for bloggers
- Graphic design resources such as clip art and digital paper that are sold in my 2nd Etsy shop, PaperCravings
- Party invitations (which I teach how to make in this course)
- Labels (which I teach how to make in this course)
There are so many types of digital products you could make!
Cost Investment
How much does it cost to start an Etsy shop selling digital products?
Selling digital products is one the cheapest business’ you can start. You only need 3 things to get started:
- Computer
- Printer
- Software (and knowledge of how to use it)
You’ll probably have the first two already and the third can be be purchased inexpensively.
Later in this post I’ll be sharing each of the tools and resources I use and the cost of each. But first I want to discuss another important investment: your time.
Time Investment
As with anything that’s worthwhile doing, it is time consuming to set it your Etsy shop up in the beginning. It’ll take a while to build up inventory and all the behind the scenes things people forget such as:
- Making product photos
- Learning and homing the skills required to make your products (do not skip investing time in this step!)
- Creating templates for your products
- Writing sales copy
- Setting up social media channels (I recommend focusing only on Pinterest in the beginning and then later expand to Instagram and Facebook groups)
- Setting up email accounts
And later on, things like bookkeeping, trademarking your business name, starting a blog if you choose to do so etc.
Where does the time go?
The first year I ran my shop it was just a fun hobby. I listed a few of the printable planners I was using to stay organized on Etsy to help save some extra money for a trip to the USA.
I was intending to close my shop and focus on my university studies and getting a job in my field before graduating, but when I came back from the USA it was too an inbox flooded with people asking when my store would be reopening. I figured why not just leave it open? I was creating hardly any new stuff but I was still earning a tiny bit of money from the shop.
Some time later I decided why not turn this little hobby into a proper business? And so I did. I registered a business name, got a trademark and also opened an online store outside of Etsy. I host my online store using Bigcommerce. I did a detailed post on why I chose them over other hosted shopping cart eCommerce options such as Shopify in this post.
Related: Why I use Bigcommerce to host my ecommerce online store
When I decided to take my shop seriously, I was spending about 30 – 40 hours per week on the shop, on top of full time university studies (and maintaining an honours level GPA) as well as working 15 hours per week part time. Busy, busy, busy! It helped that making printables and planner stickers is my favorite thing to do! 🙂
You don’t have to spend that much time to get your shop going – it depends how much money you want to make and how fast you want your shop to grow. I saw a direct correlation with the more time I invested into my shop as it meant more products. In my case, more products = more revenue. To be honest, I did waste a lot of time on things that didn’t have a lot of monetary return. Products that I had a gut feeling wouldn’t be popular but I made them anyway. Not a good idea! My motto now is:
‘If it doesn’t make money, it doesn’t make sense’ (someone famous quoted it but I can’t remember who!)
Here’s where I spent most of my time:
- Designing products
- Writing listing descriptions
- Creating product images
- Pinning to Pinterest (which was my only marketing strategy back then)
Only about 50% of my time was spent designing products -the behind the scenes stuff takes a lot longer than you think!
Now that it’s been a few years, where I spend my time has changed. I’ve shifted from working in the business to working on the business, as well as focusing more on marketing. I have my Etsy shop set up to run on autopilot as passive income.
I’ve since switched from maintaining to growing. The only things I need to do to maintain the shop and keep earning passive income are:
- Reply to customer queries
- Update keywords every few months
- Renew expired listings (which you can set Etsy up to automatically do for you)
I occasionally create new products but now my focus has switched to marketing including blogging, Pinterest and Instagram. As well as creating ecourses to teach what I do. I have 930 items in my shop – for the various price points and the product mix I have – that is sufficient in to bring in a reliable income each month.
Note that it took a couple of years of diligently working on the shop to build up that passive income – it won’t happen overnight!
One thing I’ve realised over the years is that it’s so important to have a presence outside of Etsy. Not only to promote your Etsy shop, but also to build a connection with customers (and potential customers) – you can’t rely solely on Etsy for traffic!
Related: 13 Lessons learned after 13,000 Etsy Sales
Do you need a blog?
You don’t have to blog to promote your Etsy shop. Instagram is a form of ‘micro-blogging’ these days and is excellent option if you’re time poor.
If you do want to start a blog. I use Wordpress as my blogging platform, then Bluehost to host my site. If you’re not sure what all this means, I explain further in this post.
Related: How to start a blog (step by step tutorial)
The Right Product Mix
You’ll want to maintain a mixture of low, medium and high priced products. Because the only real ‘cost’ of making a digital product is your time (apart from some graphics which are only a couple of dollars), there is typically a direct correlation between how much time it takes to make, and how much the product costs.
When you’re just starting your shop you’ll want to have a lot of low cost products. This way you’ll be able to stock your shop quicker, and start building a customer base. People tend to buy low cost products first to test out the quality and see whether they like your product, then I find they come back and buy your medium and high priced products.
I go more into how to maintain the right product mix in my ebook: 53 Mistakes Etsy Sellers Make (and how to fix them)

After you’ve got around 50 – 100 product listings (this of course, varies depending on what products you’re selling and how line it takes you to make them), you’ll want to start making some medium and high priced products.
The quickest way to do this is to bundle products you already have. I have various bundles in my shop including:
- Get it all printable planners
- Choose your own sticker bundles
- Printable planner kits e.g. Etsy business kit, budget binder
Same products but with a discount. That way you make more money with no extra effort (other than creating an image for the bundle) and customers get a great deal 🙂
If you want to sell digital products in not going to lie – they can take a long time to create. A printable planner in my shop can take as much as 100 hours to create and convert into editable off pdf file format. I don’t say that to discourage you, I tell you that because I’m a perfectionist. The great thing about digital products is that it can take as long or as short as you want them to take to make.
I have a lot of planner pages in my kits so it takes me longer to make them. There’s no right or wrong or standard you have to follow – I choose to include that many pages as that’s hoe many I feel they need to give the user s variety of ways to plan. One way to speed the process Up, though, is by investing in ecourses. That’s why I’m so passionate about creating and selling ecourses filled with all of the tutorials I wish had been available when I was first starting my business.
What platform should you use to sell your digital products?
Once you’ve made some products and are ready to start selling them, you have a couple of options:
Selling via Etsy
If you’re thinking about starting an Etsy shop selling digital products it’s easy to do so with just a few dollars.
I started my Etsy shop in January 2013 – I spent $20 on Etsy listing fees. I made my first sale 4 days later for $40 – not a bad return on investment! Especially considering those products can be sold over and over and over again.
Etsy only charges you $0.20 per item and then 3.5% commission. There’s also PayPal fees or credit card payment processing fees. All up about 10% of the sale price goes to selling expenses. This is much lower than physical products where the cost of the goods plus packaging etc. is typically 50% to 70% of the selling cost.
Selling via a marketplace
I recommend starting out on Etsy, then using an ecommerce hosted shopping cart. The reason being is that Etsy is known as the ‘go to’ place for digital products from printables, to planner stickers, to wall art etc. so it’s a good way to start building up a customer base.
Etsy lets you have up to 5 product photos per listing. In instances where you don’t need them all, I recommend adding an image like this:
With digital products you can’t send a business card with the order, but you can include a PDF or image file with the downloads to help drive visitors to your social media platforms and email list (I use ConvertKit – tutorial on how to set it up is in this post). This has proven very effective at growing my customer base.
Related: How to set up ConvertKit and how to make a subscriber opt in image video tutorial
I discussed in more detail the different platform options of where to sell your digital products including pros, cons and other things to consider in this post.
Start up expenses:
So if you want to give this digital products business a go, to get started you’ll need a laptop and software. I also highly recommend investing in an ecourse so you don’t waste hundreds of hours (or in my case, a couple of years), learning the ins and outs of how to use software to make printables.
Laptop
I’m onto my second laptop in 5 years – I recommend upgrading every 3 years. This is the biggest expense you’ll incur. You may already have a computer or laptop which you can use when you’re just starting out, but if you want to run powerful software such as Photoshop you may need to upgrade.
Some of the things you’ll want to look for when choosing a laptop:
- Good graphics (Core i5 or i7 graphic card)
- Plenty of ram (mine is 16GB – this makes your computer run faster)
- At least 1TB of storage (digital products = a LOT of files. In addition to my laptop’s hard-drive I have multiple external harddrives as well as automated cloud storage / backup via BackBlaze (only $5 / month) – just in case!)
- Large screen – I don’t recommend 13″ screens – they’re rather small so it makes it hard to see all the details when designing. I use a 15’6″ screen
Related: The 5 Electronic Devices I Use to run my Business
Laptops can cost as much or as little as you want. I recommend buying one that is $1,000 – $1,500. In this price range you’ll be able to get one with decent graphics, RAM (speed) and storage for all your files. Note that I live in Australia – laptops are probably cheaper in other countries – especially the USA.
I have a Toshiba laptop (my first laptop was also a Toshiba – love them!)
Approx cost = $1,000 – $1,500

Software
There’s a few different software you can use to make digital products.
If you’re selling ebooks then Microsoft Word or Apple Pages is fine. If there’s a lot of graphics, Canva is a free option.
But for anything else including printables, planner stickers, wall art etc. – I recommend Photoshop. You can use Adobe Illustrator or InDesign but I personally found those software too overwhelming and hard to use.
I use Photoshop for everything I design: planner printables, planner stickers, party printables etc. A Photoshop subscription is only $10USD (around $15AUD) per month (see this post for a tutorial on how to download and install).

To password protect PDF files I use Adobe Professional. You can get this as part of the Adobe creative suite (with Photoshop).
Adobe Professional is not to be confused with Adobe Reader which is a free software that you can only open PDF files with – Adobe Professional lets you create PDF files.
Canva’s paid plan is $10 per month and so is Adobe Photoshop – so in my opinion you may as well get Photoshop as it’s MUCH more powerful than Canva, produces a higher image quality and has way more design tools.
Approx cost = $20/month ($240/year) for Adobe Photoshop and Adobe Professional
Typical ongoing expenses:
If you’re wondering what the ongoing costs are, apart from the Etsy listing fees and payment processing fees, here’s a look at my typical monthly expenses:
Graphics
When you’re just starting out, I recommend focusing on making the end products using resources already created my someone else – this will speed up your design process. The more products you have in your shop – the more likely people are to find you (just remember, quality over quantity). Etsy has hundreds of shops that sell cute commercial use allowed graphics for only a couple of dollars!
I very rarely paid more than $1 for a graphic and digital paper sets – buy in bulk so you can get them for cheap and don’t be afraid to ask the seller for a discount if you’re purchasing 10 or more of their sets(I’ve only been told no once when I asked for a discount).
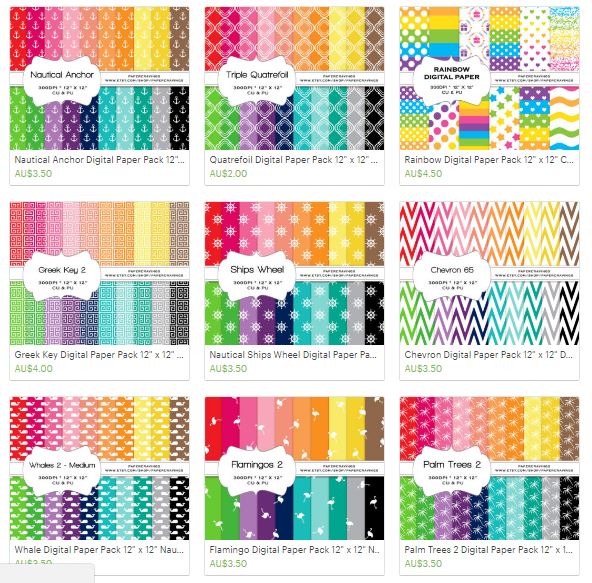
Some of the cute rainbow digital paper you’ll find in my second Etsy shop, PaperCravings
If you want products that require a licence then these usually cost $10 – $20 per set. In my opinion buying graphics that require those licences is not necessary – there are plenty of graphics out there for cheaper than that and which don’t require a licence.
However, if there is a graphic that you can only get from a certain seller and you can’t find it anywhere else – don’t waste hours searching everything just to save a dollar or two. Given how much profits can be made off digital products, graphics (which you can use over and over again in multiple products), are in insignificant expense.
I started out using digital paper I bought from other Etsy sellers. These are great but it comes to a point where you’re probably going to want make your own patterns in the size and scale you want, in the colors you like etc. It also looks awkward when a customer wants a custom color and you don’t know how to give them that!
You can do minimal designs in black and white but I like to add color. I make my own patterns (I teach how to make them in my ecourse: How to Make Patterns in Photoshop and Monetize your Designs). If you don’t know how to make your own or you would rather save learning how to make patterns for later,
Approx cost = as much or as little as you like. I’d say $10 / month or $120/ year
Fonts
I have only paid for a font once. There are thousands of free commercial use allowed fonts just waiting for you to download them!
My favorite font resource websites are:
Related: How to download and install custom fonts on your computer
If you sign up for a Creative Market account they share a lot of free graphic design resources via their email list – a free font is usually included.
When downloading fonts, be sure to check the terms of use. You’ll want to download commercial use fonts. And be sure to check if credit to the designer is required.
Approx cost = there are so many cute free and commercial use fonts that I don’t recommend paying for fonts, especially not when you’re starting out
Color tools
Good news – color tools are free! Some of my favorite color tools are:
I explain more about why I like these color tools in this post.
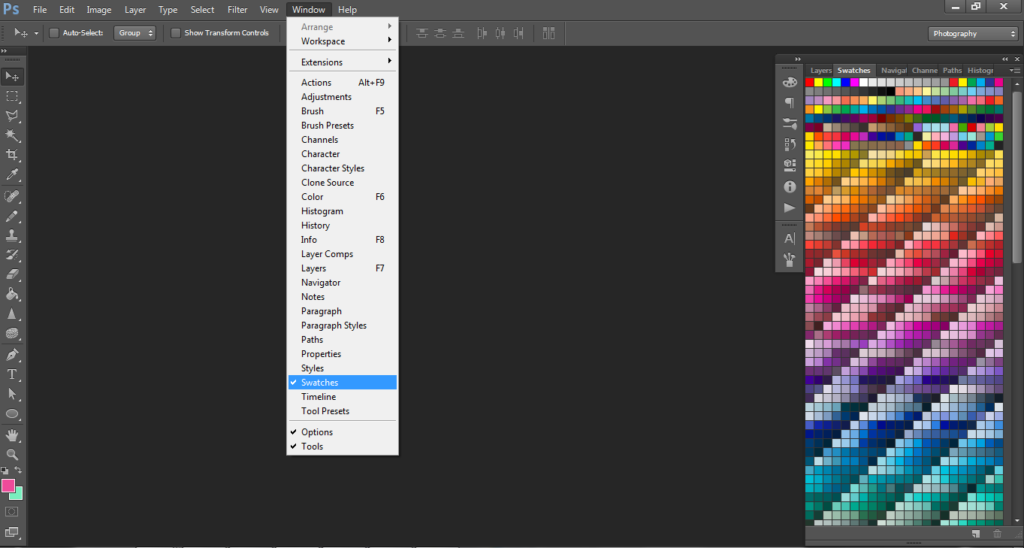
I also like using Photoshop’s Color tools which come as part of the software. I did a video walk through / tutorial on how I use them in this post: How to use the color tools in Photoshop.
Approx cost: free
Ecourses
If you want to know how to make printables for planners or party printables or labels of planner stickers or patterns to use in your designs, then an ecourse is the best way to learn. I spent years of frustrating trial and error self teaching myself how to create digital products, If you want to skip all of that (trust me when I say it was an excruciatingly slow and frustrating way to learn) then see my ecourses website.
I also have a free graphic design tutorials library:

Approx cost: $100 – $500 (worth every dollar!)
Marketing
I mainly use free methods of marketing my shop including Pinterest (highly recommend), Instagram and commenting on Facebook groups.
I did make a Facebook page for my shop but never saw a return with people clicking on my posts. It takes longer to grow as people don’t know you have a page unless you tell them – unlike Instagram and Pinterest which are keyword search based so it’s like 100 times easier for people to find you.
I don’t pay for Etsy advertising via promoting listings. I’ve tried it on a couple of occasions, made tweaks and test tried and they never earn me my money back. They’re also really expensive.
I recently upgraded to Planoly’s paid plan (only $7 / month). The reason I use this tool is so I can upload photos from my computer, add tags and links using my computer keyboard (I hate the tiny keyboards that come with phones!). You can also schedule posts and it’ll send you a text to remind you it’s time to post it.
I use Boardbooster ($10 / month) to re-pin pins for me.
I use Tailwind to schedule pins to be pinned.
Boardbooster re-pins existing pins whereas Tailwind pins new pin at a time you schedule. I’ve found it more effective to pin a couple of things throughout the day rather than all at once – Tailwind will do this for you!
Related: What expenses can I claim? Free printable tax deductions checklist

Approx cost: This is another of those expenses that can be as much or as little as you like. I’d say around $50 / month. You can get away with spending nothing on marketing but it’ll be harder to get people to your shop and hence, your income growth will likely be slower.
Cloud Storage
It is so important that you back up your files in multiple places. Saving them to the hard-drive of your computer is not enough! I like to back up things in 3 places:
- Computer’s hard-drive
- An external / portable hard-drives
- Cloud storage
I also use Backblaze which automatically backs up files and runs in the background (I don’t even notice it – it doesn’t slow down my laptop)
So, in summary, this is how much you can expect to spend:
Setup costs
- Laptop = $1,000 if you don’t already have one
- Printer = $150 if you don’t already have one
- Software = $20 / month ($240 / year)
- Initial Etsy listing fees = free – get 40 free listings by using my referral link 🙂
Total startup costs = approx $1,500
Ongoing costs
These will vary but here are some indicative costs:
- Printer ink = $20 / month
- Etsy fees = approx $100 / month
- Graphics = $10 / month
- Fonts = free 🙂
- Color tools = free 🙂
- Marketing = $50 / month
- Email software (I use and recommend ConvertKit – they’re starter plan is) = $30 / month
- Backblaze (automated file backup) = $5 / month
Total monthly running costs = approx $220 / month
Total annual running costs = approx $2,640
Related: What Expenses Can I Claim? FREE Printable Checklist of 100 Tax Deductions
These expenses are much cheaper than if you were to start, well, any other type of business! A digital products business is much, much cheaper than starting a ‘traditional’ business selling physical products. Plus with digital products you don’t need to spend time packaging orders – once a product is created the work is done and you can sell it an unlimited number of times and continue earning money from it year’s down the line. There are many other reasons why I prefer digital products:
- You aren’t dependent on suppliers that can control the cost of goods – especially bad if they’re the only place you can get products from
- Products never go out of stock, on back order or are randomly discontinued (my sister sells physical products – planner supplies – and this happens far too often!)
- No cost of goods sold (i.e. cheap!)
- Don’t need to waste time queuing at the post office
- Can run the business from anywhere in the world that has an internet connection
- Your store can stay open even while you’re on vacation. I’ve only closed my shop once – when I went away for 4 weeks. Now if I went on a holiday for that long, I’d just leave the shop open and reply to customer queries on my iPhone
- The shop can run without you so if you get sick, you’ll still be earning money on autopilot
Other tools worth a mention
- Shop Shaper (they’re trial period is free otherwise it’s only $1 for 24 hour access… so basically free 🙂 Tutorial on how to use it here
- Marmaled for keyword research – How to do market research for your Etsy shop or online business using Marmalead (review includes video tutorial)
- Shop spreadsheets (I made these for my sister and I to use for our Etsy shops – they’re available in my shop!)
I did a roundup of more of my favorite tools & resources in this post: Must have tools for Etsy sellers, bloggers & creative online business owners
Where should you start?
If, after reading all of that, you’re feeling a little overwhelmed – don’t be! This is what I recommend you do to get started:
1. Choose what type of product you want to make and sell
There are so many type of digital products you could create – choose just one to focus on. For me that was planner printables and after I had established myself as a go-to place for planner printables, and only then, did I expand into planner stickers etc.
2. Make a couple of products and list them in your shop
My shop really started gaining traction when I had 200 + listings – but always remember – quality over quantity. I recommend having 50 product listings when you open your shop.
3. Keep at it
Don’t be discouraged – it can take a while to gain traction. If you keep at it – digital products are not a business that can ‘fail’ – it’s not like you’re wasting money on inventory. The only materials you need are graphics and because they’re digital they won’t ever ‘expire’ so you can keep using them over and over again for years to come.
4. Keep honing your skills
Keep learning new ways to make printables, create new templates and designs. Make your designs stand out so that when people see them, they know that you made it. For example, the rainbow colors I use and the chevron pattern in my printable planners are very distinctive!
And most importantly… have fun with it! 🙂
Helpful resources:
- My ecourses including the free graphic design tutorials library
- What Expenses Can I Claim? FREE Printable Checklist of 100 Tax Deductions
- How to effectively use and make an Etsy shop banner (step by step video tutorial)
- How to make a logo for your Etsy shop (with step by step video tutorial)
- How to do market research for your Etsy shop or online business using Marmalead (review includes video tutorial)
- Simple spreadsheets to keep track of business income and expenses for tax time
Found this post helpful? Pin it!
Disclaimer: This post contains affiliate links and links to some of my paid products. Thanks for supporting my business!

Thank you so much for this! I recently started a blog and have been wondering about creating a freebie. This helps me start on that, as well as helping me see other products that I can create to start earning extra money. Thanks so much!
You’re welcome! Glad you found it helpful 🙂