How to make a printable with PicMonkey (Step by step tutorial including video)
By far, one of the questions I’m most frequently asked is ‘what is the best low cost software for making printables?’ I’ve previously done tutorials showing how to make a printable using Canva, Google Sheets (which is like a free only version of Microsoft Excel) and Microsoft Word.
PicMonkey is another online tool you can use. I tried it years ago when it used to be free however now it is a paid subscription only. Back then I found it to achieve much the same results as Canva but with a more clunky / slower to use tools menu. As it’s no longer free I expect the tools to have improved and wanted to provide another option for you if you don’t want to upgrade to more expensive design programs like Photoshop. There is a 7 day free trial of any of the plans. Because there are a few extra features in the Pro Plan I opted to do a free trial of the Pro plan and see if it’s actually worth paying the subscription to use it.
Disclaimer: This post contains affiliate links. If you click one of these links and make a purchase I’ll receive a small commission (at no extra cost to you) in exchange for referring you. As always, all opinions are my own.
PicMonkey Pricing
If you’d like to try PicMonkey, click here
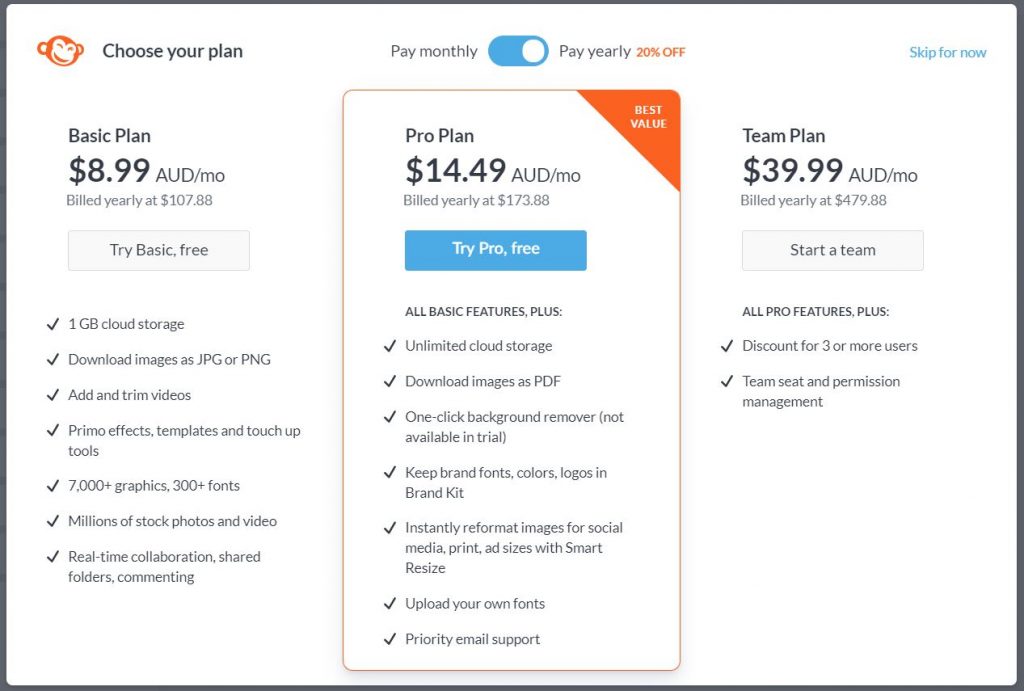
Basic Plan
- Monthly plan = $8 USD / $12 AUD per month
- Annual plan = $72 USD (works out $6 USD per month) / $108 AUD (works out $9 AUD / month)
Pro Plan
- Monthly plan = $13 USD / $19 AUD per month
- Annual plan = $120 USD (works out $10 per month) / $173.88 AUD (works out $14.49 AUD / month)
You’d only need the Team Plan if yourself and some friends all wanted to use PicMonkey.
If you like how PicMonkey works (there’s a video tutorial and step by step written instructions you can work through later in this post), and if you’re going to be making a lot of printables, it would be worth upgrading to the Pro Plan for these extra features:
- Download image as PDF (PDF is usually a smaller file size than JPG or PNG and is the format – I’ve found – most office supply stores expect if you want them to print a printable for you)
- Unlimited cloud storage
- Upload your own fonts
- Keep your favorite colors and logos saved for quick reference (if you want your printables to look consistent this will save time)
- Instant reformat tool
To start a free trial of PicMonkey, choose one of the pricing plans on this page
How to make a printable using PicMonkey
To enlarge the screen of the video, click the square icon in the bottom right hand corner of the video (it will say ‘full screen’ when you hover your mouse over the icon).

Subscribe to my YouTube channel for more planner videos!
If you’d like to try PicMonkey, click here
If you’d like a copy of the printable I made, I’ve added it to the free printables library. Existing subscribers can login and download here.
Mentioned in the video
- How to make a weekly planner using Canva (free online design program)
- How to download and install custom fonts on your computer (and where to find them)
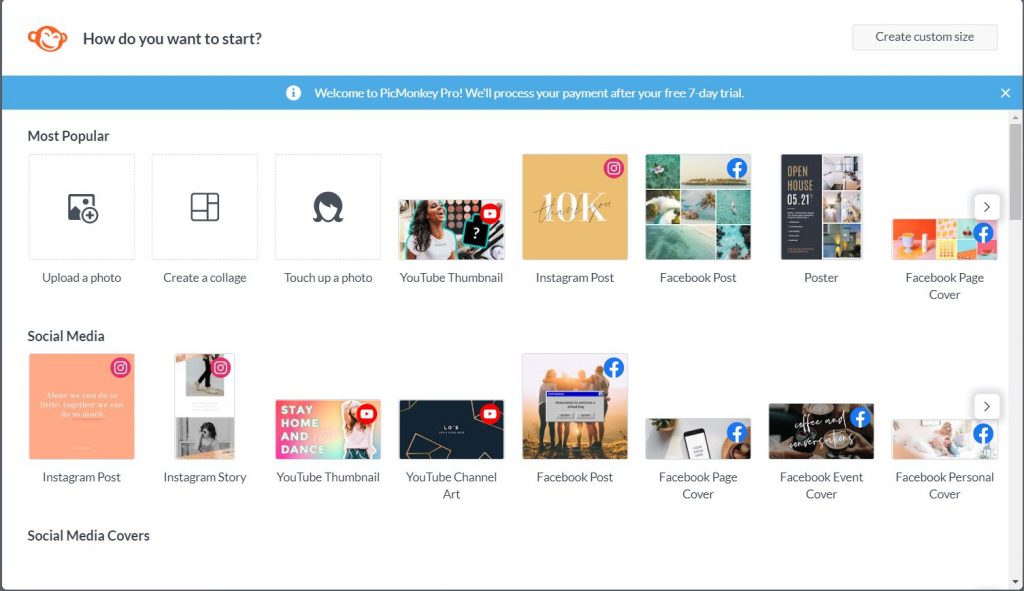
Step 1: Choose your template & Page Size
Once you create an account you’ll see this menu where you can choose from various pre-made templates including social media, invitations and cards. Since there aren’t many pre-made printables templates we’ll create our own by clicking the ‘create custom size’ button in the top right corner.
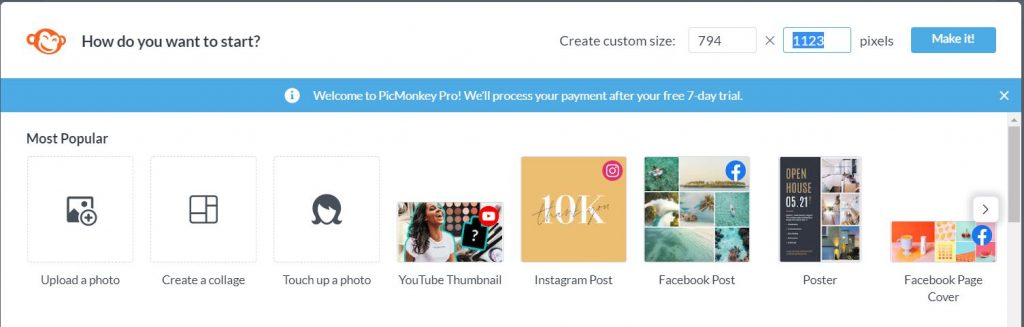
You can choose whatever page size you like. See this post for a size guide of planners (e.g. if you want to make printables to add to your Happy Planner)
If you aren’t sure what page size to make your printable I would start will full page size. 8.5 x 11″ US letter size or A4 page size for those in Australia & the UK. You can always resize.
I couldn’t find an option to change the unit of measurement from pixels to mm or cm so used an online pixels to mm converter. The pixels seem to differ for the page size depending on what print quality you want. I made an A4 size printable using 784 x 1123 pixels.
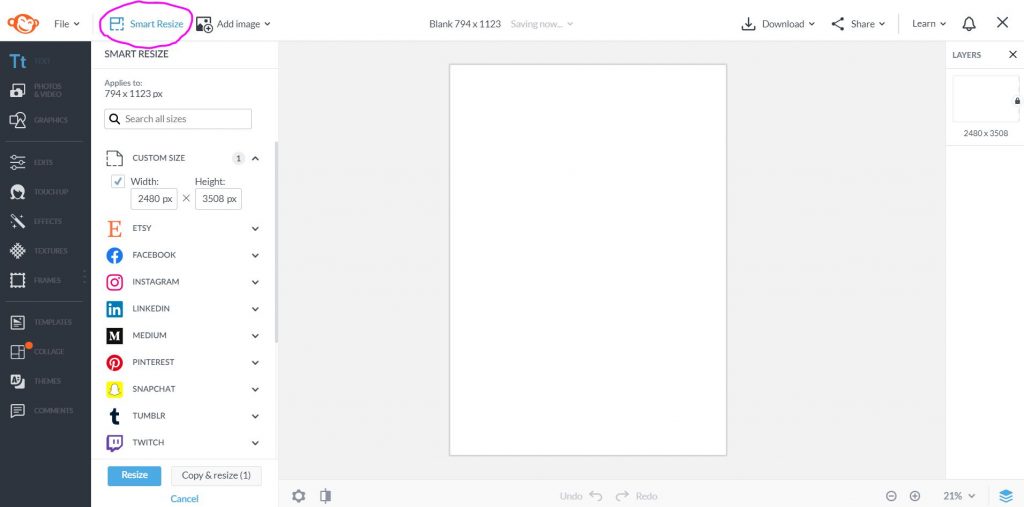
Note: If you change your mind about the page size, if you have the Pro plan you can change it by clicking ‘smart resize’ and entering in the new dimensions. You can then either resize that template or save the original template and create a new one at the different page size by clicking ‘copy and resize’ (I recommend the 2nd option).
Step 2: What do you want to make?
Some of the printables you could make in PicMonkey include:
- Daily planner
- Weekly Planner
- Monthly Calendar
- Checklists (including themed checklists e.g. weekly cleaning checklists)
- Recipe pages
As I’ve already done tutorials for most of those in other design software, I’m going to make a budget printable.
If you don’t want to start from scratch there are a few daily, weekly and monthly calendar templates you can customise from the templates menu.
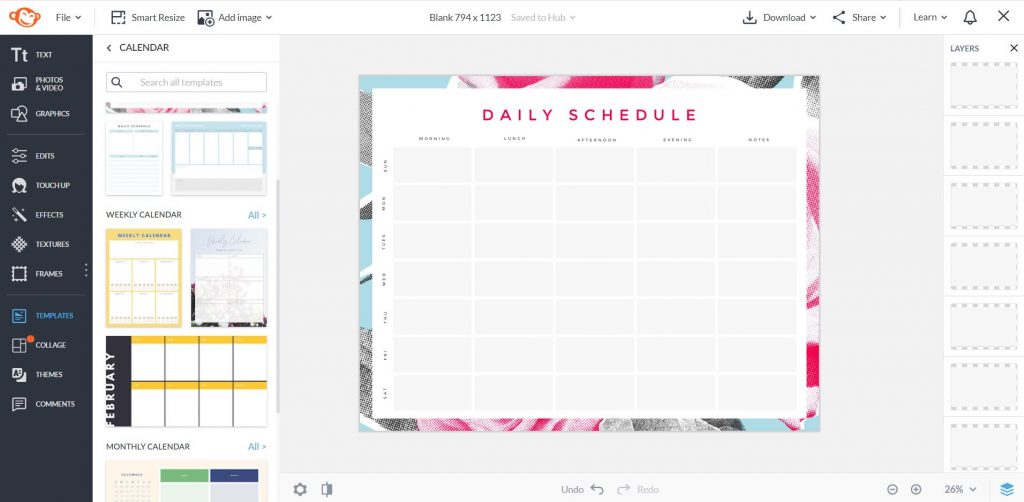
I was experimenting with some of their pre-made templates when I had a portrait page orientation template and it automatically proportionally switched to landscape page orientation as per the PicMonkey design while keeping the page size I had chosen – very useful feature!
When designing I’ll generally make a basic template and worry about the colors and patterns later on, so let’s start with the structure.
Step 3: Make the Template
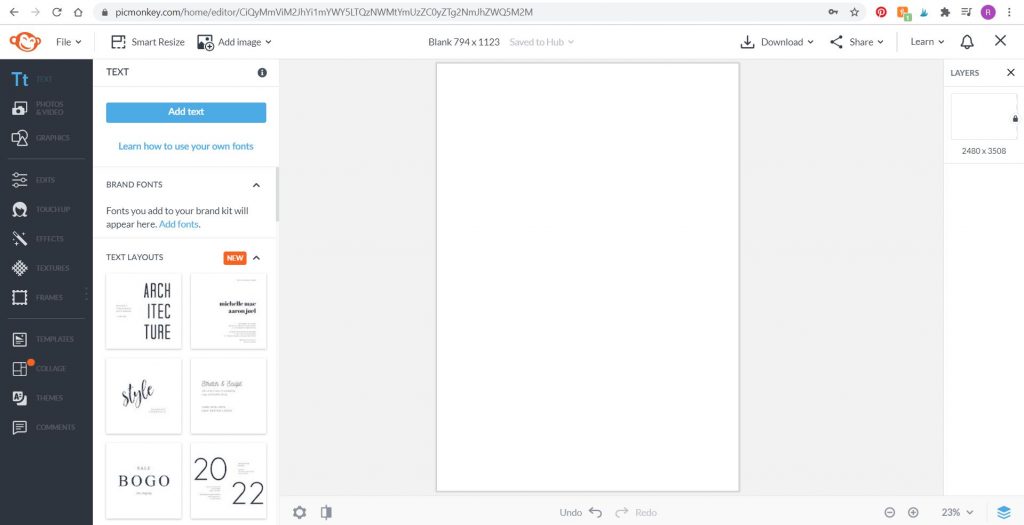
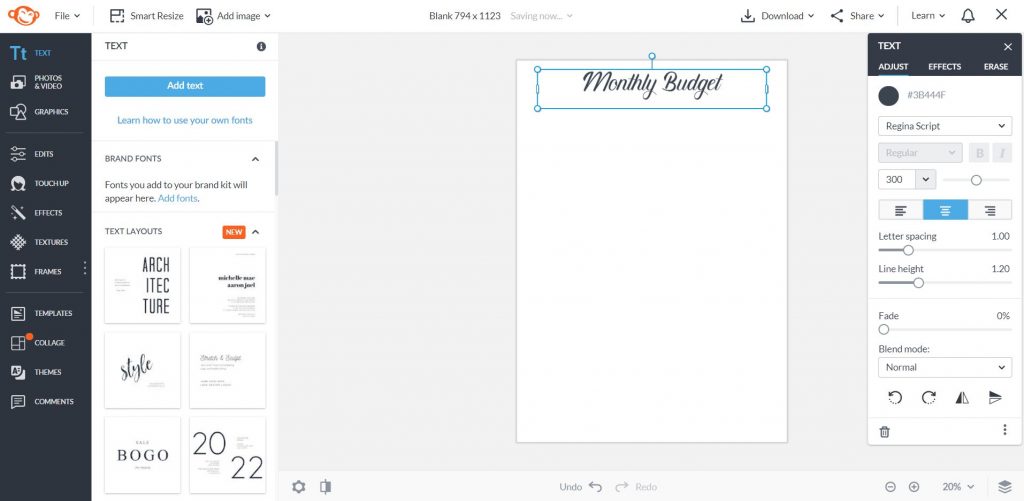
I like to start with the title. Go to the text menu and click ‘add text’
You can reposition your text by clicking on it (a box will appear around the text to help you move it, but this will not appear when printed). A red line will also appear to help you align text to the centre of the page, and horizontally and vertically with other text on the page.
You can right click and copy any text. That way you don’t have to keep clicking the ‘add text’ button, choosing the font, font size etc.
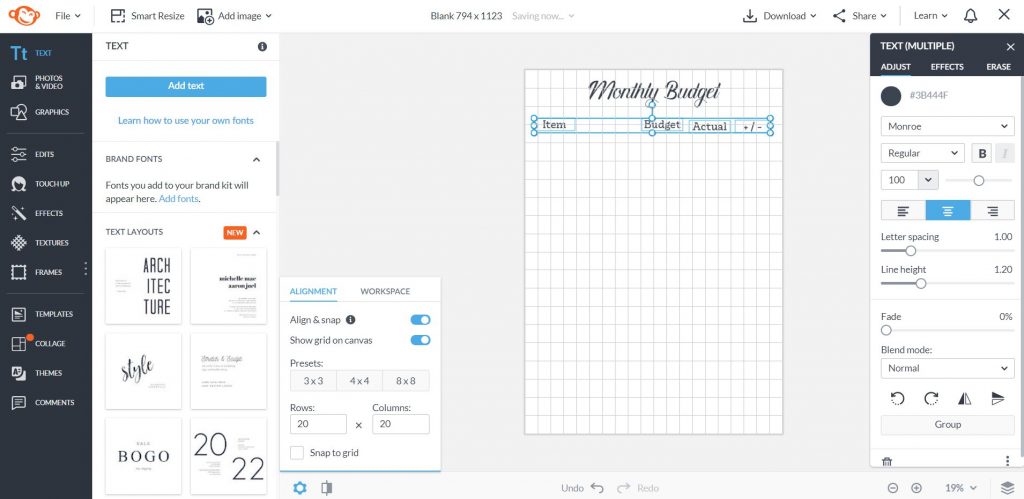
There doesn’t seem to be an align menu or vertical, horizontal, centre etc. align buttons like there is in Photoshop which is disappointing – there’s only the red guide lines that appear when you move things around. You can turn on a grid by clicking the icon in blue in the image below at the bottom of the webpage to help align.
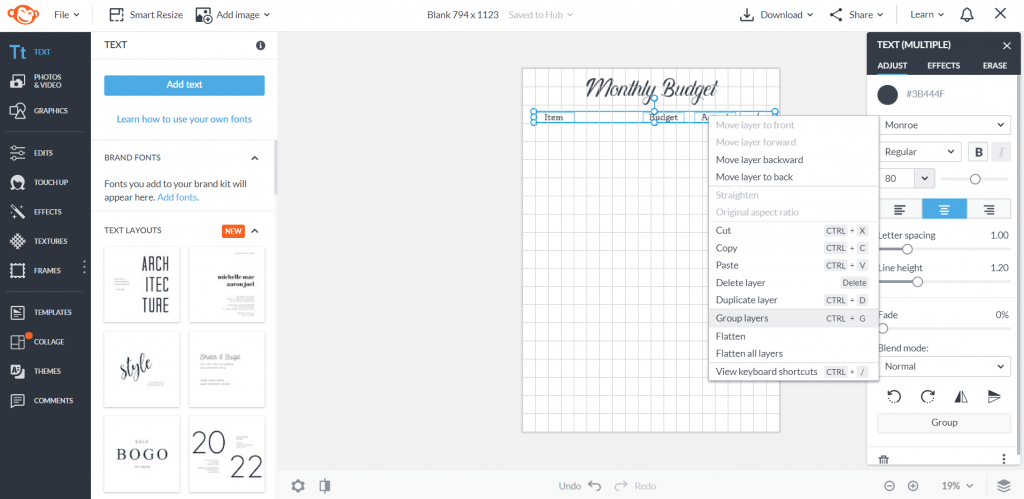
If you want to move elements together instead of wasting time individually shifting things around and re-aligning them. Click one (e.g. text), press the shift key and click all of the text, graphics or other elements you want to group together. Then right click and select ‘group’. Now you can click on those elements and drag your mouse to re-position them on the page. You can also change the text size and font style for any text all at the same time, if you have grouped together.
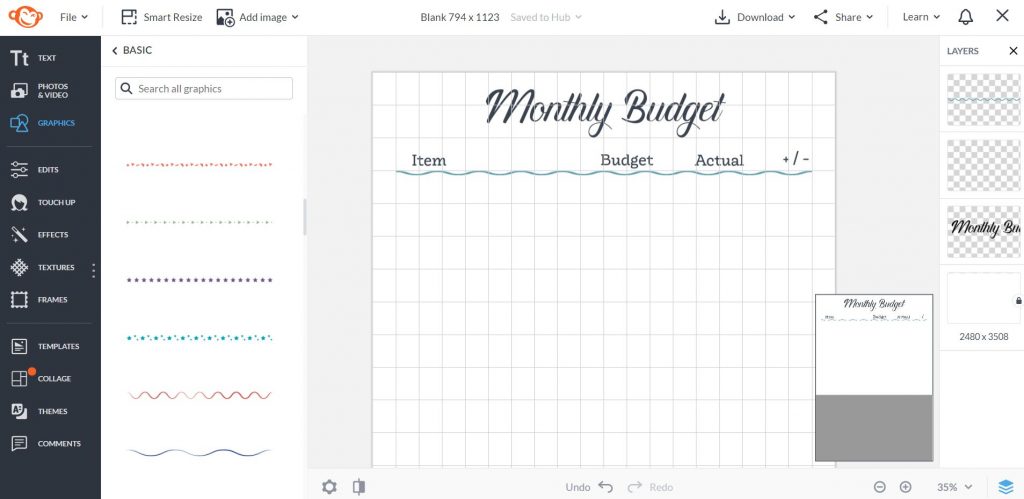
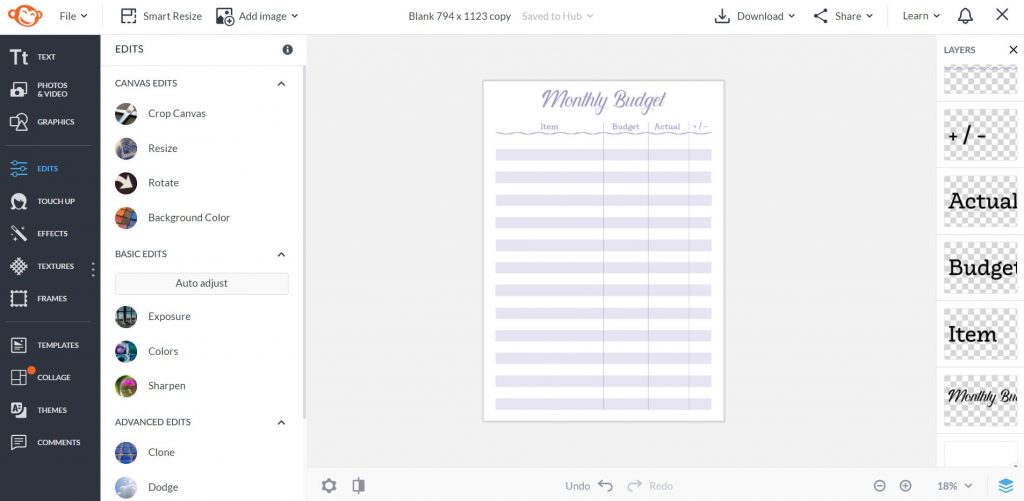
You can add lines by going to the Graphics menu then choosing from one of the many options. You can do solid lines, dashed lines and more unique wavy lines, chevrons etc.
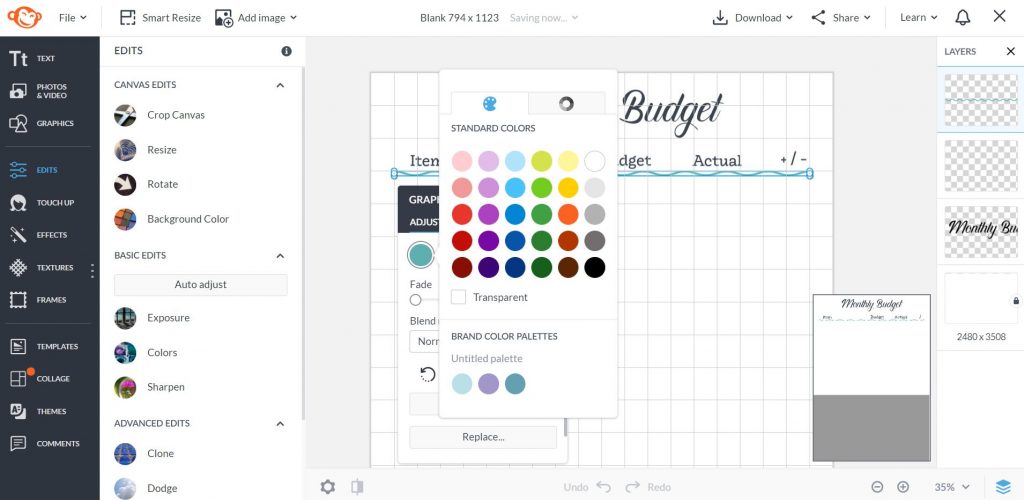
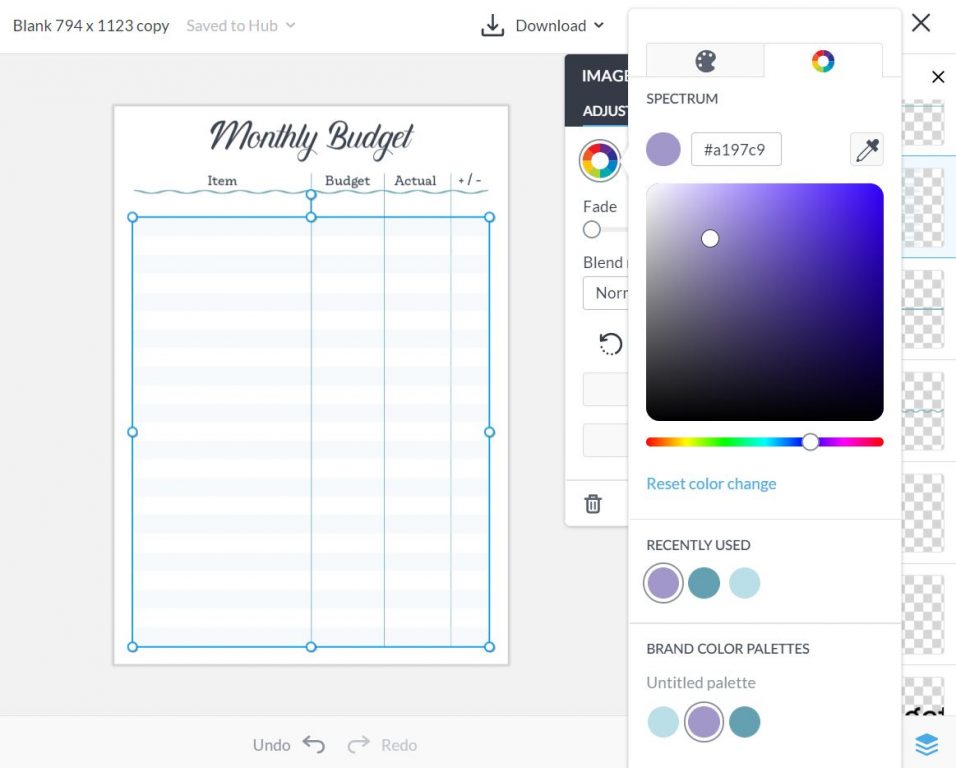
You can change the color of your shapes by clicking the circle and choosing either a color from those pre-selected by PicMonkey, by entering the color code (RGB or Hex code) of a color you want to use, using the color picker tool or by using your brand colors (more on how to set up a brand kit later in this post).
You can add lines to write on in the same way as above, but I wanted shaded lines to write on so added a square shape and resized.
One thing I wish I could change, is that it doesn’t tell you the size of the shapes so you need to guess how big it will actually be when printed. I divided the height of the page by the number of rows I added in the align menu to work out the size I wanted the lines to be. You could also use text size as a guide.
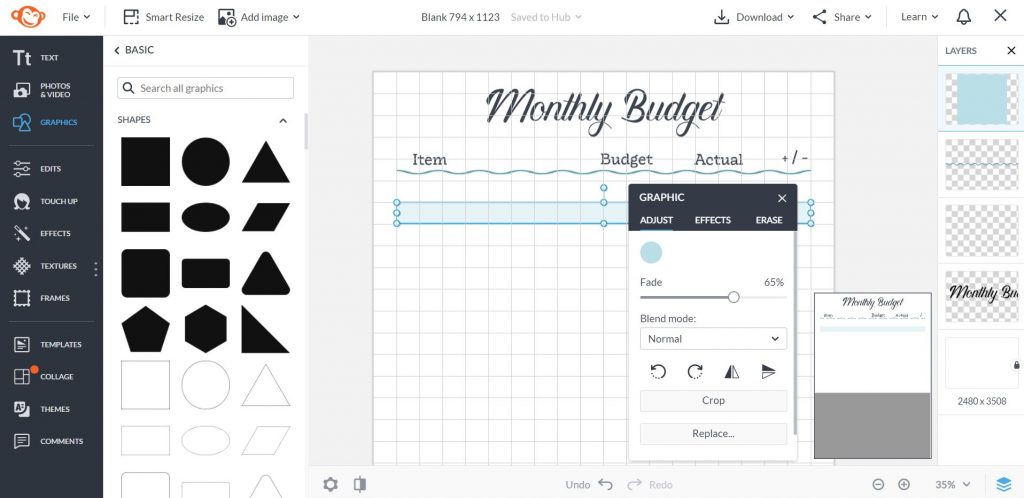
If you want to keep the same color as other elements of your design (e.g. the title), but make it a bit lighter so the color won’t be as prominent when you write over the top, you can ‘fade’ the color using the slider:
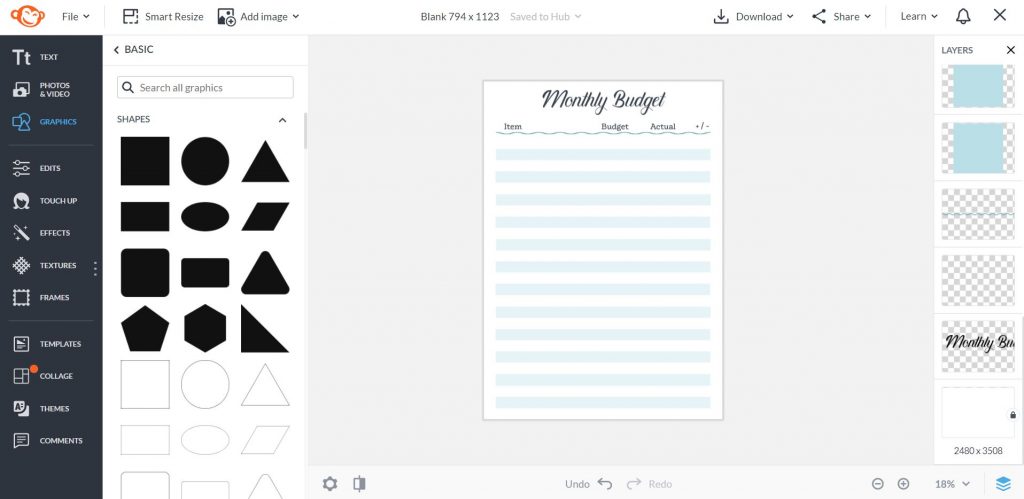
Since there is no way to quickly select elements and align them, I made a few, aligned using the grid and the arrow keys on my keyboard, grouped them together then copied and pasted to make it quicker.
You can rotate shapes, images etc. by left clicking on the circle in the middle above the element (have circled in pink in the screenshot below) and dragging your mouse in the direction you want to move it. If you know you want the item to be switched vertical or horizontal, click the arrows pointing left and right (much quicker and more accurate than dragging your mouse).
![]()
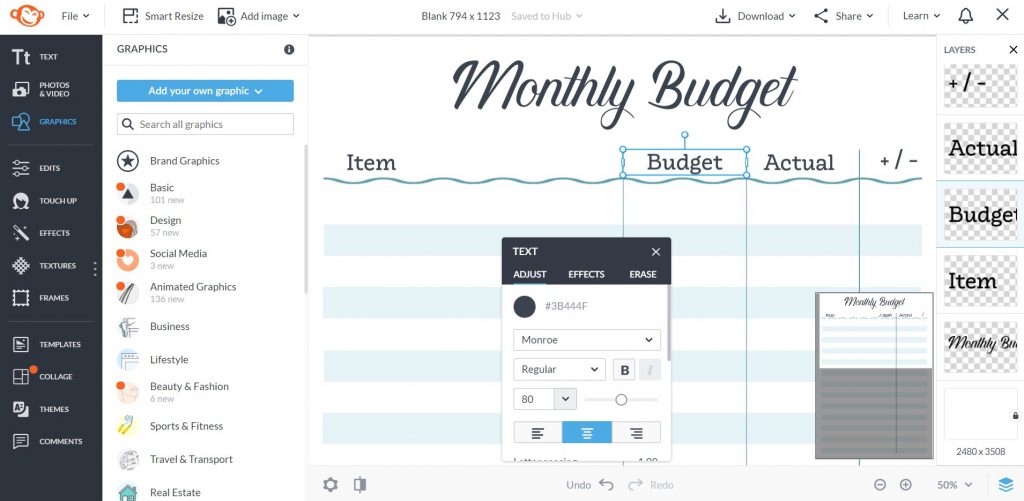
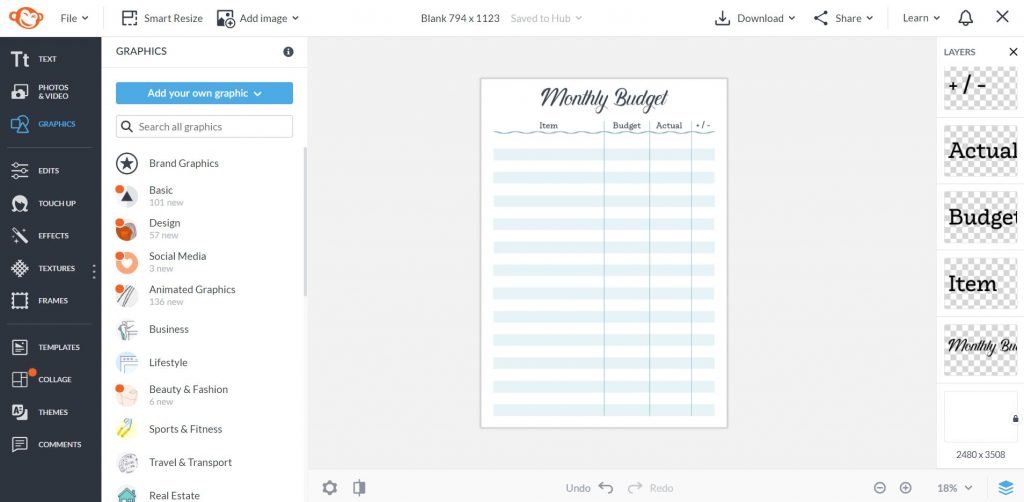
I added lines to separate the headings into columns. If you want to align text to the centre of your columns, the easiest way is to expand the box around the text to fit the column width and centre align the text.
All up, this printable only took me about 5 minutes to make.
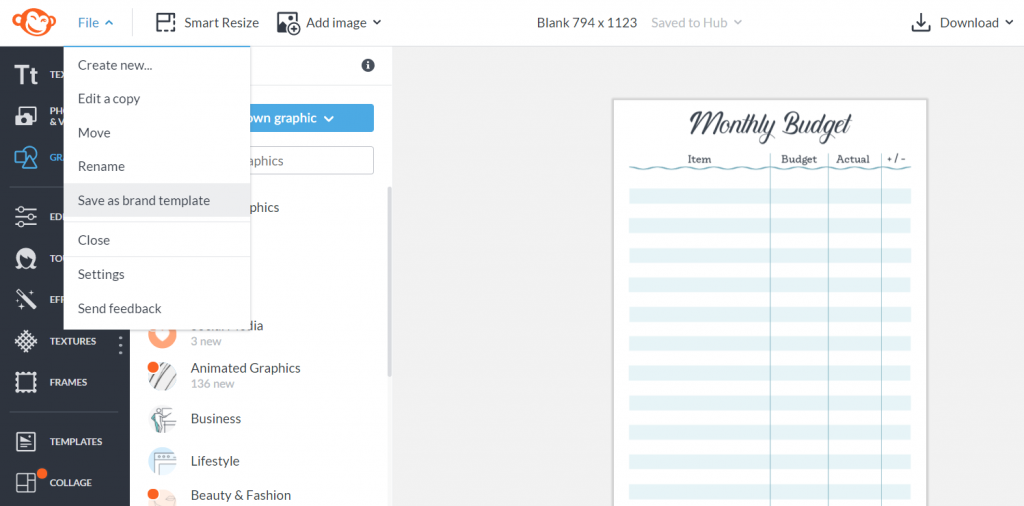
If you want to save this design to use again in the future go to file > save as brand template
You can download a copy to print by going to download and choosing either JPG, PNG or PDF. Note: PDF file format is only available with PicMonkey’s Pro Plan. You should still be able to print JPG and PNG files from your home printer (mine can).
Related post: How to Choose a Printer (Including the best printer for printing printables and planner stickers)
If you’d like a copy of the printable I made, I’ve added it to the free printables library. Existing subscribers can login and download here.
Step 4: Decorate
Time to change the font colors, add a pattern, graphics and anything else you want to use to decorate your planner.
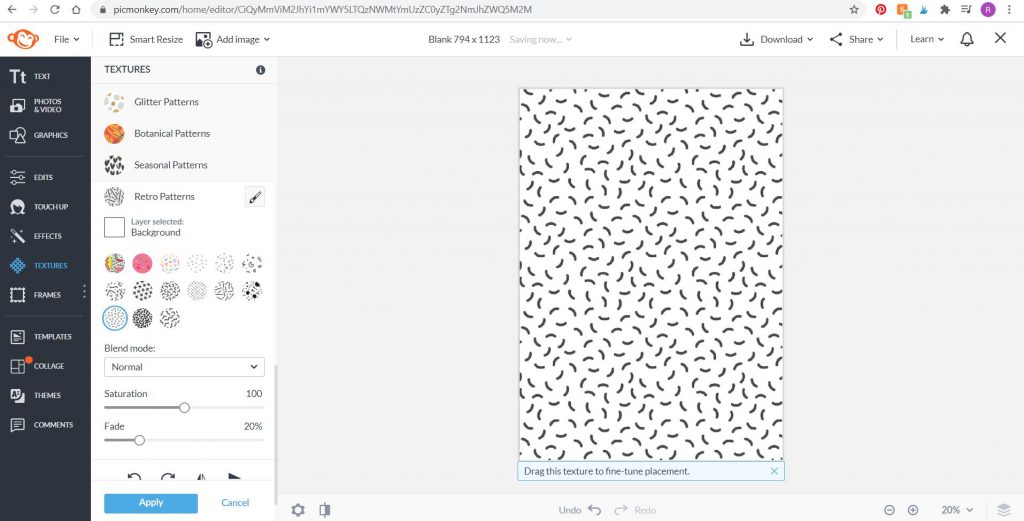
If you want to do a pattern background you can choose from the patterns within PicMonkey or upload your own. You can find plenty of digital papers on Etsy (including my shop!) for only a few dollars. There are some patterns in my free printables library as well.
If you want to test patterns first, these are my favorite within PicMonkey:
- Glitter
- Botanical
- Seasonal
- Retro
You can change the background color, ‘fade’ the pattern so it blends more into the background, increase or decrease the print size.
Here are some variations of the basic design I made above:
Change colors
Note: I had to ungroup everything to be able to change the colors. I tried flattening everything into one thing that can be moved together but it got rid of the fade menu. If you’re using a pastel color you might need that menu to tweak the colors.
Flattened and changing the color (very pastel)
Ungrouped and individually changing the colors
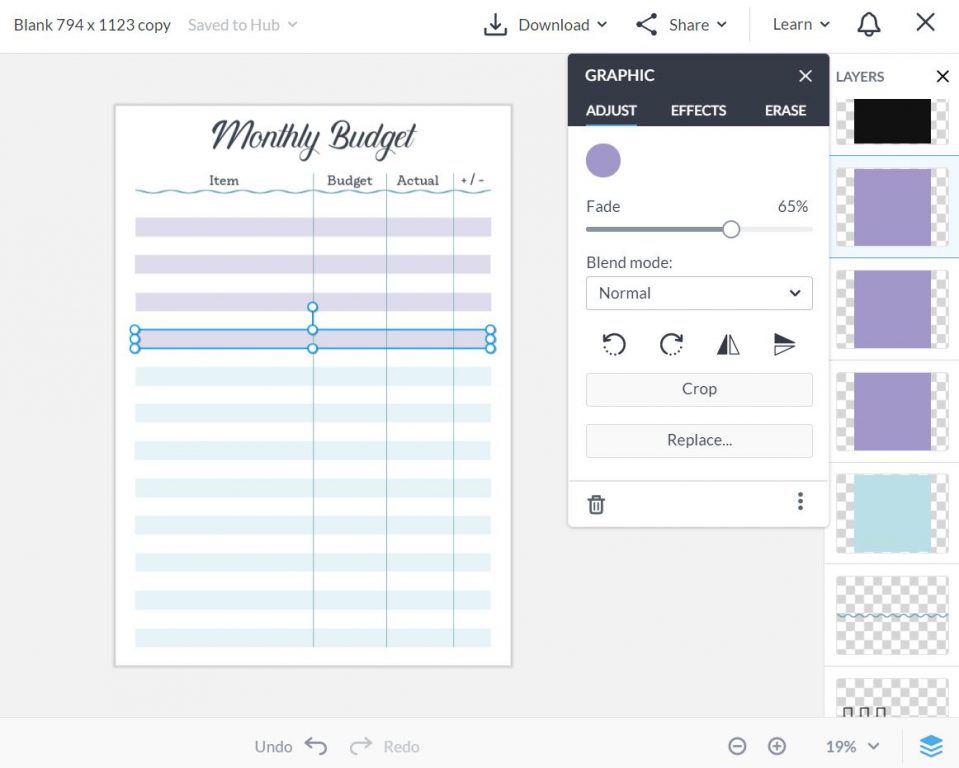
Note: when I selected all of the layers in the layers menu (on the right) it also wouldn’t let me change the colors either.
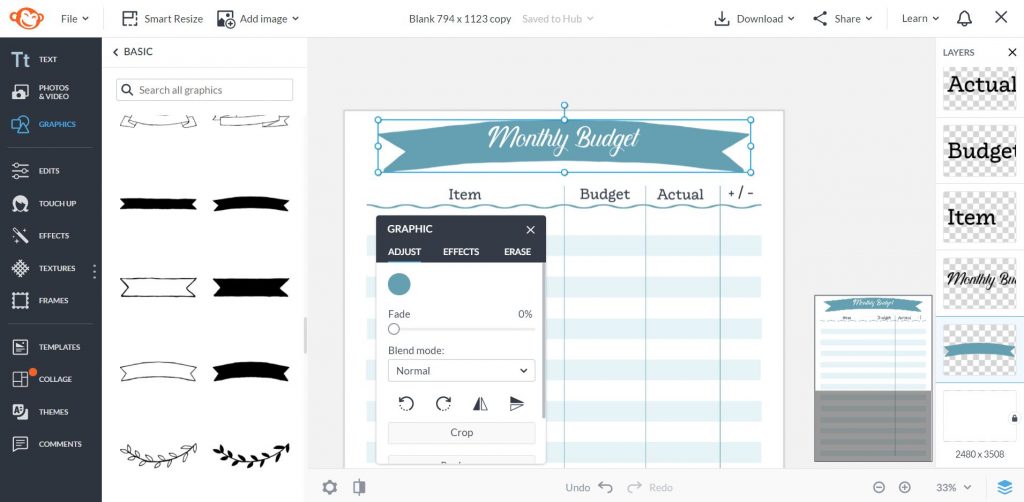
Add flag banner behind the title
You’ll need to left click on the flag banner layer from the right side of your screen, and drag it down the layers menu below the text, otherwise you won’t see the text. You can change the color of any of PicMonkey’s shapes the same way as the text in the menu that pops up when you click on it.
![]()
Add pattern to the left for whole punching
The patterns automatically become a background which is annoying if you just want to fill part of the design (so one side of the page where you could punch holes for disc binding). So I added a square, dragged the shape to become a rectangle, dragged this layer behind everything else and made it white. Then added the pattern behind that so you only need part of the pattern (as the rest is covered by that white rectangle)
![]()
I couldn’t figure out a way to change the color of PicMonkey’s patterns 🙁 Hopefully it’s a feature they add in the future!
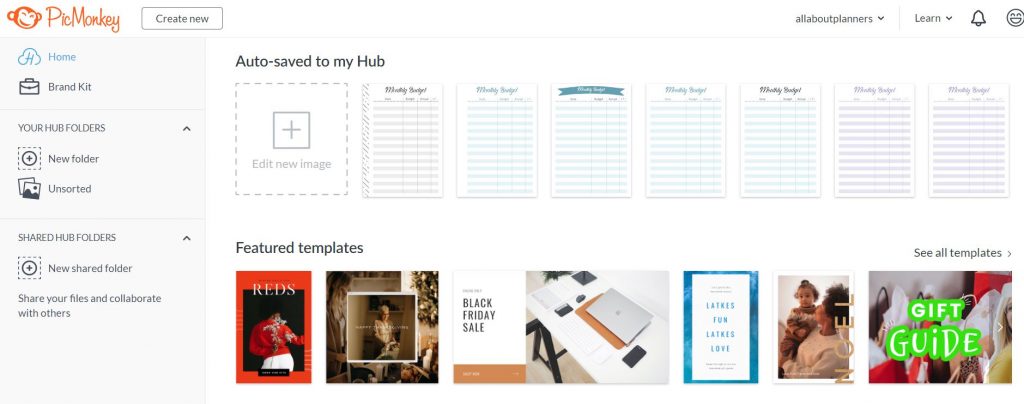
You can access all of your designs from the PicMonkey Hub by clicking the orange monkey icon in the top left hand corner.
Step 5: Print!
Click the download button in the top right corner and choose your file format. I recommend PDF.
Some helpful posts:
- Printing Tips
- How to print any printable at any page size
- 7 Ways to make colors POP when printing using an Inkjet printer
- How to get rid of a white border when printing printable (borderless, no bleed, no scaling step by step video tutorial)
- How to resize a printable to fit A5 or US half letter (5.5 x 8.5) page size
- How to resize any printable for any size bullet journal
- How to print an A4 printable onto US letter size paper (and vise versa)
Step 6: Reuse the same template
If you want to make more coordinating printables, I recommend using PicMonkey’s brand kit template (instructions later in this post).
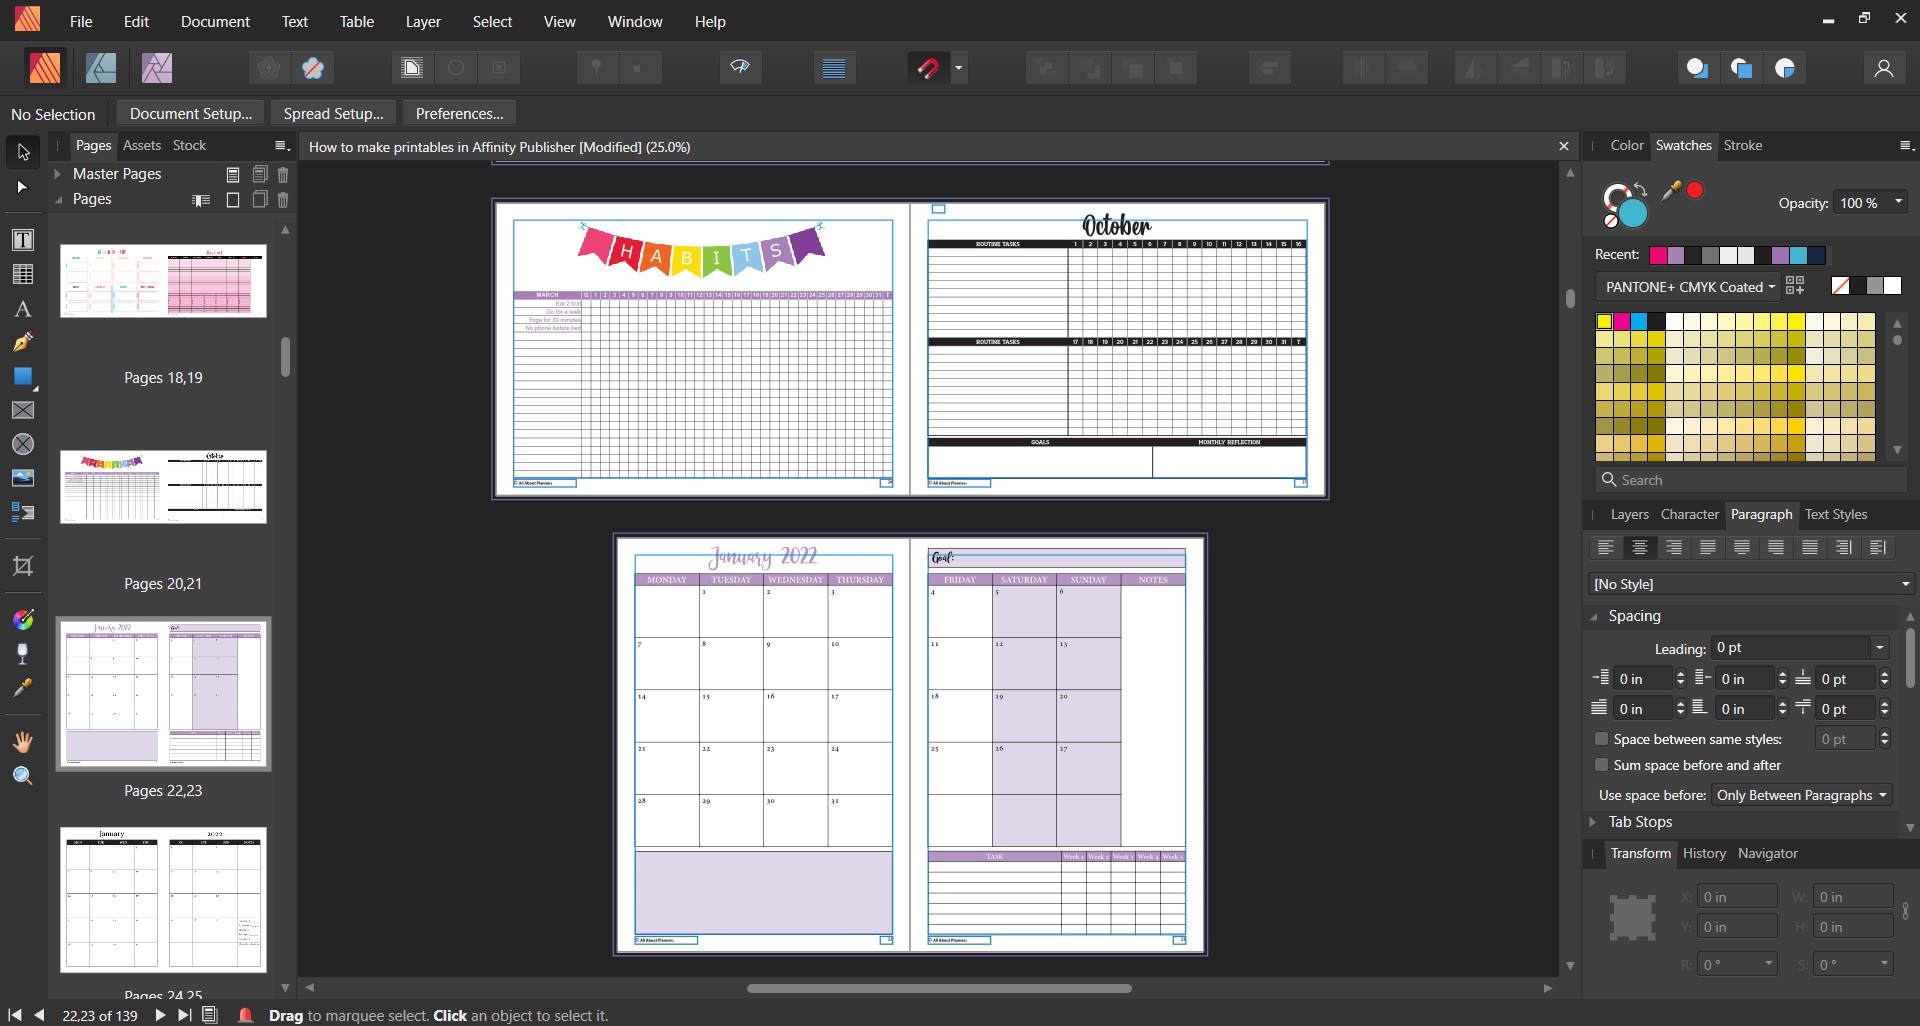
You can duplicate your template by clicking the PicMonkey logo in the top left corner which will take you to the PicMonkey hub where it will show you all of your designs. Click the three dots that will appear when you hover over one of the designs and select ‘duplicate’. You can also choose ‘edit a copy’
![]()
Here are some quick changes you could make to create some new printables
- Change the text
- Change font style and color
- Change the pattern
- Change the location of some of your design elements – maybe you add the pattern at the bottom of the page, or delete the pattern altogether
- Change the page orientation from portrait to landscape or vise versa
- Add a border around some of the text e.g. the title to make boxes
- Add graphics e.g. download a flag banner to place behind the text or download some icons to make themed printables
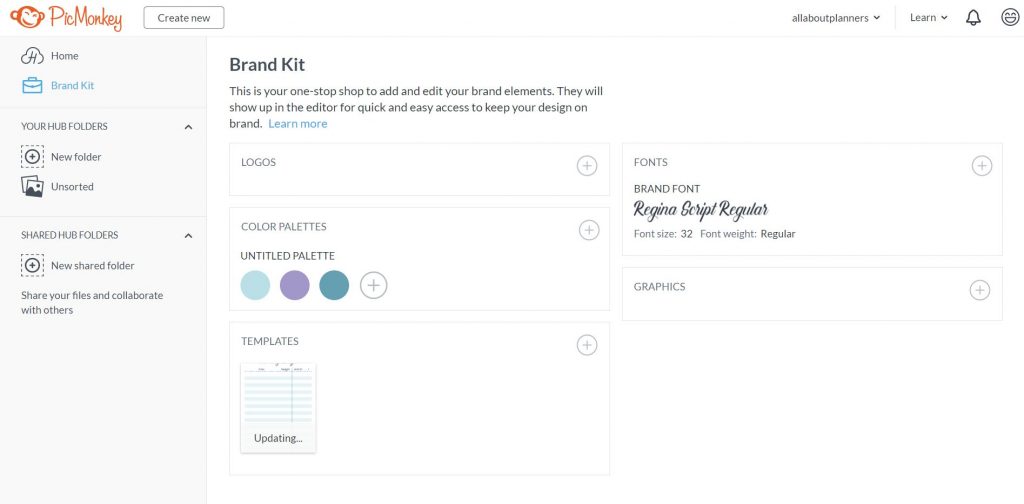
Creating a brand kit
If you like the fonts and colors you chose, you might want to create a brand kit.
You can upload an image of your logo, add your brand colors using their RGB or Hex Codes, store templates, save fonts and any graphics you regularly use e.g. icons and clipart.
Related post: Raster, vector, png, .TIFF, CMYK – what does it all mean?! (Graphic design terminology explained)
I chose a color scheme I found on one of my favorite color tools (Design Seeds), and uploaded a cursive font ‘Regina Script’. Make sure you check the licence of a font before you download it. If it’s personal use you cannot use it in any printables you sell. You’ll need a commercial use licence if you want to do that.
You don’t need to upload your own fonts, there’s actually a good selection of fonts already in the PicMonkey program but it’s great to still have the option.
Related post: Favorite color tools for making planner sticker kits (all are free tools!)
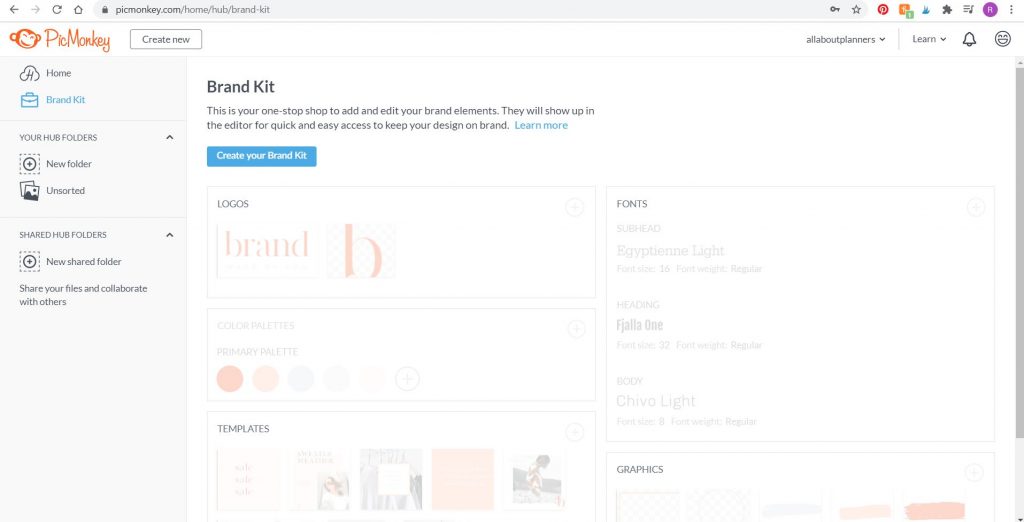
Here was my finished brand kit for this printable.
If you’d like to try PicMonkey, click here
Pros of PicMonkey
- Online tool – can access from any device, from anywhere with an internet connection
- Cheaper than Photoshop
- Plenty of tutorials on the PicMonkey website if you get stuck
- More tools than just graphic design – there is also photo retouch tools and the ability to remove backgrounds (in the Pro Plan)
- Can create photo collages (could make one, print it, laminate and make a DIY planner cover)
- Design auto-saves in the background as you design
- Can use any color you like
- Good variety of graphics to choose from – hand-drawn look images, icons, shapes, lines and patterns
- Can group shapes and text to move them as one piece
- Good resize tool – keeps the proportions and quick to use
- Wide range of fonts already in PicMonkey
- Can also use fonts you’ve purchased and downloaded but only with the pro plan
Cons of PicMonkey
- Moving around in PicMonkey can be clunky – the image zooms in but the menus e.g. color tool do not proportionally reduce. The pop-up menus take up too much space if you’ve zoomed in close
- There doesn’t seem to be an option to set up page margins i.e. do not design in these areas. You can turn on the grid and use that as a guide.. but a pre-set page margins tool would be helpful
- No quick align tool e.g. left align
- Cannot quickly align multiple shapes, text etc. together at the same time. Need to align using the grid tool
- If you want to reduce the width of a textbox, the resize button is only on 1 side
- Cannot do multiple pages within the same template
- Would not recommend using for dated printables, it would take far too long to set up the templates and add the dates
- Cannot change colors of grouped items, need to ungroup, change color and then re-group (very time consuming)
- Page / template size is in pixels. I didn’t see an option to change this to mm, cm or inches so you will need to use Google to convert the page dimensions into pixels
- In Photoshop you can left click and drag over all of the elements you want to group together or change all at once, I cannot do this in Picmmonkey so it takes longer than (I think) it should to make design changes
- Cannot fill a shape e.g. a rectangle with one of their patterns, you would need to upload an image of a digital paper pattern yourself and then resize
How does PicMonkey compare to other graphic design tools?
As this tool reminds me of Canva, I’ll be doing a comparison post on the two at a later date but for now some comments:
- Both tools have pre-made collage templates
- Both have graphics and images you can use. In PicMonkey these are free, in Canva some of these are a paid add on for $1 or $2
- PicMonkey has photo retouch tools while Canva does not
- Both have an auto resize template function – Canva’s requires some manual adjustments whereas PicMonkey’s is better at keeping the same proportions of the original template
- Both have a wide range of fonts to choose from and you can upload a font you’ve downloaded from elsewhere as well (note: this option is only available on PicMonkey’s Pro plan)
Overall I like both Canva and PicMonkey. PicMonkey has better tools for a broader range of things like collages and photo re-touching. They also have (I think) better pre-made templates than Canva. If you aren’t sure where to start the pre-made templates are good prompters. I also like PicMonkey’s quick and easy resize tool that’s part of the pro plan.
However, I really like Canva’s ability to do multiple pages within the same design. Multiple pages doesn’t seem to be an option in PicMonkey.
Online graphic design tools have come a long way from when I first started using them 9+ years ago. They never used to have pre-made templates and some of the earlier versions never had the ability to use custom colors. While they aren’t free anymore, a PicMonkey subscription comes at half the cost of Photoshop so if you’re making printables for your own use, you might like to start with PicMonkey.
If you’d like to try PicMonkey, click here
More tips for making printables
- How to make planner printables (advice from a planner addict that’s made over 4000 printables)
- Best Paper for Printing Printables
- How to Choose a Printer (Including the best printer for printing printables and planner stickers)
Want more printables tutorials? Have a look at some of my ecourses:
- How to make printables in Microsoft Word <—- great option for beginners
- How to make printables in Microsoft Excel
- How to make digital planners and notebooks in Microsoft PowerPoint
- How to make printables in Photoshop
If you’d like me to create more printables tutorials using a specific software (or for a specific type of printable), please email your request to [email protected]
Found this post helpful? Pin it!
![]()
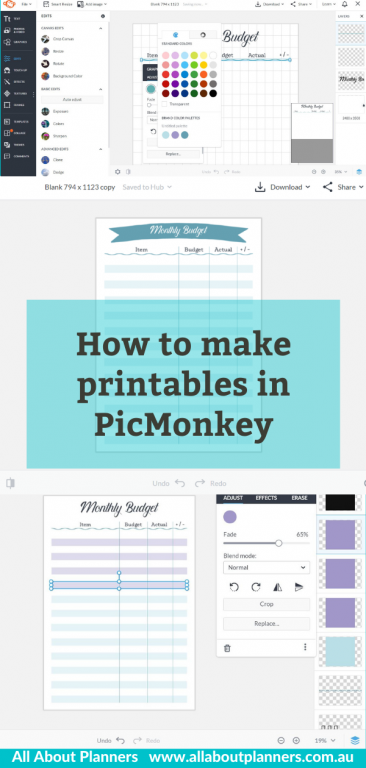
![]()